Trois Deux Redux

The Rocketry Forum

Help Support The Rocketry Forum:

This site may earn a commission from merchant affiliate links, including eBay, Amazon, and others.

Pantherjon

Well-Known Member
Joined
Jan 19, 2009
Messages
7,434
Reaction score
9
Well, at our last club launch I flew the infamous Trois Deux! It is one of our club members favorite rocket of mine..Things didn't go as planned and for some reason the laundry didn't come out and had a bad encounter with the ground.:(

All motors(2 A10PT, 2 C6-5 and 2 D12-5) lit properly, there was evidence that the D12's did fire off the ejection charges(which is used for deployment, the C6's are vented out their 'motor module')..Still not sure why the parachute didn't come out as it wasn't tightly packed in the tube..Mystery..

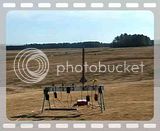
Here is the launch video..I didn't get the impact as it was just too gruesome..


And a picture of the damaged parts in the first stage of rebuilding- taking it apart..

DSCF4103.JPG
 
So, I went and got out a new tube from the Rocket Dungeon..While at it, I may as well modify the recovery system..I don't really like(tho they work) the tri-fold shock cord attachment system..So, cut a length of kevlar cord..Drilled 2 small (5/64") holes in the coupler, fished the cord in and tied knots on the ends..The knots are on the inside of the coupler, cord runs on outside of couple and tube slides over them onto the coupler...Basically created a large anchor loop for the eventual elastic shock cord..

More later tonight.....

DSCF4104.JPG

DSCF4105.JPG

DSCF4106.JPG
 
Okay..More..

Next I slipped the new body tube over the kevlar lines and glued it to the coupler..I thought I would have a hassle getting the thread tight so it wouldn't bunch up when I slid the tube on, it didn't, and for that I am glad..And as soon as the glue started to bite, I thought:"You dummy, you should have put in a baffle!"..Well,:confused2: I didn't, so will have to live with it..LOL..Then while looking at the nosecone I realized how beat up it was..So, some sanding, spot putty and then some more sanding to fill in the dings and dents and prep it for paint..Then masked off the lower section..Sprayed on a nice thick coat of primer..Looked it over, didn't see anything that really needed to be sanded, and went back out and shot some color on it! :) Not sure if I will incorporate the stripes going up to the nose or not right now..That's a lot of masking!:y: But she is ready for flight as soon as I attach a parachute!

DSCF4107.JPG

DSCF4108.JPG

DSCF4110.JPG
 
Quote of the day (from the video) "Aaaawwww. Don't do that..." :(
 
MY rocket looks mighty good again Jon! Thanks for rebuilding it!

Oh go ahead and put at least one of the stripes back on.

Can't wait to see it fly again.
 
Looking good again! :) I've often been of the opinion that *repairing* a rocket is more fun (and challenging) than *building* them :)
 
Looking good again! :) I've often been of the opinion that *repairing* a rocket is more fun (and challenging) than *building* them :)

I would venture a guess that this is a coping method for the prototype testing that goes awry... :rolleyes: ;)
 
MY rocket looks mighty good again Jon! Thanks for rebuilding it!

Oh go ahead and put at least one of the stripes back on.

Can't wait to see it fly again.

:roll: Yep, she does look perty now don't she? :p

Yeah, I think I stripe running up the upper tube would work..Will have to do a test first though..The new upper tube is painted with Valspar, don't know if it will be okay with the new Krylon over top of it for the stripe..

Make it a spiral up the tube?

Yeah, I can't wait to launch her again as well..Been bummin having to work launch weekends this last couple of months..
 
Back
Top