The creation of the CinerocDV Camera.

The Rocketry Forum

Help Support The Rocketry Forum:

This site may earn a commission from merchant affiliate links, including eBay, Amazon, and others.
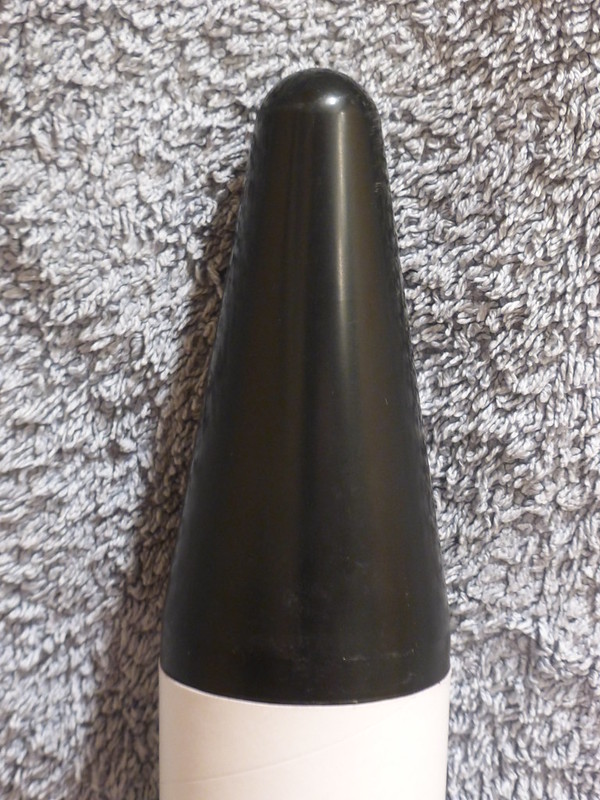
Well, Doug and his team have the original Fairing/Shroud and the camera body that came from the chewed Cineroc... Soon I hope we'll be seeing the 2.0 version of the printed parts.

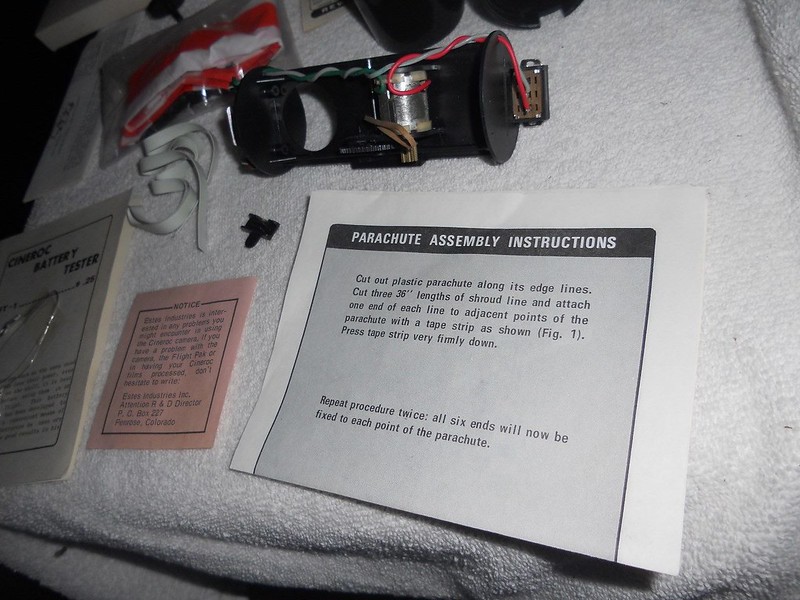
I also sent along a couple of other goodies (mirrors, switches, pieces of the chewed camera). I'm hoping that they'll be able to replicate the pickup wheel and the pulley for those who may be missing one.

Below is my concept of the DV's decal. This is based on the photographs of what must be Mike's original Omega (as seen in the 1971 catalog). The white would be the actual color of the rocket, the dark blue is a sample that I pulled from my scan of the original decals. I think the original's OMEGA was just taken from the decal sheet (part number KD-52 or KD-52A), so I used my scan of the decal sheet (thus the fuzziness of the lettering) to create my OMEGA (but I'm limited in my font choices, so I couldn't match it).


Feedback always appreciated.

Pointy Side Up!
Jim
 
Last edited:
I've been following this with interest. I had an Omega, back when they first came out. I was struggling to just afford enough to just buy engines at the time, I could never afford a camera (Cineroc or Cameroc). My friend Jim had one, but I only saw one "filmed" launch. This project could get me to build another Omega w/ a camera this time (although I'm once again struggling to afford engines :blush: )
 
@sooner.boomer: What happened to your original one? Hopefully you'll get the scratch needed to build a new one (or two) (with camera(s)), and be able to get some motors too.


For someone who's thinking about doing this, I have an observation to make...

After sanding the nosecone and washing it before painting, I noticed several small voids that were between layers. I painted it anyway, and they showed through (though not too bad), as I was trying to slip the nosecone over the original's battery tray, I heard some cracking, and I may have more voids exposed now.

I've been thinking about this, and I think that cold vapor smoothing may be called for. I think that it would cause the void to seal, and strengthen the overall part. Some glue or epoxy run inside the nosecone may also assist in strengthening the part.

All The Best!
Jim
 
Last edited:
@sooner.boomer: What happened to your original one? Hopefully you'll get the scratch needed to build a new one (or two) (with camera(s)), and be able to get some motors too.

Who knows? This was back around '75 or so. Very little of what I had back then survived until today. Books and tools, yes. Hair, no.
 
Depends on a number of things... How fast the team can modify the parts that were changed, and get them printed and sent to me, how fast I can get it assembled, how much homework I have, when can I get to a site suitable to launch from. I'm hoping by the end of spring break I'll have a system that's flyable.
 
15901872814_b5fa6b6905_o.jpg


Got to a printer today (don't have one at home), and test printed the image... Then I tried it again after figuring that Haettenschweiler 48 pt font would be the correct font size to base this on... Well, it's WAY too small (1.5" from one side of the word cineroc to the other), and 72 pt is too big (2.25") :confused:


My calipers are telling me that the Estes Logo (on the K-52A decal sheet) is .739" long (measuring the original's decal, and not a scan or a printout). I'm guessing that Estes used a common font size (11pt) for the OMEGA on the decal sheet (and not 11.25pt like my math gives me).


SO, that makes the letter "O" in "OMEGA" 0.15277777777778" tall (somewhere between 9/64" and 5/32") . Based on that, the correct length for the word "cineroc"is 2.0667" long (between 2 1/16" and 2 5/64" long) and the DV ~.644" tall... Which is danger close to 48pt font (according to the info I found online about font sizes and letter sizes). :confused:


AAAARRRRRRGGGGGG!!!!!

Now I'm thinking that I should just base it on the 11.25 pt font the calipers are giving me... Nutz!

I just ran a sample of the image through a font recognizing website, and the OMEGA looks to be... "Microgramma EF Bold Extended"

OMEGA EF Microgramma Bold Extended.png<-I chose 24 point as it clearly shows the font w/o being MASSIVE or miniscule (and looks almost correct on *this* screen for sizing)

Now I have to go home (no printer) and re-evaluate the measurements I have there ('cause I don't have the decals (or the calipers) here).
 
Last edited:
Today my 1000+ Stain Remover (aka Winning Colors Stain Remover) arrived... Picture me underwhelmed... I don't know what kind of backing was on the mirrors used by the guy on YouTube that claimed it was the best method of making first surface mirrors, but it didn't do squat for me (despite soaking the mirrors for an hour). Mind you, his mirrors were plexiglass, and mine are glass.

I pulled out some nail polish remover (for CA glue accidents) and was able to clean a mirror in about 3 minutes (after allowing it to "soak" for 10 minutes)
(I sealed up my mirrors in an old empty candy tin to prevent evaporation, and it seems to work). I used a cotton ball to rub the backing material off.

For my project, I'm using mirrors that I scored at Joanne's fabric (Darice Mirrors) for a few bucks... but after futzing with it, I suddenly remembered my bike's mirrored disco ball (for night rides (Midnight Mystery Ride, ZooBomb, etc.) and I think I could have found a mirror or two that *MIGHT* have worked. Oh well.

You might have to do several mirrors to get one that doesn't have a defect for your first surface mirror.

I plan on cutting my mirrors to width first, then length.

Pointy Side Up!
Jim
 
Last edited:
I assume you're trying to remove the paint from the back of "normal" mirrors to make front-surface mirrors? Try lacquer thinner. That stuff should soften/destroy lacquer and enamel, and might damage epoxy if you left it in long enough. But there *are* cheap front-surface mirrors to be had. Let me look around (if I go off looking now, the forum will log me off...*sigh*).
 
What I found...

Front surface mirror is 1" X 1.88" L and .045" Thick. Great for use with lasers. Has rubber bumper on back. Removed from equipment - like new. $1.49
https://www.goldmine-elec-products.com/prodinfo.asp?number=G20155

Virtual Reality Lenses - These lenses were used with a virtual reality screen. The lenses, polarizers, mirrors, etc. are incorporated in the lens. Virtual reality lens $0.97 https://www.bgmicro.com/LEN1015.aspx

probably more out there. Too bad Edmund Scientific went down the drain. They used to have such neat stuff. *Somewhere* around here, I've got some front-surface mirrors and a 1" sq. diffraction grating I got from them to make a spectrometer out of.
 
I was getting a windshield replaced at a local glass place and was looking around and found some first surface mirror... the guy told me they do make stuff with first surface mirror when requested (for folks or businesses that want a fancier look than regular back-mirrored glass) and since it was a scrap piece, he gave it to me.

Might check with your local glass shops and see if they have any scrap or would sell you what you need cheap.

Later! OL JR :)
 
Good to know about those other sources of first surface mirrors. As it stands now, I've already got some mirrors made, I just need to cut them down.

Thanks!
Jim
 
This is Brandon, one of the modelers working on the project with Doug. Thought you guys might like some pictures of our progress from this past weekend


IMG_20150307_130445725.jpgIMG_20150307_173919863.jpgIMG_20150307_183430065.jpg
 

Attachments

  • IMG_20150307_130445725.jpg
    IMG_20150307_130445725.jpg
    25 KB · Views: 109
  • IMG_20150307_173919863.jpg
    IMG_20150307_173919863.jpg
    59.3 KB · Views: 108
  • IMG_20150307_183430065.jpg
    IMG_20150307_183430065.jpg
    18 KB · Views: 109
This is Brandon, one of the modelers working on the project with Doug. Thought you guys might like some pictures of our progress from this past weekend


View attachment 257288View attachment 257289View attachment 257290


Hi Brandon!

First: Welcome to TRF!

Second: WOW!!! :surprised: Those are looking first rate!!! I'm sure that everyone here who is into this project is thinking the same.

Please pass on my thanks to the whole team! Nice Work Guys! :clap::clap::clap::clap::clap::clap::clap::clap::clap:

All The Best!
Jim
 
I was getting a windshield replaced at a local glass place and was looking around and found some first surface mirror... the guy told me they do make stuff with first surface mirror when requested (for folks or businesses that want a fancier look than regular back-mirrored glass) and since it was a scrap piece, he gave it to me.

Might check with your local glass shops and see if they have any scrap or would sell you what you need cheap.

Later! OL JR :)

Also try the Surplus Shed, lots of optical parts including 1st & 2nd surface mirrors
 
Hi Brandon,

Those are looking pretty Sweet! It looks like you and your team are really trying to crack that odd angle on the point, and having some MARVELOUS success!

All The Best!
Jim
 
The 3D models for all bulkheads are ready for trial printing. I will load some ABS in the printer on Monday (sooner if I have time). I think we are very close to a full set of major (excluding a film holder) parts for the project.

From upper left clockwise: blank bulkhead, standoffs for switch, plugged version for CinerocDV.
Screenshot from 2015-04-11 08:55:13.png

Doug
 
Sorry that this has languished for a while. Doug's team won an opportunity to compete in this years TARC competition, and the (now) $100K prize probably is more important that the Camroc I gave them and the MDRM that I owe them for this.

Here's the latest image from Doug that I've received on the project. It's a shot of the Camera Shrouds being printed. I can't wait to see them in person.


I'm told that it's nearly ready to be mailed out to me for approval.

All The Best!
Jim

Go GRETNA!!!
 
Last edited:
Just an update... My 3rd Omega is in primer. The other two are awaiting fillets before they go into primer (and the Semroc Omega is not far behind).
 
I've been informed by Doug that the CinerocDV parts are all printed and in the mail now (I'm guessing they'll arrive today or tomorrow). One of the bulkheads had to be printed in PLA as the team ran out of black ABS. Looking forward to showing you what we've got done.

Oh... I spotted a Cineroc on Ebay (it sold) that had the bulkhead separated from the aft transition... it's the only time I've seen the underside of the bulkhead.


Photo from Ebay.

If I had the cash, I'd have picked this one up... Imagine not having to break one to discover how they did it. C'est la vie.
 
Well, we're closer, but still not quite there... I need to study for finals, so I'll have a full report when I have more time.
 
Here's an image of the 2nd prototype of the CinerocDV's shroud (on the left) and the actual shroud from a Cineroc...


As you can see, the DV's shroud is pointier, as well as slightly narrower at the tip, and the base edge is slightly concave, whereas the actual part's base edge is convex (and the upper edge is slightly rounder). The original is back on it's way to Nebraska (2nd trip). We're trying to create a completely accurate copy of the original part, so this is not a final version.

The Aft transition has been signed off on, as has the nosecone. There's two variations of the bulkhead (one plugged for a pure digital version, one for a repair or clone of the Cineroc) that are now signed off on as well. I've also received copies of the film pressure plate, pulley and the pickup wheel.

[EDIT] DAMN!!! I forgot to send the film cartridge again... Well, I guess I'll be mailing that off to Nebraska soon.

More photos later...
 
Last edited:
Estes Cineroc Nosecone? Or 3D Printed copy? One is real, two are copies... Which one is which... Option A, B, or C

Option A


Option B


Option C


Per samb's request...

The latest on the DV project. I've been in contact with Estes to see if they'd reissue the Omega K-52P/1200. So far the answer is no, not yet. If more people get behind it, that might change.

Mr B. changed jobs over the summer, and lost access to the 3D printer he was using, and the student working on the project also graduated. The nosecone of the Cineroc was accepted, as was the aft transition and bulkhead plate. The 2nd edition of the camera shroud (the aerodynamic fairing that houses the mirror) got it's internals done (looked really good). However the external shape was off. It'd work, but look odd. The goal is to produce as close as possible a clone of the Cineroc's externals, so it was sent back for redesign. He's been busy with classes (taking), his classes (teaching) and his L3. So, that's the hold up on the 3D printing.

The 1/1 scale detail is too fine for Stickershock's vinyl as a cut piece (he tried) (perhaps it'd work for a 4" upscale), though a printed version is still an option. I've passed this on to Tango Papa to see if he can handle it.

My rockets, and cameras are currently packed for storage and shipping. Until I get to China, this is pretty much on hold.

Pointy side Up!
Jim

[EDIT] Oh, and Option "A" was the legit nosecone.
 
Last edited:
Per samb's request...

The latest on the DV project. I've been in contact with Estes to see if they'd reissue the Omega K-52P/1200. So far the answer is no, not yet. If more people get behind it, that might change.

Mr B. changed jobs over the summer, and lost access to the 3D printer he was using, and the student working on the project also graduated. The nosecone of the Cineroc was accepted, as was the aft transition and bulkhead plate. The 2nd edition of the camera shroud (the aerodynamic fairing that houses the mirror) got it's internals done (looked really good). However the external shape was off. It'd work, but look odd. The goal is to produce as close as possible a clone of the Cineroc's externals, so it was sent back for redesign. He's been busy with classes (taking), his classes (teaching) and his L3. So, that's the hold up on the 3D printing.

Gord (Sandman) has been having issues with his printers, and it looks like he's getting out of the decal biz, he's bowed out. Squirrelworks apparently can't produce white decals with their technology. The 1/1 scale detail is too fine for Stickershock's vinyl (he tried) (perhaps it'd work for a 4" upscale). I've passed this on to Tango Papa to see if he can handle it.

My rockets, and cameras are currently packed for storage and shipping. Until I get to China, this is pretty much on hold.

Pointy side Up!
Jim

[EDIT] Oh, and Option "A" was the legit nosecone.

Thats kind of a bummer that we are losing the Sandmans talents, maybe Tango Papa will step up or even Randy with E-rockets since he sells decals for some of the Estes clones he sells.
 
I've talked to Tom (Tango Papa), and he's sent me some preliminary .pdf's on the body tube decals and the white camera body decals. Looks like he'll be able to include them on the same sheet as the Omega's fin decals. I still need to print the .pdf file and then measure it. However, since he was provided all the details as to the sizes (3 paragraphs of detailed descriptions), as well as my (crude) attempt at reproducing them, his designs were done with the specs in mind (and he already had the fonts).

BTW, I've never worked with him before, but I've got to say, he's nice to work with.
 
I hope to play around with the shroud in the upcoming days of break. My DIY Taz5+ 3D printer got some attention during early November, but it still needs some fine-tuning. Thank you for your patience, many hours (probably 100+) have gone into this.

Doug
 
Back
Top