


The decals are nice, but it looks like I will have to cut them to fit. They are actually too long so it's an easy work around.
You are using an out of date browser. It may not display this or other websites correctly.
You should upgrade or use an alternative browser.
You should upgrade or use an alternative browser.
SHROX SkonkWulf Build Thread (FINISHED)
- Thread starter AfterBurners
- Start date
Help Support The Rocketry Forum:
This site may earn a commission from merchant affiliate
links, including eBay, Amazon, and others.
I'm currently repainting the white section of the nose cone and now the primer is crazing? WTH!!! I swear I should just burn it and be done with it!!
I'm so tired of this BS!
I'm so tired of this BS!
I'm currently repainting the white section of the nose cone and now the primer is crazing? WTH!!! I swear I should just burn it and be done with it!!
I'm so tired of this BS!
Don't burn it, fly it, then think about it.
I'm just sayin...I went ahead and wet sanded the primer and sprayed the first coat of white. I'll know more after the next few coats. Of course I'll fly it and get the altimeter data as well. I don't have to burn it chances are I'll destroy it before I do ... :rofl::rofl:
hornet driver
Well-Known Member
- Joined
- May 1, 2011
- Messages
- 4,639
- Reaction score
- 9
Hang in there Dan, it's what we call a home run stumble. You've already hit the home run--just tripped a bit rounding third base. Great looking build bud!!!!
- Joined
- Aug 27, 2011
- Messages
- 2,818
- Reaction score
- 25
I agree with Hornet Afterburners...she is looking sweet so far!! when you fix up the nose this baby is going to look awesome with the decals on!! hang in...you are doing an awesome job!!
I know guys I'm just venting. I'm just anal and want to do an exceptional job. I would never burn it no way! I have too much time in it. but I will have to wait until next week to spray the gray portion which is on the underside. After that I plan on giving it a red nose tip and then completely wet sand it and clear it. Then I'll apply the cockpit decal. They are long so I'll cut them to fit the nose cone section.
BTW - The white turned out OK, but I'm never happy because I know I could better. It's just me. It still pisses me off that the primer crazed, but I guess I can expect it. It seems to be the norm for me.
In between the dry time I have yet to mask off the airframe and paint the green trim on the rocket. I was considering just using a brush and still might. I fear that if I tape everything off that I might end up pulling some paint when I remove the tape. I know 3M Blue with the orange inside is good for this since it's low tack. I have some Frog Tape here 1 1/2" Pro Painters tape that I was considering using. Has anyone used this type of tape before? I pulled a piece and it seems very similar to the 3M Blue w/ the orange as far as tackiness goes.
Just an FYI after this I plan on building another. but with a 29mmt. I'll use 3/16 basswood and epoxy fillets.
ROCKSIM file for the 24mm If you click on the 3D option and use the "Opacity Mode" you will see the internal parts of the rocket. I love this feature that ROCKSIM offers.
View attachment Skonkwulf 24.rkt
I also need to drill some holes 1/8" just below the nose cone shoulder in the body tube so I can get the flight data. I'll post all that in this thread along with on board video.
Thanks for everyone's feedback.
Last edited:
- Joined
- Aug 27, 2011
- Messages
- 2,818
- Reaction score
- 25
I have not used any of those tapes. I use Tamiya tape which is excellent...but even with that there have been times when I have pulled some paint up. For me, its always a cross your fingers moment when I pull the tape up hoping for no pull up or paint creep. when I mask and paint, I use the tape with wax paper to cover the areas I don't want hit...I try to put as much of the tape on the paper to reduce the risk of pulling the paint up. Wish I had better advice for you!! can't wait to see how she turns out!
I know guys I'm just venting. I'm just anal and want to do an exceptional job. I would never burn it no way! I have too much time in it. but I will have to wait until next week to spray the gray portion which is on the underside. After that I plan on giving it a red nose tip and then completely wet sand it and clear it. Then I'll apply the cockpit decal. They are long so I'll cut them to fit the nose cone section.
BTW - The white turned out OK, but I'm never happy because I know I could better. It's just me. It still pisses me off that the primer crazed, but I guess I can expect it. It seems to be the norm for me.
In between the dry time I have yet to mask off the airframe and paint the green trim on the rocket. I was considering just using a brush and still might. I fear that if I tape everything off that I might end up pulling some paint when I remove the tape. I know 3M Blue with the orange inside is good for this since it's low tack. I have some Frog Tape here 1 1/2" Pro Painters tape that I was considering using. Has anyone used this type of tape before? I pulled a piece and it seems very similar to the 3M Blue w/ the orange as far as tackiness goes.
Just an FYI after this I plan on building another. but with a 29mmt. I'll use 3/16 basswood and epoxy fillets.
ROCKSIM file for the 24mm If you click on the 3D option and use the "Opacity Mode" you will see the internal parts of the rocket. I love this feature that ROCKSIM offers.
View attachment 158866
I also need to drill some holes 1/8" just below the nose cone shoulder in the body tube so I can get the flight data. I'll post all that in this thread along with on board video.
Thanks for everyone's feedback.


When I painted the nose cone this time I did use masking paper and used Tamiya just to outline the edges. Hopefully all will work out. Right now I'll let it go. I know this is the first build of this kit and I promise you there will be more and my results will be much better. You can't really see the imperfections in the white, but I can so I guess I'll live with it. Chances are it will just get dinged up after several flights.
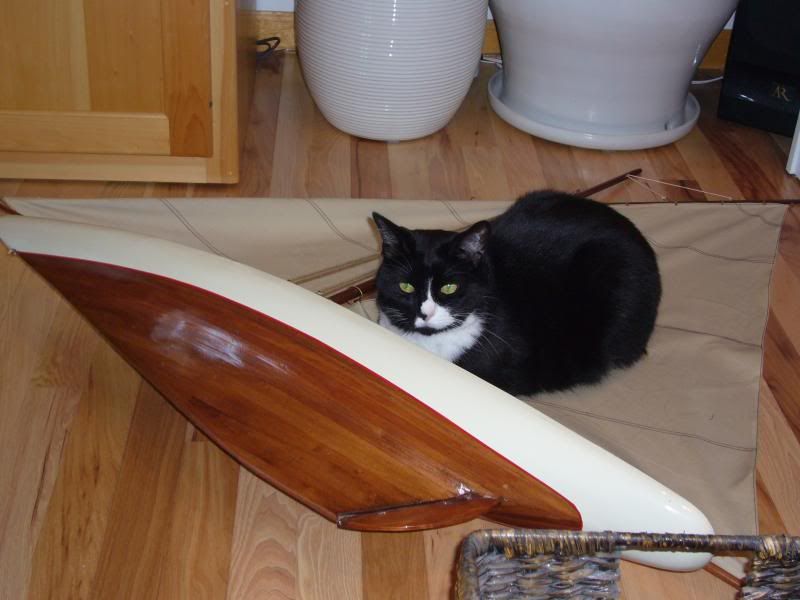
Here some pictures I took just now of the nose cone. Also is a picture of my cat Twiggy. She was a stray when we found her. Guess her age? I actually lost count at 27 yrs old and she is an outdoor cat. At night we put her in the garage. My sister bought me the coffee mug from her recent trip. I would love to go there. Seems like it would be a fun road trip.
Last edited:
Madison Alum
Well-Known Member
- Joined
- Apr 30, 2011
- Messages
- 696
- Reaction score
- 2
Looks pretty good to me. Dont have a cat, but yours looks to be in good shape for 27+. A freind of mine had a real old tom, with all the battle scars to show it. He went missing one night in the early spring and was found a couple of days later where he had broken through the snow cover over a ditch and fell in.
marwady
Build twice, Launch once
- Joined
- Oct 28, 2012
- Messages
- 389
- Reaction score
- 10
Keep at it Dan, you will get there.
I have been using liquid masking film with great results on those compound curves. You may want to give it a try.
Wow, 27 years is a REALLY long life for a cat, especially an outdoor one!!
Here is my buddy Boris who does all the QC on my projects.
He is 7:
I have been using liquid masking film with great results on those compound curves. You may want to give it a try.
Wow, 27 years is a REALLY long life for a cat, especially an outdoor one!!
Here is my buddy Boris who does all the QC on my projects.
He is 7:

You mean this stuff??

I never tried this on the exterior of rockets. It's mainly used for Lexan RC bodies if you want to mask something off to paint, but I can see how it would work nicely. It would definitely make it easier.
OK I decided to apply some of this liquid mask to a section on the rocket. It takes 24hrs for it to dry completely and should be clear when completely cured. I'll peel it off and see how well it works and make sure there's no issues. I don't think there will be. It's like rubber when you peel it off. This will be much easier than using tape and safer. Less likely that it will pull any paint with it.
Last edited:
marwady
Build twice, Launch once
- Joined
- Oct 28, 2012
- Messages
- 389
- Reaction score
- 10
You mean this stuff??
View attachment 158902
I never tried this on the exterior of rockets. It's mainly used for Lexan RC bodies if you want to mask something off to paint, but I can see how it would work nicely. It would definitely make it easier.
OK I decided to apply some of this liquid mask to a section on the rocket. It takes 24hrs for it to dry completely and should be clear when completely cured. I'll peel it off and see how well it works and make sure there's no issues. I don't think there will be. It's like rubber when you peel it off. This will be much easier than using tape and safer. Less likely that it will pull any paint with it.
View attachment 158901View attachment 158900
Yep, that's the stuff. I can cut very small details out of it with an Xacto knife.
Just make sure to let it dry thuroughly and apply thickly, it peels off better that way (don't ask me how I know this...:blush:
I went ahead and masked off the section for the green trim. I used 10mm Tamiya tape and on the AFT section of the airframe I just double the width to 20mm. I think the proportions look about right. Next I have to brush on the "FASMASK" to the entire rocket and allow it to dry over night until it's clear. I tried some small areas earlier and it dried for a few hours. When I peeled it off there was no issues whatsoever so I think this stuff will work. Beside after I wet sand the entire rocket it will take care of all the imperfections. At least that's the plan.


I have some Rustoleum 2X "OREGANO" but I was considering just getting some small Testor's spray paint for the project at hand. It calls for two shades of gray light and dark, which I think I can find? I'd have to search Hobbylincs sight. My other option is just to paint it the same gray on the nose cone and AFT tail section and paint the AFT ring black. That would save me a few dollars and it will still look decent. Undecided, but I have time to think about it.
I have some Rustoleum 2X "OREGANO" but I was considering just getting some small Testor's spray paint for the project at hand. It calls for two shades of gray light and dark, which I think I can find? I'd have to search Hobbylincs sight. My other option is just to paint it the same gray on the nose cone and AFT tail section and paint the AFT ring black. That would save me a few dollars and it will still look decent. Undecided, but I have time to think about it.
I applied the "FASMASK" to the entire surface of the rocket, except where it will be painted. I will let it dry 24 hrs before peeling back the tape and trimming where necessary. The only other time I used this was when I was painting my RC Truck body and I didn't end up using it because it was a PITA to trim the compound curves on the body, but that's because I wasn't that familiar with it so here it should work fine. We'll see. I hope it works out ok


Keep at it Dan, you will get there.
I have been using liquid masking film with great results on those compound curves. You may want to give it a try.
Wow, 27 years is a REALLY long life for a cat, especially an outdoor one!!
Here is my buddy Boris who does all the QC on my projects.
He is 7:
He's a cool looking cat! I love animals! Cats are have a lot of personality.
Well I let the "FASMASK" dry overnight, but when I peeled the tape back the line really wasn't that sharp so I'm back to the drawing board once again. The good news is the FASMASK does it's job, but the only way to get sharp edges is if you cut it with a very sharp blade and I didn't want to risk damaging the paint underneath. This is why it works well with Lexan bodies, because you will never see any scratches or slight cut marks after the body is painted.
So what I'm considering doing is painting a camouflage pattern on the top side only after the nose cone dries and then applying the decals and calling it done. I'll use tape to mask the pattern off so it will look pretty cool.
Just an idea IDK I'm open to suggestions
So what I'm considering doing is painting a camouflage pattern on the top side only after the nose cone dries and then applying the decals and calling it done. I'll use tape to mask the pattern off so it will look pretty cool.
Just an idea IDK I'm open to suggestions
I had some time and decided to finish up the nose cone. I masked off the gray section and sprayed it with Duplicolor Gloss Gray. Before doing so I wet sanded the section of the nose cone that I wanted to paint with 600. I applied two good coats so it's thick enough to handle any type of wet sanding. The pattern I just eyeballed and it's not exactly as the Skunkwulf original pattern, but I wanted to try something different and I might work the gray into then lower section...we'll see how this turns out first.


Last edited:
I unmasked the nose cone and placed it on the body. I think it turned out pretty cool looking. The last thing I have to paint is the tip. Probably do a black tip, but was considering a red one. Not sure I'll kick it around. Also still considering the top half camouflage?
After I get all the colors on the nose cone I'll come back and wet sand it.


After I get all the colors on the nose cone I'll come back and wet sand it.
marwady
Build twice, Launch once
- Joined
- Oct 28, 2012
- Messages
- 389
- Reaction score
- 10
Dan,
Beautiful!!
I knew you would "get the lid off the jar" sooner or later.
That's what makes it rewarding for me, overcoming my mistakes and finally coming up with something that satisfies me.
Love that color scheme!!
Cheers!!
Beautiful!!
I knew you would "get the lid off the jar" sooner or later.
That's what makes it rewarding for me, overcoming my mistakes and finally coming up with something that satisfies me.
Love that color scheme!!
Cheers!!
I unmasked the nose cone and placed it on the body. I think it turned out pretty cool looking. The last thing I have to paint is the tip. Probably do a black tip, but was considering a red one. Not sure I'll kick it around. Also still considering the top half camouflage?
After I get all the colors on the nose cone I'll come back and wet sand it.
View attachment 159005View attachment 159006View attachment 159007View attachment 159008
Red tip with a thin black ring at the edge.
I have some other ideas for the next Skunkwulf build that I do. I learned a lot so far from this build and I hope I don't make the same mistakes twice. I had paint issues, but I hope to put those behind me now.
Thanks for the compliments!
I'm looking forward to wet sanding this rocket and getting some clear on it, but there's a few more things that need to be done. I'm still debating what to do with the top half? I'm sure it will come to me, but I do like the tan and white combo...it looks cool and the gray just makes it look better.
I was reading how some people spray paint their camouflage patterns and they suggest using leaves and randomly placing them of the surface and spraying different color combinations. I was going to use Olive drab, dessert sand and black.
This kit has so many cool lines to it you can go with so many different paint schemes and they will all look good.
Last edited:
Not only do I dislike sanding, but taping as well. Anyway taped off the main body and decided to change it up bit with the standard design. Hope you guys like it when I'm through. I'm also doing some painting on the nose cone.


As I said thought I would make it pop. Kind of just painting as go and messing around with some color schemes...hope it turns out OK


Here's a few pictures of the nose cone tip...


hornet driver
Well-Known Member
- Joined
- May 1, 2011
- Messages
- 4,639
- Reaction score
- 9
I'd like to see it unmasked---you sorta lost me all of a sudden!!!!! Knowing you, it's gonna be fantastic. But for the life of me, I can't figure where your going with it.
I pulled the tape back and all is good. No paint pull. Thanks Tamiya (Gonna place an order for more of this stuff) there are some areas where the lines may not be that sharp, but I'll live with it. I also have to carefully scrape away some areas with a blade where the overspray landed, but I'll wait until it dries up some more.
I'm going to add some more highlights to the nose cone. Probably either red or black. Something is missing there. Hope you guys like the paint scheme. I figure once I get the decals on it it will look nice. So next is adding some paint touches and then wet sand and shoot the clear coat. Apply decals and then I'm done....


I'm going to add some more highlights to the nose cone. Probably either red or black. Something is missing there. Hope you guys like the paint scheme. I figure once I get the decals on it it will look nice. So next is adding some paint touches and then wet sand and shoot the clear coat. Apply decals and then I'm done....
hornet driver
Well-Known Member
- Joined
- May 1, 2011
- Messages
- 4,639
- Reaction score
- 9
OH YEA!!! ME LIKES!!!
Thanks Bill. I still need to do some paint touch up like on the AFT center ring and a few other spots along the wing edges. I might just get a small jar of red and a brush and carefully brush the edges red where I missed spraying. I also want to add something to the nose cone. Not sure what just yet?? I need to order some more tape too and small 1/4 oz jars of paint..
Like I said the next one will be insanely cool....
I can't wait to wet sand it and shoot the clear.
More pictures


Like I said the next one will be insanely cool....
I can't wait to wet sand it and shoot the clear.
More pictures
Last edited:
Similar threads
- Replies
- 47
- Views
- 3K