Scratch micro Alarm

The Rocketry Forum

Help Support The Rocketry Forum:

This site may earn a commission from merchant affiliate links, including eBay, Amazon, and others.

sandmantoy

Well-Known Member
Joined
Jan 27, 2009
Messages
541
Reaction score
1
I was inspired from Jim Flis's micro rockets I saw him tinkering with a few years ago and decided I would build my favorite rocket. A launchpad Alarm, I ended up making a work stand and a launcher which is still being worked on. I got most of the parts from Quest Aerospace including a bunch of micro motors. Funny I have been working my way up to larger rockets and this little project just consumed me lol.

Here are some pictures of the build it came out so nice I had to share :)

Here is the parts for the build.
alm1.jpg

Got the fins on, very tedious.
alm2.jpg

first color on, I should have taken pictures of taping it off for the next color.
alm3.jpg

Here she is, made it same paint scheme as my LP Alarm :D
minialarm.jpg
 
Very Nicely Done Sandmantoy!
I really Like it. have you had a chance to swing test it? I find some downscales that didn't require any adjustments in Standard size sometimes need some noseweight in Micro Scale;) I use an 8foot piece of 13lb kevlar thread as my micro swing test line. Works like a charm. Just be sure to include everything. including the little piece of 1/4" masking tape that holds the motor in. yeah sometimes just that much makes a difference.
Great looking little model. Hope is hear/see your successful flight report soon. looking at the size of the model don't be surprised if it's out of sight before you know it! I'd have some extra eyes on the field when you fly. After the swing test of coarse.

Edit: a micro Alarm is on my list of micro Scale models for the future, I've been gathering scale data but it hasn't made the top of the list yet.
 
Last edited:
The larger LP Alarm is on a shelf above where I was designing or figuring out the scale so most of it is just been made by eye. I have not decided if I am going to make a chute for it or a streamer. I have some light weight chrome Mylar to play with. I am leaning towards the chute though just for the weight. It has came out better than I expected though so far lol. I coated the nose cone and sanded it down a few times with epoxy to seal it and make it a bit heavier also. The fins may be a little large, scale wise but over all it looks well balanced in comparison to the larger version.

I have been working on a launch pad for it which is almost complete. I used a section of a drink straw for the launch lug not even thinking about the ID. of the straw so a bamboo skewer is the launch rod lol. I am working on adapting the small igniters to work with the pad. The pad is made of Popsicle sticks lol. The idea for building the rocket was to be small enough to set on my desk where my computer is to promote rocketry conversations and a little day dreaming adventure now and then but function was a must. I can't wait to launch it :cool:

micropadviews.jpg

almonpadviews.jpg
 
Last edited:
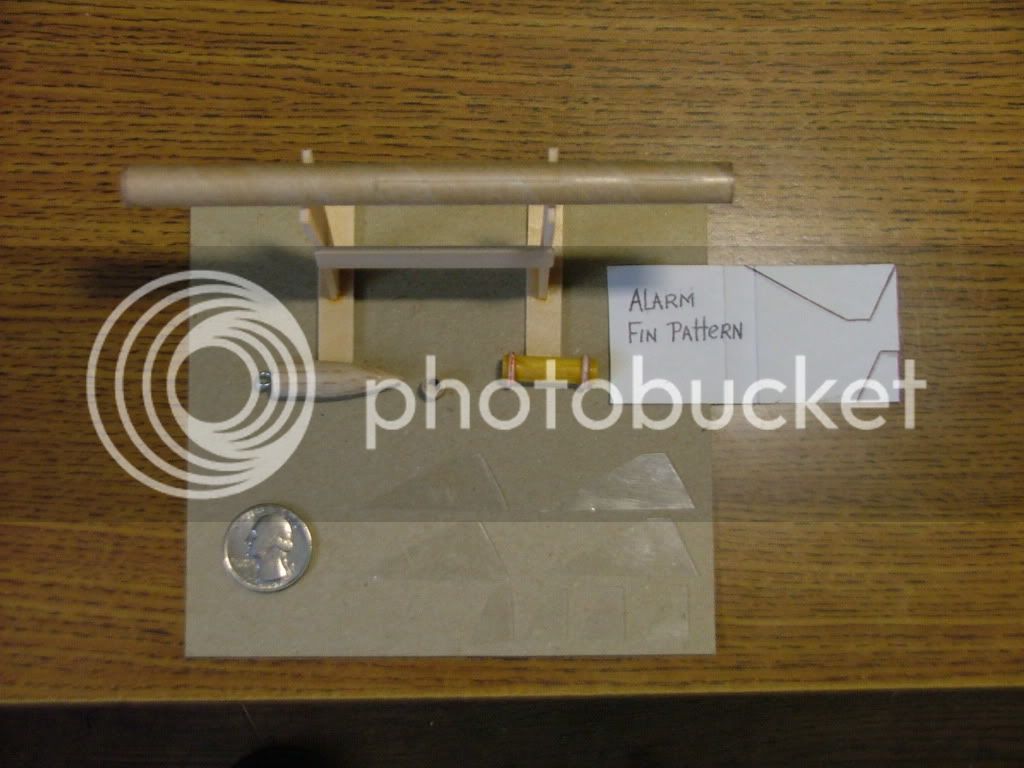
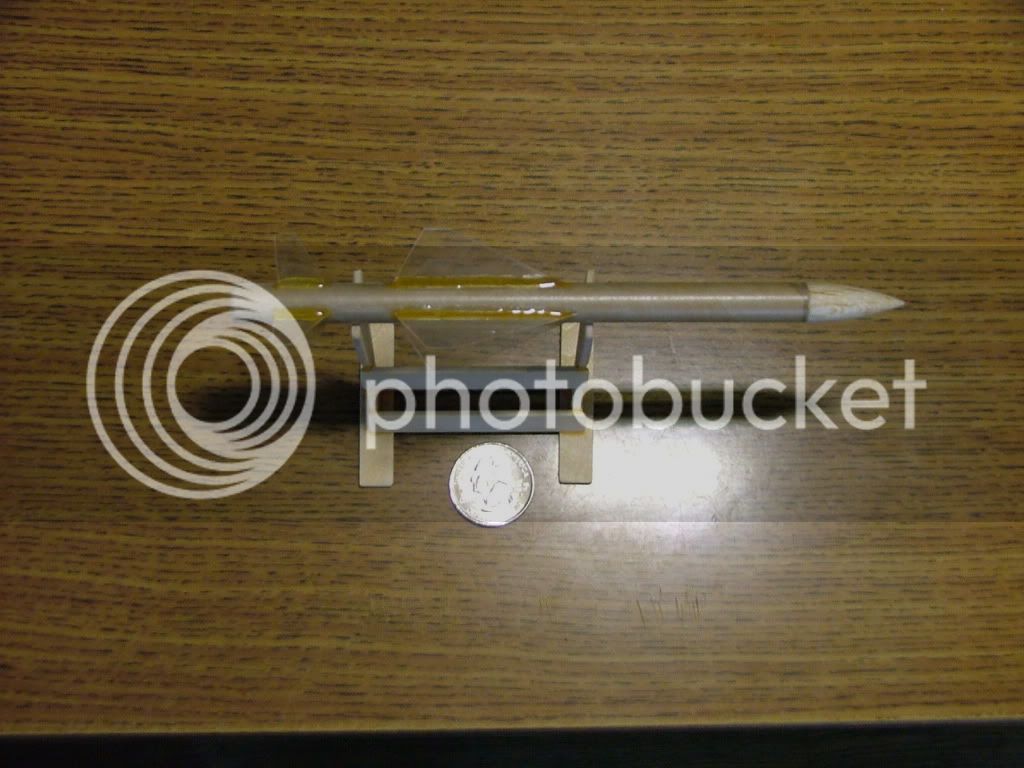
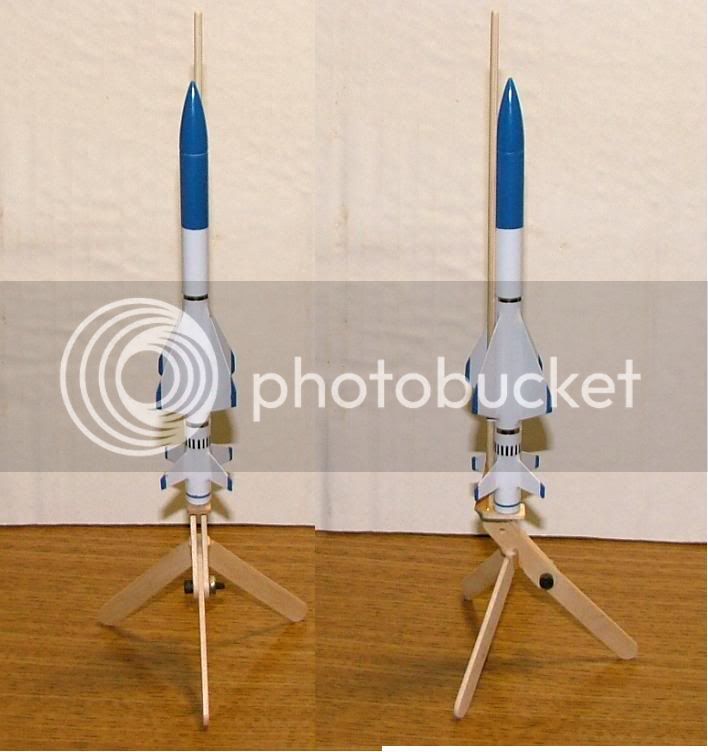
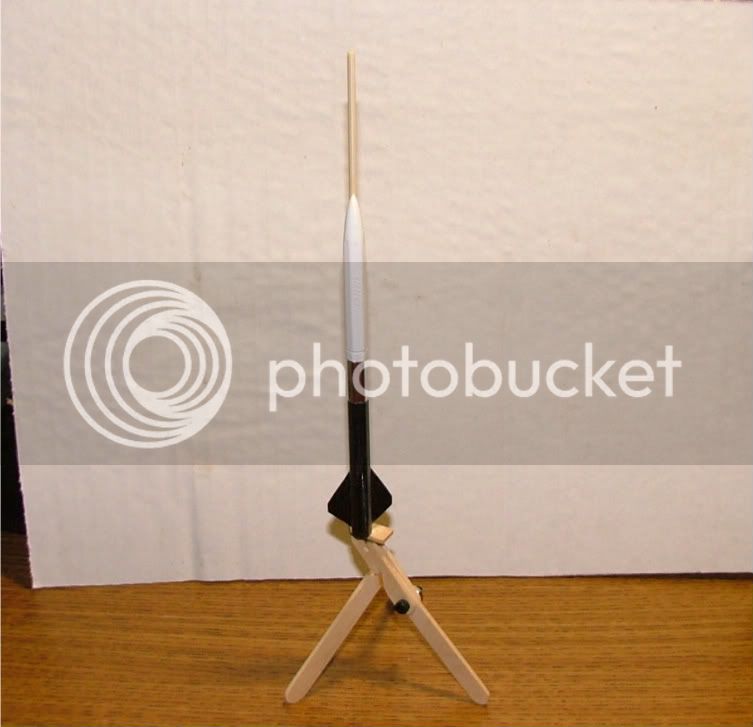
Unless your model is a lot larger than I think. Looks like T3 (.375") or T4 (.448") dia body to me;) all you'll need is about 9" -12" of plain old plumbers white teflon tape as a streamer that also doubles as your wadding. I'm using double thick military grade colored Teflon tapes for just about all my Micro models, and new build standard size models. If you used Kevlar as your shockline simply tie the tape to the line. Talc baby powder the heck out of both sides before you fold/roll it the first time. it's good do go. after a couple flights you'll need to re-powder the tape but it generally outlives the model.

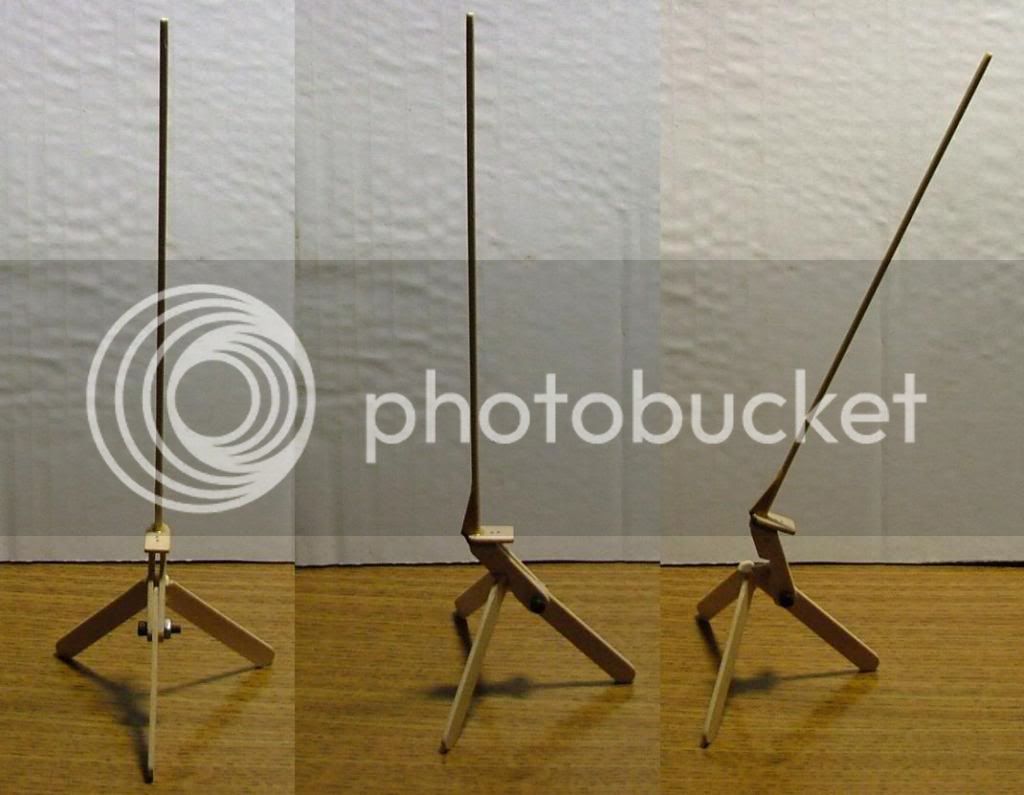
Very Cute display launcher, but I think you'll find you need a little more base weight for stability out in the field. Generally most of us use .049" music wire of one type or another for the launch rods in 9 to 12" lengths. 1/8" or smaller coffee stir sticks, or the hollow small dia dollar store Q-tip stems make excellent Launch lugs for micros.

You mentioned you got most of our micro supplies from Quest. Might I suggest taking a look at Fliskit.com He has a complete line of just about everything needed for building scratch micros. very single piece I've ever purchased from them has been highest quailty, first rate stuff. and I make just about all my own micro parts. I have to say the balsa cones, plugs and transitions supplied by Fliskits are as good as any of the Basswood part I turn for myself.

You will need to add a bit of clay or something metal to the blast deflecting area as you'll be a little surprised by the energy of these little motors. I melted thru an .040" 5005 alum plate on a first launch once. I've seen switched to 22ga stainless deflectors or covered the area in Nomex.

Launcher can be as easy as a couple pieces of music wire stick in a board and two cloths pins to very detailed micro Rack systems.
I've switched my everyday type launching to a light weight digital camera tripod with a homemake aluminum/acrylic launcher base that can accept a number of different launcher arrangements, towers, pistons, rods, and accessories.

Not sure if your aware of the MicroMaxRockets Yahoo group. If you join us our files section full of info and tips on all kinds of different launcher/controller materials, igniter material methods etc. Lists of where to get needed materials and parts or how to make your own.
Tons of pics and plans for a couple hundred different scratch micro models for download.
Hope you'll check us out.
 
Last edited:
I hear Ya: I have this one sitting on at my computer at work.

and I built this Nike-apache for one of our club members who works at Nasa Goddard SFC in greenbelt. she has it on top of her computer as well:)

People just don't want to believe these can actually fly:LOL!!!
 
The tubing is .375, I did not even think to look on Fliskits for parts lol. Thanks for the tips also :D I was thinking about using aluminum on the pad for the deflector too. At first I was playing with some flashing but figured it would not hold up. Exactly what I use for a launcher, small 3/4" x 3x3 piece of pine with a piece of bailing wire sticking out of it lol. I will have to check out the micro Yahoo groups now ;) Nice looking rockets! Funny I just got finished building a 5" 10ft. tall rocket and then to build this one, I really like it too. I am actually kinda excited to see it fly.

When I started building it I was thinking about letting it fly across the shop at work just because most of the people I work with would be expecting it lol, but I like it to much to wreck it. I like all the micro decals you used.
 
Parachutes do not scale down to the Micromaxx world very well in my experience. That's why nearly all Micromaxx-sized models use either streamers, simple break-apart, tumble or featherweight recovery. The problem is that when you get down to 4", 3", 2" diameter parachutes, just about any material that you can find will be too dense and stiff relative to its diameter to open up promptly at deployment and capture an effective pocket of air underneath the canopy. You can try using extremely thin material such as dry cleaner bag plastic, but it will be very fragile, prone to sticking to itself and easily melted by the ejection charge, even if it is well-protected by wadding. A single sheet thickness of Estes recovery wadding might work as parachute canopy material, but again, it would be extremely fragile. You would probably only get one use out of it, if that.

Micromeister did some experimenting with paper parasol recovery, without, as I recall, much success, even though he made a real effort to get it to work. I don't recall right now whether he ever tried to use origami-like folded paper parachutes either, but he might have.

Certain species of spiders send their young out on tiny sock-shaped parachutes made from spider silk. The sock- or balloon-shaped canopy style might be the most effective design for a Micromaxx parachute, if you can find material that is thin enough or if you can obtain a sufficient supply of spider silk. ;)

MarkII
 
Mark is correct about the thickness of the material to be used for Micro Chutes. I've found over a good number of experiments that 1/4mil mylar, drycleaner bag..(also about 1/4mil) and a few very thin plastic shopping bags. do make pretty reliable micro chutes in 3" to 6" sizes. A T2+ minimum diameter .281" body Micro model generally doesn't "need" a chute unless your doing it for other reasons such as My T2+ Orbital Transport with it's 2" chute to bring it down horizontally while the glider circles the Main (Just Like the Fullsize and Upscales versions). Personally I find Chutes unnecessary in most other mircos in the 1 to 12grams weight class regardless of body size or dimensions.
When you get into larger 14 to 17gram models 3" to 6" chutes are sometimes helpful to eliminate landing damage. Just like Mylar chutes in competition models the easiest way to protect them from the ejection charge heat is to use a styrofoam plug. I generally use a tiny piece of FP Wadding on each side of the plug just as added security. These plugs also help with deployment of the tiny chutes insuring complete ejection as long as the motors taped in well LOL:)

OH no Mark! I guess because they've become such a crowd pleaser, over the last couple year the "powder Parasols" have been more or less prefected and work quite well. Generally getting a Great laugh was they oscillate down after boost. I think the biggest problem was finding ink pen springs to fit the paper parasol stems:) and & #16 snaps for use on the shock lines:)

Sandmantoy: attached is a handy little template for cutting 6 sided chute canopies and a micro X-forms chute as will. The X-Form Chute has been working exceedling well in T4 (.448") model bodies, I use one now exclusively in a Micro Charokee-1/8A. Very neat looking on decent.

Sorry didn't mean to take your build thread off track. Hope this info helps let you know that just about anything you can think of to do with a model rocket can and generally has been done with micros.

Thanks again: I draw and Print the largest majority of my Decals in Corel Draw printed on an Alps dry transfer printer. Some have been printed on a Epson inkjet with the durabite inks covered completely with Krylon UV resistant clear or microscale decal liquid film before cutting from the sheets.

View attachment MM 3to6in Chute & X-Form Patterns-c_11-04-02.pdf

MM 230a-sm_Cherokee-8thA_08-29-00.jpg
 
Last edited:
Great info guy's. I was sitting here yesterday looking at the little cocktail umbrellas, I have 2 of them lol. I was thinking about a chute to keep it more like the big rocket and for the weight of it but I am also thinking a streamer would be much easier to deal with. I don't think it weighs enough to do any damage with out a chute or streamer as long as the NC comes out. I do have a large roll of chrome Mylar that will make it more visible once deployed. I have done no more than look at it so far though.

MarkII have you been harvesting spider silk? j/k ;) I was so excited that I was able to get the fins onto the air frame as it was very hard for me to do. I am a machinist so there is not much feeling on the finger tips any more lol. I don't think I would be able to get spider silk to work for me but I understand what you are saying. I am not looking forward to putting string on a tiny chute yet but talking about it with you guy's has me thinking about it more. I usually drop the micro rocket once or twice before I figure out how much pressure I need to hold onto it without crushing it in between my fingers lol.

I just this summer started tinkering with micro rockets. My first was a bic pen, it was more an experiment into what I was going to use for fin material. The micro motors don't fit into the pens but bottle rocket motors do. I spent most of my time into putting the fins on it I forgot about the report lol! I knew the rocket would go up and then come down and it was a nice flight even with the lawn dart recovery, which I knew it would survive. I had a few friends over for the flight. I got more cheers from the report which blew the fins off of it :clap:
 
When I started looking at messing around with the cocktail umbrella recovery, I saw a box in the dollar store....turned out to be a gross of the little guys LOL. I think I've worn out perhaps 8 or 9 over the last couple years and maybe used a half dozen in the research phase... but I've still got a Bunch left to play with.

Art Applewhite designed a folded paper or cardstock fin unit for the bic Stick pens a number of years back. Very KEWL little piece of engineering!
I've altered the rockets inner design a bit, added a shockline, motor block and teflon tape streamer to being the back softly rather then lawn darting them. But micro maxx motors fix PERFECTLY in the Bic sticks...you can even use a couple pieces of the unfilled portions of the ink tube as the Launch lugs. I think the hardest part of the whole conversion process was sanding down the collar of the tapered blue tip to slid easily at ejection. It's like they were made to be Micronized LOL!!

Ya really need to check out the MicroMaxRockets yahoo group files section.
I believe Art still has the basic insturctions sheets for the Bic Pen Odd-roc, several versions of the all cardstock Micro powered offset thrust Monocopters, and several saucer type "UFO" Scimitar and other Qubits (My fuzzy Dice are an offshoot:) all cardstock micro models.
In case your wondering my current Micro Maxx fleet has 161 different models not counting duplicates of the same model or design. One of the very KEWLest parts is being able to have every one of them on the field with me at any launch I attend with no problem. How fantastic is that!

MM 258a1-sm_Bic-pen OddRoc_06-15-02.jpg

MM 258a2-sm_to g1_7 Micro Bic Pens group pic_03-14-06.jpg

MM 265a-sm_Mono Copters a&b_10-06-02.jpg

MM 292p1-sm_Scimitar Qubit paper Ufo_03-20-04.jpg
 
Last edited:
Yes!! BIC Round Stic pens make GREAT Micromaxx rockets, and they really go high, too! Art Applewhite Rockets is the place to go to find out more about them. You can buy complete kits (for $2, how can you go wrong?) or click the link on the product page to get free plans and scratch-build your own. You use practically everything from the pen except the cap (and the ink). You even use the ink tube to make launch lugs, which work great. The way that I clean the ink out of the tube, after I pull the ink tube out of the back of the pen point, is to stick it into a coffee can filled to about an inch or so of citrus-based degreaser. I use the kind that you can find in any supermarket or dollar store. Just stand the ink tube up in it; capillary action will draw the citrus solvent up into the tube and dissolve the ink. Leave the tube in the can at least overnight.

If you are scratch-building, then the white barrel Bic Round Stic pens are the ones to get for this; accept no substitutes! ;) :D Like Micromeister, I made some very minor modifications to the internals of Art's design in order to create an easier and cleaner attachment for the shock cord. Awhile back, I also experimented with using the newer Bic Round Stic Grip pens. The frosted clear pen bodies can be used for payload sections, and the section of the pen body that is covered by the grip can be cut off and used to make tube couplers. Put one of those mini cyalume glow sticks that are used for fishing into the payload section, and launch it at dusk! I haven't built any new ones in some time (my original group is still working fine - the rockets are practically indestructible), but now that Quest has come out with the Micromaxx-II NE motors, I'm thinking about building a two-stager. :cool: My Bic Stic rockets were some of the very first rockets that I built after becoming a BAR in 2004.

Art's Bic Stic kits also include one that uses the hard-to-find green Round Stic. It is the only place that I have found that has that color in the original white-body Round Stics.

MarkII
 
Last edited:
....but now that Quest has come out with the Micromaxx-II NE motors, I'm thinking about building a two-stager.

MarkII

I did just that when the NE motors became available. It flew very well.

Another CHAD 2-stage is a Quest RTF cut down as a booster.
Make sure you paint the booster a bright color if you fly on a grass
field. I eventually found mine. :)

Bic Pen 2-Stage.JPG

Raw Fusion 2-Stage.JPG
 
I did get some NE motors to play with lol, I did not know they where new. I also did not look at the other type of bic pen, makes sense. I was just tinkering with one of the older types I guess. First one I built I used the regular pen tip. One I still have I used JB WELD to make the nose cone. I used some plastic from packaging a mini mag flashlight came in for my fin material. It cuts nice and also sanded up nice. It is the plastic cover you have to cut off most goods you get now a days. does not have furry edges when you sand it. I just use CA to hold it on the pens and epoxy for my micro Alarm. I made a coupler from the same plastic material for the pen too, if they are to tight they will crack the pen too lol. Here is a shot of my bic ballistic missile rocket, color is white paint black marker and a piece of chrome vinyl lol. Still have it so it has not been flown, those bottle rocket motors are pretty hard on them :cool:
DSCF1128.jpg
 
Last edited:
I like your approach, and your rocket looks great. The NE motors came out less than a year ago. On the micromaxrockets group, we had been talking for the longest time about what it would take to stage Micromaxx rockets, and whether it would even be worth it. All the while, Micromeister was quietly doing prototype testing for Quest, and he never let on. Quest doesn't say anywhere that these are booster motors, only that they are motors with no ejection charge. They do have a delay grain, but as we all know, the delay is extremely brief anyway.

MarkII
 
So far I've been very happy with the MMX-II-NE motors....I purchased a gross (144) as soon as they came out:) They give us the Booster many of use had been asking for since these wonderful little motors were introduced.
I do have to warn that the .85s average delay between burnout and breakthrough can increase the heartrate if you have a very heavy or very draggy model. Its now my standard practice to try very hard to keep all Staged Micro Models under 10grams total mass without motors which seems to give them enough coast time to stage as intended;)
Hope this helps a little.

PS: Something I feel is kind of important for those how buy MMX-II-NE motor: They look identical to standard MMX-II's once out of the package so I strongly suggest marking them before they get mixed in with your other micro motors.
I spent an evening opening each pack and with a wide tip Magic Marker coloring all my -NE's RED. I used an 1/8" bamboo skewer in the forward end to hold them while markering the entire exterior of the casings. Wasn't all that messy or time consuming but sure makes it easy to identify them in the range box or laying on the table out in the field.

MMX-II-NE #5665 Booster motor Stock & WP stor box_02-2009.JPG
 
Last edited:
Back
Top