Rail Launcher build

The Rocketry Forum

Help Support The Rocketry Forum:

This site may earn a commission from merchant affiliate links, including eBay, Amazon, and others.

Rob702Martinez

Zip-Tie Oversight Committee
TRF Supporter
Joined
Dec 30, 2015
Messages
1,371
Reaction score
351
Location
Las Vegas
In the never ending quest to research the best methods, learn from others or get new ideas....for the last 3 months I have been searching for a rail launcher for purchase or something I can build. I spent a lot of time going back and forth from a Jaw stand or welding custom parts, to buying one, back to the jaw stand, welding, cutting and grinding, drawing 4 different designs....untill a neat setup showed up. It either popped up here in a search or a google image search. So if you are the original designer, thank you. Thank you very much!

I ordered most of the parts a while ago, specifically the angle aluminum channel, and the side exit elbow, made 2 trips to our local McFaddendale's (mcmastercarr) and about spent 3 weeks drawing to scale different ideas or ways to use parts etc..

While building a launch pad is not rocket science, I did want some thing that would meet the following requirements that made sense in my head and on paper;

Rigid
Portable, break down
Less than 16 pounds
Expandable to bigger rails and rockets
Strong
Adjustable launch angle and direction
Adjustable Blast plate and stop bolt
No welding required
Heavy duty
Able to be staked down
Metal
Durable
Safe
Easy to duplicate, inventory parts, parts suppliers and exact prices.
Less than 160$

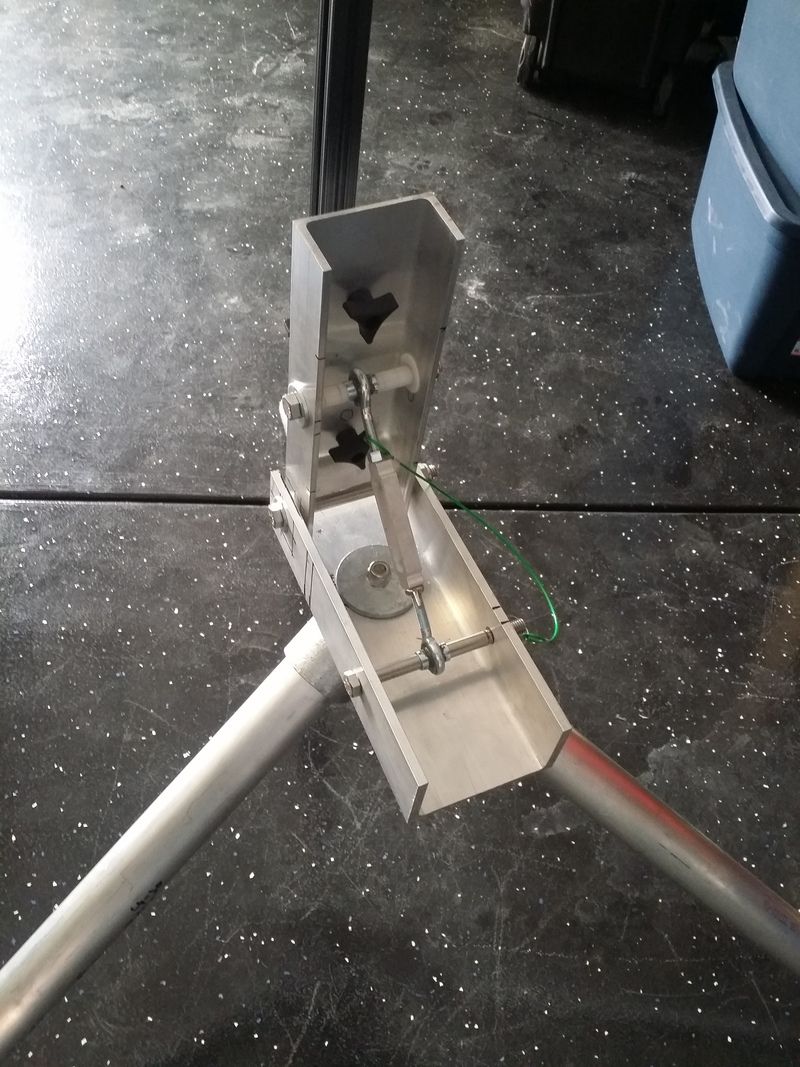
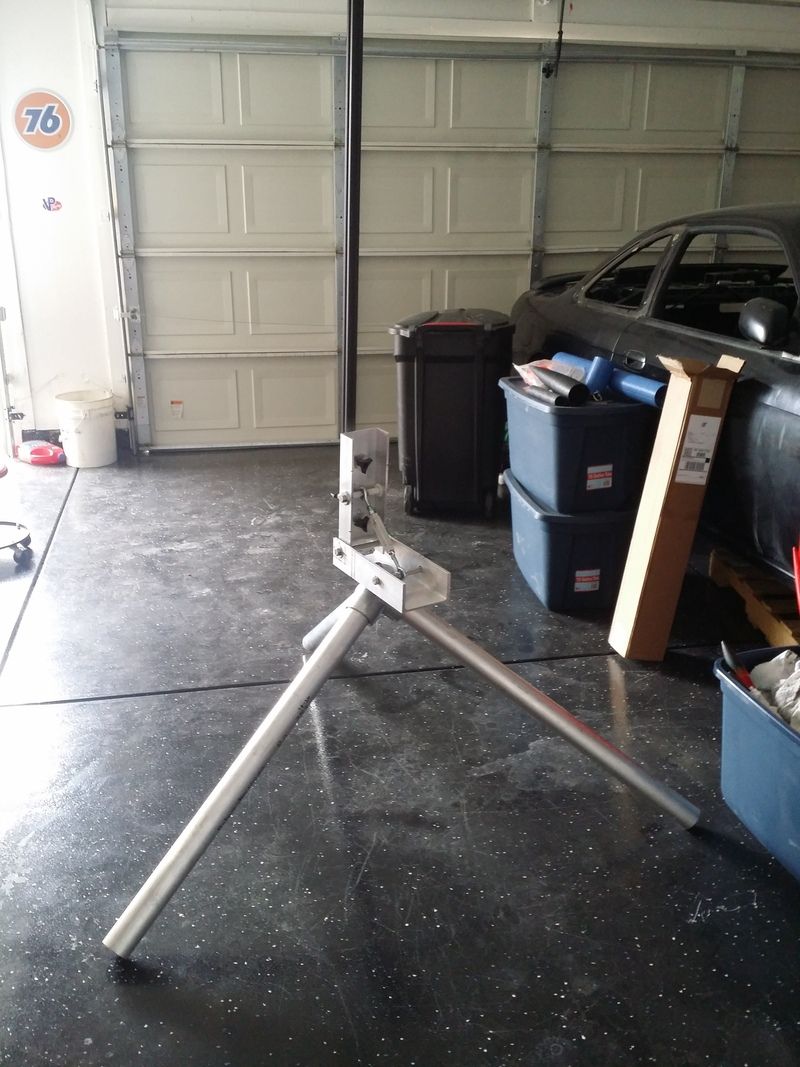
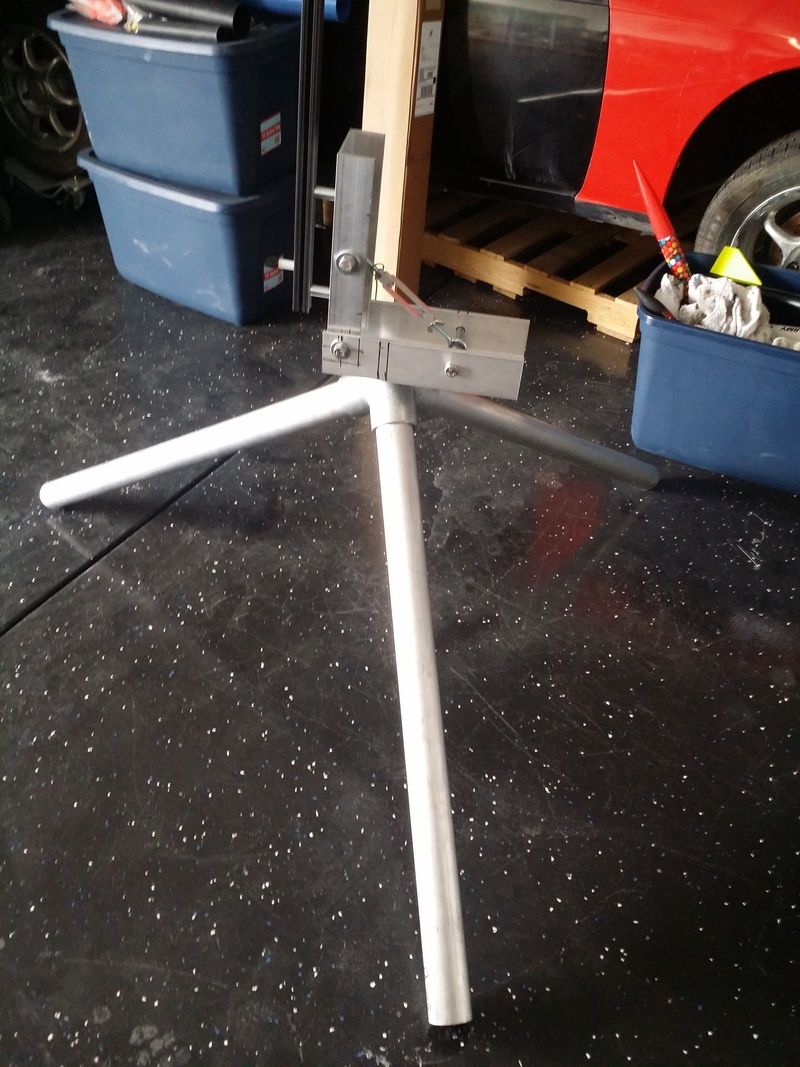
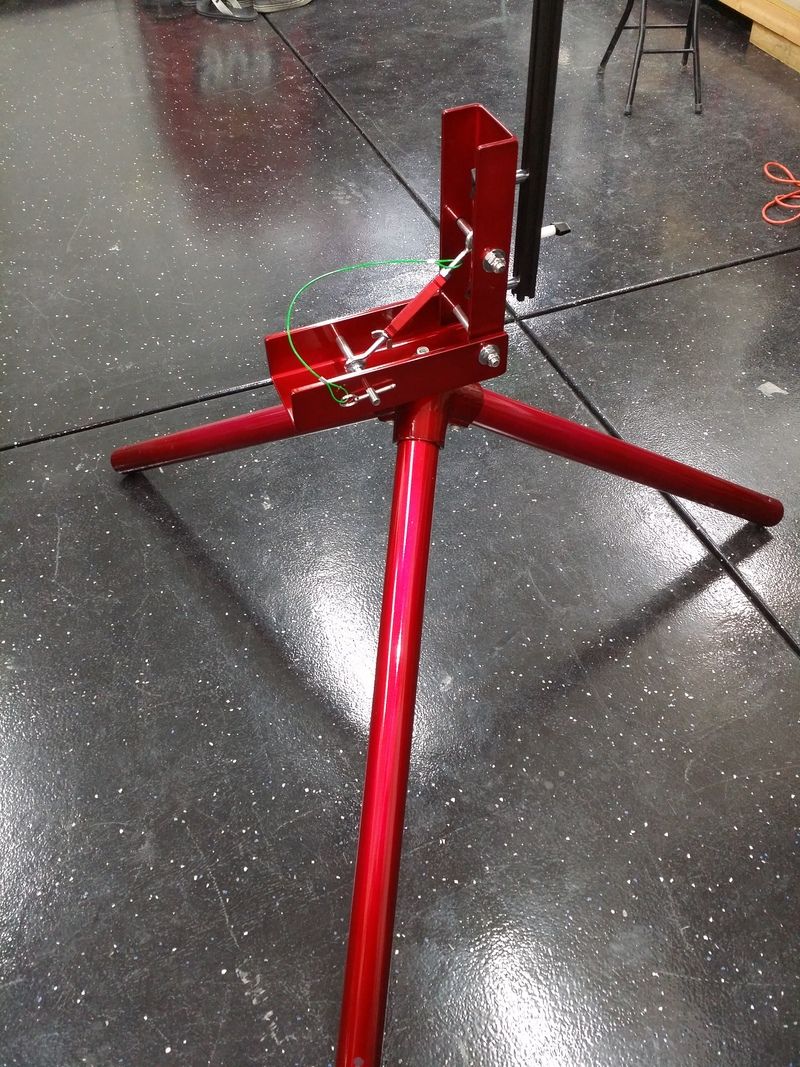
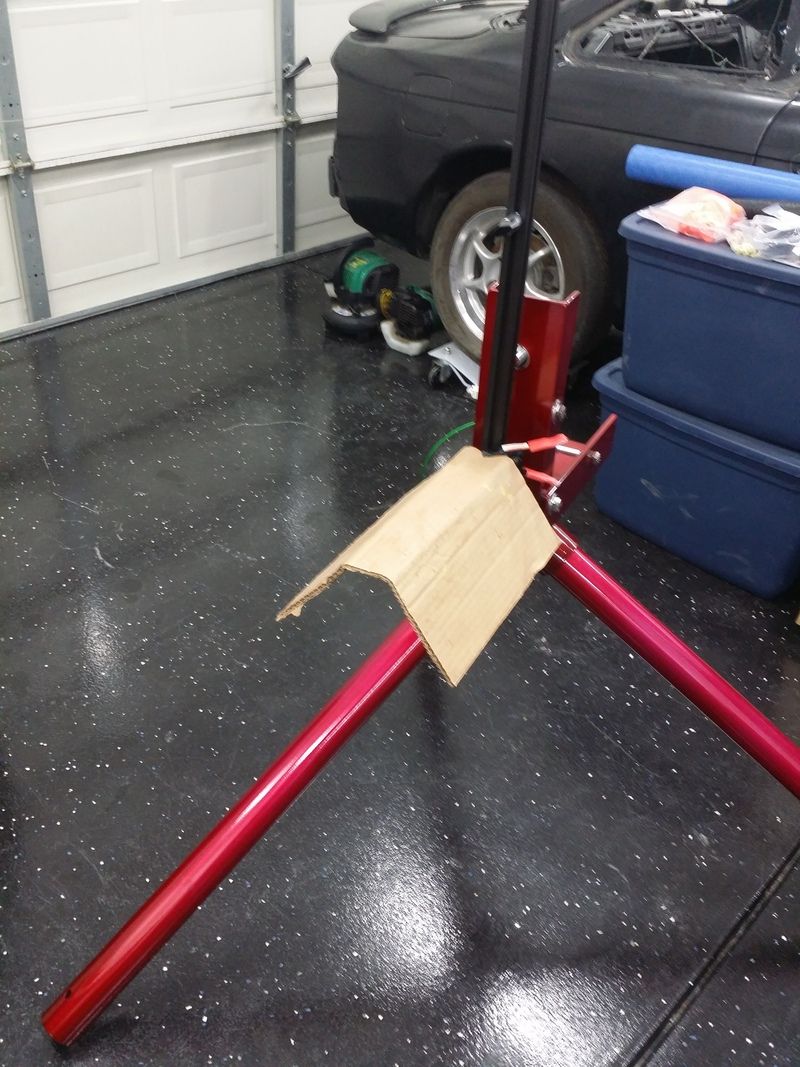
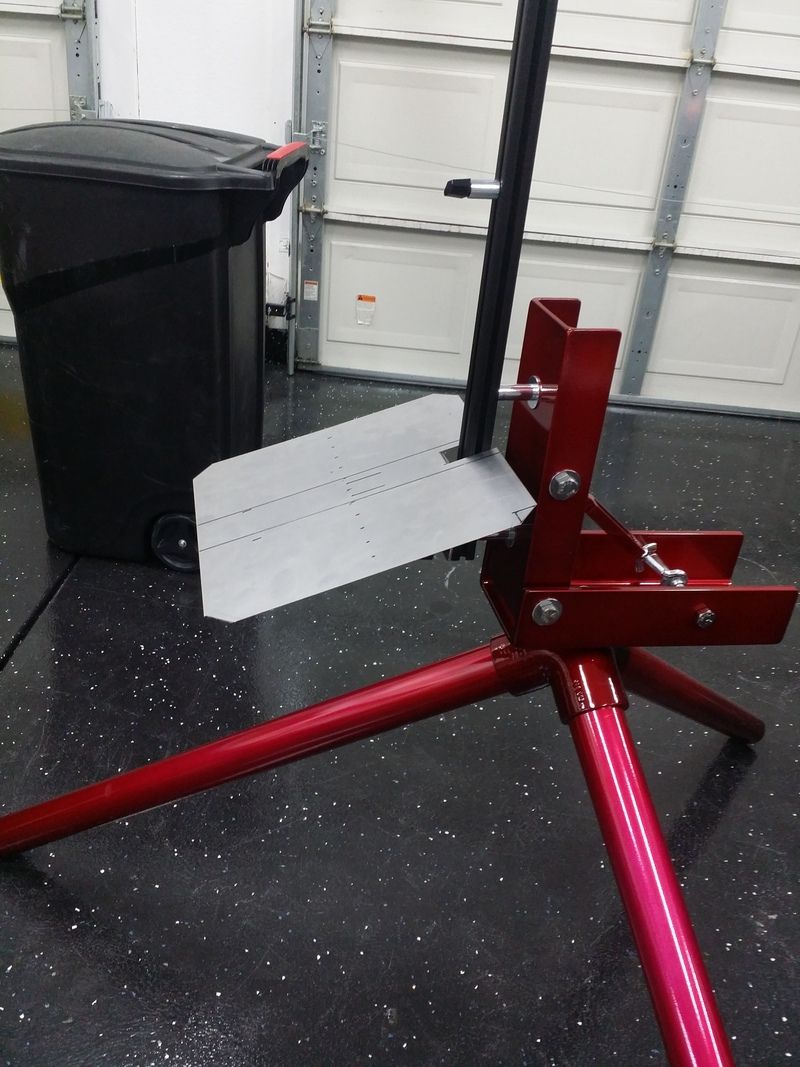
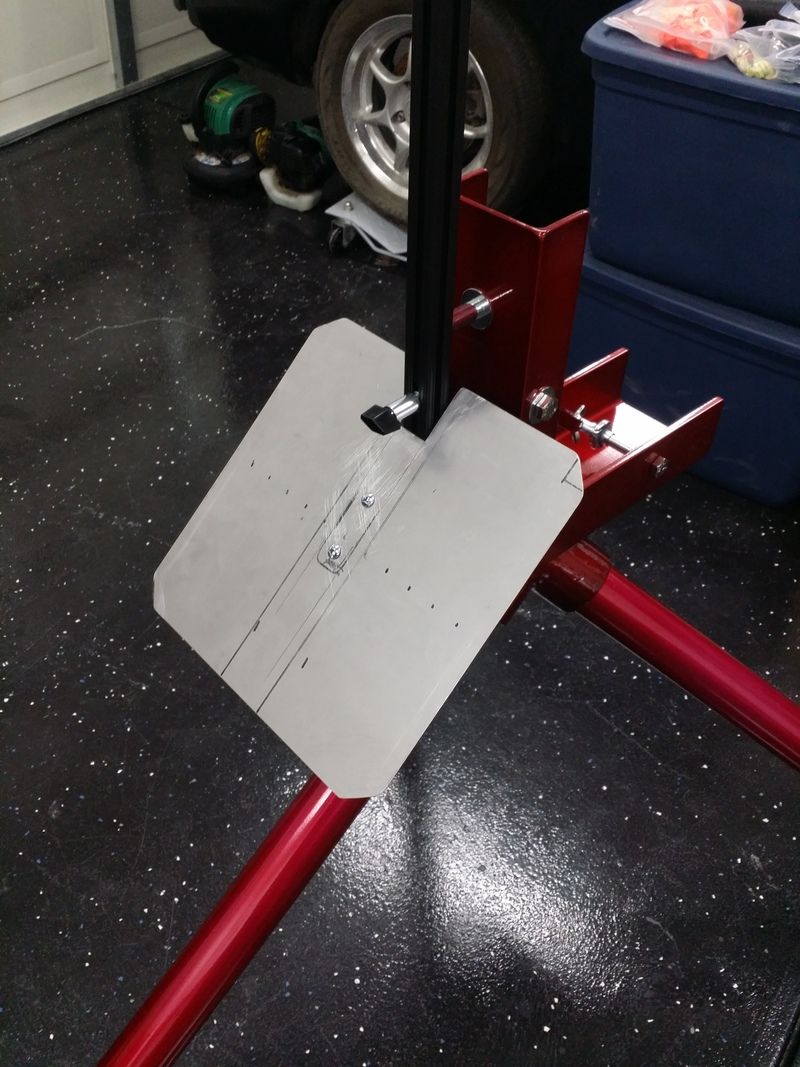
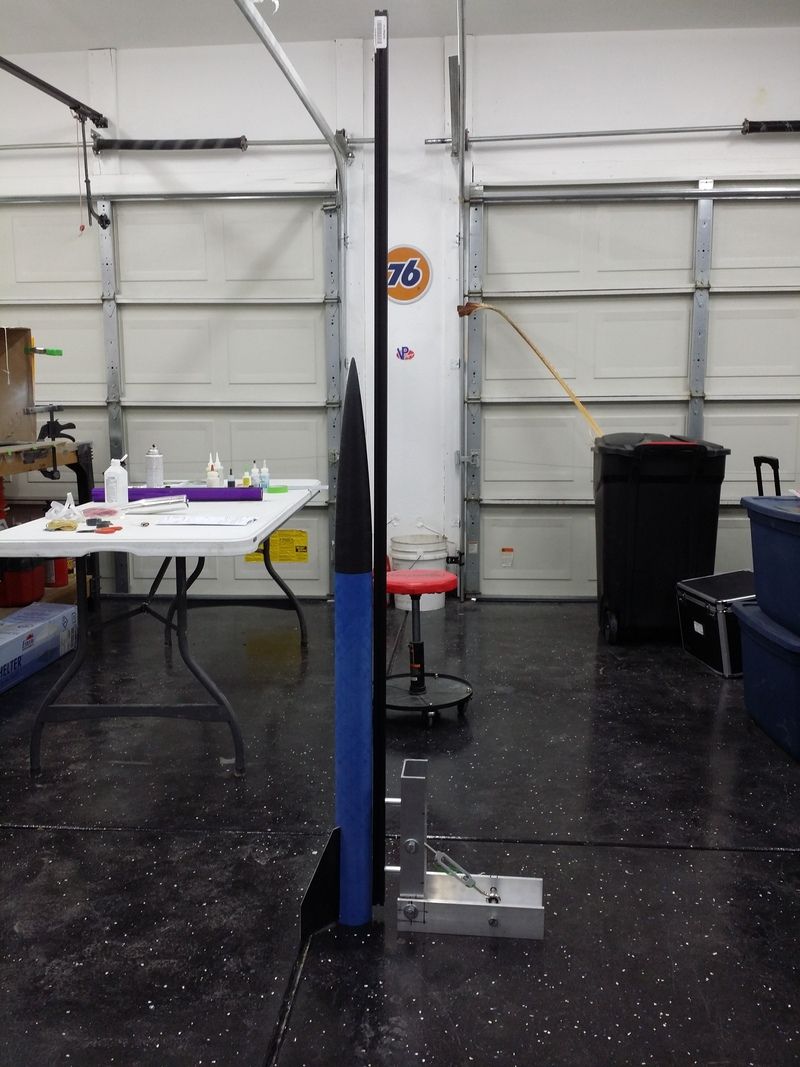
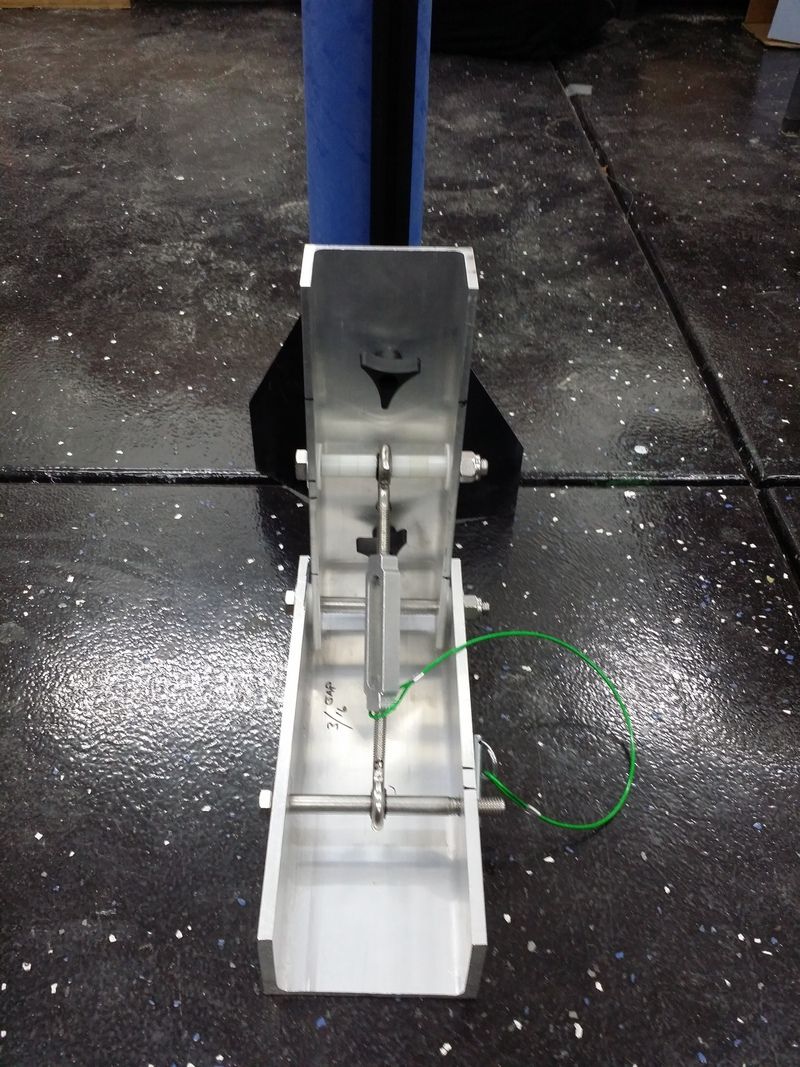
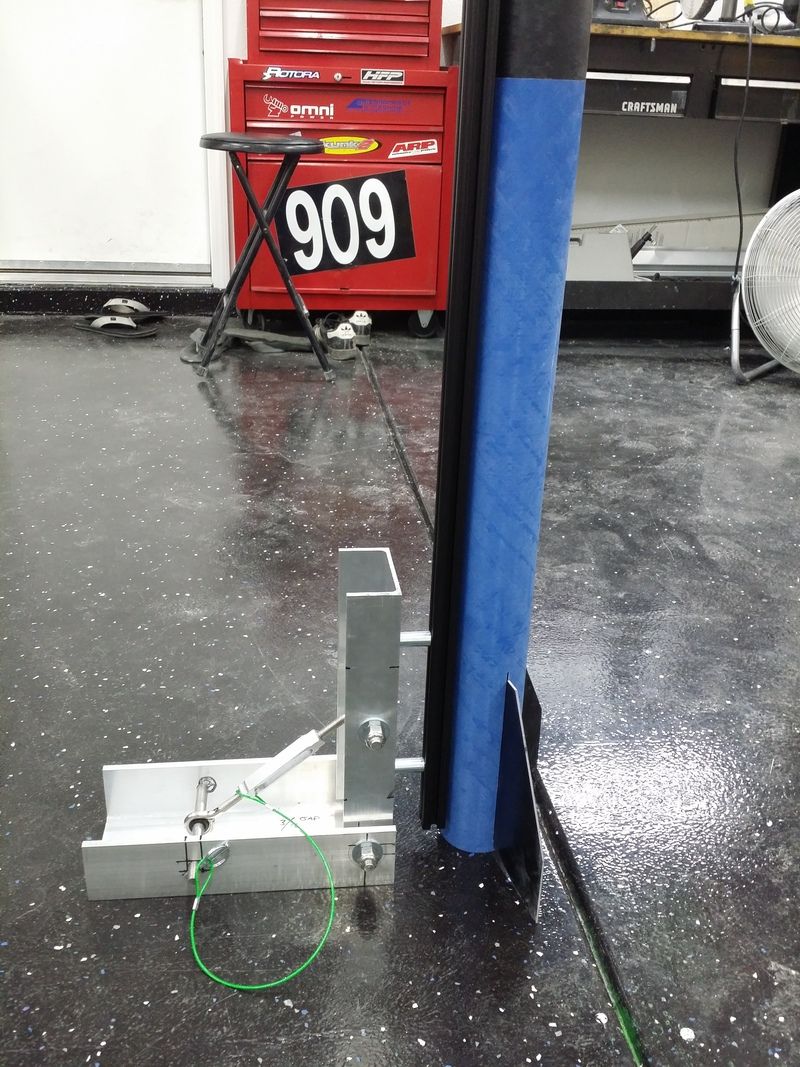
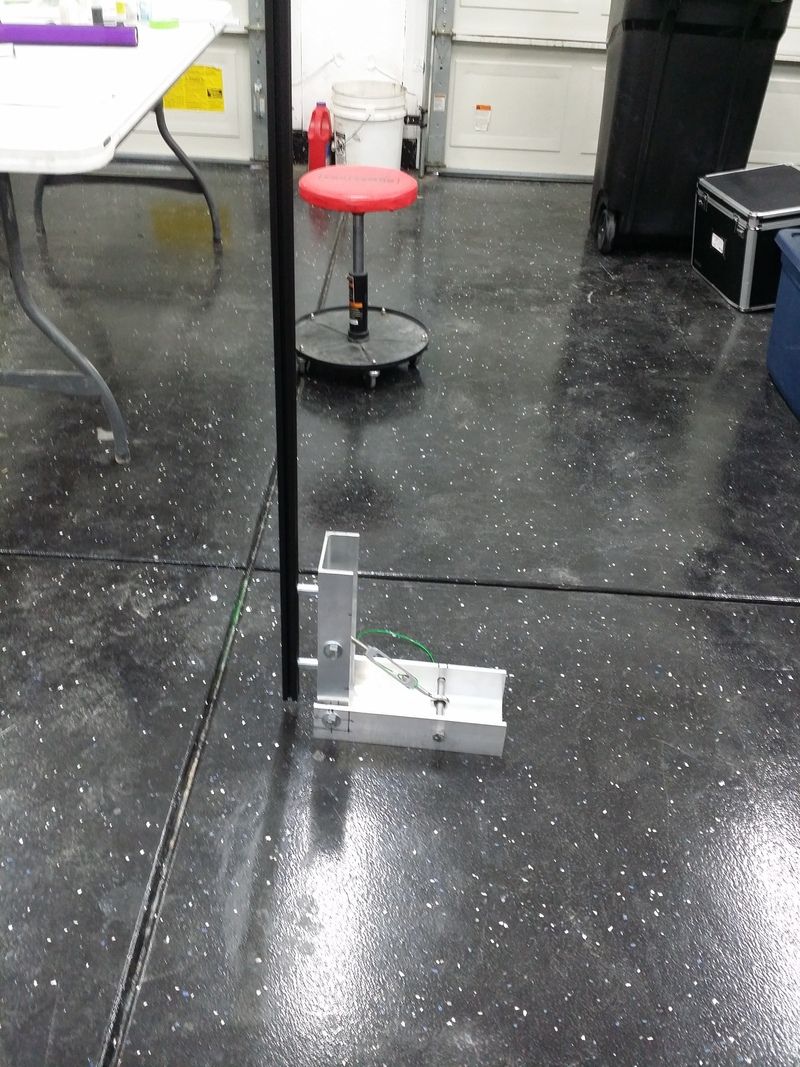
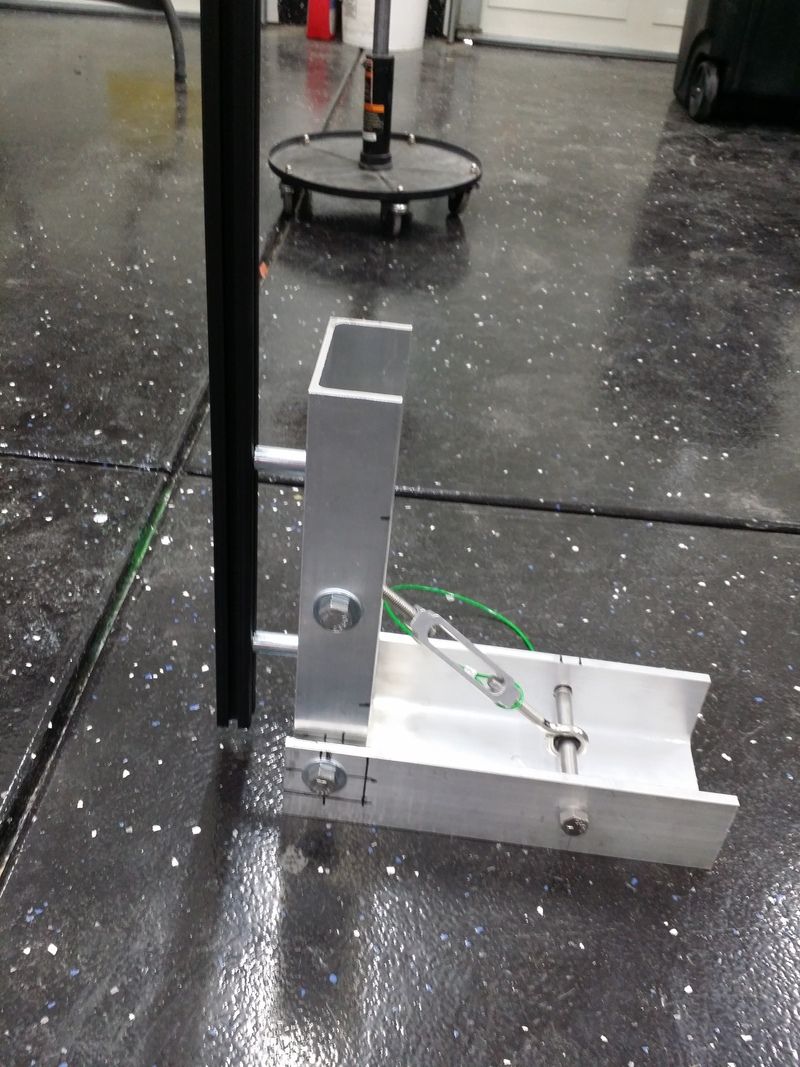
After a few hours back and forth from the drill press to the table measuring.....here we are at the rough stage of assembly. Still more to go and a few more things to do.

20160424_122503_zpskou7ci57.jpg


20160424_122447_zpsrbvh1yop.jpg


20160424_122518_zpsc8gkzkam.jpg


20160424_122528_zpsz8zvc4na.jpg


20160424_122649_zpsdpcpdm1v.jpg


20160424_122655_zpsrao0wan3.jpg


I would like to hear your guys' thoughts or ideas, thanks!
 
Last edited:
Looks very nice, good start for the rail mounting portion, now for some stabilizing legs. The green tether, you might look a moving the loop on the turnbuckle to the opposite end of the turnbuckle that way when the bolt is removed to lay the rail over the tethers loop wont slide off over the turnbuckles eye.
 
That's not only awesome, but now I now what to use my broken portable picnic table parts for!!!
It was really cool while it lasted, as it folds up like a suitcase, but you open it and it becomes a table for four.
The plastic had become brittle over the years, and recently a wind gust blew a piece of plywood I had leaned up against the side on the house down onto it, and it exploded into a bunch of pieces.
It's got lots of aluminum struts and hinged parts, and I had no Idea how I would use them until I saw your design!
I'll set them in the shed for disassembly. Way to many projects going on to get to this anytime soon.

Fiberglass Angle Press 2016-04-25 002.jpg

Looking forward to seeing you pad get built!
 
Last edited:
For larger rockets this might work with a thicker back such as 3x3 tubing. This is a versatile tilt design.
 
Cool. Most of my MPR rockets have 101 buttons on them instead of lugs. While this is great for a club launch, it precludes me from launching privately unless I build something like this. Thanks for the idea.

Not sure what I'm going to do, as I don't launch privately very often, but I would like to be able to launch privately.
 
I like it. I have a new high power pad on the drawing board my self. The channel pivot seems a good option to allow the rail to go flat. You might consider a crush tube in the center channel with the pivot bolt passing through it. This will allow tension without distorting your center channel. You could also add a knob to allow tensioning after the adjustment. The rocket exiting the end of the rail has a lot of leverage on that point so whatever you can do to firm it up is a big help.
 
I made some progress and it's just about finished. Just need to weigh it and inventory the parts and prices. I should have pics today. The 3 foot aluminum legs came in and so did the kee klamp side exit elbow. I ground down the joint of the elbow to make it flat and allow the bottom channel, with a 1/2x3x1/4 washer as the base, with another one on top. I also changed a few mounting parts for the turnbuckle. It would be nice to find a heim joint turnbuckle but finding a 3/8x1/2 setup is not easy. Anyhow pics shortly.
 
AAAAANNNNNNNNNNNNDDDD..........it has grown legs.

20160428_072915_zpsrt3x58k2.jpg


20160428_072835_zpsets717bf.jpg


20160428_072905_zpsm5cmykb1.jpg


Got the pipe I needed and it really fits nicely at the height and its very very sturdy, even off kilter from a leg pulling on the rail from the top it did not deflect at all. There was however, play in the turnbuckle threads which translated to about a 1 1/2 inch wobble at the tip of the rail. getting some left and right hand nuts on the threads helped tighten it up tons. Now there is only 1/4 deflection at the tip from the slack in the pull pin bolt. The base of the channel is really rigid using some extremely heavy duty (grade 10?) 9/16 washers under the base of the elbow and the 2 big washers to spread the load. Cranking down really tightens the whole thing up and I am very happy with the results.

As always there is room to improve, at the last minute I ditched the nylon inserts pressed into the turnbuckle eyes for steel 1 inch inserts to help spread the load across the bolts and the turnbuckle its self. I later then jb welded those centered in the eyebolts. If i could find a heim joint setup that would work, I would be all over that but didn't find anything that looked like it would work without seeing in my hands and spending more money on this thing...good news is, I almost have the list narrowed down to duplicate these and get an accurate price, now that we know what we need.

Thursday night I spent the better part of the evening on the bench grinder rounding all the sharp corners and edges. Then using files and sandpaper to finish off to a nice rounded soft feel. No one will have to worry about snagging a knuckle or slicing a finger on any of it, including the tubes. I also drilled 1/2 holes at the base of the legs to anticipate the use of custom 1/2 spikes with a ring at the end.

Over the next few days I will have some of the parts professionally finished, some parts polished. I still meed to fab up a blast plate. I am thinking about doing a tri angle blast plate rather than the flat kind. What do you guys think?
 
Also the top elbow channel assembly weighs in at 9.7 LBS, minus the rail. The legs come out to 6 LBS for all three so I might be close to the weight I want.
 
Here is an idea for your turnbuckle. This is a alternator tensioner I found on Amazon. It has 3/8" ball ends and is really heavy duty. Cost was around $15.00.

IMG_1285.jpgIMG_0999.jpg
 
That looks great Rob!

I'm going to adapt some of your design features into one that I'm working on, so thanks for posting your pad build thread!
 
Got it back from the Powdercoat shop down the street. Threw it in on a batch of Silver Metallic base and Candy Red top coat. Not bad at all. Got busy on the bench polisher and fitted it all together. Just need an idea for the blast plate. Pictures in the garage under the shop light don't really bring out the color, I will try to get some in the sun this weekend.

Thoughts?


20160502_090955_zpsugjipvnb.jpg


20160502_205304_zpsgwfybpoy.jpg


20160502_204903_zpsurl5exox.jpg


20160502_204821_zpsakhnxd1l.jpg


20160502_204737_zpsawrblgzf.jpg


20160502_204714_zpsxnwa8kcd.jpg
 
Got around to some more work on this pad, just been so busy lately. I needed to make a blast plate and always liked the triangle set up. I opted to try a triangle mock up with a flat middle section out of cardboard but didn't like the way it looked and neither did Dr.X or my girlfriend. So I moved to a angled plate, set up.

20160507_201717_zpseqw2bti0.jpg


20160507_201446_zpsolytoesi.jpg


In keeping up with the mobility theme on this rig, I used a 1/4 button head screw with a bite washer between the rail and the head, with a adjustment knob to tighten it or to move it up and down. I went with one mounting point as two would have caused some issues lining it up. I used a 1 inch x 1/4 inch flat bar of 6067 aluminum with the edges softened up and the bend annealed. Drilled 2 plate mounting holes with 1/4 stainless button bolts.

20160507_215453_zpsntl6xa8l.jpg


After about an hour of carfule measuring and cutting on my smaller scroll saw, we have the rough outline of the plate. I think it came out very well.

20160507_215440_zpsxdce3anc.jpg


20160507_215430_zpsyaokwugk.jpg


I also spent a good amount of time with a 120 grit sanding block and various files to round all the edges up on the plate and soften up the angles. I then went over the plate with acetone then sanded with 220 on the orbital hand sander as prep for paint.
I sprayed each side with 1500 degree silver paint (which looks like an estes blast plate). A few coats and off to cure in a preheated oven over night. After the paint dried I assembled the plate to the bracket, and the bracket to the rail.

20160509_202413_zpsesmhz7ko.jpg


20160509_202352_zpsyrvdfdwl.jpg


20160509_202340_zpsidqwtyeq.jpg


And that is pretty much it. Now I can get the receipts together and figure out how much it really cost and take some measurements for anyone else who wants to duplicate this.
 
Nice looking pad. I think you will find the paint on the blast deflector will be short lived.
 
Back
Top