Quest Raptor

The Rocketry Forum

Help Support The Rocketry Forum:

This site may earn a commission from merchant affiliate links, including eBay, Amazon, and others.

foose4string

Well-Known Member
Joined
Jan 17, 2009
Messages
2,853
Reaction score
8
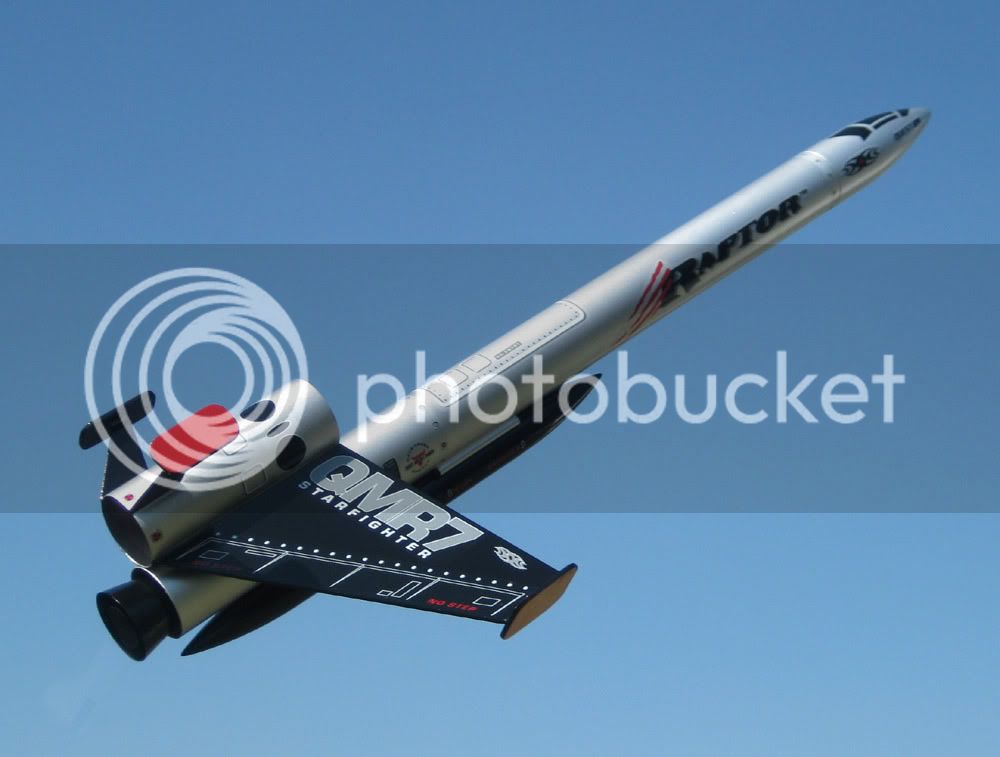
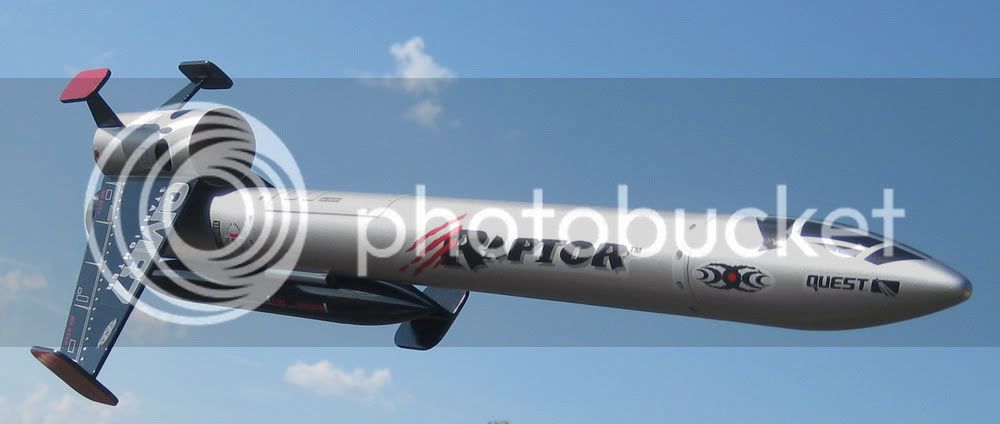
First off, I want to congratulate Rokitflite for one of his designs making to mass market and want to thank Quest for making it happen! I don't think they are available for purchase yet, but probably will be in the very near future.

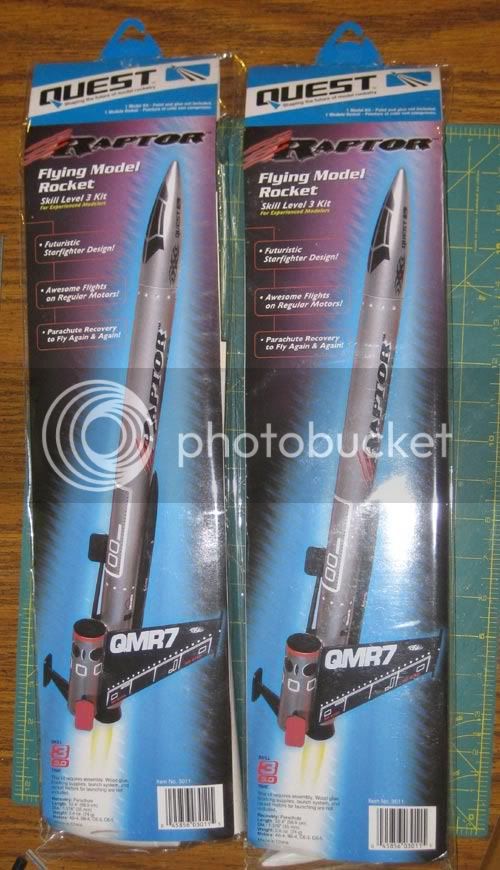
I replied to Bill Stine a couple weeks ago when he placed a thread in the Vendor section looking for "demo" builders. I wasn't going to let an opportunity to get my hands on some brand new, cool looking kits slip by.
I received the package yesterday morning.:)

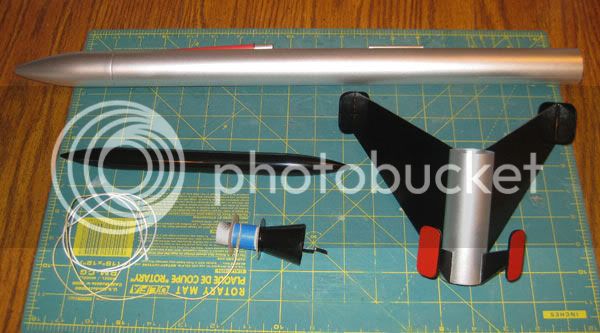
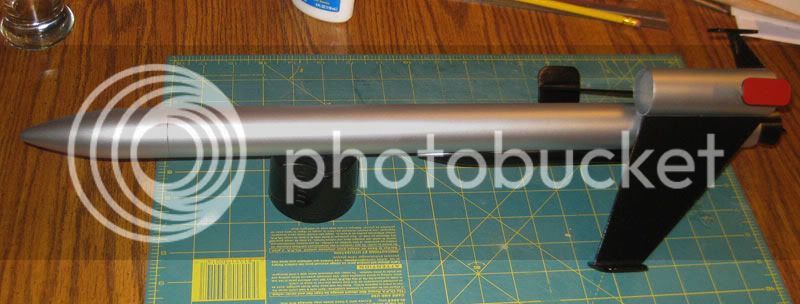
I think Quest did a great job with the model graphics. Scott(rokitflite) admits the artwork is not his- only the design, so kudos to whoever came up with the decals.

QuestRaptorpackage.jpg


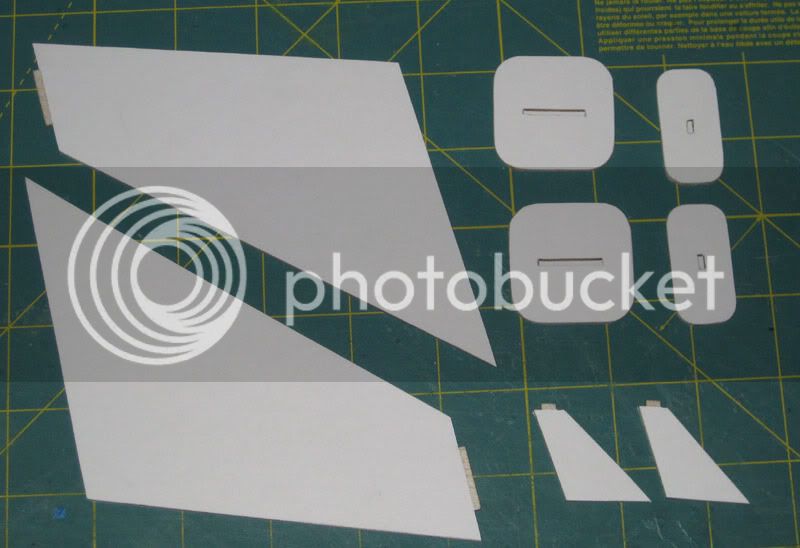
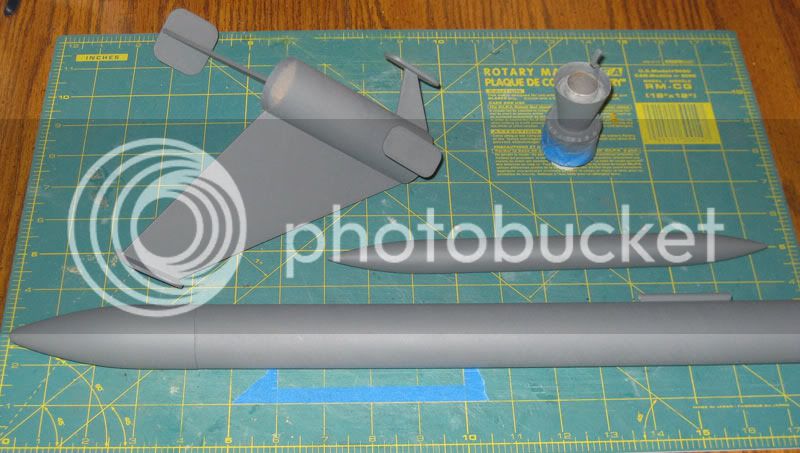
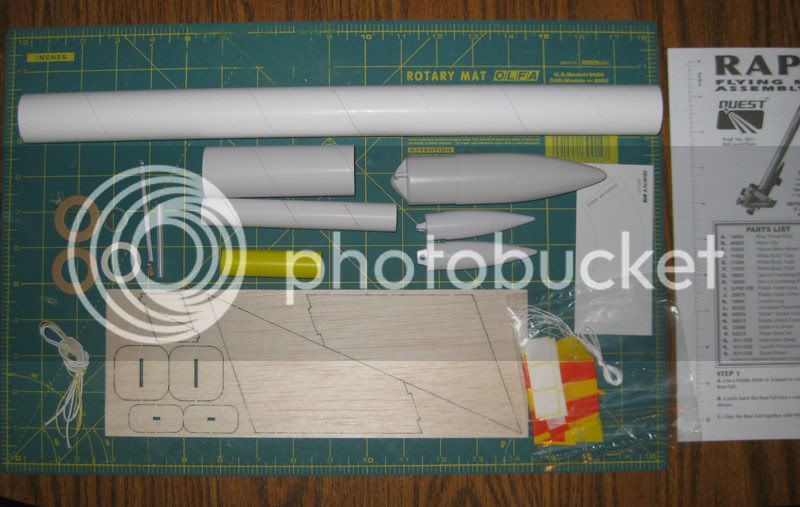
and here are the parts...

Raptor-parts.jpg


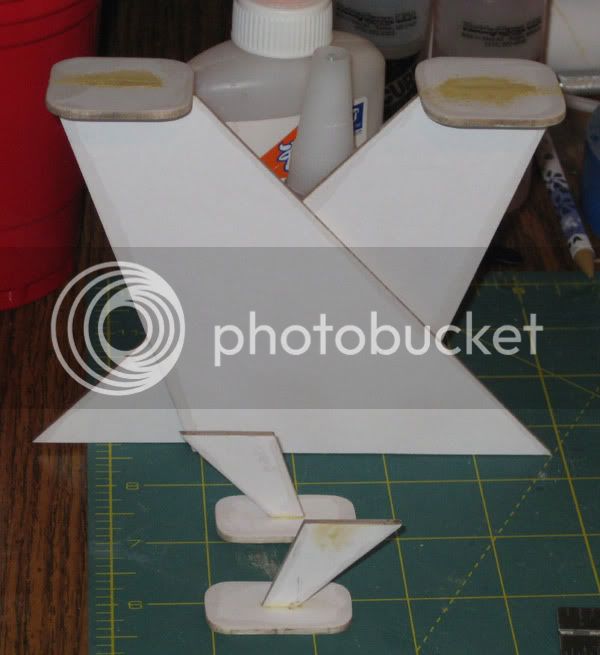
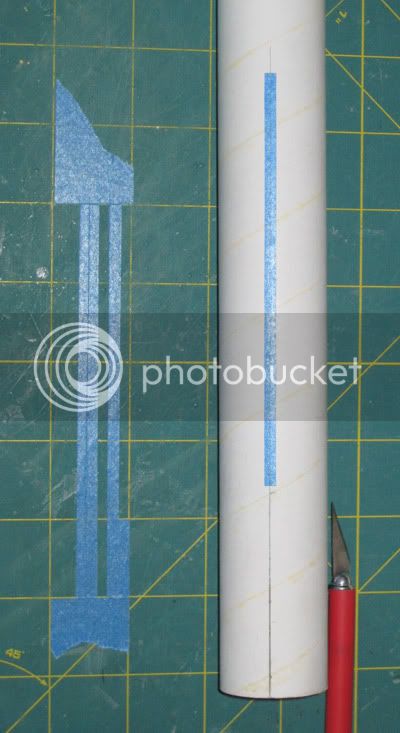
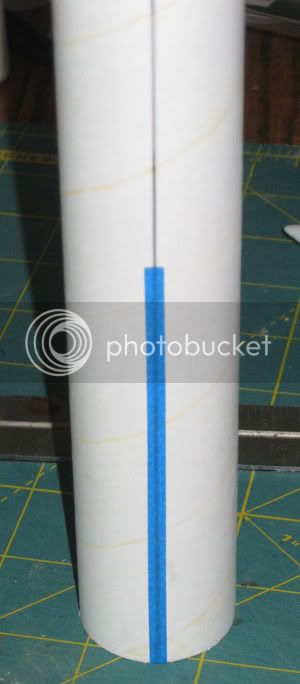
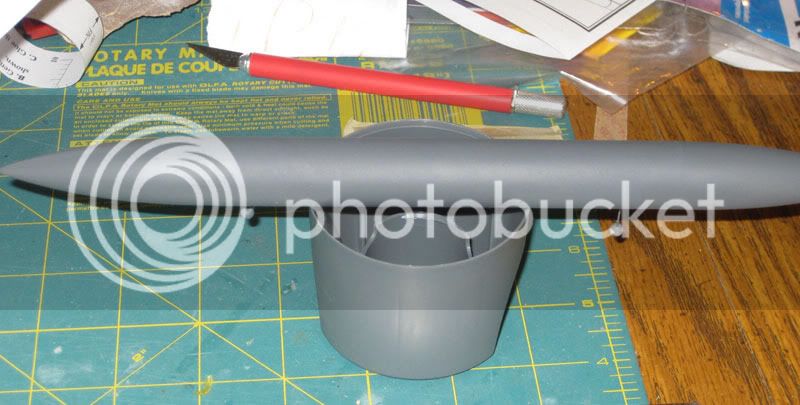
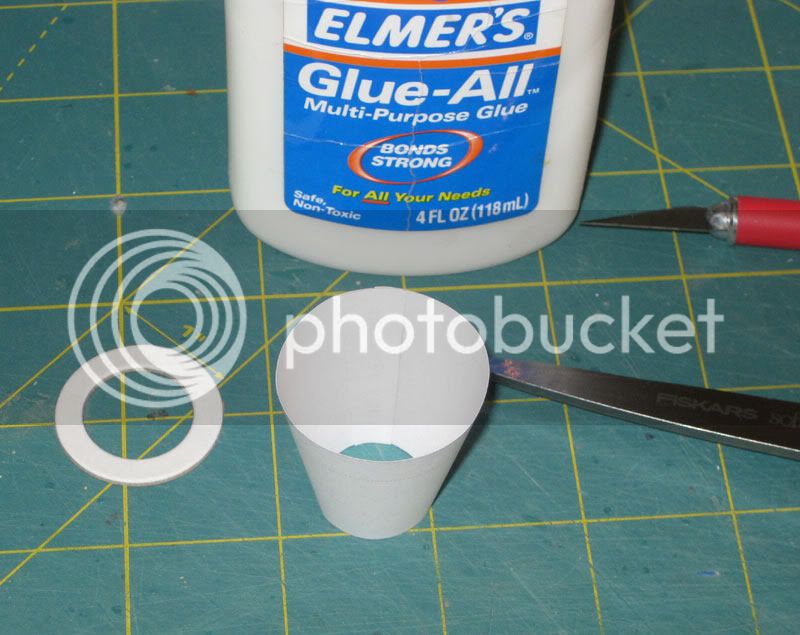
Assembly begins by forming the tail shroud. I rarely overlap the paper when making shrouds, this was no exception. Cut off the tab and glued to the inside making a (virtually)seamless shroud on the outside. The cardstock is fairly light and I ended up coating this part with CA to add some strength. The ring you see next to the shroud is fitted inside the shroud to add some support as well. This becomes the nozzle doo-dad on the back.

Tail-Shroud.jpg


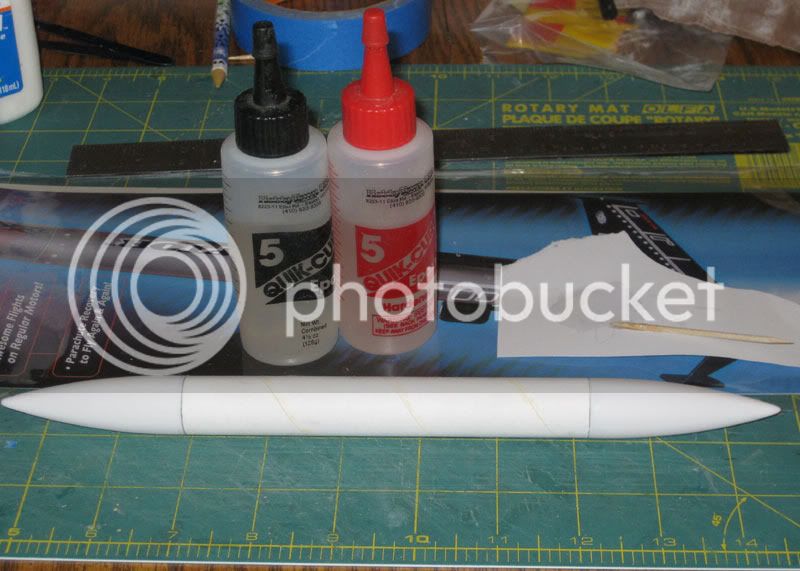
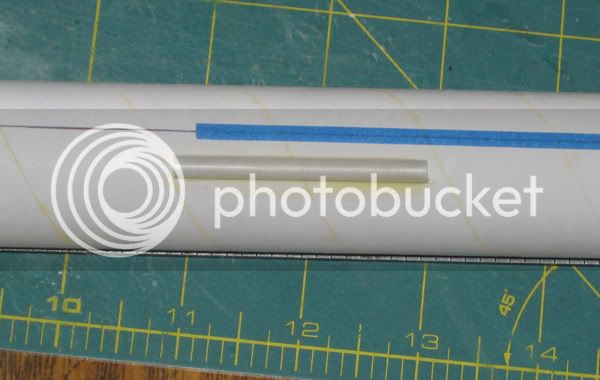
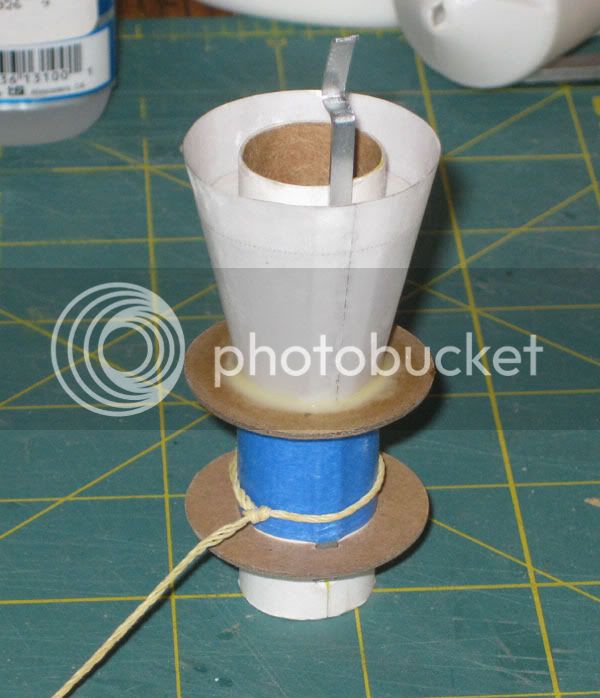
The engine mount tube slides into the shroud then, the larger engine mount rings get glued into place. A generous length of Kevlar is provided as a recovery anchor and is attached as well. The instructions want you too run the Kevlar through the middle of the rings, but I prefer to run it to the outside-keeping it a little farther from the ejection charge.

Engine-mount-and-shroud.jpg


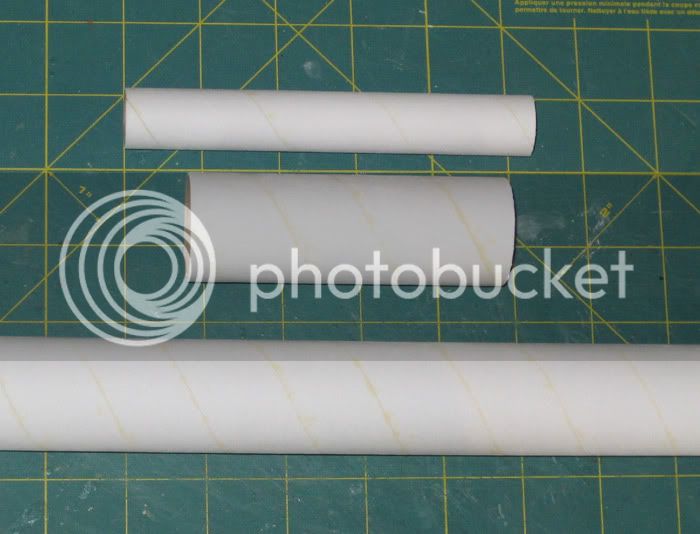
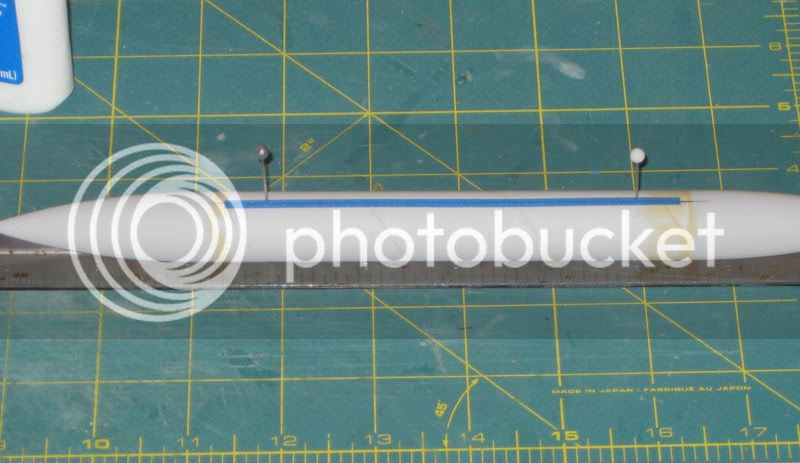
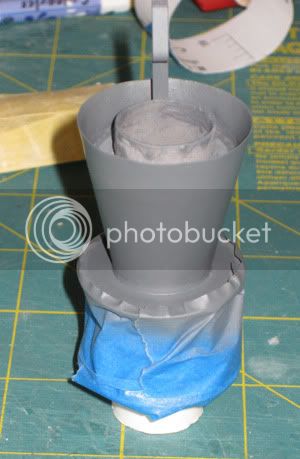
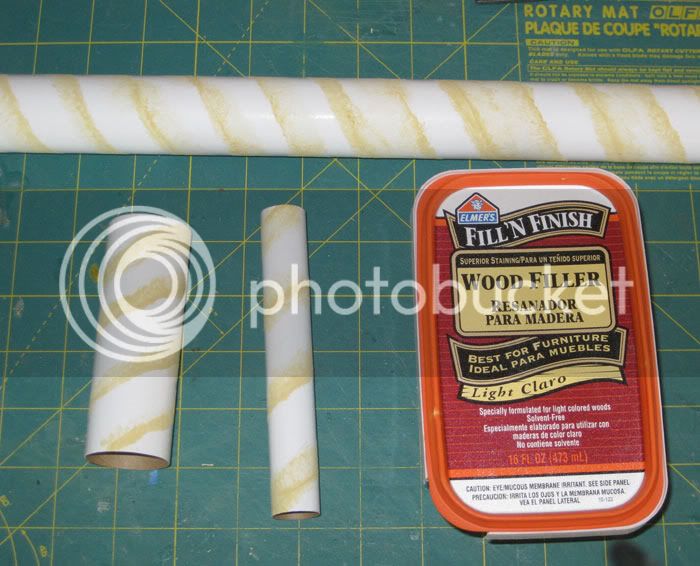
Next, I filled the tube spirals with some Fill N Finish and set them aside to dry. Can't have Bill showing up to NARAM with a model that looks like it was built by my 6 year old now, can we?:cool:

Tubes-and-filler.jpg
 
Last edited:
While the FNF was drying I arranged the balsa fin pieces on some full sheet, self adhesive, label paper. One label sheet was large enough to accommodate all the balsa pieces, top and bottom. I cut the sheet in half and laminated one side of the balsa, then used the other half sheet for the opposite side. Sealed edges with CA.

Label-papered-fins.jpg


Next, I glued the corresponding fin parts together. I was hoping these would be tabbed before I laid eyes on the kit....and they were. Nice. Added a little filler to cover up the joint(and now you can see the edges are sealed).

Fin-assembly.jpg


Sat on the porch and sanded the filler off the tubes while the kids took a dip in the pool.

Tube-filler-sanded.jpg


Then, I used the marking guide included in the instruction to mark the 35mm tubes.
Two- 180 degree marks for the main tube, 4- 90 degree marks for the upper fin tube, and made a single line on the skinny, pod tube(for mounting alignment). I could then begin mounting the fins to the short, 35mm, fin tube.

Fin-attachment_sub-assembly.jpg


I sanded the nose cones with 220 grit followed by 400 grit to get rid of the seam lines. Only took a few minutes.

Once the cones were smooth, I began assembly of the pod. The instructions call for plastic cement for this step, but I used a thin smear of epoxy instead. I roughed up the base of the cones with the 220 while I had out, so the epoxy could get a good grip.

Pod-Assembly.jpg


*note* : I am doing things slightly out of order, making small sub-assemblies, because of the painting that will be involved later.
 
Last edited:
Because of the color scheme, some forethought and prep is needed. I cut little strips of tape to mask the alignment lines on the main tube.

Pod-mask.jpg

Fin-mask.jpg


The next step was sort of tricky. Before I forgot about the launch lug(we all do it!:blush:), I needed to find out were it would sit on the main tube once the pod was attached. See, the main tube is silver and the pod will be black. Rather than attach the pod to the main tube and mask later, I figured it would be easier to paint them separately(which is why I masked the pencil lines earlier). I thought of alternative locations for the launch lug(like inside the upper fin tube or under the main wing), but they involved the lug being too far aft for my liking. I kept it in the location that the instructions call for.

Launch-lug.jpg


While I was already thinking about painting, it occured to me that the pod would be very difficult to paint with a cone on each end and nothing to hold on to!:eek: I stuck some straight pins through the masked side of the pod. Not ideal, but it worked for the primer stage.

Pod-mask-and-pins.jpg

Pod-primed.jpg
 
Last edited:
The tail assembly was dry, so I primed that too. I made sure the Kevlar, elastic, and ring edges were masked.

Tail-shroud-primed.jpg


Not bad for two days work. I should have the main tube, main cone, and fin assembly primed this evening as well. With the humid weather, I'm sure I'll have to let everything dry for a couple days before they are ready to sand.
 
Everything is primed now. I'm hoping to get it sanded and painted by the weekend.

Raptor-parts-primed.jpg
 
Kewl!:cool: Nice clean looking build going on there Craig! :)

Can't wait to see it fully assembled..It will be a knockout, I am sure! ;)
 
I am excited with this build... been waiting for this bird to be available since it was announced last year. Craig, I am following this with great interest. Your finishing techniques are #1. What color are you going with? Tamiya Mica Silver? I think the Tamiya is a laquer-base paint. If so then any silve laquer based paint will do since it will keep the silver look after clearcoating. Keep posting pictures.

- RPR
 
Thanks Jon.

Raul, I don't have any of the Tamiya paints on hand and it might be another week or two before I can make it to the shop. I have a couple cans of the old Krylon Silver, so I may use that. Valspar(available at Lowes) makes a silver laquer as well, been wanting to try that too but I'll probaby try that on something else.;) I'll bet the Tamiya is a nice paint though. My concern at this point is how to mask the silver on the fin can without dulling it too much.


Thanks Scott. I hope to see it fly also. I was going to build two in assembly line fashion so I'd have one built for myself, but I thought better of all that sanding for the moment.
 
Impressive - both the design and the build.

What size tube does it use? T-35?

Thanks.

Thanks. Yep, it's a 35mm tube(I guess that's T-35?).


Painting and finishing has been delayed slighty as I've had some out of town guests, but I still had a chance to shoot a few coats of paint. Still, more to go.
 
Last edited:
The 4 wheeler stayed parked for some reason and I enjoyed the company;). It was good to take a break from the finishing, but I was anxious to get started again. Here are the sub assemblies painted and ready to go....

Raptorsubassempainted.jpg


Then, fully assembled.

Raptor-assembled.jpg


The only thing left to do is decals and coat of Future,
 
Applied the decals today and added the clear coat. Whew....there are lots of decals! All those decals are tedious but they are excellent quality and went on without any problems. I say tedious because elements like the cockpit decals are not all on one slide and must be pieced together. Had fun building this and now I have to do it all over again....for myself!:cool:

Raptor-with-decals.jpg
 
Came out really nice! Tell me do you airbrush the Future, paint it on or what? Do you dilute it?
 
Great work!!! I can't wait till i can get my hands on one......man that looks good.
 
Came out really nice! Tell me do you airbrush the Future, paint it on or what? Do you dilute it?

Thanks. I haven't used the airbrush for Future but I probably should. I use a soft, white, bristled brush and move quickly. It levels itself pretty well. It'll streak if you brush it as it's curing on the rocket so it's important not to dwell in one spot very long.

Great work!!! I can't wait till i can get my hands on one......man that looks good.


Thanks again. It shouldn't be long. ;)
 
Last edited:
Wow thats a great looking rocket and I really like the midair shots :)
Cheers
fred
 
Cool:cool: Will have to get one or three..:rolleyes:

If mine come out HALF as good as Craig's I will be pleased as punch!:)
 
I just bought my Quest Raptor Today. Looks like it is going to be a neat rocket to build. I now have one of Scott's Fake Wulfs and his Raptor. The pressure is on to build these guys right because if I don't I won't be able to face him at our monthly club meeting!!!!

Congrats Scott and I thanked Kevin at the Bel Air ordering two of the kits.
 
I was looking forward to seeing this fly at NARAM, but no joy. I guess Bill decided it was too windy. I think the winds were at their peak during the Vendor Showcase.
 
I was looking forward to seeing this fly at NARAM, but no joy. I guess Bill decided it was too windy. I think the winds were at their peak during the Vendor Showcase.

Bill told me he had demo models ready but he was helping out on the FAI range and didn't have time to fly his models.
 
Back
Top