PR Intimidator 5

The Rocketry Forum

Help Support The Rocketry Forum:

This site may earn a commission from merchant affiliate links, including eBay, Amazon, and others.

lmt56

Well-Known Member
Joined
Jan 26, 2009
Messages
411
Reaction score
0
Anyone with flight experience with a PR Intimidator 5?
I was the L2 mentor for a SLI team this year.
We flew a PR Maddog on a CTI K570.
We may be able to return next year as a second year team and fly on an L motor.
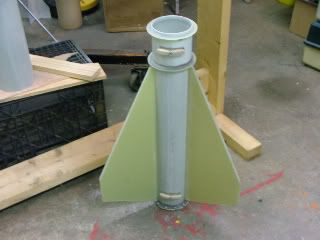
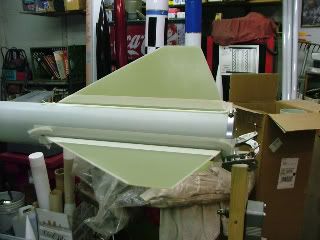
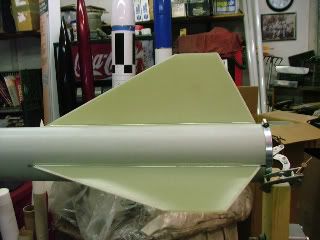
Thinking the Intimidator may be a good rocket of choice.
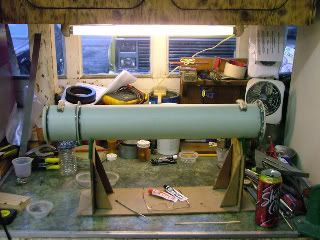
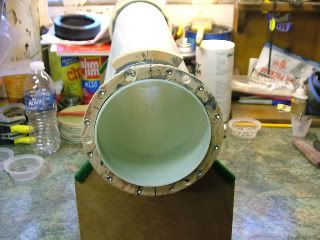
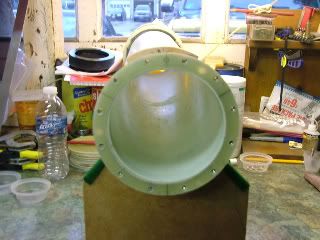
To get ahead of the game I ordered one for myself.
Plan now to use it as my L3 build.
Thoughts anyone?
 
The Intimidator 5 is a great flying kit, Here's mine on an AT M650W and an AMW M1480RR, LDRS28 its going up on an AMW M1850GG.
TestPhotos005-1.jpgIntimidator5M650W.jpgIntimidator5RG6M1480RR.jpg
TestPhotos011.jpg
 
Last edited:
Can you give me some build details?
Finish weight?
What size chutes are you using?
Would it be ill advised to fly one off a 8' 10/10 rail?
Thanks much

My finished weight all ready to fly (No Motor) is 25.5lbs, I'm using a Skyangle CERT3 Large for the main and a 36" Drogue, I would Definitely! go with the Extreme rail buttons on the I5 though, Like Kevin said it be MUCH! more comfortable and Safer!. Now the standard rail buttons would probably work if properly mounted bla bla etc etc but why?? On a 10' 2" Bird weighing over 30lbs on the pad they'd most likely need replacing after a few flights anyway cause they'll wear down. Also keep an eye on your CP CG ratio as this kit tends to be a bit over stable on smaller (lighter) Motors L's and the like.
 
My finished weight all ready to fly (No Motor) is 25.5lbs, I'm using a Skyangle CERT3 Large for the main and a 36" Drogue, I would Definitely! go with the Extreme rail buttons on the I5 though, Like Kevin said it be MUCH! more comfortable and Safer!. Now the standard rail buttons would probably work if properly mounted bla bla etc etc but why?? On a 10' 2" Bird weighing over 30lbs on the pad they'd most likely need replacing after a few flights anyway cause they'll wear down. Also keep an eye on your CP CG ratio as this kit tends to be a bit over stable on smaller (lighter) Motors L's and the like.

I hear what you are saying.
I was expecting built weight to be about 20 lbs so I was thinking about installing both small and large buttons.
The parts list for the I5 off the web, list the weight at 12 lbs.
How did you install your lower button so it can be replaced?
I have had trouble in the past to get a nut to stay in place using epoxy.
I did order some 3/8" plywood centering rings to use instead of the G-10.
On the over stable I had the same issue on my 3" WildMan.
Does better on larger motors.
It's best flight was on a CTI L730.
Hit 11600'.
I have 5 flights on it now so figured it was time to give it a paint job.
Did that today.
 
I'll only use Extreme or Unistrut buttons on mine, I epoxied blocks of wood to the CR's I then drilled and tapped them to accomodate a 1/4-20 bolt, Both the extreme and unistrut buttons use the 1/4-20 bolt so its easy to swap them out. Oh I also had mine made with a 75mm MM, I didn't want the 98mm MM.
 
I'll only use Extreme or Unistrut buttons on mine, I epoxied blocks of wood to the CR's I then drilled and tapped them to accomodate a 1/4-20 bolt, Both the extreme and unistrut buttons use the 1/4-20 bolt so its easy to swap them out. Oh I also had mine made with a 75mm MM, I didn't want the 98mm MM.

How well do the machine threads hold up in the wood?
I would think they would strip out to easy.
I was going to go with a 75mm MM but did not for two reasons.
1. The $25 extra cost.
2. I already have an 98mm Aeropac motor retainer.
Door prize from LDRS.
What did you you do for attaching the fins?
Epoxy only?
 
The screw goes in like an inch, I tap the hole, soak it with CA then tap it again, Its rock solid.
 
I didn't even go that far!
All I did was drill & tap the fiberglass air frame & add a lock nut on the back side of it.


Some day it will be finished....


JD
 
Hey Gary
What did you use for shear pins and what size bp charges?
 
On the I5 I use (2) 4-40 Nylon Shear Pins, As for BP I use 3g for the drogue/apogee and 5.75g for the Main and only! 4F, I also use (2) 40' 1/2" Tubular Kevlar shock cords.
 
Hey if you Like the PR Mad Dog , I had one custom made in a 6" version, stands 9.5' tall and weighs 30lbs (no motor) Its probably my favorite bird, flys awesome! too.

MAD DOG 6 #1.jpg

On an AMW M1900BB
View attachment 6407

On an AT M1315W
RedGlare5-068145.jpg
 
On the I5 I use (2) 4-40 Nylon Shear Pins, As for BP I use 3g for the drogue/apogee and 5.75g for the Main and only! 4F, I also use (2) 40' 1/2" Tubular Kevlar shock cords.
Thanks for the info Gary.
I was planning on using (2) 20' 1/2" Tubular Kevlar shock cords.
Would you consider that ill advised?
Also at what alt. do you kick out the main?
lt
 
Imt56,

It would be very ill advised to use such short lengths of harness. The I5 is a 10 foot long bird so those lengths will be just around 2x that. Much to short, especially for Kevlar. Kevlar doesn't stretch so when it goes taut too fast sometimes it snaps. The rule of thumb is 3-5 times the rocket length. Personally I go with 5x on the drogue and 3x on the main. Has worked so far. I like the drogue section to have a lot so the two pieces don't bang into each other on the way down.
 
Agreed 20' is too short (IMO) for a 10' 2" bird, The 3-5 X's the rockets length rule of thumb would be much more advisable, Some even like the 10' of SC for every inch of body diameter rule so in your case 50', I'm a big! fan of long shock cords, I always keep both SC the same length as well.

When I pop my main is determined on wind,weight, SC length and Chute, The Bigger the chute and longer the SC the Higher up I'll pop the main as they will naturally take longer to fully deploy, Heavier winds I'll pop it a little lower, For my I5 I use a Skyangle CERT3 Large for the main so with average weather and say 5-10 mph winds I do Main @ 800' back up @ 700'.
 
Last edited:
Big large rockets like big long shock cords!

Due to the weight and size, a late deployment, which usually means on the going down part of the flight, can cause the shock cord [if not ample enough] to fully extend. And this happens a lot on big rockets. Especially when breezy and you get some weather cocking.

This will not show up during ground testing, you are level.

When this does happen the mass of the payload and nc will want to continue moving when they reach the end of shock cord. Thus payload jerks when at end of harness....nosecone pops shearpins and pulls main out at the top.

Your in for a long walk!
It's happened to most of us who fly big rockets on big motors, especially early on in our learning curve.
You can never have enough.... prevents bad things from happening, doesn't cost much to do, and will generally save you repairs and long retrievals If you got room.....put it in. I usually use 4-5 times rocket length in the drogue side. Not as much needed on the main. You are moving at a slower descent rate and closer to the ground when main pops. [if using Dual Deploy]

Nice build... good luck on your flights.
 
Last edited:
2-40 foots and 1- 25 foot on the way.
I am abit surprised in the differances from flying the 4" Maddog versus the 5" I5.
The jump from flying a 3" WildMan to the 4" Maddog was no big deal.
This looks to be abit differant.
Thanks for all the imput it is a big help.
 
Hey Gary
Also what size static port holes did you use?
 
Hey Gary
Also what size static port holes did you use?


I use the Rule of thumb of (1) 1/4" hole for every 100 Cubic inches of volume inside your Ave-Bay, My I5's Altimeter bay is 5" x 12" giving me 235.71 Cubic inches of Volume, So for this kit I used (3) 1/4" Holes evenly spaced around the kit.
 
I have finally started my I5 build this week, I have been procrastinating enough lol. I don't see any pictures in here for such a long post ;)

Hi, Gary
I got the camera charged up but I have only been cleaning up and fitting the parts together. I haven't decided if I am going to make the booster section zipperless or not. I did start to make a few bulk heads, one for the NC in case I want to put tracking in it. I should have some pictures up in a few day's.
 
I started to assemble the motor mount, 4 inch dia. :D JB Weld for this part of the assembly, I also added a 1/4" plywood CR aft to beef it up a little and installed the threaded inserts in it as well along with some access holes to later inject some epoxy in there after it is in the airframe. I put two 1/2" plywood lugs on the MMT for putting in 1/4" inserts for the rail guides once it is installed, two more places to strengthen the assembly once it is together.
DSCF1017.jpg
4" MMT :cool:
DSCF1018.jpg
Aft plywood CR with inserts capped on the inside to keep epoxy out.
DSCF1019.jpg
Aft G10 CR seals off the back end when done.
 
Last edited:
Thanks for the build pictures. Keep them coming.
My build is a bit on hold.
Kit came with a 3" MT not a 4".
Fins and CR's are for a 4".
I had all three CR's made fron 1/2 plywood.
 
Got the threaded inserts in and cut the fin slots all the way to the end of the air frame. I installed 2 1/4" bolts and washers in the rail button positions and tacked the fins in place. I should have waited a little longer to remove the MMT with the fins as the last one I tacked on slid down over the course of a few minutes, you can see it in the pictures. I got lucky, I turned it over and put a little pressure on it and in a few minutes it went back into position. I checked it it did not move out of position and I put some tape on it to make sure it does not move over night. I don't usually rush the process but I was itching to get a picture of it once it was removed lol. I used 30 min. epoxy to tack the fins, on smaller rockets I use 5 minute epoxy. Tomorrow I will put JB Weld fillets on the fins.
DSCF1020.jpg
I was careful with the epoxy and it slid right out.
DSCF1021.jpg
You can see the fin on the left sneaking down lol. Good view of the threaded insert installed with JB.
 
I plan on building mine in the same manner.
That being slot the air frame all the way to the end.
I did this on my 3" WildMan build and it worked out well.
On that build I drilled a series of holes in the fins and air frame to give the epoxy something to key into.
Thoughts on that build technique?
Keep the pics. coming.
 
I drilled holes in the G10 fins on my horizon and laced some Kevlar through the holes, rock solid and tested too lol. I have not decided if I am going to tip to tip these fins or just make the strength inside the airframe. The fins look nice and strong, they measure .200 thick a little better than 3/16". They did a nice job putting the slots in the air frame tubing, I got the fins within 1/16" all the way around. I am starting to get excited after seeing the fin section coming together lol. I put some nice JB fillets on today just waiting for them to cure.

There is more than 1/2" bonding area for the fins inside the airframe including the outer fin to airframe fillets. I think if they come loose it will be from a ballistic event lol. My horizon was G10 fins to cardboard MMT so I laced them I think I also put some fiberglass on them also. This kit looks like nice clean even bonding is going to go a long way. I wipe down where I am going to bond with Goof off and then sand with 80 grit with a nice cross hatch pattern before the epoxy goes on.
 
Last edited:
I cut some strips of fiberglass, don't remember what the weight of it was. I put the strips along the fin roots on the MMT. I thinned it with some MEK after mixing it to make it easier to apply with out making it stringy. It evaporates off pretty fast anyway. I also used Devcon epoxy, it is pretty thick but flows nice. A small hobby brush will help to ease it into place. After about an hour I mixed another batch of epoxy and put some micro fibers in it and finished off with a nice fillet.
DSCF1025.jpg
roughly 3/4" strips
DSCF1026.jpg
Tape off where you don't want epoxy
DSCF1027.jpg
When it's dry I will do the rest the same way
 
I dry fit the MMT fin assembly into the airframe, It fits very nice so I marked where it comes to rest and put more Devcon epoxy in the airframe and installed it. I put 1/4" screws in the rail button holes and tightened them up. Put a clamp on the aft section and started the fillets on the fins. Again I used Devcon 30 min. epoxy but I added micro glass to it to the consistency of pudding. It still flows but does not seep through any open spaces very well. It would not have been a problem on this rocket any way every thing fits so nice. I don't have pictures of the next part. I used West System epoxy to do the inside fillets on the fins and to beef up the center rings I also added some chopped carbon fiber but not a lot since I wanted it to flow well. I used a drop light to make sure it was going where I wanted it to go. You have to get creative for propping the assembly so it will settle where you want it. Once it has set enough you can move on to the next spot where you want it to settle. It took all day just to do the inside of the fins. tomorrow I will do the CR's.
DSCF1031.jpg
Taping up getting ready to put the fillets on
DSCF1032.jpg
1/4" fillets
 
Back
Top