smapdiage9
Well-Known Member
- Joined
- Mar 14, 2009
- Messages
- 442
- Reaction score
- 3
I'm going a bit build crazy lately, and the combination of a full kegerator and internet access has really been fueling this fire. Recently I ordered a 10" diameter V2 sport rocket from Polecat Aerospace, fulfilling a build desire I've had for years but never attempted.
The Polecat kit is a pretty old school one, consisting of gel coated fiberglass nose cone and boat tails, a thinly fiberglassed cardboard body tube, a thin paper/cardboard motor mount tube, and plywood centering rings and fins:

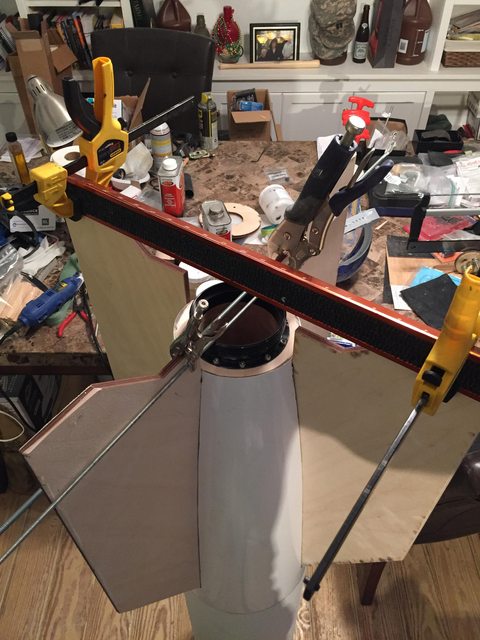
It has some 1/4" allthread and u-bolts, 16' of 1" tubular nylon shock cord, and is designed for single deploy only. I haven't cracked the nut yet on how I'm going to get dual deploy into this thing, but there are many options. The parts are made pretty well though I will note that the fin slots were way too thin. Part of this may be that the act of cutting the slots causes the four sections of the tail cone to bow in, pushing them closer together, but the instructions explicitly warn you to avoid putting too much force into the boat tail before it's assembled as it can split, so I ended up widening mine quite a bit:
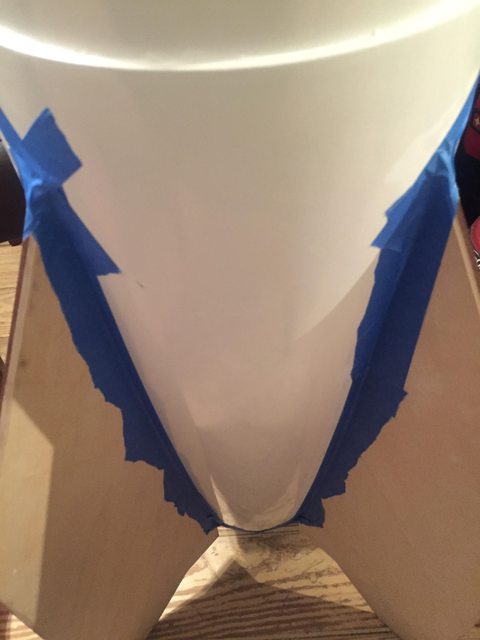
Construction starts with getting the aft centering ring mounted in the bottom of the boat tail. I beveled mine for more surface area of engagement as it comes squarely cut, meaning only the bottom edge would actually touch. Gaps are filled in with epoxy:
The boattail is provided extra long so that you can trim it to where your actual CR sits. I used my power sander to reduce some of the bumpiness and do surface prep, but like many gel coated glass cones the inside surface of the boat tail is very bumpy:
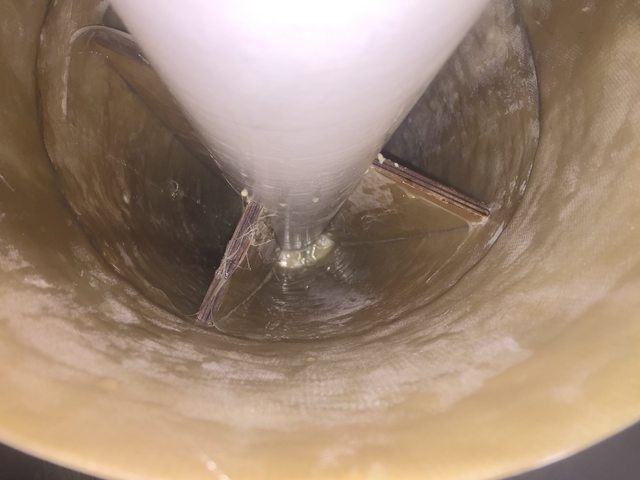
Once it was all prepped I stuck the CR down there, checked through the fin slots to make sure it was even, and reached my arm waaaay down to get coverage with rocketpoxy holding it in place.
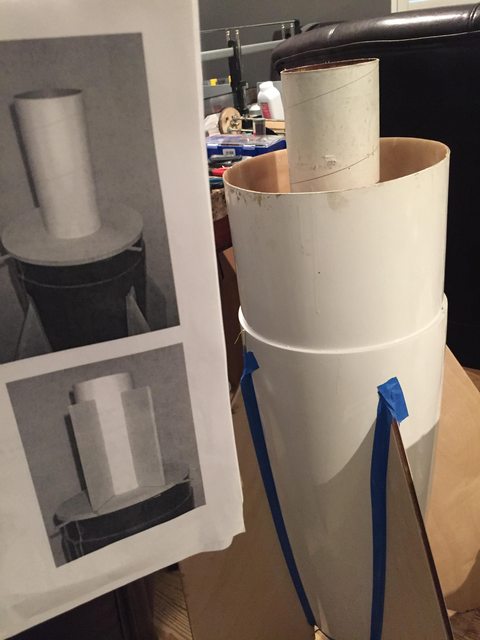
Then I use the body tube and CRs to glue the motor mount tube into the aft centering ring and let it cure:
Then I used a cutoff wheel on a dremel to widen my fin slots as well as trim the boattail flush with the CR. This was the messiest fiberglass work I've ever done, and I've never cut glass that generated so much dust. I used a respirator, face shield, and gloves, but still had to separately clean my clothes and shower afterward because the dust was insane!

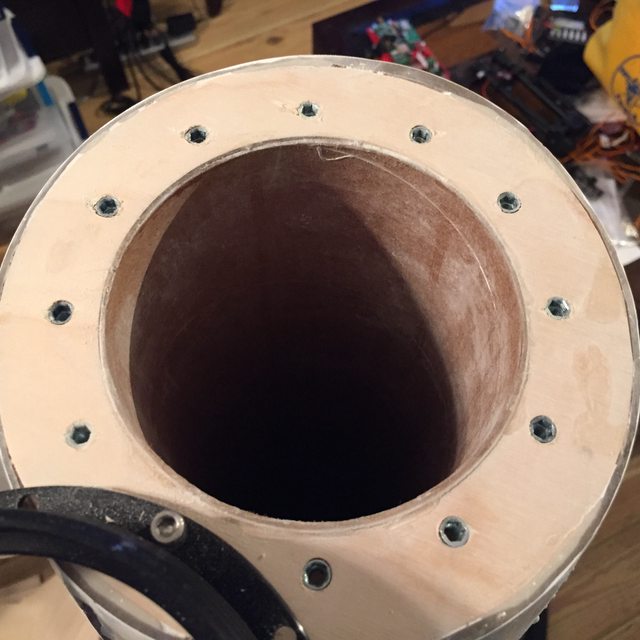
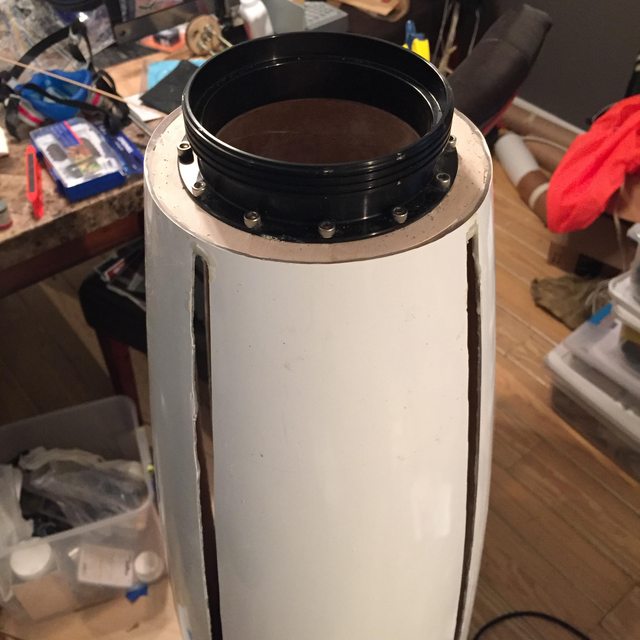
Used a 98mm aeropack as a drill guide to do pilot holes for the threaded inserts, then inserted them:
So here's where we are:
More to follow!
The Polecat kit is a pretty old school one, consisting of gel coated fiberglass nose cone and boat tails, a thinly fiberglassed cardboard body tube, a thin paper/cardboard motor mount tube, and plywood centering rings and fins:
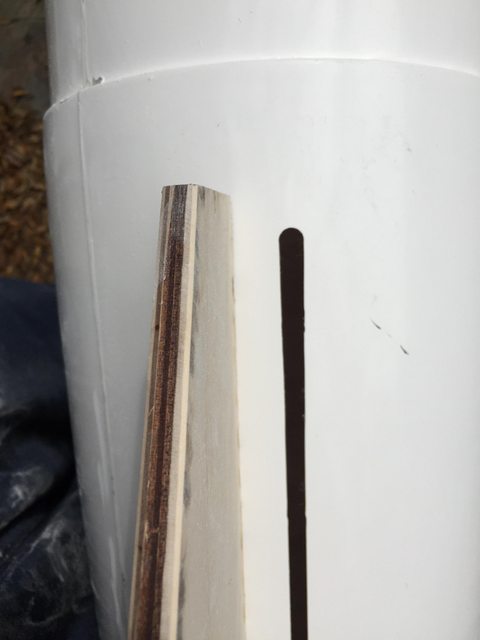
It has some 1/4" allthread and u-bolts, 16' of 1" tubular nylon shock cord, and is designed for single deploy only. I haven't cracked the nut yet on how I'm going to get dual deploy into this thing, but there are many options. The parts are made pretty well though I will note that the fin slots were way too thin. Part of this may be that the act of cutting the slots causes the four sections of the tail cone to bow in, pushing them closer together, but the instructions explicitly warn you to avoid putting too much force into the boat tail before it's assembled as it can split, so I ended up widening mine quite a bit:
Construction starts with getting the aft centering ring mounted in the bottom of the boat tail. I beveled mine for more surface area of engagement as it comes squarely cut, meaning only the bottom edge would actually touch. Gaps are filled in with epoxy:
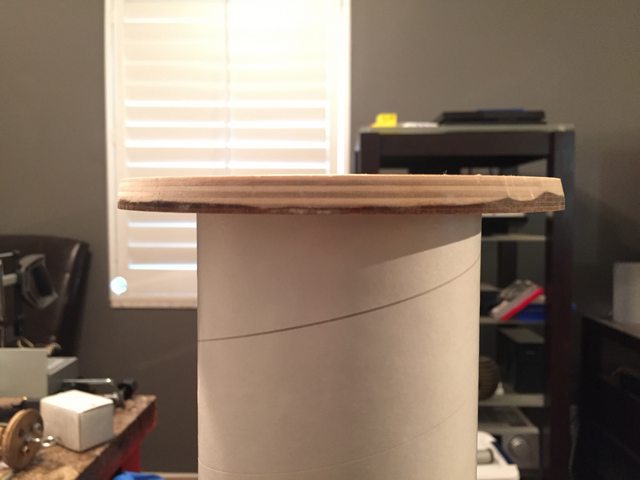
The boattail is provided extra long so that you can trim it to where your actual CR sits. I used my power sander to reduce some of the bumpiness and do surface prep, but like many gel coated glass cones the inside surface of the boat tail is very bumpy:
Once it was all prepped I stuck the CR down there, checked through the fin slots to make sure it was even, and reached my arm waaaay down to get coverage with rocketpoxy holding it in place.
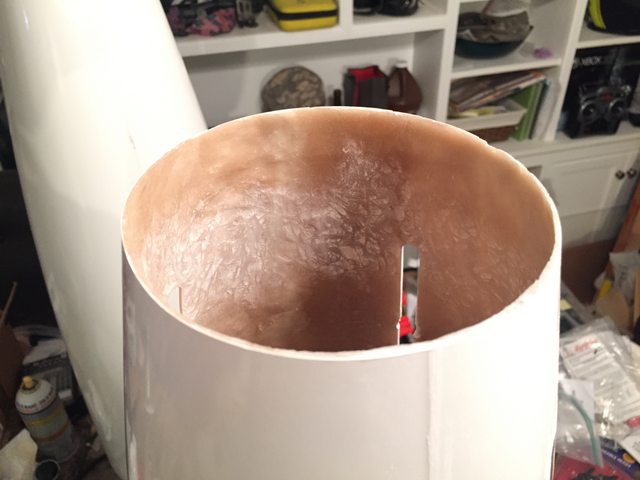
Then I use the body tube and CRs to glue the motor mount tube into the aft centering ring and let it cure:
Then I used a cutoff wheel on a dremel to widen my fin slots as well as trim the boattail flush with the CR. This was the messiest fiberglass work I've ever done, and I've never cut glass that generated so much dust. I used a respirator, face shield, and gloves, but still had to separately clean my clothes and shower afterward because the dust was insane!
Used a 98mm aeropack as a drill guide to do pilot holes for the threaded inserts, then inserted them:
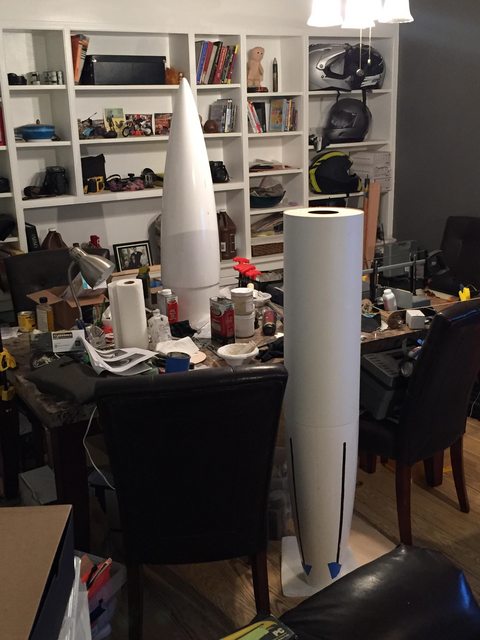
So here's where we are:
More to follow!
 op:
op: