- Joined
- Mar 27, 2013
- Messages
- 22,536
- Reaction score
- 14,949
Well, some may remember my plea for help a few months back (Making Balsa Nosecones Look Like Plastic... How Do You Do It???). Well, I've made progress since then. However, I don't remember seeing a step-by-step photo tutorial on how it's done. Mind you, I don't claim to put a Nathan level of gloss on my nosecones, but then again, who (besides him) can?
First thing, for best results, upon getting the nosecone (either as a spare part, or part of a kit) is to protect it from damage. I have a number of nosecones that got dinged because I waited till I learned how to make balsa look good. This means more work for me on those projects.
Important safety tips:
Super Thin CA glue is pretty nasty stuff. Having a fan blow the fumes away from you is a pretty good idea.
Wear some kind of protective clothing while using thin CA glue, but make sure that the clothing isn't something you value (CA messes up clothing pretty bad). I got two scars on my stomach from the 2nd degree burns I got when large drips from a nose cone fell onto my shirtless stomach, then began to cure. I had my hands full of glue covered nosecone, glue, and napkins while trying to wipe up the spots. I wasn't a very good juggler that day.
Now, on with the tutorial...
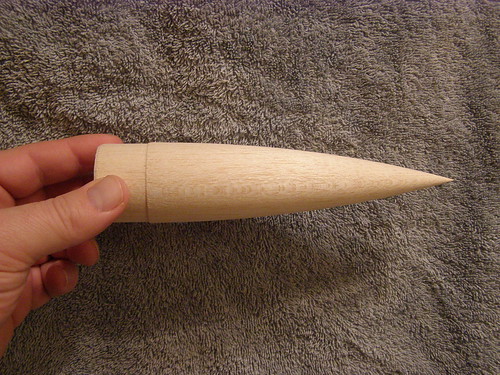
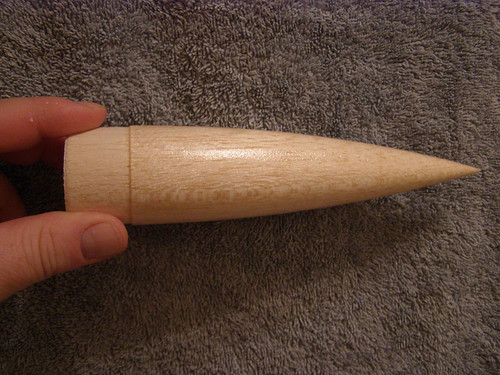
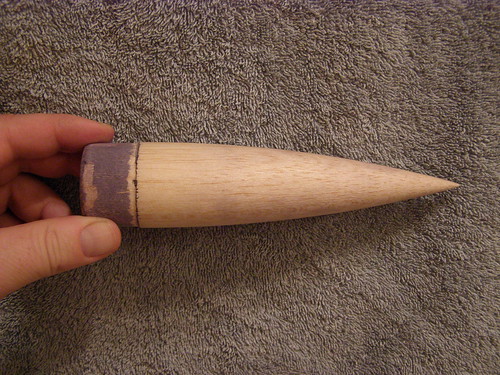
Here's a brand new cone:
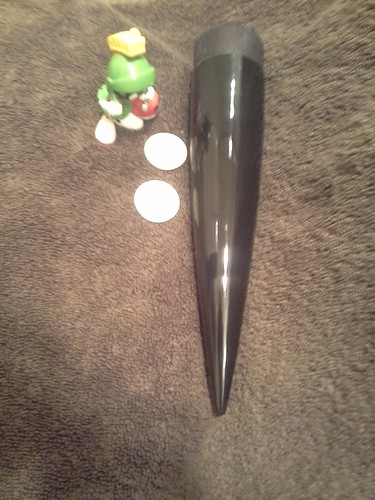
The best method I've found to protect it is to go ahead and seal it with Super Thin CA glue. Starting with the nosecone pointed down slightly, drizzle the glue slowly over the surface of the nosecone, working from the shoulder down towards the point giving it a complete covering. I like to repeat the process of adding glue until it starts to feel "slimy". Using the reflection of glue on the balsa, I try to get it covered until it's completely glossy. Then I hit it with Insta-Set to accelerate the curing process.
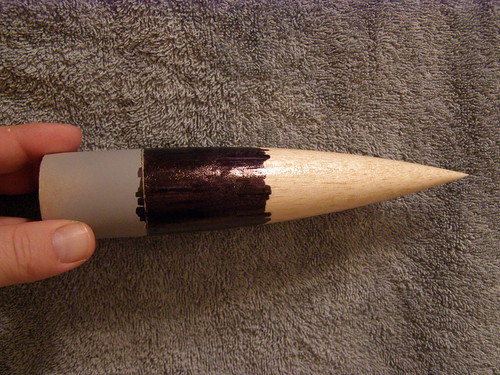
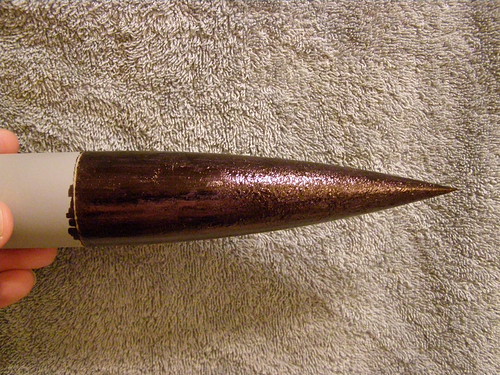
Next I paint the nose cone with a sharpie pen. This allows me to see the low spots on the nosecone when I'm sanding. If the nosecone isn't going to be painted black when it's finished, I try not to mark up the shoulder by covering it with a scrap of body tube.
Now I'll use some 320 Grit Wet/Dry sandpaper to sand off all the black Sharpie. I keep the scrap body tube on the nosecone to protect the shoulder.
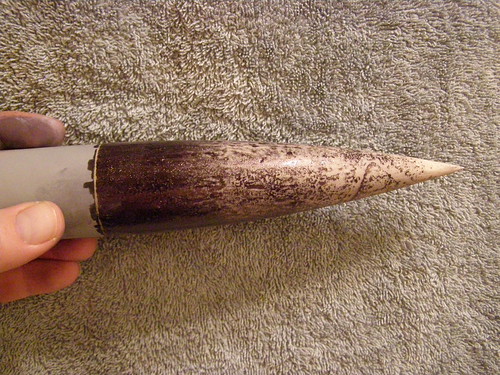
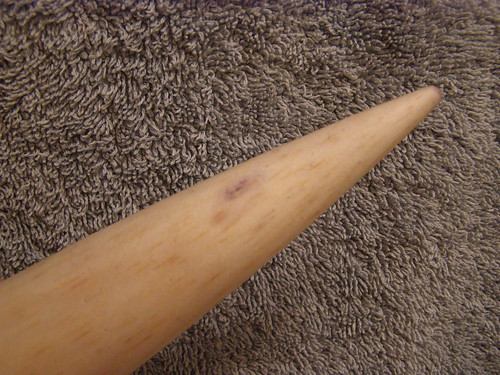
If I find that sanding a spot is making the region around the area I want to remove a blurry grey, I've probably sanded completely through the CA, and I'll need to re-glue the area to protect it and keep it looking even. After gluing the affected area again, I'll 'paint' it with another colour Sharpie, and sand it until that colour is gone. This won't get rid of the blurry area, but it does protect the balsa underneath it. In the photo below, you can see a slight discoloration around the upper knot in the balsa.
After removing all traces of the Sharpie, the cone is ready for a quick wipe down to remove dust, before painting.
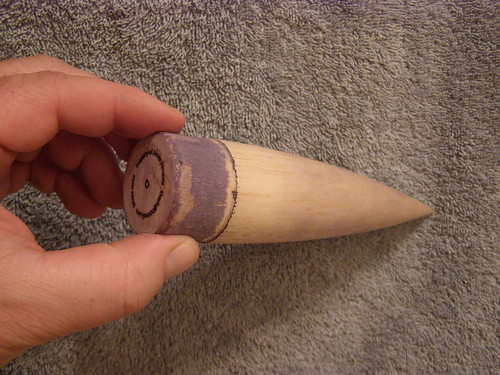
Lately, I've started gluing a label onto the bottom of the nose cone with my name, email address, and SAM# typed on it. If a lost rocket is recovered, the finder can use the info to help get it back to me. I also am doing this to my balsa couplers to prevent ejection gasses from blowing through the coupler, and popping the nose cone off of the rocket without deploying the parachute (had this happen once while testing a baffle in a payload carrying rocket).
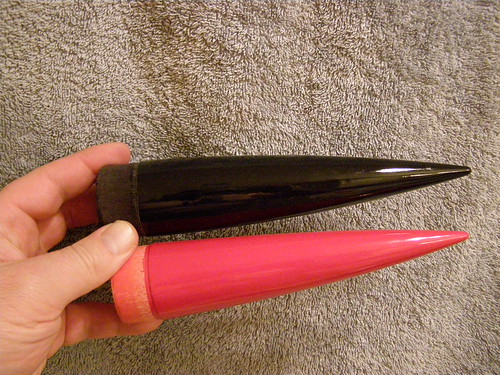
For lighter colours (yellow, red, orange, white, etc.) priming the nose cone with a base coat is needed for best results. Especially if the nosecone and the body tube below it are supposed to be the same color. Dark colors (Black, Dark Blue, etc.) does a better job of hiding the color of the wood below it, and so I'd say priming is optional.
So, that's how I do it now. Sure beats Aerogloss (presuming you can still find it).
All The Best!
Jim
.
First thing, for best results, upon getting the nosecone (either as a spare part, or part of a kit) is to protect it from damage. I have a number of nosecones that got dinged because I waited till I learned how to make balsa look good. This means more work for me on those projects.
Important safety tips:
Super Thin CA glue is pretty nasty stuff. Having a fan blow the fumes away from you is a pretty good idea.
Wear some kind of protective clothing while using thin CA glue, but make sure that the clothing isn't something you value (CA messes up clothing pretty bad). I got two scars on my stomach from the 2nd degree burns I got when large drips from a nose cone fell onto my shirtless stomach, then began to cure. I had my hands full of glue covered nosecone, glue, and napkins while trying to wipe up the spots. I wasn't a very good juggler that day.
Now, on with the tutorial...
Here's a brand new cone:
The best method I've found to protect it is to go ahead and seal it with Super Thin CA glue. Starting with the nosecone pointed down slightly, drizzle the glue slowly over the surface of the nosecone, working from the shoulder down towards the point giving it a complete covering. I like to repeat the process of adding glue until it starts to feel "slimy". Using the reflection of glue on the balsa, I try to get it covered until it's completely glossy. Then I hit it with Insta-Set to accelerate the curing process.
Next I paint the nose cone with a sharpie pen. This allows me to see the low spots on the nosecone when I'm sanding. If the nosecone isn't going to be painted black when it's finished, I try not to mark up the shoulder by covering it with a scrap of body tube.
Now I'll use some 320 Grit Wet/Dry sandpaper to sand off all the black Sharpie. I keep the scrap body tube on the nosecone to protect the shoulder.
If I find that sanding a spot is making the region around the area I want to remove a blurry grey, I've probably sanded completely through the CA, and I'll need to re-glue the area to protect it and keep it looking even. After gluing the affected area again, I'll 'paint' it with another colour Sharpie, and sand it until that colour is gone. This won't get rid of the blurry area, but it does protect the balsa underneath it. In the photo below, you can see a slight discoloration around the upper knot in the balsa.
After removing all traces of the Sharpie, the cone is ready for a quick wipe down to remove dust, before painting.
Lately, I've started gluing a label onto the bottom of the nose cone with my name, email address, and SAM# typed on it. If a lost rocket is recovered, the finder can use the info to help get it back to me. I also am doing this to my balsa couplers to prevent ejection gasses from blowing through the coupler, and popping the nose cone off of the rocket without deploying the parachute (had this happen once while testing a baffle in a payload carrying rocket).
For lighter colours (yellow, red, orange, white, etc.) priming the nose cone with a base coat is needed for best results. Especially if the nosecone and the body tube below it are supposed to be the same color. Dark colors (Black, Dark Blue, etc.) does a better job of hiding the color of the wood below it, and so I'd say priming is optional.
So, that's how I do it now. Sure beats Aerogloss (presuming you can still find it).
All The Best!
Jim
.
Last edited:
") .
.