


- Joined
- Mar 27, 2013
- Messages
- 22,536
- Reaction score
- 14,946
It's no secret that I like papering fins far more than using sanding sealer (it's cheaper, less toxic, and easier to do). That said, I've had a few that still manage to get messed up... runs of thin CA (used to seal the edges) that I've found can be seen under some of my earlier paint jobs. Now I think I've finally cracked it. This method is being used to get rid of them once and for all.
I'm a fan of Avery's Permanent Glue Stic, but that's hard to find. My new "Go To" glue stick is Elmer's All Purpose Glue Stick (I find mine at Office Depot). I won't touch Scotch's Wrinkle-free Glue Stick with a 10 meter cattle prod... IMHO that product is pure C**P. It's gloppy, and doesn't spread evenly, this makes it totally useless for papering fins.
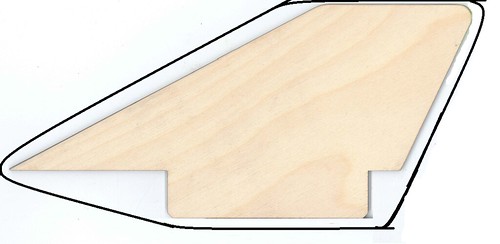
First I cut the fins out (unless I'm using a paper template), and sand them to shape, and round (or bevel) the edges (except for the root edge).
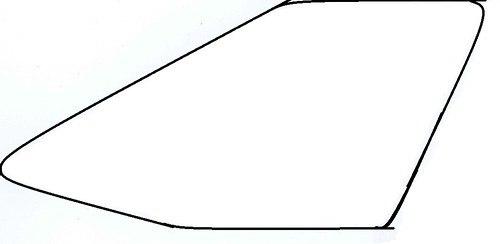
On a clean surface, I lay the fins out on the paper I'm using (typically just your average office photocopier/printer paper, occasionally junk mail). I trace the fin out with a large border. If the paper is printed on one side, my tracing is done on the printed side. If it's printed on both sides, and I don't have space w/o print, I'll just recycle it and find something that I can use.
I then remove the fin, and use the glue stick and completely cover the area I've drawn with a heavy coat of glue. I'm not worried if it wrinkles a little, I just try not to crease it.
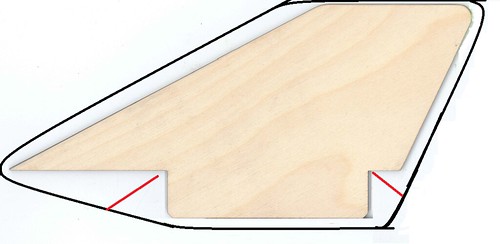
Next, I gently place the fin back into the glued area, and cut it out with a border. If there's a TTW fin tab, I use an Xacto to cut a couple of slits to prevent the paper from lifting up at the corner between the root edge and the tab. [EDIT] I didn't get a chance to photograph the process before I moved to China... I had to improvise this. The red lines indicate the slits. [/EDIT]
Next, I rub the paper down onto the fin starting from one point and working out from there. I want to remove all the air pockets trapped under the paper. When finished, the fin should be smooth and without bubbles, wrinkles, or creases. It is very important not to let any contaminants get sandwiched between the paper and the balsa, as these may create raised bumps that will need to be sanded out.
Next I use sandpaper to cut the border off, while blending the two materials together.
If some paper peels up, carefully pull up the edge, and I use the glue stick to re-apply glue to the fin, then smooth the paper down again.
Now for the new step...
To seal the edges, I now am laying a line of Thin CA glue (the stuff that runs like water) onto a piece of paper that is laid down on a surface that won't be ruined by any CA spills. I squeegee the fin's flight edges (not the root edge) through the glue. If there are large "wet" areas, I use a paper napkin or kleenex to wipe the excess off. From there, I just let it cure. This prevents the drips that create raised areas which can be visible under the paint. [EDIT]For the root edge, use white or yellow glue if needed.[/EDIT]
Finally, I knock down the hardened fuzzies with some sandpaper, and the fin is ready to glue in place.
IMPORTANT NOTE: Occasionally, I've found that the paper will wrinkle/bubble up with a heavy coat of primer... All is lost!!! Right? Nope. I let it dry completely (perhaps for a couple of days), then try to find the defect... I have yet to be able to, and I doubt that you'd be able to either. You should wait until the solvents completely flash off. Perhaps warming the rocket inside a hot car, or warming it with a hair drier may speed the process up.
As with any method that people may decide to try, remember to experiment with it on scraps of balsa first. I'm happy with my method, unaltered, but you may find that an alternative idea that works better for you.
I'm a fan of Avery's Permanent Glue Stic, but that's hard to find. My new "Go To" glue stick is Elmer's All Purpose Glue Stick (I find mine at Office Depot). I won't touch Scotch's Wrinkle-free Glue Stick with a 10 meter cattle prod... IMHO that product is pure C**P. It's gloppy, and doesn't spread evenly, this makes it totally useless for papering fins.
First I cut the fins out (unless I'm using a paper template), and sand them to shape, and round (or bevel) the edges (except for the root edge).
On a clean surface, I lay the fins out on the paper I'm using (typically just your average office photocopier/printer paper, occasionally junk mail). I trace the fin out with a large border. If the paper is printed on one side, my tracing is done on the printed side. If it's printed on both sides, and I don't have space w/o print, I'll just recycle it and find something that I can use.
I then remove the fin, and use the glue stick and completely cover the area I've drawn with a heavy coat of glue. I'm not worried if it wrinkles a little, I just try not to crease it.
Next, I gently place the fin back into the glued area, and cut it out with a border. If there's a TTW fin tab, I use an Xacto to cut a couple of slits to prevent the paper from lifting up at the corner between the root edge and the tab. [EDIT] I didn't get a chance to photograph the process before I moved to China... I had to improvise this. The red lines indicate the slits. [/EDIT]
Next, I rub the paper down onto the fin starting from one point and working out from there. I want to remove all the air pockets trapped under the paper. When finished, the fin should be smooth and without bubbles, wrinkles, or creases. It is very important not to let any contaminants get sandwiched between the paper and the balsa, as these may create raised bumps that will need to be sanded out.
Next I use sandpaper to cut the border off, while blending the two materials together.
If some paper peels up, carefully pull up the edge, and I use the glue stick to re-apply glue to the fin, then smooth the paper down again.
Now for the new step...
To seal the edges, I now am laying a line of Thin CA glue (the stuff that runs like water) onto a piece of paper that is laid down on a surface that won't be ruined by any CA spills. I squeegee the fin's flight edges (not the root edge) through the glue. If there are large "wet" areas, I use a paper napkin or kleenex to wipe the excess off. From there, I just let it cure. This prevents the drips that create raised areas which can be visible under the paint. [EDIT]For the root edge, use white or yellow glue if needed.[/EDIT]
Finally, I knock down the hardened fuzzies with some sandpaper, and the fin is ready to glue in place.
IMPORTANT NOTE: Occasionally, I've found that the paper will wrinkle/bubble up with a heavy coat of primer... All is lost!!! Right? Nope. I let it dry completely (perhaps for a couple of days), then try to find the defect... I have yet to be able to, and I doubt that you'd be able to either. You should wait until the solvents completely flash off. Perhaps warming the rocket inside a hot car, or warming it with a hair drier may speed the process up.
As with any method that people may decide to try, remember to experiment with it on scraps of balsa first. I'm happy with my method, unaltered, but you may find that an alternative idea that works better for you.
Last edited:

")