Nathan
☢
- Joined
- Apr 19, 2012
- Messages
- 2,230
- Reaction score
- 755
I often get asked about how I paint my rockets, so in this thread I will describe my rocket finishing technique in detail. I took lots of pictures while finishing the Minie-Magg which I just completed. This is the rocket that I will be using for my L1 attempt. This process took 5 weeks so I am going to squeeze 5 weeks of rocket finishing into this post.
Instead of doing a build thread, I'll start at the point where I have already completed assembling the Minie-Magg. First, here some of the finishing-related steps that were already done during the build:
This kit has a HDPE (polyethelene) nosecone. I've heard that it can be difficult to get paint to stick to HDPE but I've never had a problem. You first just need to wash it with hot water and dish detergent, let it dry, and then really rough it up with 150 grit sandpaper. While sanding the nosecone make sure that you thoroughly sand down the mold lines on the sides.
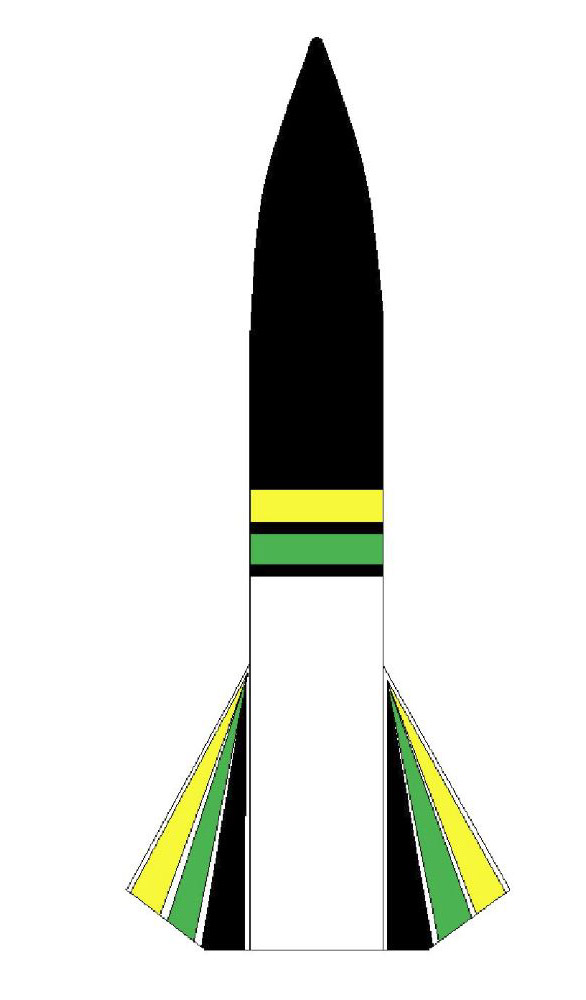
Here's my paint design. I came up with several designs that I liked but had to eliminate some that would have been too difficult. This one was fairly easy.
Here is the bare naked Minie-Magg:

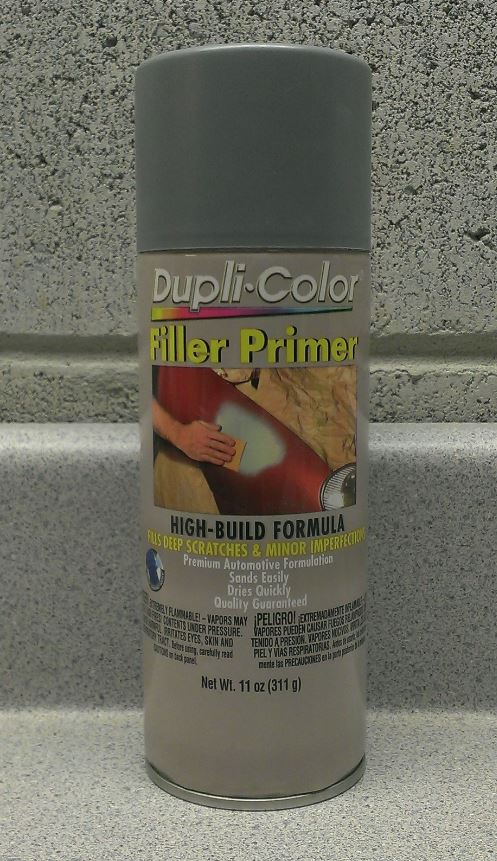
I use Duplicolor high-build primer:
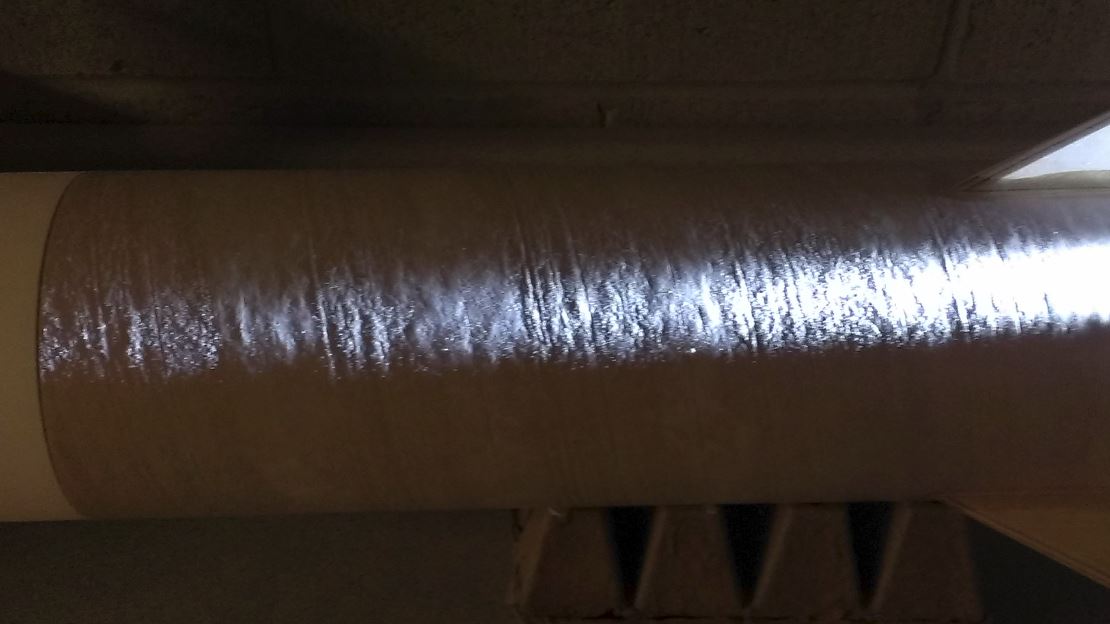
I spray as many coats of primer as necessary to completely fill the spirals and cardboard texture of the body tube, and also the mold line in the nose cone. After letting each primer coat dry, sand off most of the primer with 400 grit sandpaper. The idea is to get a smooth even surface, not just build up a thick layer of primer. To assess my progress during priming I use a flashlight at a low angle to highlight the spirals and roughness of the body tube. This is the bare tube before primer:
You can see from the picture above that to get a very smooth surface on the body tube, it is not just the spirals but also the rough surface texture of the cardboard that needs to be filled.
After spraying and sanding 4 coats of primer I finally got the tube perfectly smooth with no spiral marks.
The woodgrain on plywood fins is easier to hide so by the time there are enough coats on the body tube, the fins are also perfectly smooth. Another benefit of four coats of primer is that it also evens out minor imperfections in the epoxy fillets.
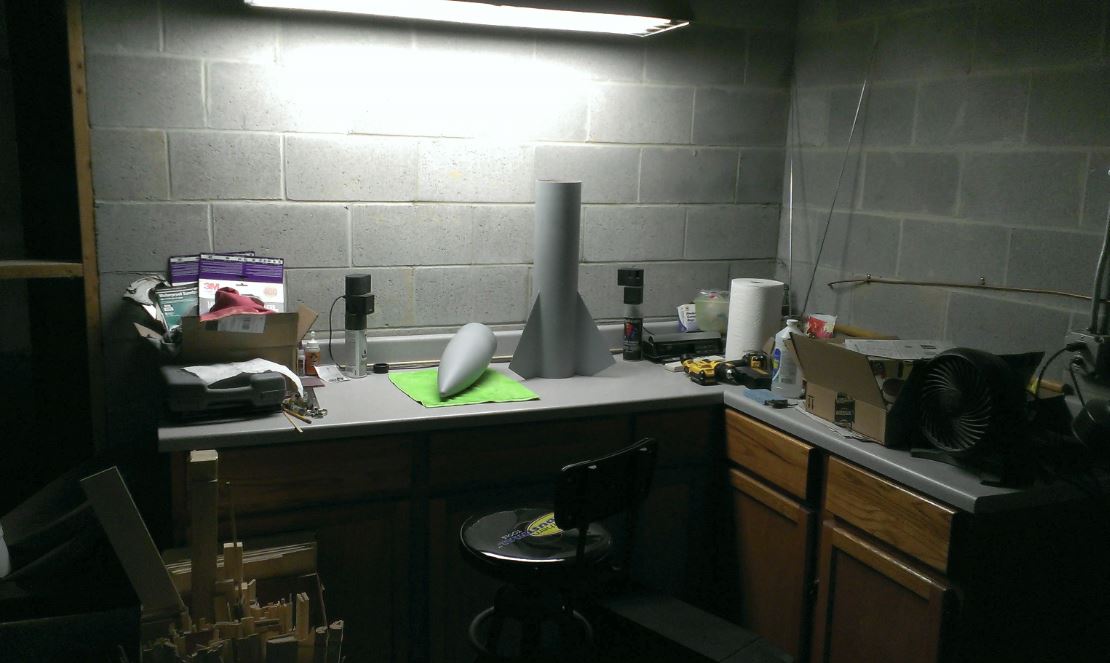
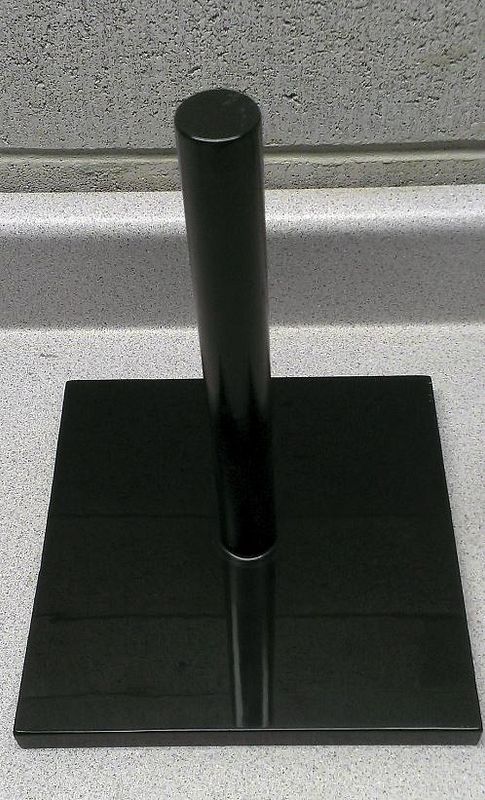
Here is a shot of my rocket workshop with the Minie-Magg primed and ready for paint. Notice that my speaker stands are spray paint cans and the subwoofer is my footrest. So I can rock out while I build rockets:
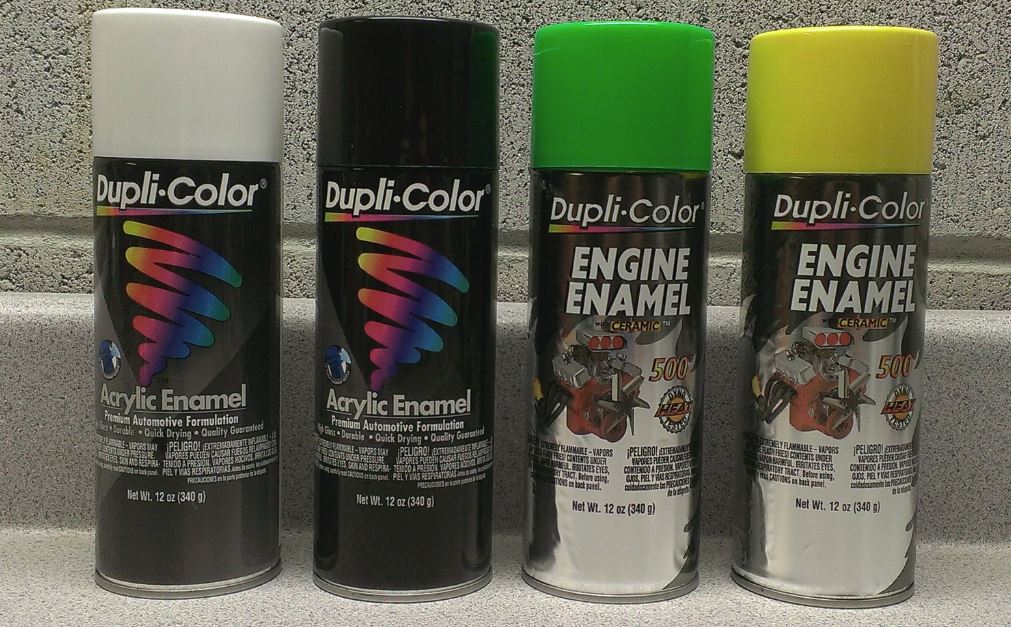
The paint that I am using is all DupliColor enamel.
Enamel gives a very hard finish that polishes up nicely but the downside is that it takes a while to dry. I wait at least one day between coats and at least 2 days before wetsanding the final coat of each color. Enamel actually takes weeks to fully cure.
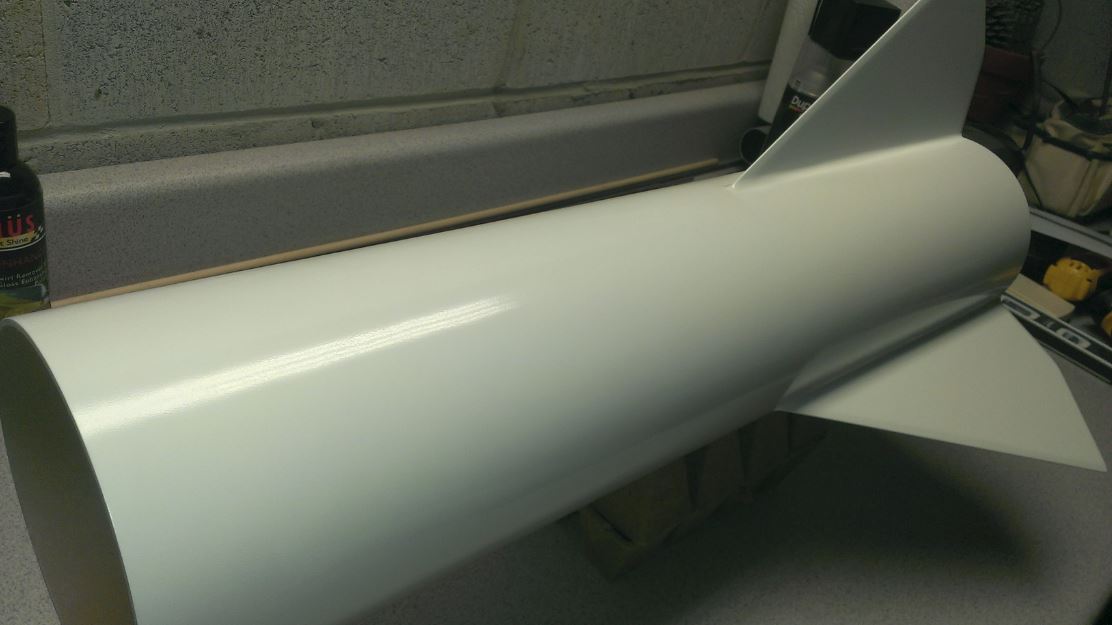
I sprayed 3 coats of white on the body tube and fins. I sanded the first 2 coats with 400 grit sandpaper before spraying the next coat. Here it is after spraying the final white coat:
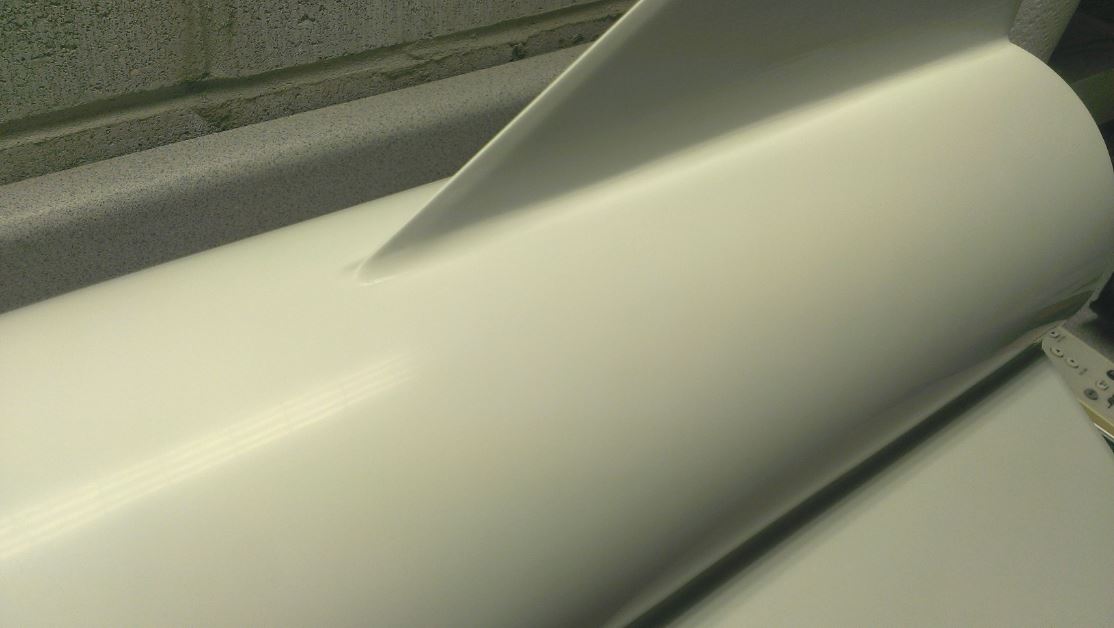
After 2 days, I wetsanded the final white coat on the body and fins. I use 2000 grit sandpaper for wetsanding:

Optionally you could wetsand with 1500 grit sandpaper but then it would require more polishing to remove all the 1500 grit scratch marks. Wetsanding with 2000 grit is a very slow process, but it's an important step that can't be rushed if you want a perfect finish. I probably spent about 6 hours wetsanding the body tube and fins. I could wait and wetsand just once after spraying all of the colors, but wetsanding before spraying the next color creates a nice smooth surface for masking for the next color. Here it is after wetsanding the white:
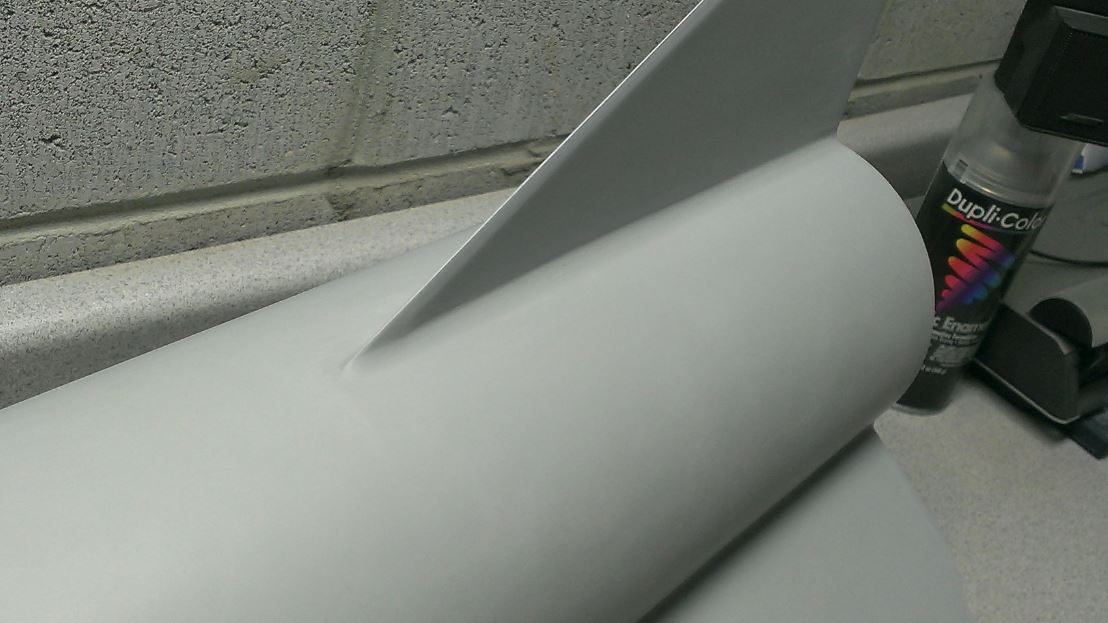
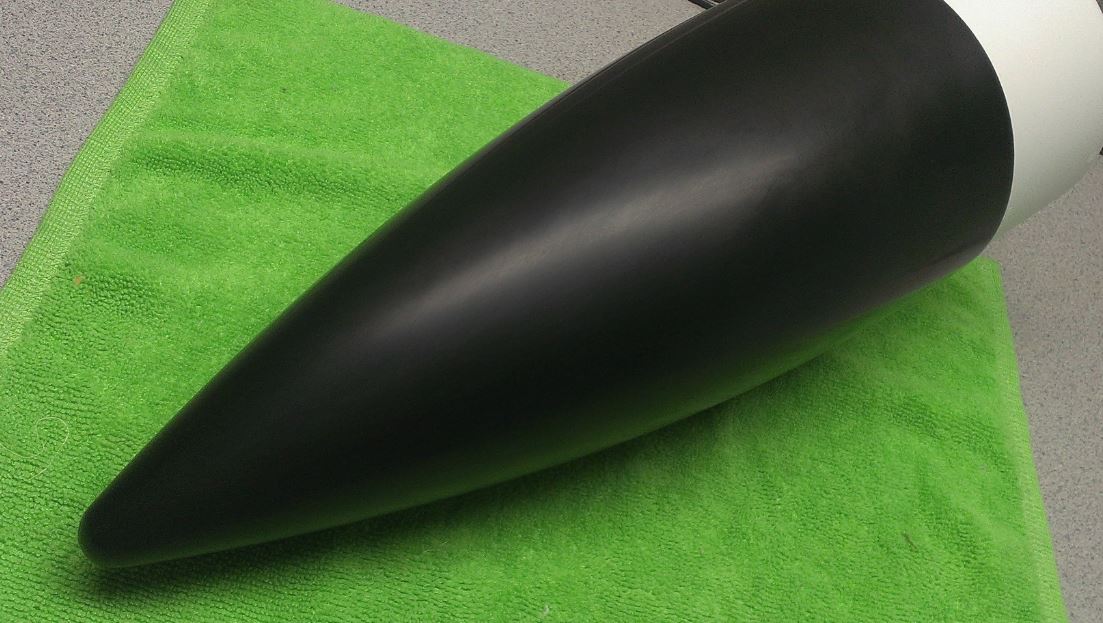
I sprayed 2 coats of black on the nose cone. As before, I waited 2 days and then wetsanded with 2000 grit.
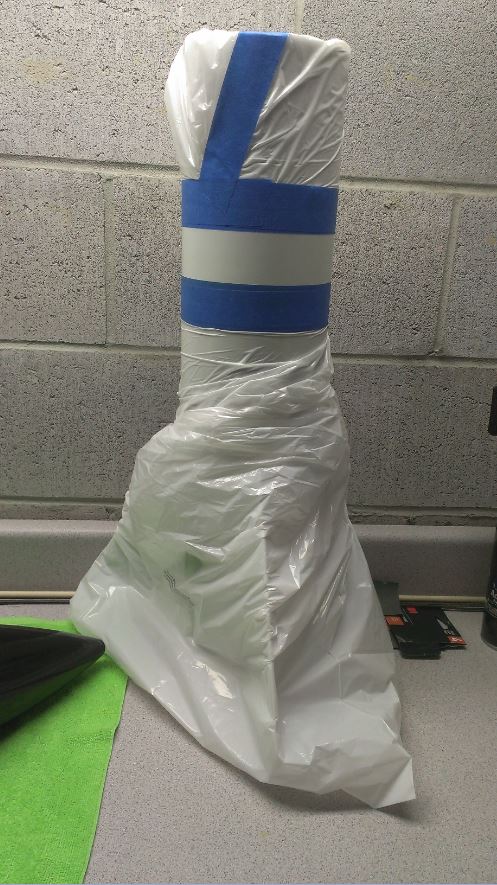
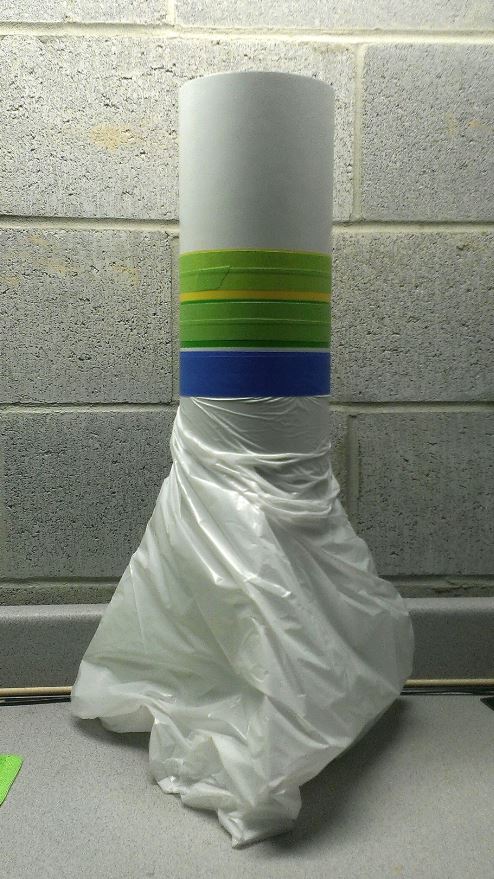
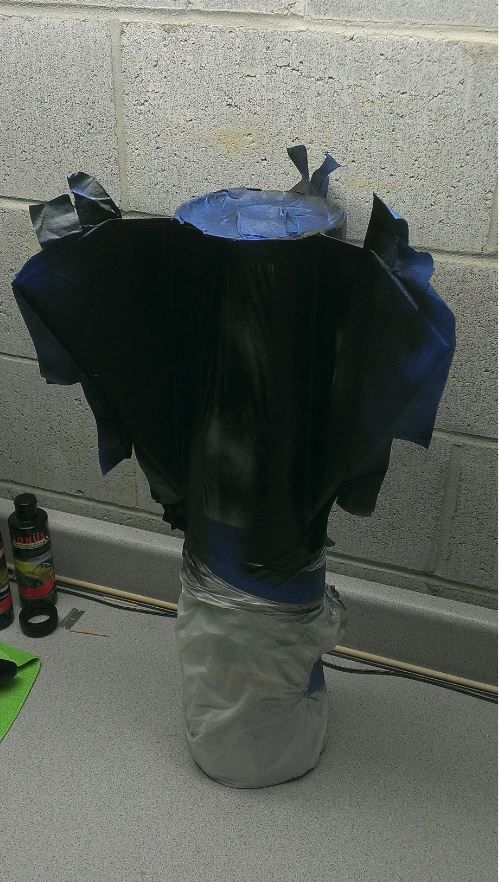
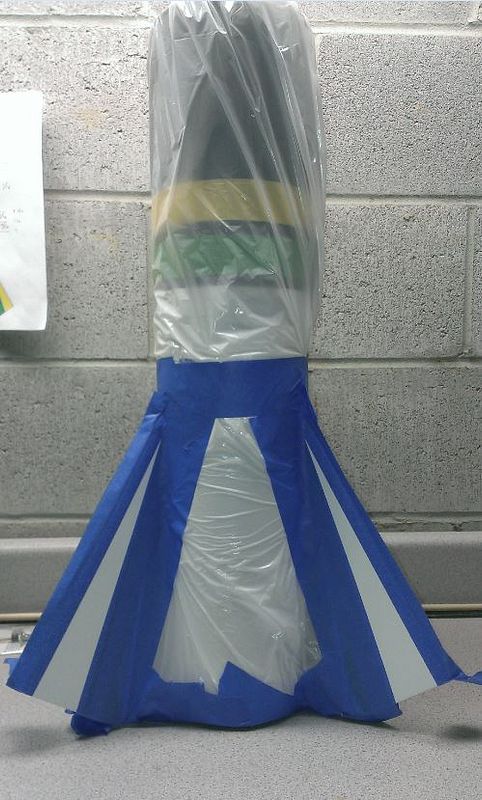
The upper part of the body tube will be black with green and yellow stripes. But you can't paint light colors over black so the stripes go down first then the black goes on last. Here it is masked for the green stripe. I mask using a combination of blue painter's tape and medium size trash bags.
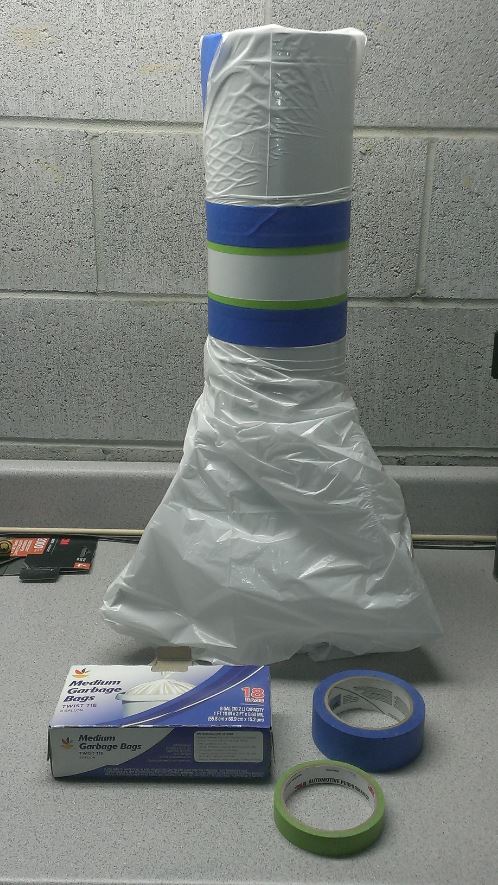
The picture above shows that I also used green 3M automotive masking tape on this one, but I stopped doing that because my green tape got fouled with dirt so I threw it away (since then I started storing my masking tape in a sealed plastic bag). I have also found that normal blue painters tape does a perfectly good job as long as you seal the edges with clearcoat.
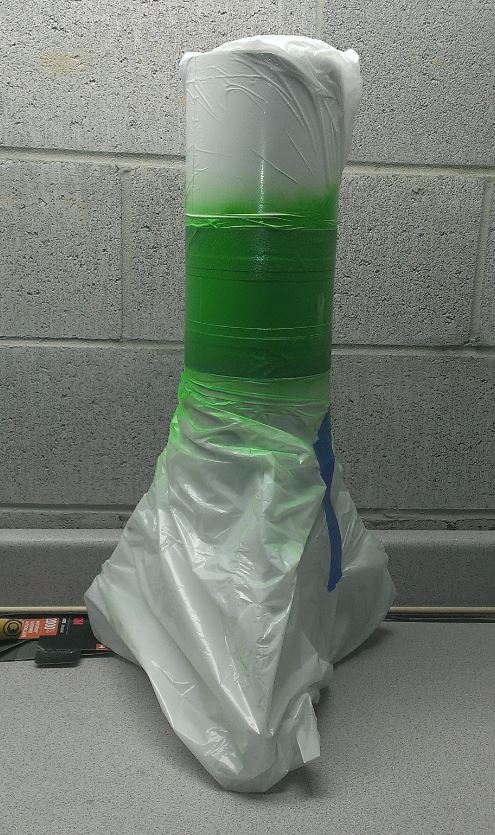
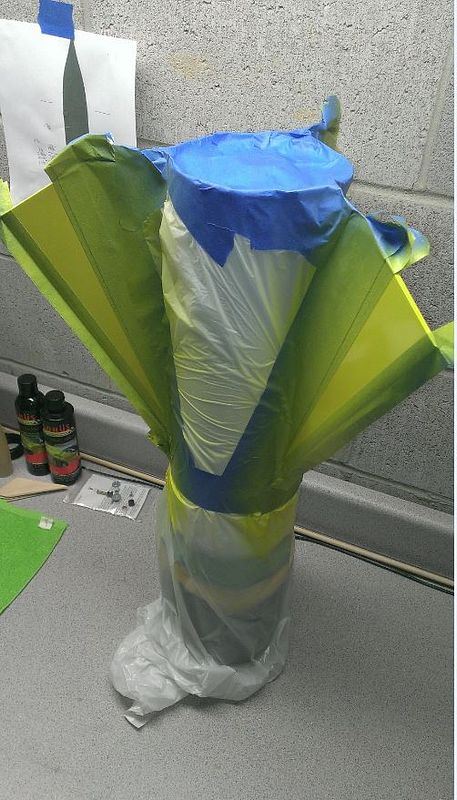
Here it is after spraying the green stripe. For each color I first spray a light coat of clear enamel to seal the tape, wait several minutes, spray a light color coat, wait about 10 minutes and then spray a wet color coat:
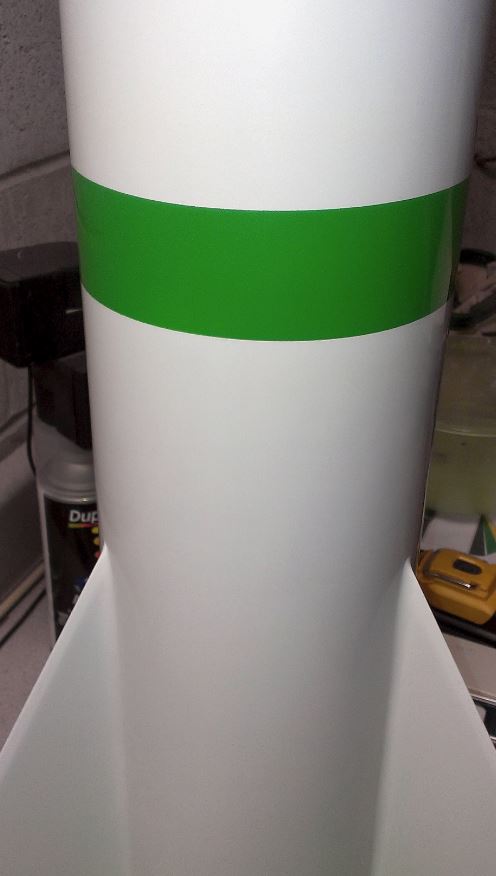
And after removing the masking:
Meanwhile, I polished the nose cone.
Polishing is an often misunderstood process. Polish does not put anything on the finish, it is just an extremely fine abrasive paste that actually removes some paint. I am referring to car polish here, not floor polish which I understand some people actually put on their rockets :y:. I polish by hand using a cotton cloth, then buff off the polish with another clean cloth.
With enamel, the longer you wait before polishing, the better. If you polish too soon after wetsanding it might initially look good but will then get dull as the enamel continues to cure, requiring re-polishing. I try to allow the paint dry at least 5 days before polishing. I do a two-step polishing process using Sonus brand car polish.
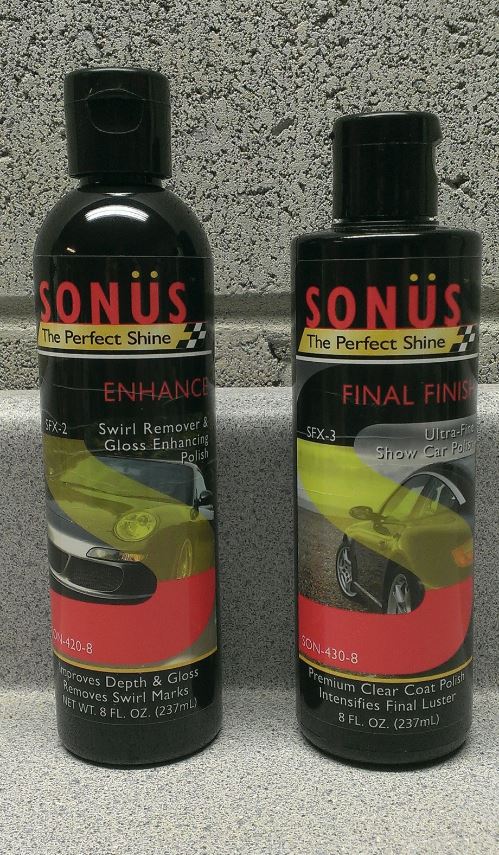
The first step is medium cut polish (aka swirl remover) followed by fine cut polish (aka finishing polish, or "prewax" polish). You could use only fine cut polish but it would take a lot more work to polish out all the 2000 grit scratch marks. And if you used only medium cut polish it wouldn't get as shiny.
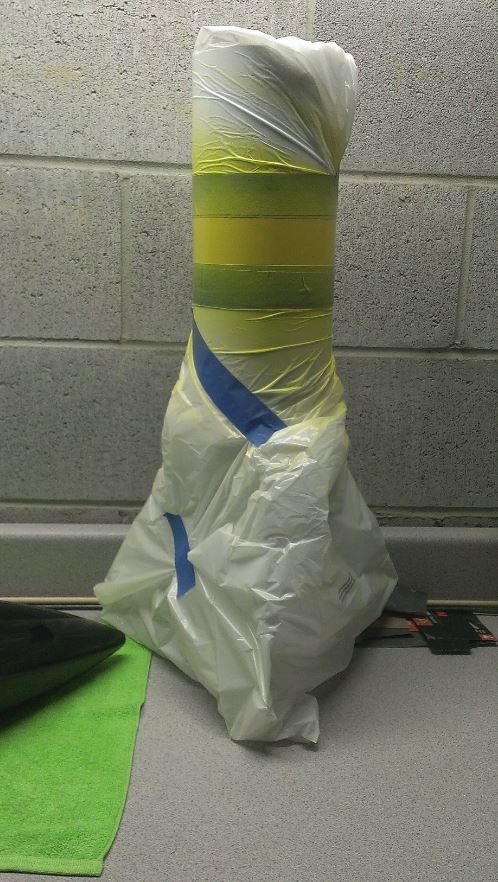
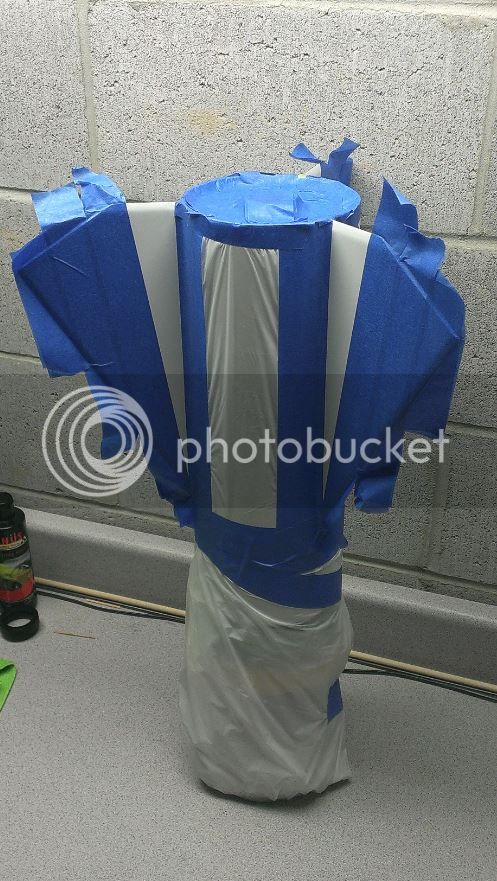
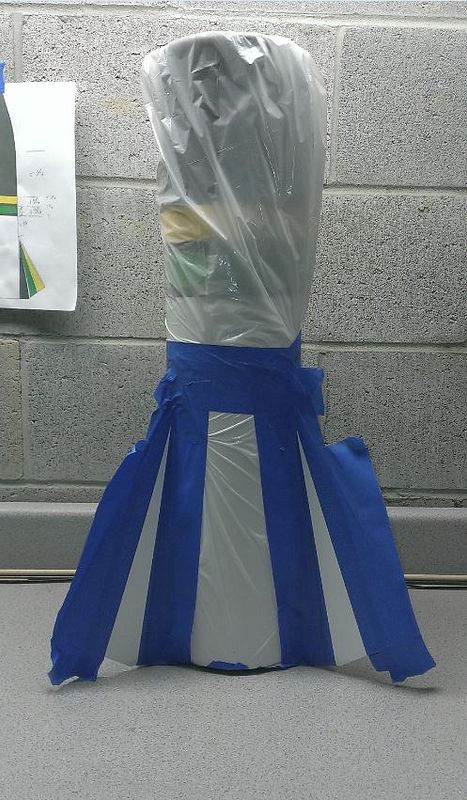
Here is the body masked for the yellow stripe:
After spraying the yellow stripe:
And after removing the masking:
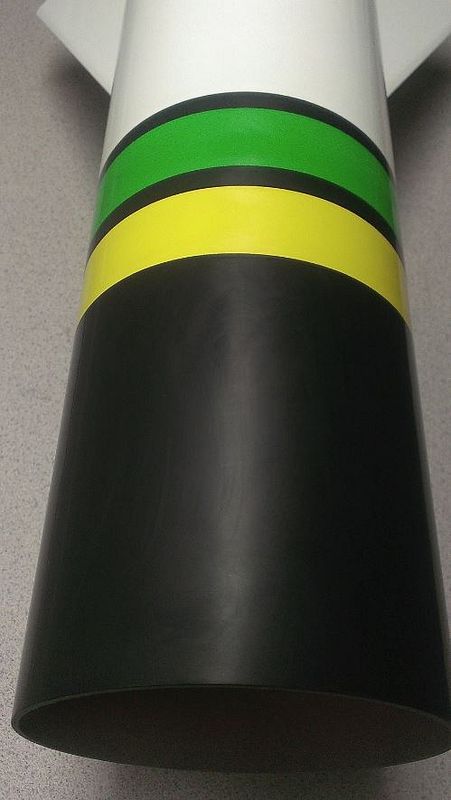
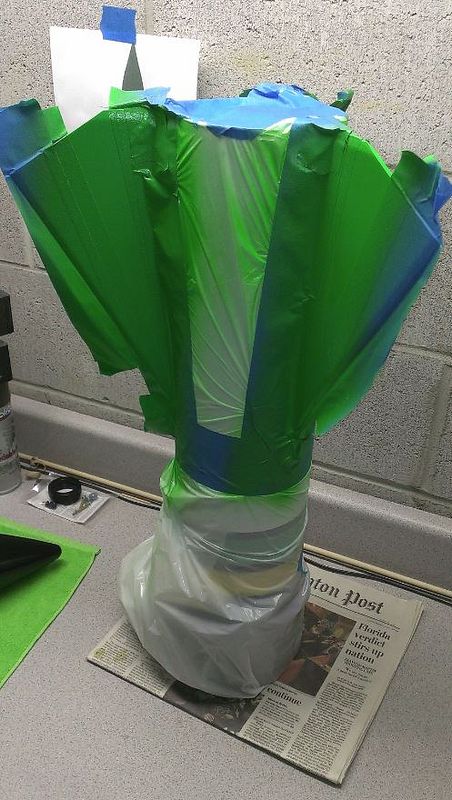
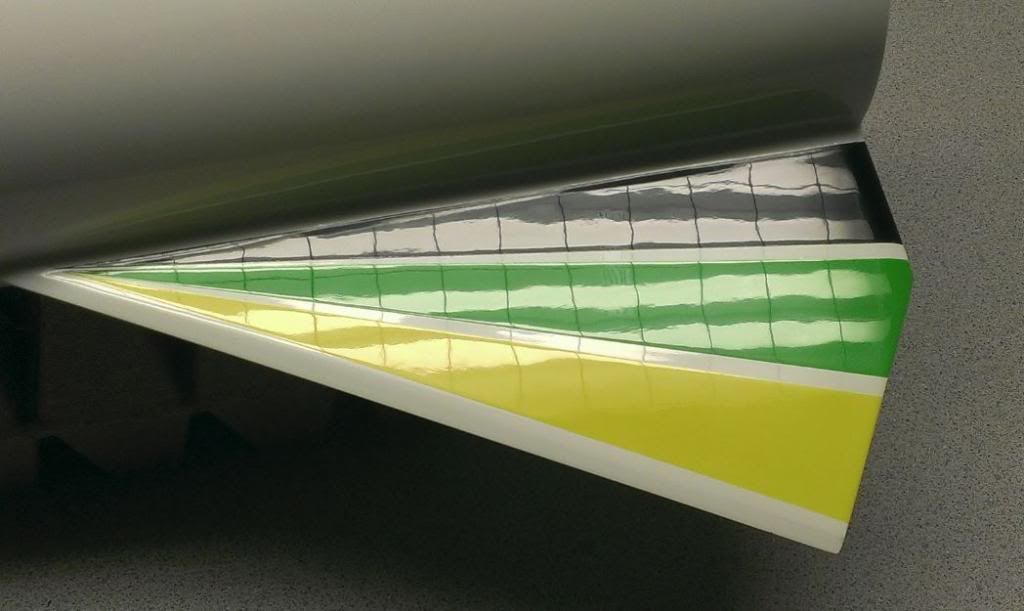
I wetsanded the green and yellow stripes, then masked for the black:
After spraying the black:

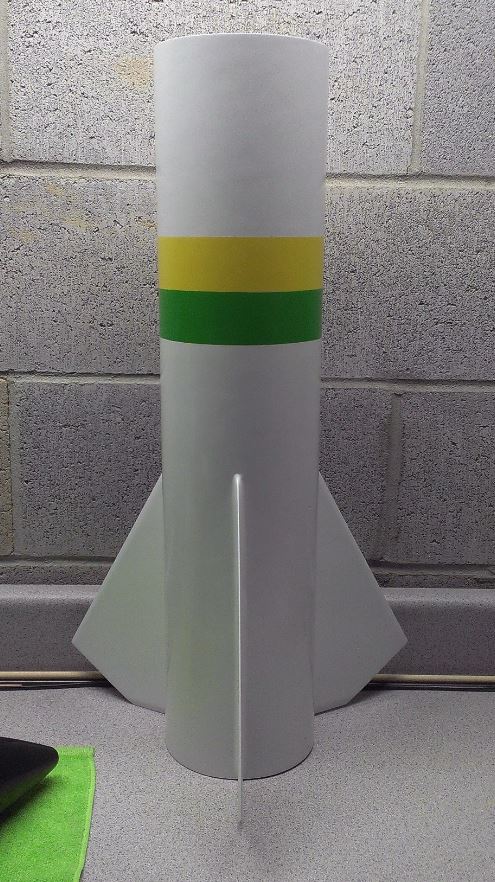
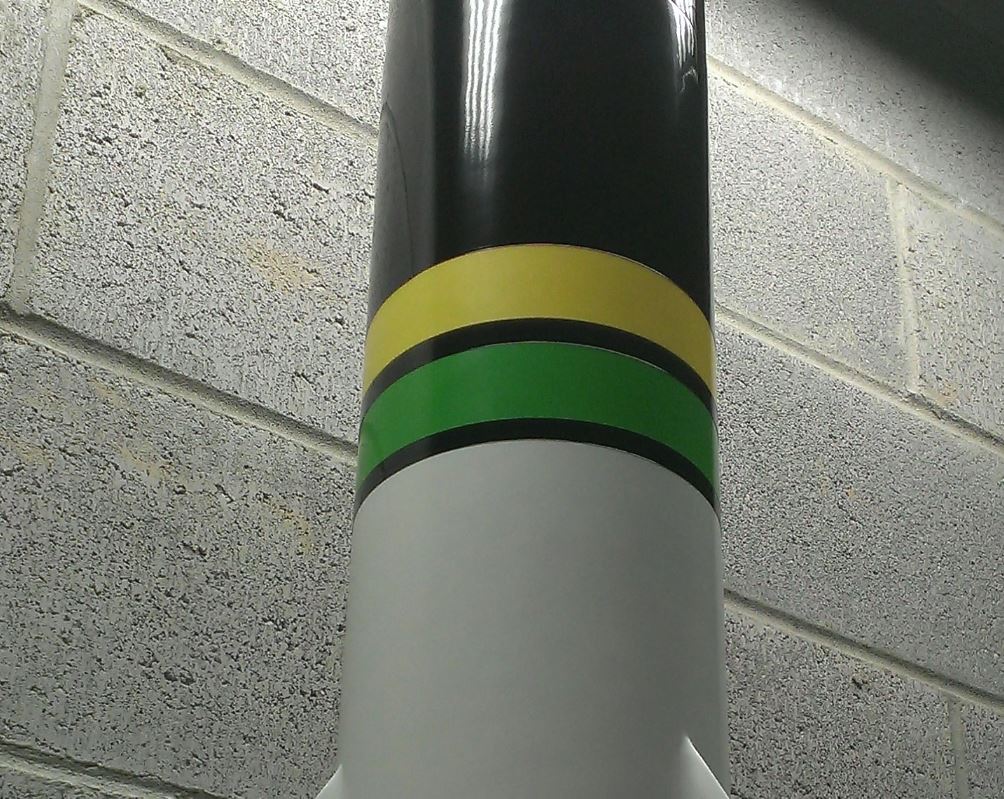
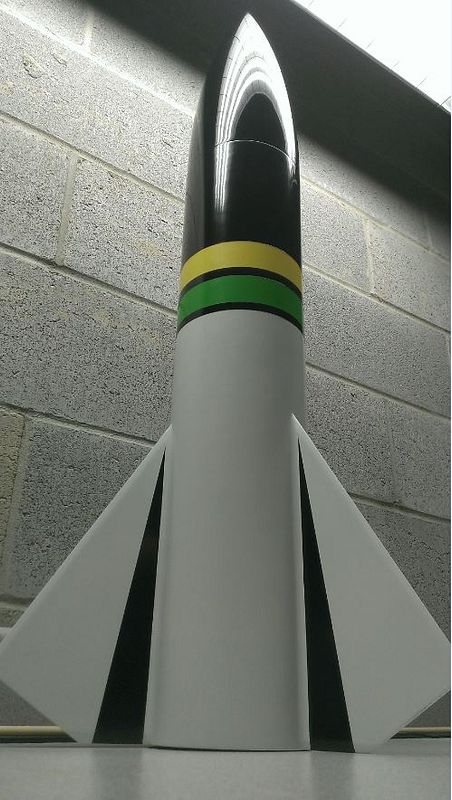
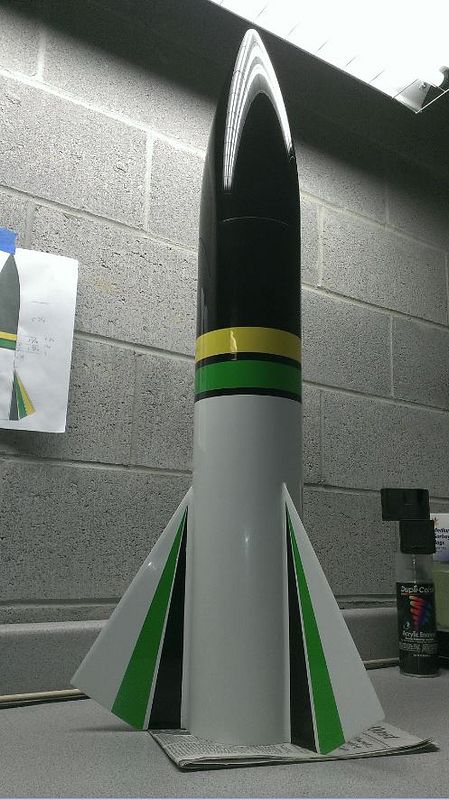
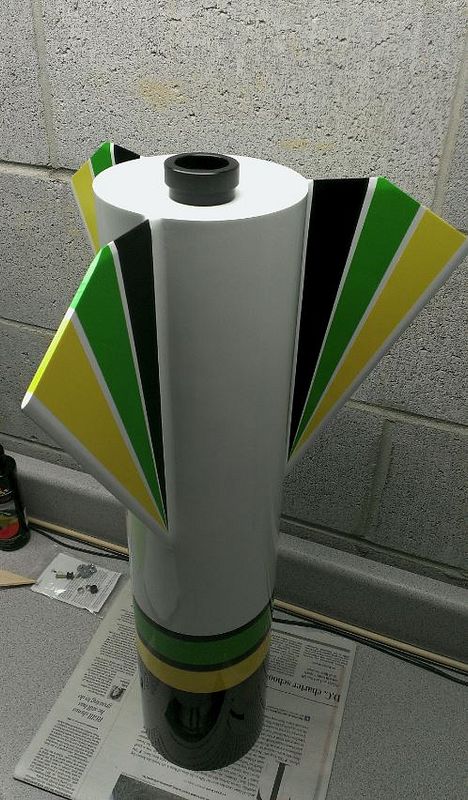
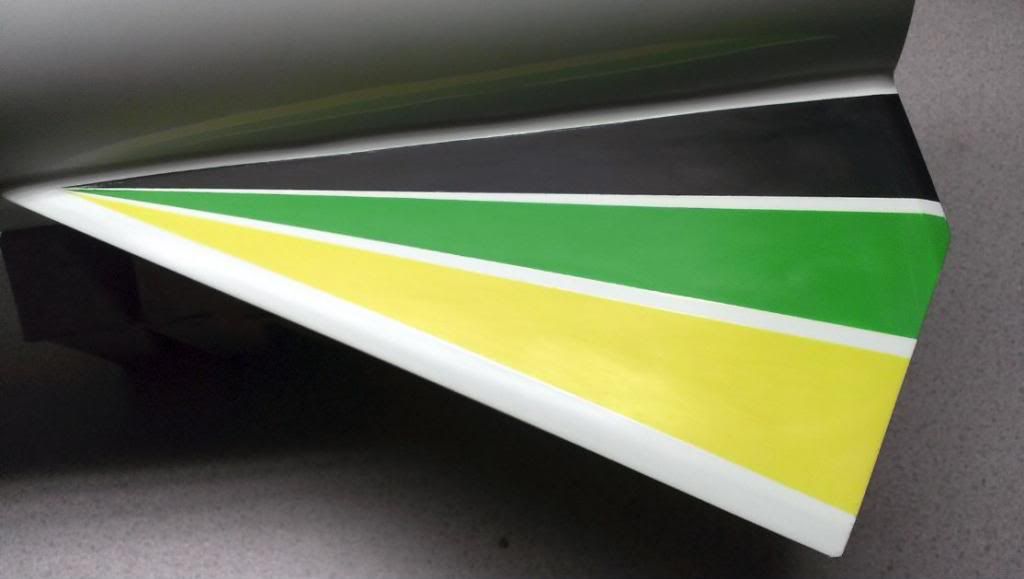
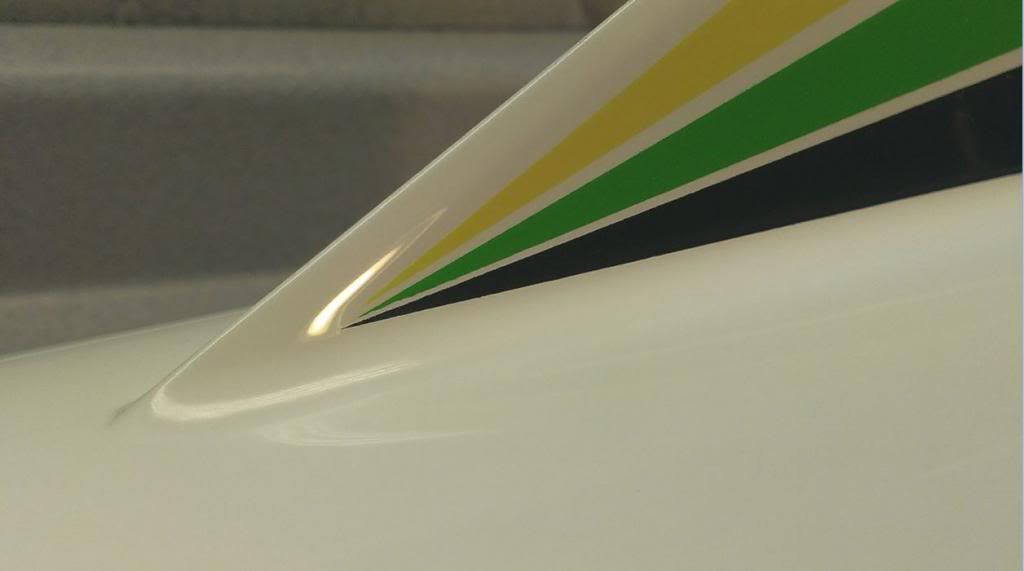
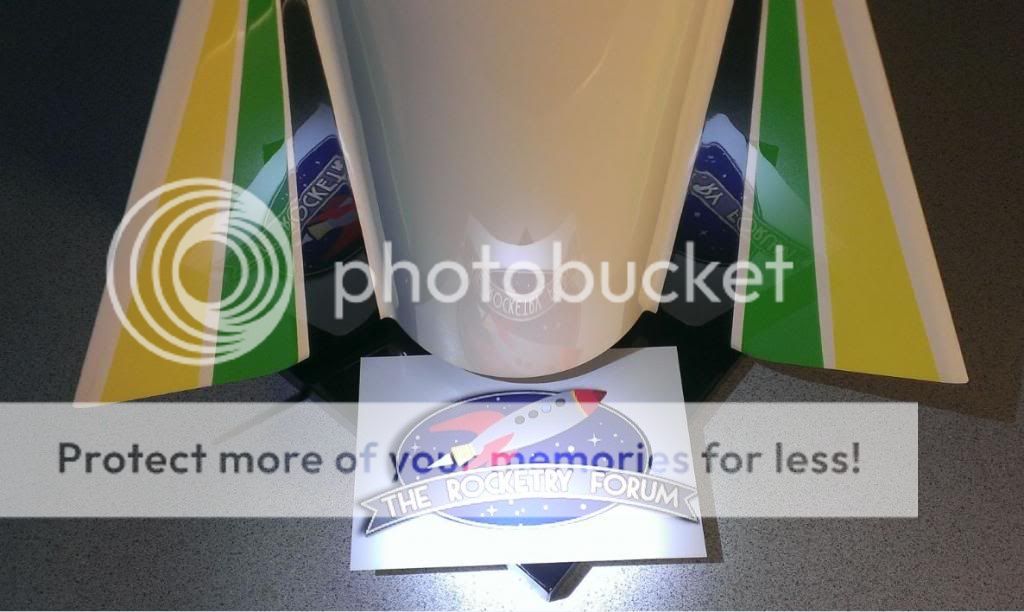
And after removing the masking. Now it's starting to look like my paint design:
Instead of doing a build thread, I'll start at the point where I have already completed assembling the Minie-Magg. First, here some of the finishing-related steps that were already done during the build:
- Sanded the outer surface of the airframe tube with 400 grit sandpaper.
- Before attaching the fins, I beveled the leading and trailing edges of the fins and then sanded all fin surfaces with 400 grit sandpaper.
- Sanded the bottom surface of the aft CR with 400 grit sandpaper.
- Applied and sanded 2 coats of AeroGloss sanding sealer to the fins and the bottom of the aft CR.
This kit has a HDPE (polyethelene) nosecone. I've heard that it can be difficult to get paint to stick to HDPE but I've never had a problem. You first just need to wash it with hot water and dish detergent, let it dry, and then really rough it up with 150 grit sandpaper. While sanding the nosecone make sure that you thoroughly sand down the mold lines on the sides.
Here's my paint design. I came up with several designs that I liked but had to eliminate some that would have been too difficult. This one was fairly easy.
Here is the bare naked Minie-Magg:
I use Duplicolor high-build primer:
I spray as many coats of primer as necessary to completely fill the spirals and cardboard texture of the body tube, and also the mold line in the nose cone. After letting each primer coat dry, sand off most of the primer with 400 grit sandpaper. The idea is to get a smooth even surface, not just build up a thick layer of primer. To assess my progress during priming I use a flashlight at a low angle to highlight the spirals and roughness of the body tube. This is the bare tube before primer:
You can see from the picture above that to get a very smooth surface on the body tube, it is not just the spirals but also the rough surface texture of the cardboard that needs to be filled.
After spraying and sanding 4 coats of primer I finally got the tube perfectly smooth with no spiral marks.
The woodgrain on plywood fins is easier to hide so by the time there are enough coats on the body tube, the fins are also perfectly smooth. Another benefit of four coats of primer is that it also evens out minor imperfections in the epoxy fillets.
Here is a shot of my rocket workshop with the Minie-Magg primed and ready for paint. Notice that my speaker stands are spray paint cans and the subwoofer is my footrest. So I can rock out while I build rockets:
The paint that I am using is all DupliColor enamel.
Enamel gives a very hard finish that polishes up nicely but the downside is that it takes a while to dry. I wait at least one day between coats and at least 2 days before wetsanding the final coat of each color. Enamel actually takes weeks to fully cure.
I sprayed 3 coats of white on the body tube and fins. I sanded the first 2 coats with 400 grit sandpaper before spraying the next coat. Here it is after spraying the final white coat:
After 2 days, I wetsanded the final white coat on the body and fins. I use 2000 grit sandpaper for wetsanding:
Optionally you could wetsand with 1500 grit sandpaper but then it would require more polishing to remove all the 1500 grit scratch marks. Wetsanding with 2000 grit is a very slow process, but it's an important step that can't be rushed if you want a perfect finish. I probably spent about 6 hours wetsanding the body tube and fins. I could wait and wetsand just once after spraying all of the colors, but wetsanding before spraying the next color creates a nice smooth surface for masking for the next color. Here it is after wetsanding the white:
I sprayed 2 coats of black on the nose cone. As before, I waited 2 days and then wetsanded with 2000 grit.
The upper part of the body tube will be black with green and yellow stripes. But you can't paint light colors over black so the stripes go down first then the black goes on last. Here it is masked for the green stripe. I mask using a combination of blue painter's tape and medium size trash bags.
The picture above shows that I also used green 3M automotive masking tape on this one, but I stopped doing that because my green tape got fouled with dirt so I threw it away (since then I started storing my masking tape in a sealed plastic bag). I have also found that normal blue painters tape does a perfectly good job as long as you seal the edges with clearcoat.
Here it is after spraying the green stripe. For each color I first spray a light coat of clear enamel to seal the tape, wait several minutes, spray a light color coat, wait about 10 minutes and then spray a wet color coat:
And after removing the masking:
Meanwhile, I polished the nose cone.
Polishing is an often misunderstood process. Polish does not put anything on the finish, it is just an extremely fine abrasive paste that actually removes some paint. I am referring to car polish here, not floor polish which I understand some people actually put on their rockets :y:. I polish by hand using a cotton cloth, then buff off the polish with another clean cloth.
With enamel, the longer you wait before polishing, the better. If you polish too soon after wetsanding it might initially look good but will then get dull as the enamel continues to cure, requiring re-polishing. I try to allow the paint dry at least 5 days before polishing. I do a two-step polishing process using Sonus brand car polish.
The first step is medium cut polish (aka swirl remover) followed by fine cut polish (aka finishing polish, or "prewax" polish). You could use only fine cut polish but it would take a lot more work to polish out all the 2000 grit scratch marks. And if you used only medium cut polish it wouldn't get as shiny.
Here is the body masked for the yellow stripe:
After spraying the yellow stripe:
And after removing the masking:
I wetsanded the green and yellow stripes, then masked for the black:
After spraying the black:
And after removing the masking. Now it's starting to look like my paint design:
Last edited:


")