It's been quite a while since I've done anything with rockets. I built a 3" LOC Iris with the plan of getting an L1 cert but I never was able to find the time. I was deployed and life just got in the way. The rocket sits unflown but I'm planning on flying it with a 29mm G motor and an adapter later this year to shake things out. I bought a JLCR and am gonna see how that works out. Hopefully I get back on track.
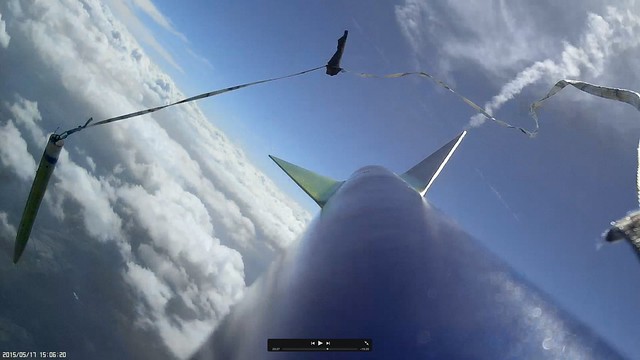
Anyway. The new build. I cato'd a Ventris last fall. Not sure what happened but using an aerotech 29/40-120 case and an E16-7 it made it 10' off the rod and blew apart violently. The forward closure blew out and into the dog barf and the entire fin can and motor section was shredded. The delay grain and ejection charge remained intact. The case and aft closure are fine, the threads on the forward closure are stripped off though. I ordered a new one.
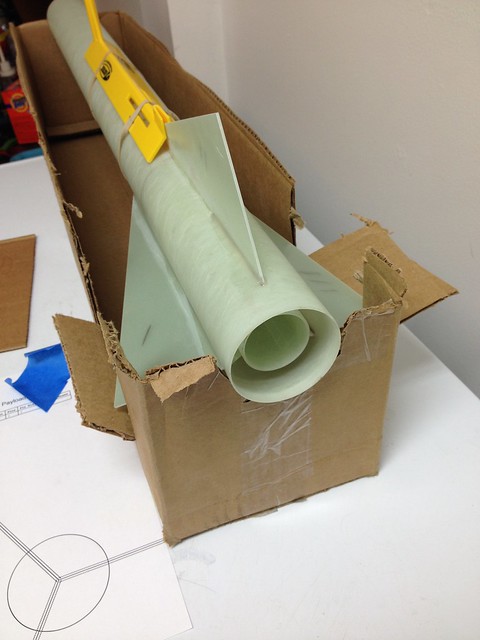
So I wanted to build another rocket to replace the destroyed one and Was shopping around just went and ordered a Madcow TWFG 2.6" 38mm DX3. And it came today. Maybe I'll get the L1 done this fall and get to fly it also. It's packaged for it to be configured as a DD but I'm thinking SD with the chute release and utilizing the AV bay for an altimeter.
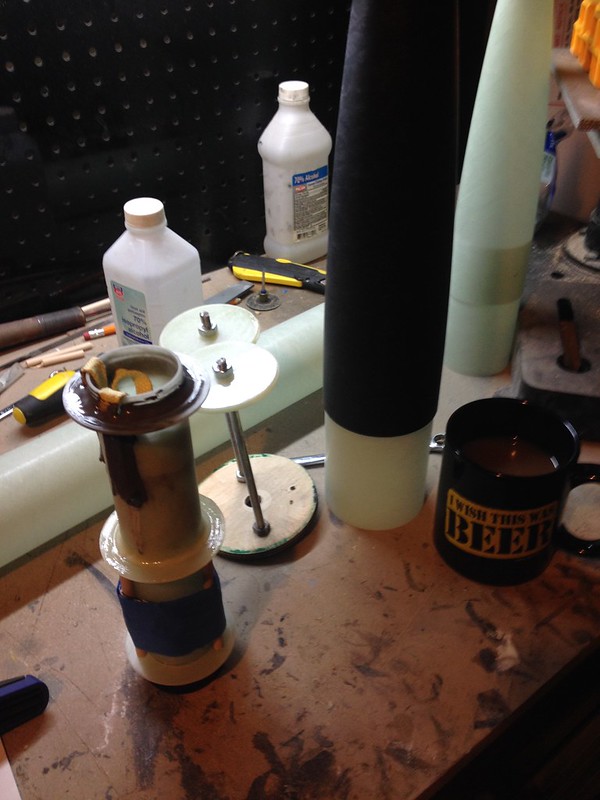
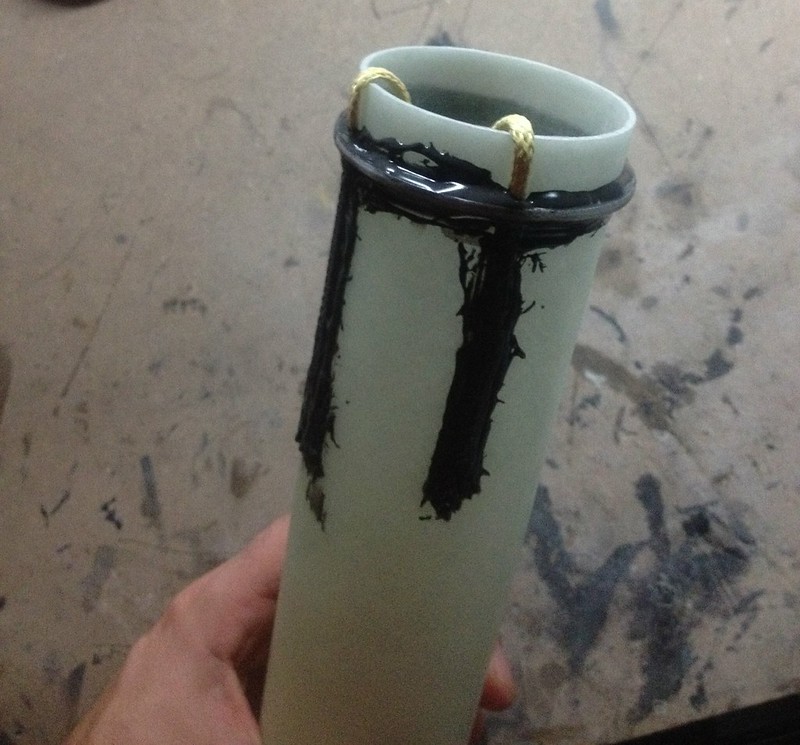
Before I get too too deep into it, I am considering using plastic rivets to keep the DD configuration optional. Or should I just fix the nose assembly and go SD with the chute release and just access the AV bay from the aft end of the nose assembly? I'll start the motor mount tomorrow just the centering rings. I'll try to put up pictures.
Last question. This is a stout build. Would I be able to fly this on any larger G motors in a 29mm adapter and the 29/40-120 case to shake things out first?
I am thinking a metallic red paint paint scheme with gold accents, kinda Ironman looking.
Anyway. The new build. I cato'd a Ventris last fall. Not sure what happened but using an aerotech 29/40-120 case and an E16-7 it made it 10' off the rod and blew apart violently. The forward closure blew out and into the dog barf and the entire fin can and motor section was shredded. The delay grain and ejection charge remained intact. The case and aft closure are fine, the threads on the forward closure are stripped off though. I ordered a new one.
So I wanted to build another rocket to replace the destroyed one and Was shopping around just went and ordered a Madcow TWFG 2.6" 38mm DX3. And it came today. Maybe I'll get the L1 done this fall and get to fly it also. It's packaged for it to be configured as a DD but I'm thinking SD with the chute release and utilizing the AV bay for an altimeter.
Before I get too too deep into it, I am considering using plastic rivets to keep the DD configuration optional. Or should I just fix the nose assembly and go SD with the chute release and just access the AV bay from the aft end of the nose assembly? I'll start the motor mount tomorrow just the centering rings. I'll try to put up pictures.
Last question. This is a stout build. Would I be able to fly this on any larger G motors in a 29mm adapter and the 29/40-120 case to shake things out first?
I am thinking a metallic red paint paint scheme with gold accents, kinda Ironman looking.