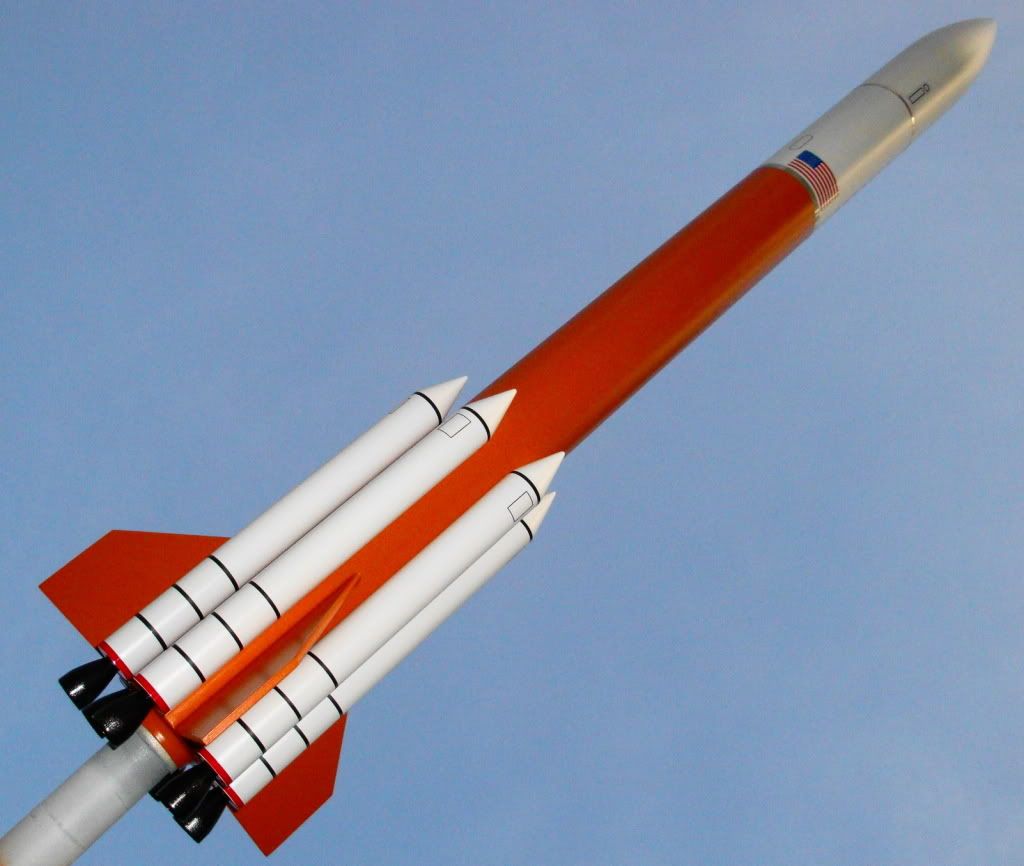
need help paint color Shuttle fuel tank

The Rocketry Forum

Help Support The Rocketry Forum:

This site may earn a commission from merchant affiliate links, including eBay, Amazon, and others.

dfos

Well-Known Member
Joined
Apr 3, 2011
Messages
50
Reaction score
0
I am near the painting stage for an estes space shuttle kit. It is the one with the orbiter glider and SRB/fuel tank that separates.

The directions say to paint the fuel tank brown. However, when I see pictures of the space shuttle, the fuel tank doesn't seem exactly brown. It seems to also have some sort of orangish or copper type tint.

Does anyone know exactly what color the real fuel tank is on the space shuttle, and any paint recommendations for me -- or should i just go with regular brown?

Thanks.
 
It's definitely not a brown. The "paint" is actually a primer. I've always thought it was closer to a red metal primer.
 
It's definitely not a brown. The "paint" is actually a primer. I've always thought it was closer to a red metal primer.

Actually, the external tank (ET) is coated with foam insulation, which starts out very light colored, almost cream or white. As it ages, it turns brown. STS-133 and STS-134 have light spots on the tank where the foam was repaired.

Dr. Zooch outlined a method that is now in the archives. Here is that post. I used it to paint the tank of my Jupiter 120, pictured below, compare to the real tank.

jupiter120_054.jpg

STS124_crop.JPG
 
The best matching paint that I've found is Valspar Premium Satin La Fonda Copper. I used it to paint my Quest Minotaur. The shuttle tank is tricky because of the foam NASA uses. The more it ages, and is exposed to sun the darker it gets. It starts out looking orange, and as we saw with the last tank launched it turns a dark reddish brown looking color. Like someone said above, it's not painted or primed.

DSC00311.jpg
 
I used orange on mine. If you're interested I made a custom set of decals for this rocket. I can send a hires file if you like or just copy and print the attached onto decal paper. Additionally, I don't know what you've considered for power. I had a couple of these years ago and they are marginal on a C6. Last weekend I flew my current model on an Aerotech 18mm D reload. AWSOME flight, around 400-500ft. Glide was flat and straight....and LONG. If you go with the D reload be sure to add a bead of epoxy around the Centering ring joints on the motor mount at both the body tube and motor tube Best of luck.

Shuttle Decals new.jpg

101_0659.JPG

101_0660.jpg
 
Last edited:
It's definitely not a brown. The "paint" is actually a primer. I've always thought it was closer to a red metal primer.


Not primer either-- it's essentially, for all intents and purposes, "spray foam in a can"...

The shuttle ET was painted white on the first two missions-- the engineers rapidly figured out this was a waste of time/effort/money/weight, because losing 600 pounds of paint off the ET meant another 600 lbs of cargo could be carried by the shuttle... so therefore the ET's all went to their "orange-ish" weathered spray foam.

ET's coming out of the assembly building at Michoud are a creamy tan color-- just like spray foam in a can is... once it's exposed to UV rays from the sun for awhile, they turn that orangish color, getting a redder/browner "rustier" color the longer they sit... Ever look at spray foam on the outside of your house, say applied around utility penetrations around the walls, water pipes, etc... the stuff follows the exact same color changing process...

Here's a thread with relevant pics and some paint tests I did on my DR. ZOOCH shuttle... The whole first page is mostly about paint tests for the ET...

https://www.rocketryforum.com/showthread.php?t=1207

You might also want to check THIS ONE out... it's BY FAR the simplest/easiest... :)

https://www.rocketryforum.com/showpost.php?p=16277&postcount=54

Good luck with your build! Later! OL JR :)
 
Last edited:
As rocketguy101 and Luke Strawwalker said, the color of the ET is the spray-on foam’s natural color (except for STS-1 and 2).

I suggest going to this page on my website, which shows a lot of ET details, including various ET’s:

https://homepage.mac.com/georgegassaway/GRP/Scale/ShuttleData/ET_photos.html

Below is part of what I wrote on that page:

-----------------------
The first two ET's were painted white. After that, they have been the natural color of the foam insulation. The color of the foam varies a lot. The foam originally is much lighter in color. Both age, and especially exposure to sunlight, causes it to darken. Due to slips in launch schedules, some ET's sat in storage for a very long time, so they got even darker. Also, in some photographs the color may vary due to the exposure or lighting. The only truly really useful color comes from photos on the day of launch and even then it depends on the lighting, exposure, and film color sensitivity.

On tanks that look dark orange or rust, but also have lighter orange or yellow-orange places on them, what is that about? Two causes. One, where new foam was applied in places for various reasons. Such as building up the foam ramps that are along the right sides of the conduit lines. The other, where old foam was ground down or cut into for some reason. Only the outer part gets dark, like a "rind", so when the rind is cut away the exposed old foam is lighter in color.

More recent ET's, "Super Lightweight Tanks", first flown in June 1998, are even lighter. I do not know if the foam itself is any different, or if the ET's are being produced closer to the time of launch rather than being stored for a very long time. In any case, the tanks can have an almost butter-yellow color to them when they arrive, as seen below. When rolled out, they might look a little darker, but not much. The big thing is that being exposed to sunlight for weeks on the pad, the foam gets significantly darker. But the RSS covers a lot of the tank from direct sunlight. So when the RSS is rotated back for launch, the ET has a sort of a "sunburned look", the exposed areas are darker than the areas protected by the RSS.


-------------------

So, the “right” color really depends on what specific mission you are modeling. And if it is a mission since 1998 or so, some parts of the ET may be lighter/darker than others, due to the “sunburn effect” of most of the tank getting darker in the sunlight while other parts are protected by the pad’s RSS.

The ultimate scale model I built, was the only shuttle mission I ever saw launch, STS-47 in September 1992. On that one, the ET was more of a rust color. I simply used a cheap spray can of rust-colored primer which was a decent match.

Some examples below of various ET’s/missions.

Photo 1 - 1998 - first super light ET, on arrival at KSC

Photo 2 - same ET with STS-91 very shortly after arrival at pad, before RSS is rotated into place.

Photo 3 - Probably STS-91, not certain, shortly before launch. Note how much darker the ET is in most areas, due to the sunlight.

Photo 4 - STS-91 liftoff. Note how much darker the ET is in most areas, due to the sunlight.

I will post some other photos after this message.

- George Gassaway

KSC-98PC-0518_LITEET.jpg

--KSC-98DC-0551_STS91_LITE_ET.jpg

Shuttle_LOX_Tank.jpg

KSC-98PC-0693.jpg
 
Last edited:
By contrast, the rust-colored ET of STS-47 (September 1992), and my model of it using a "rust" colored primer for the ET.

The lighter colored foam (orange-ish) areas were foam that was either added later, or trimmed-down later. THey still got darker but not as dark as the original (oldest) foam. THat is common for many shuttle ET's.

I also suggest seeing other photos on my website, starting with this main index:

https://homepage.mac.com/georgegassaway/GRP/Scale/ShuttleData/ShuttleDataMain.htm

- George Gassaway

KSC-92PC-1774.jpg

STS47-S-019.jpg

STS47-S-118.jpg

-shuttle2002wsmc-PA140078.jpg

-shuttleWSMC2002-PA140052.jpg
 
Last edited:
so if some enterprising person had applied a water based uv coating to selected areas of a new tank in a pattern that just happened to look like buy american...you would have a rather big billboard:).
rex
 
so if some enterprising person had applied a water based uv coating to selected areas of a new tank in a pattern that just happened to look like buy american...you would have a rather big billboard:).
rex

Sorta like writing messages on people with sunblock while they're sunbathing, so that the message is 'burned' into their skin?? LOL:)

Could have made some funny messages on the tank that way... LOL:)

Later! OL JR :)
 
I've found that the hardest color to get is that of the first two ETs, which were not really "white" but were, as stated, more of a cream off-white. I think the only one (yes 1) that I got right had about seven coats of paint before I got it where I liked it.
 
Here's the best Shuttle Marking guide I've found, colors and markings for orbiters and booster stack by mission. There were a large number of subtle changes from mission to mission. https://www.axmpaperspacescalemodels.com/REFERENCE.html
Just go to the lower portion of the page for image links.
This one is a discussion on all colors involved. at the bottom of the page is a color mixing guide. Thanks to George for his contribution there.
https://www.spaceinminiature.com/ref/sts/etank.html#nose
 
Last edited:
I used orange on mine. If you're interested I made a custom set of decals for this rocket. I can send a hires file if you like or just copy and print the attached onto decal paper. Additionally, I don't know what you've considered for power. I had a couple of these years ago and they are marginal on a C6. Last weekend I flew my current model on an Aerotech 18mm D reload. AWSOME flight, around 400-500ft. Glide was flat and straight....and LONG. If you go with the D reload be sure to add a bead of epoxy around the Centering ring joints on the motor mount at both the body tube and motor tube Best of luck.

why custom decals? are the ones in the kit not very good?
 
why custom decals? are the ones in the kit not very good?

The ones I worked up have greater detail, plus I made decals for the ET and the SRBs. I incorperated a number of the kit decal images that were good plus many more I worked up from the previously mentioned reference sites.
You can compair for yourself. The one on the left is my rework, the one on the right is the kit decal.

Shuttle-Decals3.jpg
 

Attachments

  • Shuttle Decals new.jpg
    Shuttle Decals new.jpg
    80.8 KB · Views: 77
Last edited:
Back
Top