Midge - a PGC build

The Rocketry Forum

Help Support The Rocketry Forum:

This site may earn a commission from merchant affiliate links, including eBay, Amazon, and others.

LW Bercini

Well-Known Member
TRF Supporter
Joined
Jun 15, 2011
Messages
2,622
Reaction score
147
Location
Macon GA
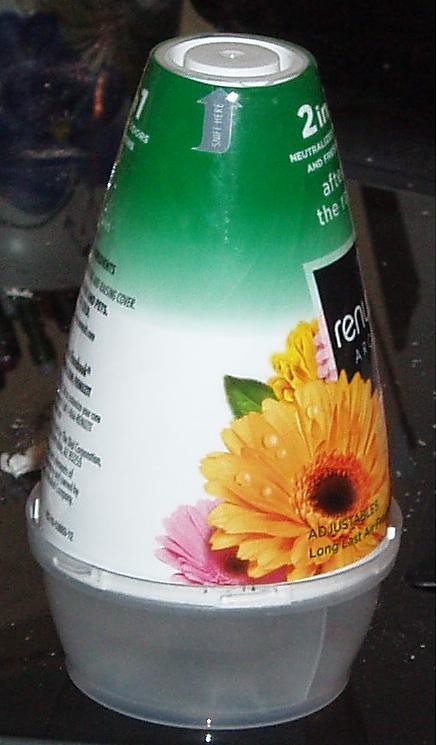
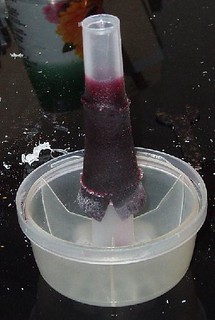
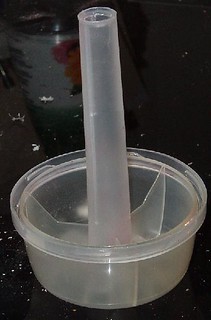
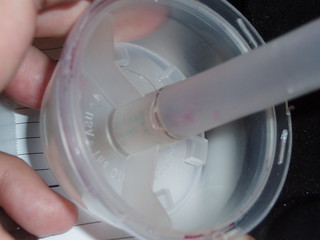
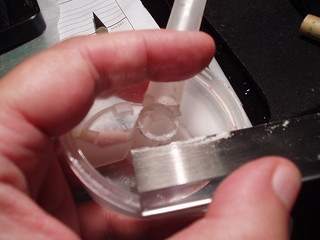
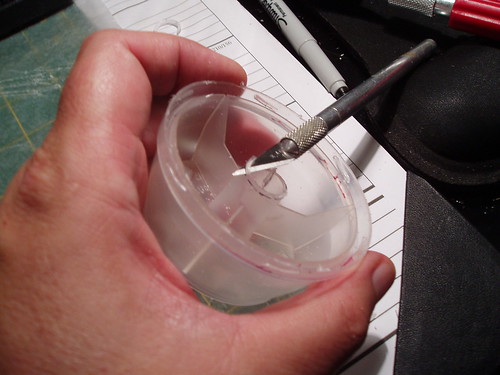
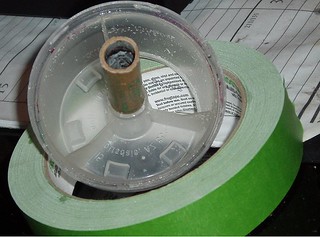
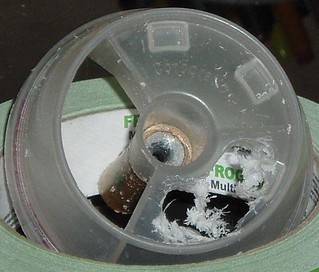
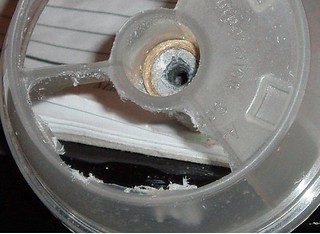
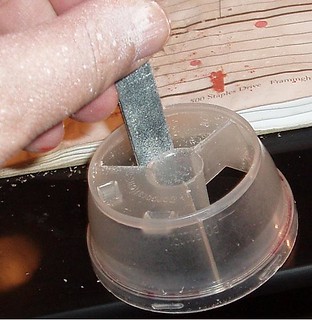
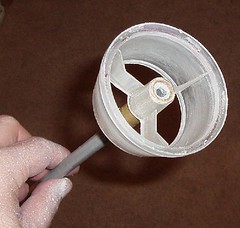
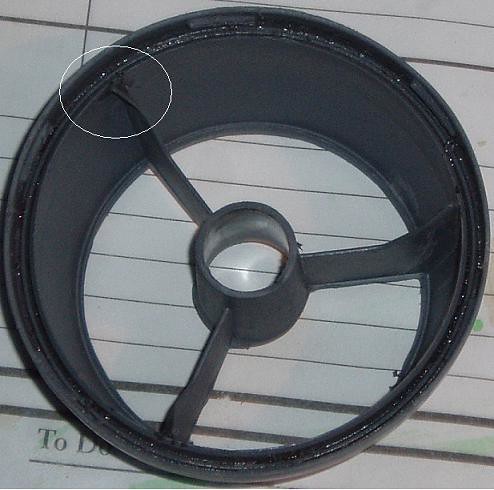
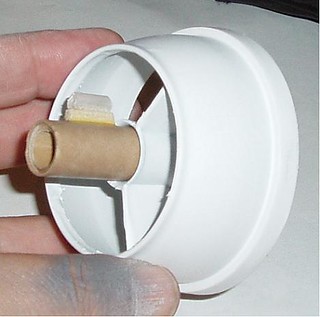
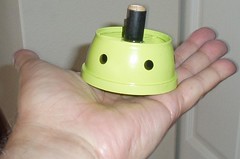
In the grand tradition of PGC as demonstrated by MrGneissGuy and GDJ, I have just finished this build of the Midge (a small, annoying flying object). The build starts off with this:

7730077946_25aa318092_b.jpg
 
Last edited:
It is the base and not the curved cover that is used in this build. (bet you thought otherwise!). Remove the cover and put it away for some future effort.

Once the fragrance gel has finished its work, you have this:
7730078018_e84f2450bc_n.jpg


Just take your pliers, grasp the hardened gel, twist and pull. It should slide off in a single piece leaving this:
7730078098_d49c486780_n.jpg


By the way, I would recommend you do these early steps with gloves on. Even though the gel is dried out, a lot of fragrance remains. I neglected to use gloves and I had raspberry-scented fingertips for 2 days.
 
Last edited:
Because I was uncertain if this project was going to work, I didn't spend too much time on finishing. If/when I make another one of these, I would take the time to wash the piece in hot soapy water; taking time to scrub out the residue in the "trough" where the cover fits into the base, using a toothbrush or nail brush to remove the bits of dried gel. In the last picture on this page, you can clearly see some of the red residue that I should have cleaned out.

The next step is to mark the motor mount. Push an expended 13mm motor in from the other side as far as it will go without getting stuck. Mark where it ends.

7730079908_6b1cc2af57_n.jpg


Next, remove the "spindle" just above where you marked it. As you can see, I used a razor saw to chop it off.
7730079580_3c72d51b3d_n.jpg


Next, use a sharp hobby knife to "whittle" the plastic away until is even with the end of the motor. This step needs to be done with the expended motor still in place. I removed the motor in order to get a clear picture of this step. Use a sanding stick or emery board to smooth the edge of the cut plastic.

7730079298_7753692648.jpg


What you see in this last picture is what will be the rear of the new model.
 
Last edited:
Following this for sure... Have a dried up one of these sitting in the other room.
 
This next step is to remove the extra material on the top.

Now move the casing to the rear of the model to use as a handle while you work on removing the "panels" between the 3 fin/membranes. In this picture, one of the panels has already been removed.

7730077716_fbab559761_n.jpg


I used a rotary tool (e.g., a Dremel) to remove the bulk of the material in each panel. What I noticed right away is the way the rotary tool created a lot of "fake snow". It accumulates pretty quickly, so you may need to pause partway through to remove the snow.

7730078366_5861c54144_n.jpg


Once you get the majority of the material ground away, use your hobby knife to work into the corners. I found that I could slide the flat side of the blade along the membranes and along the outer rim to help create a clean cut. The central circle is the most difficult part to shape (not that any of this is really hard!),

7730078534_d179eb7c9f_n.jpg


Finally, use an emery board to smooth the edges

7730078656_f3cdf0e49a_n.jpg
 
I think may you should prolong this thread as much as possible. jus sayin!

<chuckle>. If this were a complex build that had multiple exacting steps like an accurate scale model or an L3 build, I could see making it lengthier. But this is a really simple build and the length of the build thread will be commensurate
 
Last edited:
<giggle>. If this were a complex build that had multiple exacting steps like an accurate scale model or an L3 build, I could see making it lengthier. But this is a really simple build and the length of the build thread will be commensurate

In other words Bobby, it won't be another 4-5 seasons in the making. This build might actually leave the ground before a....'ahem'....deadline?
 
Gary....so what you mean is we can actually see the launch in our lifetime? LOL

Got more popcorn poppin fer ya.
I can't figure his direction, this will be fun. Who'd thunked a rocket from an air freshener container?
 
Gary....so what you mean is we can actually see the launch in our lifetime? LOL

Got more popcorn poppin fer ya.
I can't figure his direction, this will be fun. Who'd thunked a rocket from an air freshener container?

Yes. LW is a class act. Not your run of the mill self absorbed rocket star. He told me about it a few days ago but I had no idea it would go the way the build is going.
And yes, I'll have another bag of dat there popcorn if you please.

:pop:

Thanky.
 
More rockets out of trash! Wohoo! I'll have to try this next time I see one.
 
Ah plastics! They are either a blessing to hobby rocketry, or the most evil ooze from the seventh level of Hell to have ever invaded our world.

Personally, I can't tell one polyvinylchromalarrymoecurly from another. So when it comes to finishing plastic parts, it's sort of a crap shoot for me.

I took some 400 grit sandpaper and used it on both the interior and exterior surfaces of the plastic until I had a velvety surface:

7730078748_9341d3e31a_n.jpg
7730078856_d4d229b0c4_n.jpg


Don't forget to wash off all the plastic dust before you go to the next step
 
Last edited:
LW...you will extend the build at least 22 pages correct? I mean what's a build unless it's 22 pages? :rofl::lol:
 
I didn't think about doing this next step until after I did my priming. But I think it would be better to cut the spin tabs prior to priming.

Here is a repeat of an earlier picture:
7730078856_d4d229b0c4_m.jpg


Here you can see that the fins/membranes come to a point at the rear of the shell. I used the knife to cut the rear-most approximately 1/4" (0.5cm) of the joint between the fin/membrane and the shell. This freed 3 triangular-shaped tabs. It is not easy to see in the next photo because of the dark primer, but in the circle you can see where I bent each of the tabs to the left:

7730079076_e3c88ae2f1.jpg
 
Bud lite correct? I'll just have diet dews. Walmart has family paks of milk duds I believe.

This build LW....for some reason I think "spin". Should I get my vertigo tabs?
 
When it came to finishing, I used Rustoleum Painter's Touch 2X throughout. I used 2 coats of grey primer, wet sanded after each coat and then a flat white base coat before the final color coat.

I made the decision that I wanted to paint the engine tube a different color than the body, so in the following steps you will see a "nekkid" tube being used with a partially finished body.


Making the motor mount

Cut a BT-5 (or equivalent) tube to 1.5" (3.8cm). Insert the expended motor in the tube and push the assembly into the top of the body as far as it will go.

NOTE: never insert the tube without a motor in place. Because the central channel tapers at the bottom, an unsupported tube will distort and prevent a motor from going all the way to the bottom.

Place a mark on the tube even with the top of the central channel. Remove the tube and install a 1/2" (1cm) launch lug. Because the top of the channel flares out a little bit, you will need to use a standoff.

7730078970_5bc0638767_n.jpg


After painting the body and the motor mount separately, I pushed the motor mount in place as far as it would go. making sure the launch lug is centered between 2 membranes. Run a bead of CA around the top of the central channel.

7730077606_9c0fff3d2e_n.jpg


I used a paper punch to cut some discs from adhesive vinyl and the model was done!

7761431968_3f46b0fa38_m.jpg
 
For flight prep, insert the motor from the top, NOZZLE END FIRST! Push the motor into the tube as far as you can get it. Make sure the nozzle end is not recessed more than 1/2" (1cm). The narrow throat of the central channel will hold the motor in place. However, if you feel uncomfortable about the motor being secured, you may wrap some tape around the top where the motor is exposed (see the prior photo)

The first flight was July 28th at a club launch. At this launch we were besieged by cub scouts and I spent more time helping than launching. I managed to get the flight in, but at the time I was LCO and couldn't get a launch photo.

This first flight was with an A10-P. It had a slightly helical flight path which I attributed either a wobble caused by the launch lug or by unequal spin tabs. The less-than-linear flight path was the inspiration for the model name: because it reminded me of a gnat in flight. After burnout it tumbled back to earth.

With a flight success behind me, I felt comfortable with doing the build thread.

Oh, there is an added bonus here...

7730077830_f021ea8284.jpg


It works pretty well as a stand for your other 13mm models
 
Last edited:
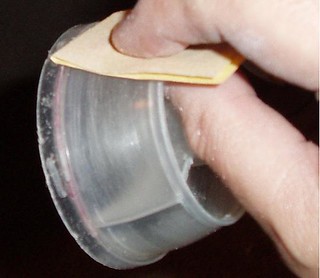
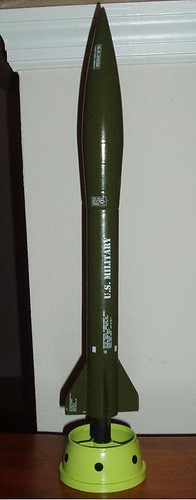
Very clever idea! Sure wish I could have seen the launch!
 
Back
Top