patelldp
Well-Known Member
- Joined
- Jan 23, 2009
- Messages
- 5,647
- Reaction score
- 101
In preparation for the arrival of baby #2 (any day now...) I purchased a 3D printer. I've been using a South Bend 13" lathe to make rocket parts for a few years now but have always been frustrated with the manual nature of the tool. Every rocketeer should own a lathe, but the time involved in making even a pretty simple part is significant. Since we'll be devoting a lot of time to taking care of the new arrival and making sure my almost 2 year old son gets plenty of attention, I wanted a CNC machine.
I purchased a Monoprice Maker Select from Amazon. This printer is quite remarkable for the $330 price tag. It has issues (weak z-axis, non-glass print bed, odd two-piece design), but it will give you satisfying results right out of the box. Couple that with robust support online (https://3dprinterwiki.info/wiki/wanhao-duplicator-i3/) and you can upgrade the printer relatively easily to really improve the print quality. So far I have added the z-brace to stiffen the printer, added a glass print bed, and added a few other peripherals.
Now that the printer is dialed in and ready for just about anything, it's time to start using it! Enter the LOC Ultimate kit that I purchased a bit ago. I've always wanted to build a 7x 29mm kit to use the EX cases that I make and sell on the aforementioned lathe. I've been having fun with some 29mm two-stage flights while staying under our small East Coast waivers, time for some cluster and air-start fun as well.
The kit will be built almost stock. The one exception will be the incorporation of an electronics bay just above the motor mounts. A Raven will reside there and control any air starts that I want to do. The rocket will also separate there for apogee deployment for a "zipperless" design.
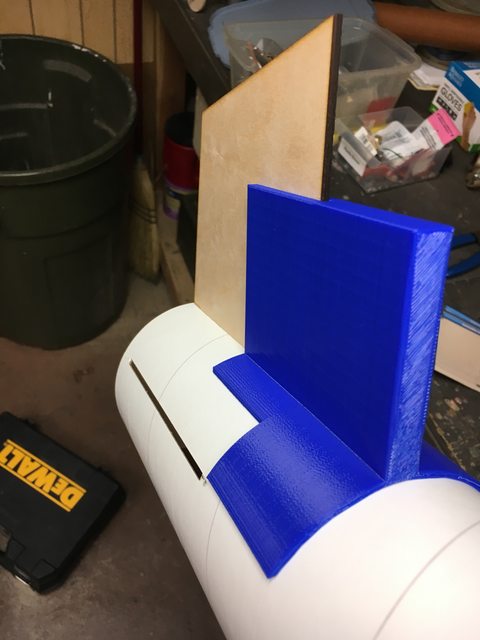
The first print for this project is a fin alignment guide. I hate aligning fins (especially on this 6-finned rocket...), this will almost entirely eliminate that burden.
This is a view of the inside of the guide:

Here's the guide in place with a dry fit fin:
Next up: Designing and printing the Raven sled that will be modular in nature; usable for both this project and my upcoming MAC Canvas 54mm three stager.
I purchased a Monoprice Maker Select from Amazon. This printer is quite remarkable for the $330 price tag. It has issues (weak z-axis, non-glass print bed, odd two-piece design), but it will give you satisfying results right out of the box. Couple that with robust support online (https://3dprinterwiki.info/wiki/wanhao-duplicator-i3/) and you can upgrade the printer relatively easily to really improve the print quality. So far I have added the z-brace to stiffen the printer, added a glass print bed, and added a few other peripherals.
Now that the printer is dialed in and ready for just about anything, it's time to start using it! Enter the LOC Ultimate kit that I purchased a bit ago. I've always wanted to build a 7x 29mm kit to use the EX cases that I make and sell on the aforementioned lathe. I've been having fun with some 29mm two-stage flights while staying under our small East Coast waivers, time for some cluster and air-start fun as well.
The kit will be built almost stock. The one exception will be the incorporation of an electronics bay just above the motor mounts. A Raven will reside there and control any air starts that I want to do. The rocket will also separate there for apogee deployment for a "zipperless" design.
The first print for this project is a fin alignment guide. I hate aligning fins (especially on this 6-finned rocket...), this will almost entirely eliminate that burden.
This is a view of the inside of the guide:
Here's the guide in place with a dry fit fin:
Next up: Designing and printing the Raven sled that will be modular in nature; usable for both this project and my upcoming MAC Canvas 54mm three stager.
Last edited by a moderator:
")