Level 2 Build Thread - 1/4 Scale Nike Smoke

The Rocketry Forum

Help Support The Rocketry Forum:

This site may earn a commission from merchant affiliate links, including eBay, Amazon, and others.

COrocket

Well-Known Member
Joined
Oct 27, 2009
Messages
913
Reaction score
112
For my Level 2 certification, I am constructing a Performance Rocketry 1/4 Scale Nike Smoke. I am planning on using a Pro38 J335 Red Lightning reload, at Northern Colorado Rocketry's new year's day launch.

Picture 1:
All the parts laid out. The kit has a nosecone, 4" fiberglass tube, 54MM motor mount, 2 centering rings, nosecone bulkplate, and 4 fiberglass fins. Next to the nosecone is an Aeropack retainer with a 54-38 adapter. There is also 2 stainless steel U-bolts and quick links. Finally to put it all together, Aeropoxy, Colloidal Silica filler, and GLR expanding foam.

Picture 2:
Sanding down the edge off of the side of the nosecone

Picture 3:
Attaching the U-bolt to the top centering ring. The backing plate had to be grinded along the black line to make room for the motor mount and body tube

Picture 4:
Top centering ring attached to motor tube, with fillet in place


I will try to update this thread with lots of pictures as I make progress. Questions, comments, suggestions are always welcome.

DSC_0787.jpg

DSC_0788.jpg

DSC_0791.jpg

DSC_0795.jpg
 
Will you be using electronics, or will you 'pop at the top' ?
 
Lookin' good! I've always like the Nike Smoke. I'll have to build one myself one of these days.

Nice choice on motor too. Very nice flame. Lotsa mach diamonds. :)

_MG_3572.jpg
 
Very nice. I look forward to seeing this flight - I might even have to drag race you if I decide to bring mine up :D

The Performance Nike is a great kit, that's for sure.
 
Another update for tonight:

Picture 1:
Sanding rear centering ring to fit into tube

Picture 2:
When I installed the motor tube, I found that each of the fin tabs are about 1/4" too long. Each fin was marked and sanded so each fit into the slots.

Picture 3:
Here is my setup for the nosecone bulkhead. I first plugged the hole in the center. Then, I lined up a PML 3.9-3.0 Coupler CR under the bulk plate. 12 holes were drilled for the SS 6-32 screws also shown. Then the SS washers were glued to the bulk plate. The wood Coupler CR will be glued to the nosecone, making the G-10 plate removable, if i ever need to add a tracker or nose weight. Next step is to add the U-Bolt. I was considering running all-thread up the center, but I went for this approach due to the fact that the nosecone is so long.

Picture 4:
Top CR/motor tube is glued into body tube, the bottom CR is just supporting the motor tube while the glue dries

DSC_0796.jpg

DSC_0799.jpg

DSC_0800.jpg

DSC_0801.jpg
 
Will you be using electronics, or will you 'pop at the top' ?

I plan on motor deploy for this rocket, just for simplicity. The body tube is pretty short, so electronics might be tough, especially dual deploy. I might extend the kit if i decide to use a larger motor in the future, with a coupler and forward parachute section.
 
With the Nike Smoke nosecone, you have plenty of room for electronics inside there. Especially something tiny such as the Raven.

Dual deploy from a single separation is fairly well documented, the first method that comes to mind is using a device such as the Tender Descender to keep your main inside the deployment bag until the rocket drops below 750' or so.

Just illustrating some options for you.
 
My son is building the same kit. I really think this is a fantastic kit that can be flown on G to K motors. We plan on sending it over mach and so really fortified the fins. What we did was install the forward center ring and the fins first and glass the fins from the inside. Although this was difficult with two people it went well. After that we installed the motor tube and foamed it in. For electronics we will install a 54mm tube into the nose cone. The main chute goes in the 54mm tube and the av bay will be in a coupler tube which will eject from the nose cone tube.
 
Here are some pictures from attaching the rail buttons...

Picture 1:
I used two pieces of tape to find the center between the two fins, then used a flexible tape measure to double check

Picture 2:
I used this piece of aluminum to draw a straight line down the tube. It is not ideal as say, a 90 degree bracket, but I carefully made sure that the channels sit flat, and it worked fine.

Picture 3:
Here are the 1010 rail buttons to be used with the rocket. Due to the shoulder on the nosecone, I also got nylon spacers. I got them a while ago, but I think that Lowe's has them in the fasteners section. I also got longer spacers in case they don't provide clearance. Finally, i am using 8-32 PEM nuts from Missile Works.

Picture 4:
Here is the lower PEM nut installed. Unfortunately, i did not have a scrap of fiberglass to test on, so i had to start with a small drill bit and work my way up. Eventually, a 1/4" bit did the trick.

Picture 5:
The finished result. I was happy the way the PEM nuts turned out, very simple and secure

DSC_0803.jpg

DSC_0805.jpg

DSC_0807.jpg

DSC_0814.jpg

DSC_0816.jpg
 
And finally, a bit more of work for today

Picture 1:
The finished rail buttons. They are 2" and 12" from the bottom of the body tube

Picture 2:
Roughing up the fin area before 1st fin goes on

Picture 3:
First fin attached. I just eyeballed it, then secured it with tape to dry. Standard Aeropoxy is used for initial tacking. I could have done all 4 fins with a quick cure epoxy all at once, but im not in a very big rush.

Picture 4:
I added a fillet to the forward end of the top CR. The only real way was to apply it with my gloved finger. Looks ok, but im sure it will be plenty strong.(It took about 10 attempts to get the camera to focus on the CR instead of the body tube)

Thats my progress so far. I really like the suggestions of installing a 54MM tube in the nosecone for electronics, and using a Tender Decender. It would be a good opportunity to try something new. The only obstacle is that I have two Missile Works altimeters, which are strictly barometric. I don't think there is a place near the front of the rocket that would give accurate ambient pressure during flight, due to the nosecone lip. (Maybe it will be an excuse to get a Raven)

DSC_0817.jpg

DSC_0821.jpg

DSC_0827.jpg

DSC_0830.jpg
 
My son is building the same kit. I really think this is a fantastic kit that can be flown on G to K motors.

G?

That's a bit optimistic in my opinion - I've found the sweet spot for this kit to really be more around the 4 grain I motors, although it also LOVES larger J motors. The AT J825R is probably my favorite flight on mine to date:

 
Hey Everyone,

No real progress to report yet. I'm in the process of tacking on the last fin, then I will get started on fillets. I'm having trouble with my original plan of using the wood CR on my nosecone, to make the bulk plate removable. I had to sand a lot of the already thin CR to make it fit.

I was wondering if anyone could post a picture/drawing of how they put an avionics bay in their nose cone, because while I will be doing a motor eject on the cert flight, I would like to build the rocket electronics "ready". As I previously posted, I really like the idea of a Tender Decender, because I could separate the rocket drogueless at apogee, then have the TD wrapped around the chute that is attached to the nosecone bulkplate. Seems like a good plan, I would just like some ideas on electronics mounting. Finally, is there any way to put a barometric altimeter such as my Missileworks, in a nosecone? I am just worried about how to get good pressure readings.

Thanks!
 
Here's how I do e-bays in my nose cones. It seems very similar to your setup. It is just a ring that glues into a coupler with a bulkhead screwed to it. I use the same design for mounting radio beacons as well. It takes time and a steady hand to make, but the result is easy to use and nearly indestructable.

Also, this is in a 3" nose cone.

Picture 202.jpg

Picture 203.jpg
 
I have to concur great! kit, Your build is coming along nicely as well. I have the Performance Rocketry 5.5" Nike Smoke coming now, I got mine with a 75mm MM. I'll be flying that come Red Glare X. Good luck on your L2 flight.
 
I now had a chance to work some more on the rocket, and now I'm almost finished.

Picture 1:
The internal fillets were done with the "popsicle stick" method. Here you can see the outer fillet between the fin and the body tube. I used Aeropoxy and Colloidal Silica.

Picture 2:
The plywood CR is glued into the nosecone and later sanded flush.

Picture 3:
The U-Bolt for the nosecone is drilled in the Bulkplate and everything is screwed together

Picture 4:
After the internal fillets cured, the fincan was foamed. Normally I would foam the four separate sections, but the tabs on the fins do not touch the forward CR, I had to do it all at once. Here is the cured foam. I made a pretty good guess as to how much it would expand.

Picture 5:
The foam is trimmed down, and the aft CR is now secured. All that is left is to glue the Aeropack retainer, external filets, and possibly do a small filet between the aft CR and body tube.

DSC_0805_2.jpg

DSC_0808_2.jpg

DSC_0809_2.jpg

DSC_0810_2.jpg

DSC_0815_2.jpg
 
Looks great :D

I'll drag race you on I800s sometime.
 
best part of the build is that you're using K'nex to hold up the body tube :p
 
Well, tonight I finally finished the rocket :D
Tomorrow I will be doing some motor/rocket prep, then on Saturday, I will go for my L2 (2nd attempt) at Northern Colorado Rocketry's new years day launch. I promise to get lots of pictures, and maybe a video

Picture 1:
For the paint, I went with Dupli-Color Enamel. I found it at Napa Auto Parts, and I figured I'd give it a try. Colors are gloss white, cherry red, and schoolbus yellow

Picture 2:
The rocket primed and with the white coat on it. To support the rocket, I have a thick wood dowel, supported by 2 K'nex stands. I saw that a few people have commented on the K'nex stands, so if anyone is interested, I can share some detail photos on the stands. They work great, and can be built to any size depending on the rocket.

Picture 3:
Fins are masked off, ready for the colors.

Picture 4:
A shot of the final product. I was really pleased with the Dupli-Color paint, very glossy, it looks wet even after it has dried

Picture 5:
The final finishing touches. JB Weld the 54 MM Aeropack retainer, re-attach the rail buttons, and add the "United States" decals.

Only thing left is to verify the stability, and pray for good weather Saturday

DSC_0031.jpg

DSC_0032.jpg

DSC_0033.jpg

DSC_0051.jpg

DSC_0053.jpg
 
Looks great. I look forward to seeing it this Saturday :D
 
The launch was scrubbed due to weather, unfortunately.

Yep...what he said. Right now I think I am going to ship the rocket down to Florida where my college rocket club launches. Hopefully I will get to launch before the end of January. It is pretty cold in Colorado this time of year. Stay tuned for updates!
 
Well, I've been stuck in the Charlotte Airport for the last few days, so to pass the time I thought I would tell you about my (failed) first attempt at L2. This was during a normal club launch on July 10-11, 2010 at Northern Colorado Rocketry. I was using a 1/4 scale patriot, on a CTI J285 Classic. Estimated altitude: 4000 ft. I had flown this rocket multiple times on 4G motors with no trouble finding it, so a 5G motor didn't really worry me. Wind was out of the north, nothing extraordinary. As you can see from the last picture, the rocket took a fairly good weathercock. The skys were fairly overcast, so the tracking smoke was hard to see. I expected to see the red 48" parachute, but I never saw it come down. I later heard that the upper winds were greater than expected from cjl, so I had to search down wind for as far as the eye could see (literally). After no luck, I checked where it might of lawn darted, still no luck. After I lost the Patriot, i started the Nike smoke. Hopefully I will have better luck this time.

Picture 1:
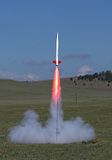
My rocket just starting to smoke

Picture 2:
The rocket taking off very quickly. My mom was shooting this photo, which is rather impressive that she caught it considering the acceleration

Picture 3:
A zoomed-in version of Picture 2, showing some sweet mach diamonds :eyepop:

Picture 4:
The last I saw of the rocket :confused:

DSC_0023.jpg

DSC_0025.jpg

DSC_00250.jpg

DSC_0026.jpg
 
Well, tonight I finally finished the rocket :D
Tomorrow I will be doing some motor/rocket prep, then on Saturday, I will go for my L2 (2nd attempt) at Northern Colorado Rocketry's new years day launch. I promise to get lots of pictures, and maybe a video

Picture 1:
For the paint, I went with Dupli-Color Enamel. I found it at Napa Auto Parts, and I figured I'd give it a try. Colors are gloss white, cherry red, and schoolbus yellow

Picture 2:
The rocket primed and with the white coat on it. To support the rocket, I have a thick wood dowel, supported by 2 K'nex stands. I saw that a few people have commented on the K'nex stands, so if anyone is interested, I can share some detail photos on the stands. They work great, and can be built to any size depending on the rocket.

Picture 3:
Fins are masked off, ready for the colors.

Picture 4:
A shot of the final product. I was really pleased with the Dupli-Color paint, very glossy, it looks wet even after it has dried

Picture 5:
The final finishing touches. JB Weld the 54 MM Aeropack retainer, re-attach the rail buttons, and add the "United States" decals.

Only thing left is to verify the stability, and pray for good weather Saturday

Can't believe I never thought of that! I have like 8000 k'nex in my garage! Any chance I can get a picture of the stand?


Sorry about the loss, I'm sure it will turn up some time!


Braden
 
Can't believe I never thought of that! I have like 8000 k'nex in my garage! Any chance I can get a picture of the stand?


Sorry about the loss, I'm sure it will turn up some time!


Braden

Unfortunately, I just left for college. This was a christmas break build at my house. The best picture I have is the last one in post #20. If you study that, you should be able to replicate one pretty easily, or you can design your own to fit whatever size rocket you have. Anywho, I have a pretty extensive history with K'NEX. I saw some other people interested in the stand, So I thought I'd post these pictures. It's completely unrelated to rockets, but most people still find it amazing. Before I entered high school, I built a 1/48 scale of the Golden Gate Bridge. Off the top of my head, 160 feet long, 20 feet high, and 70,000 - 80,000 pieces :D:eyepop:. K'NEX was generous enough to donate all the parts.

Picture 1:
Myself in front of one of the towers

Picture 2:
Adding road to the center span

Picture 3:
End of bridge and anchor detail

Picture 4:
My dad, my friend and myself(far right) and the television news person from Denver

Picture 5:
Wide view of bridge, almost completed

Chris by bridge.jpg

P5290067.jpg

P5290098.jpg

P5280065.jpg

P5310113.jpg
 
I have to concur great! kit, Your build is coming along nicely as well. I have the Performance Rocketry 5.5" Nike Smoke coming now, I got mine with a 75mm MM. I'll be flying that come Red Glare X. Good luck on your L2 flight.

Gary, Just out of interest, is the 5.5" smoke a DD version with coupler and bulk plates or single deploy like the 4" version?

COrocket, sorry to hear of the loss of your Smoke, they are a great rocket....love the bridge too!
 
Lamp:
The 5.5" is a DD bird, Most any 75mm Load would put it allot higher than where I'd like to pop the main, For my location anyway.
 
COrocket, sorry to hear of the loss of your Smoke, they are a great rocket....love the bridge too!

Just to clear things up...I didn't loose the Smoke...It was a side story about my first shot at L2. I have not launched the Nike yet. Hopefully I will get a chance in February.
 
Back
Top