HATTR Action Figure Rocket build thread

The Rocketry Forum

Help Support The Rocketry Forum:

This site may earn a commission from merchant affiliate links, including eBay, Amazon, and others.

DaveCombs

Carnivore, Interrupted
Joined
Jan 18, 2009
Messages
3,096
Reaction score
6
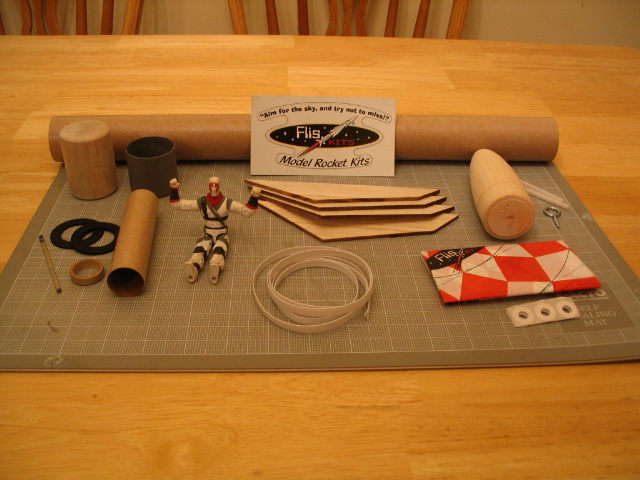
We all do it... You look at something around the house and say to yourself, "I could use that for a rocket..."

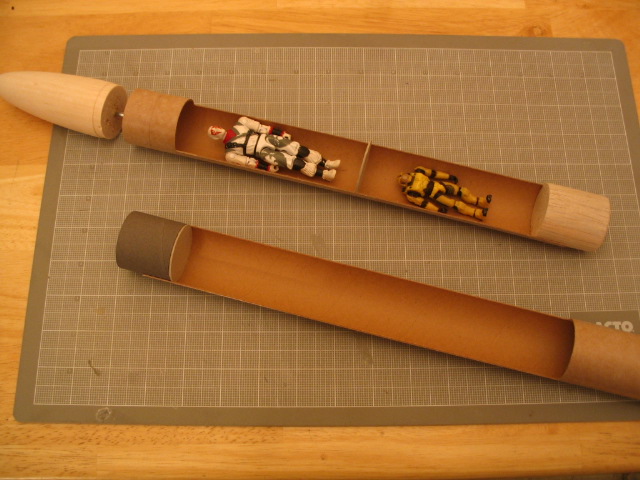
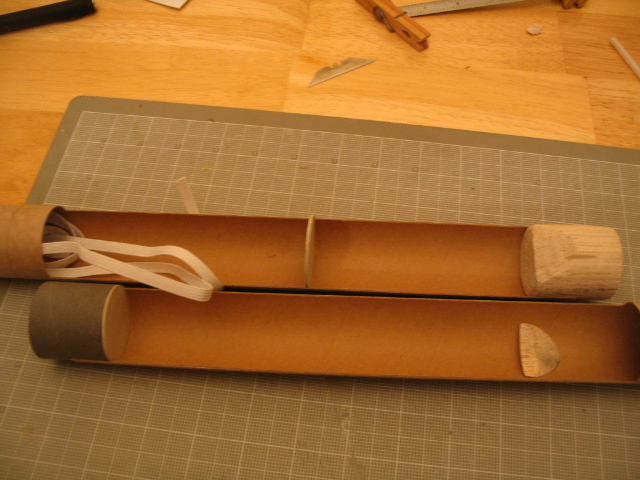
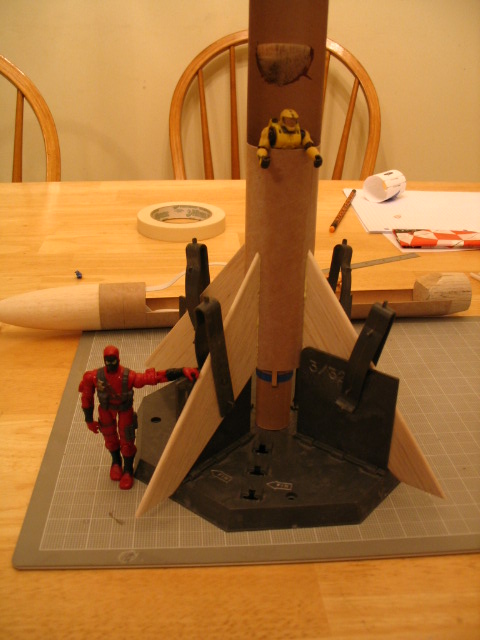
My youngest son was playing with some of his action figures, and it came to me as I was looking at my Estes Cluster Bomb rocket - why not make a rocket that drops action figures with parachutes?

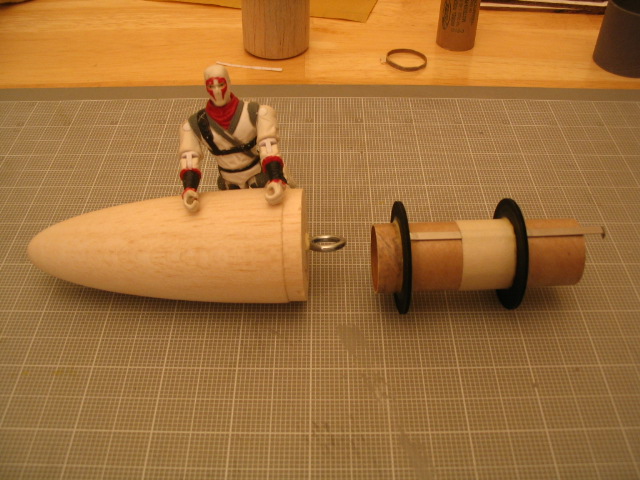
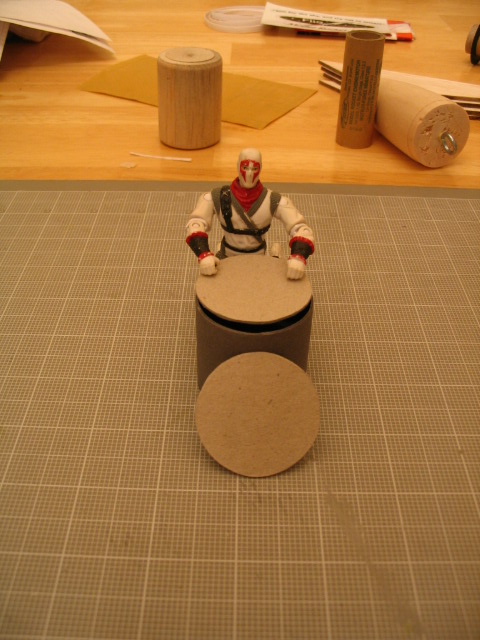
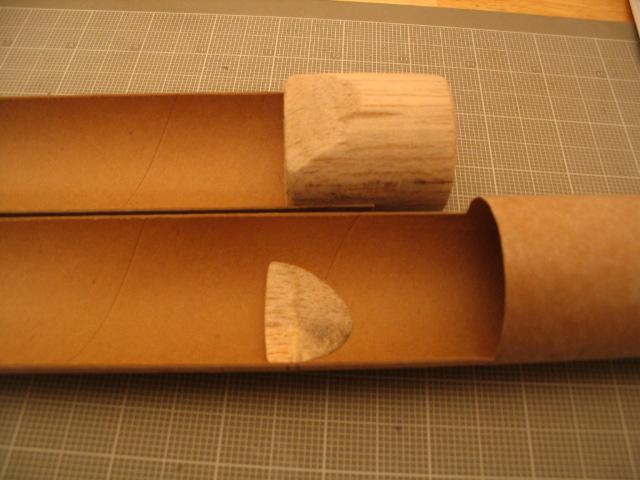
I had a couple of FlisKits Rhinos left over from our Scout build, and the figure Nick was using fit inside the airframe very comfortably. And so it began - the HATTR (High Altitude Troop Transport Rocket).

I started out with a drawing on graph paper, which I scanned and emailed off to Mr. Flis Himself. I needed input on the deployment system. The original scanned drawing is too big to post here.

Jim shot me back an improved design that relocated my recovery system (which was originally in the lower part of the airframe, just above the MMT) up to the top of the airframe. He also made a suggestion on how the balsa block can kick out upon ejection. Finally, he suggested that I may want to consider a 24mm MMT.

Attached is the PDF of the reworked design.

View attachment Dave Combs HATTR.pdf
 
I begged and pleaded with him to get some balsa blocks for BT-60, and he obliged right after Christmas. So, here are the parts: most of the original Rhino kit, a coupler, the balsa block, 24mm MMT, and the "test subject" - we'll call him Minion for now.

HATTR_parts.jpg
 
In order to maximize the available space in the recovery bay (inside the coupler), and knowing that the nose cone won't come off this rocket, I cut the shoulder down to 1/4" and installed the screw eye. Minion is assisting, obviously in awe of the 24mm powerplant to the right.

HATTR_noseMMT.jpg
 
I needed to fab a couple of bulkheads, one to seal the recovery bay, and one to separate the bays for the action figures. A quick look around the school supplies yielded the thick fiberboard from the back of a tablet.

HATTR_bulk.jpg
 
I won't go into the gory details, but if you look at the drawings, I had to cut the airframe into similar halves. Before this, I spent a significant amount of time putting pencil marks all over the airframe, trying to figure out where I have enough room to put everything.

I'm glad I didn't drink much pop yesterday when I cut them, because those were some of the best, most straight cuts I ever made. (Thanks to the edge of my kitchen counter as well...)

Once the cuts were made, I was able to fit the nose cone, coupler and bulkheads into place. Here, lying in repose, are Minion and his friend Master Chief.Yellow, checking out their new digs.

HATTR_bays.jpg
 
Tomorrow, I'll add in the motor mount and cut the angle into the balsa block. The fins should be on as well. I'm considering some "hooks" that could hold the halves of the airframe together better, but I'm going to wait until after the first launch to see if they're necessary.
 
Got a little more done tonight. After slicing the "ramp" wedge out of the balsa block, I glued the block in place on the nose cone half, and the ramp on the motor half. I also coated the surfaces that will collide with each other with medium CA. I'll probably sand it down a bit and apply another coat for hardness.

HATTR_block.jpg


HATTR_blockclose.jpg
 
Minion's evil brother (we'll call him Red - because he wants me to) oversees the fin attachment. Master Chief.Yellow, as usual, is clowning around. (You can see that the MMT is in place already.) When the fins set up and I get the fillets in, I'll attach the shock cord with a trifold inside the coupler. And this time, I might remember to put the launch lugs on before I go to the paint booth...

HATTR_fins.jpg
 
Had a very similar idea but was going to use about 20 little green army men with parachutes. My son got one at a chucky cheese and it sorta gave me the idea.
Love the balsa block idea very nice. Good Luck
 
Thanks, everyone, for the comments.

I just need to get the launch lug on (figured out that I don't have a 3/16", so Loopy is gonna hook me up) and it's ready for a test flight. I'm pretty sure a D12-3 will be the right motor; with the weight and the big fins. I also think I'll put the victims, er, figures in for the first launch; I have a couple of pre-made chutes in my emergency repair kit to use for the Minions.
 
... And this time, I might remember to put the launch lugs on before I go to the paint booth...[/img]

I'll believe it when I see it...granted, that means I have to remember to bring the darn thing to you, doesn't it?
 
This is just to cool, you may be on to something.

Dan
 
Thanks, Dan. When it's all done and flight tested, I'll probably put comments into Jim's PDF for pars lists and dimensions if someone wants to try this on their own.
 
very very cool. can't wait to see how well this works, my kids would LOVE this!
 
Interesting approach. Reminds me a great deal of the CMR Break-Away..
https://www.oldrocketplans.com/cmr/cmrC1/cmrC1.htm

Here's my take on the parachuter mission- filled this guy with about 35 little guys on chute, and about 8 4 inch sized ones. Used a piston ejection system to get em all out in the sky. This was built for a club launch, but then used it for the NARAM Imagination Celebration.

This side, red and blue for the 82nd. Other side black and yellow for the 101st. Hooyah!

kj

airborne.jpg
 
This is coming out SO kewl :)

Glad my sketch could help. Haven't heard much, what's the status? Get that lug on? Painted? Flown??
 
Lug's on, and I'm gonna see if I can get it in the air either today (busy family schedule) or tomorrow (dicey weather). But pics will be posted!
 
DaveC,

I will be very interested to hear your evaluation of your design after you have a few flights on this airframe, specifically, how you like the condition of the BT and the external appearance.

I did something similar once but was unhappy with the way a long lengthwise cut on paper BT turned out--after a while, it didn't close up as tightly, didn't fit together quite so pretty, and the half-sections of BT started to uncurl.

I hope yours works better than mine did-
 
this is a cool build, looking forward to the final results.

i had an estes kit a long time ago that held one action figure with a chute, and ejected it out the end, (nose cone was on a streamer). kinda worked, but the thing was more or less a pre-built, with a weird plastic fin assembly and engine mount, the fins warped badly for some reason, and the engine mount broke.

other trouble, is with a rocket on a chute, a action figure on a chute, and a nose cone on a streamer, you have a lot of parts to find. (never did get that action figure back the last time...)
 
Launch yet?
No; you know what kind of weather we've been having. :cry:

You know you're gonna have a bad day when you get an automated email from your club scrubbing the launch day for 20-30 MPH winds...

I'm watching the weather closely, though, because I have a bunch of stuff to throw into the air.
 
Back
Top