Hnefi
Well-Known Member
- Joined
- Jul 30, 2014
- Messages
- 101
- Reaction score
- 2
Thinking about my next project after I hung my stretched Leviathan on top of a nice grove of trees last weekend, and I have been wanting to learn how to properly dual deploy. For me, the fun in rocketry has been trying to learn a new "Technique" with each build... First it was filling balsa using CWF, then it was a simple two stage black powder, then it was a real paint job with primer & wet sanding, and most recently it was MPR construction with TTW fins, baffles, kevlar cord tied to MMT, etc etc... There's so much to learn at each stage and I don't want to just fly bigger and bigger and bigger motors until I hit the limits of what's attainable on my time and budget. I've done the standard progression from E2X kits on A/B, up to my first 'E' motor in a Vagabond, and recently some scratch built rockets designed for F's and G's... The club that is local to me only flies LPR and MPR, and since I don't have the resources to get down to NY/Potter like a lot of Canadians do for high power, I've been wanting to try to push altitude boundaries on the MPR propellant limit... That's what ultimately led me to putting a modded Leviathan up on a longburn CTI G54 RL, simmed to 2100'. Tracked it all the way with an arrow straight boost, but it was realistically way too high for the wind conditions that day.... My mistake, learned the hard way with losing my first CTI case.
So here's what I have been thinking.... I am likely going to build a DX3 and modify it for DD, since it has a fair sized payload tube with 1 bulkhead already in the kit. Do you think it's fair to just go drogueless for a kit this small and throw a sheet of mylar in there for visibility? I was thinking that if I convert the payload tube into an ebay, I will need some other setup than what I have seen on many of the HP build threads where you have a switch band with tubes butting up on both sides of it.... My first thought was to just buy or make a bulkhead on the other side of the payload tube, but then I would have to cut the NC shoulder for a bulkhead as well, and drill holes for shear pins. Also, the payload tube according to Madcow's supplied rocksim file is 10.5" long, which is super big for an ebay that I would likely only need a battery and simple Eggtimer Quark or something. I think it would make the most sense logically to put the ebay in the coupler (which is 5" long should be plenty of room based on some of the ebay setups I've read about), and then house the drogue/streamer/upper deployment in that payload tube. Thoughts on where the best place to house the ebay?
Secondly, I have a question about allthread. Most ebays I see here use a length of allthread that runs right through... Might be a stupid question but how do you secure the sled to the allthreads??? I am assuming just sand the allthread flat on one side and epoxy it? I don't have a belt sander or machine tools so I am thinking I might try to use angle brackets to screw the sled to instead of grinding down a steel piece of allthread flat on one side, is that considered safe and acceptable?
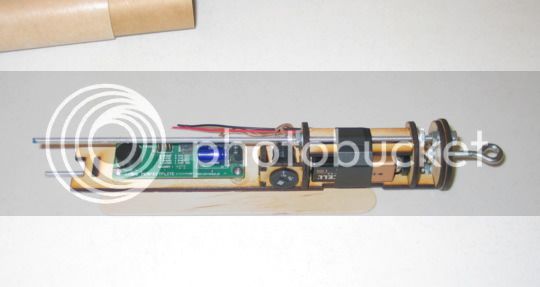
Thirdly, I've been reading that a lot of small DD projects just use glove fingertips or some disposable plastic for charge containment... Insert ematch, tape up, and fly. I then would basically just set the ematch leads into the eggtimer the night before at home, using a bit of bluetack to seal the holes in the bulkheads. The question is this: what are the white wiring terminals I often see on the outside of ebays?? For example, photo #3 in this post from conman's jr L1 build: https://www.rocketryforum.com/showthread.php?60950-Super-Dx3-Junior-level-1-Cert&p=671963#post671963
I'm assuming those are screw terminals so that the ematches just go into those rather than having to disassemble the ebay to hook up to the altimeter itself?
I have done a decent amount of soldering before with through-hole components, so I am thinking that making the jump to SMT won't be too bad.
Finally, I'm thinking about ground testing. For me this is ESSENTIAL since I don't want to put cases & more expensive rockets at huge risks anymore... Do you just ground test the drogue deploy by using a shopvac or something like that to drop the pressure by the vent hole, and assume the main works fine after that?
Thanks for reading this long smorgasbord of questions from a noob. Appreciate this forum a ton because of the amount of help you can get from very experienced rocketeers.
So here's what I have been thinking.... I am likely going to build a DX3 and modify it for DD, since it has a fair sized payload tube with 1 bulkhead already in the kit. Do you think it's fair to just go drogueless for a kit this small and throw a sheet of mylar in there for visibility? I was thinking that if I convert the payload tube into an ebay, I will need some other setup than what I have seen on many of the HP build threads where you have a switch band with tubes butting up on both sides of it.... My first thought was to just buy or make a bulkhead on the other side of the payload tube, but then I would have to cut the NC shoulder for a bulkhead as well, and drill holes for shear pins. Also, the payload tube according to Madcow's supplied rocksim file is 10.5" long, which is super big for an ebay that I would likely only need a battery and simple Eggtimer Quark or something. I think it would make the most sense logically to put the ebay in the coupler (which is 5" long should be plenty of room based on some of the ebay setups I've read about), and then house the drogue/streamer/upper deployment in that payload tube. Thoughts on where the best place to house the ebay?
Secondly, I have a question about allthread. Most ebays I see here use a length of allthread that runs right through... Might be a stupid question but how do you secure the sled to the allthreads??? I am assuming just sand the allthread flat on one side and epoxy it? I don't have a belt sander or machine tools so I am thinking I might try to use angle brackets to screw the sled to instead of grinding down a steel piece of allthread flat on one side, is that considered safe and acceptable?
Thirdly, I've been reading that a lot of small DD projects just use glove fingertips or some disposable plastic for charge containment... Insert ematch, tape up, and fly. I then would basically just set the ematch leads into the eggtimer the night before at home, using a bit of bluetack to seal the holes in the bulkheads. The question is this: what are the white wiring terminals I often see on the outside of ebays?? For example, photo #3 in this post from conman's jr L1 build: https://www.rocketryforum.com/showthread.php?60950-Super-Dx3-Junior-level-1-Cert&p=671963#post671963
I'm assuming those are screw terminals so that the ematches just go into those rather than having to disassemble the ebay to hook up to the altimeter itself?
I have done a decent amount of soldering before with through-hole components, so I am thinking that making the jump to SMT won't be too bad.
Finally, I'm thinking about ground testing. For me this is ESSENTIAL since I don't want to put cases & more expensive rockets at huge risks anymore... Do you just ground test the drogue deploy by using a shopvac or something like that to drop the pressure by the vent hole, and assume the main works fine after that?
Thanks for reading this long smorgasbord of questions from a noob. Appreciate this forum a ton because of the amount of help you can get from very experienced rocketeers.
") Trust me... DD is worth it. Saved my butt on a few rockets.
Trust me... DD is worth it. Saved my butt on a few rockets.