First build: a zipperless, mid-power, Yellow Jacket upscale

The Rocketry Forum

Help Support The Rocketry Forum:

This site may earn a commission from merchant affiliate links, including eBay, Amazon, and others.

Sparkytfl

Well-Known Member
Joined
May 11, 2012
Messages
236
Reaction score
0
I've got a pile of parts in the mail, about to start a build. I've done fifteen or twenty estes kits, but this will be my first scratch build, and my first one to use anything bigger than a C6. Just want to make sure nobody sees any fatal flaws to my design that might be obvious to anyone else. Then I'll be starting right away when my parts arrive on friday.

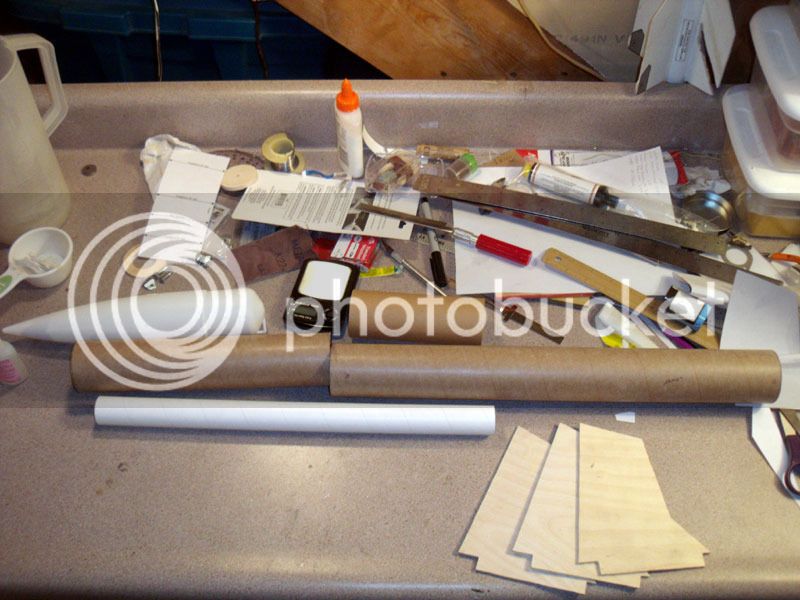
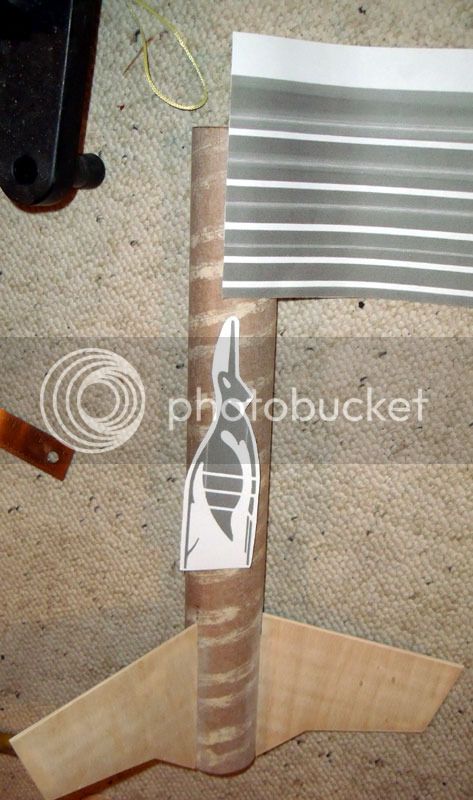
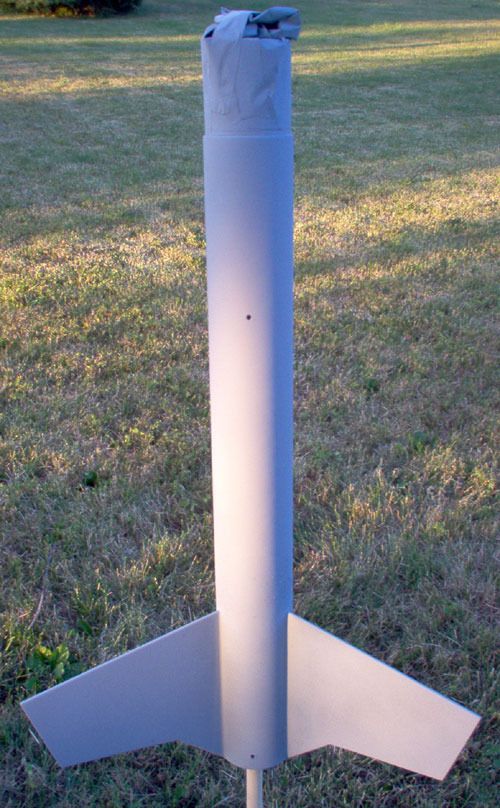
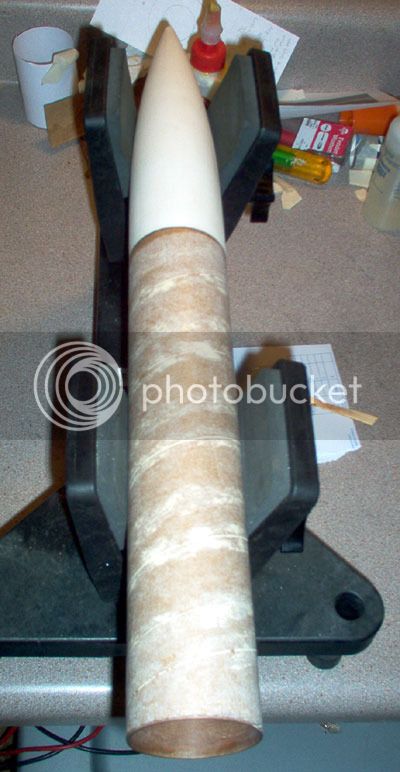
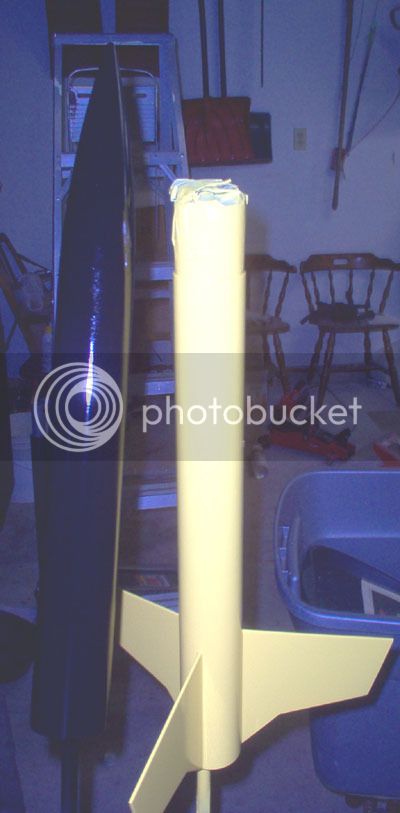
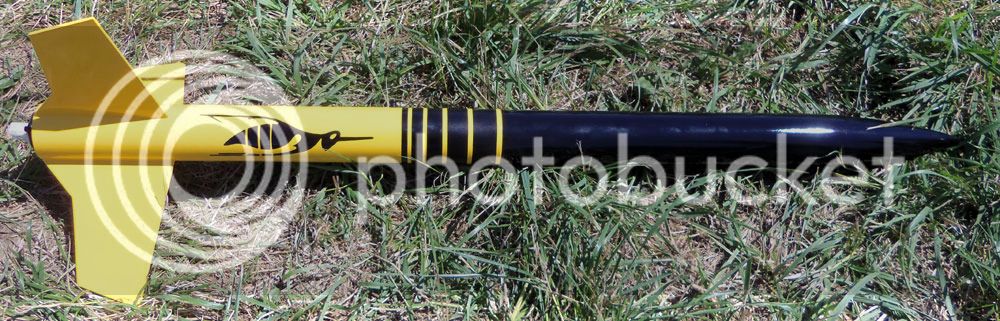
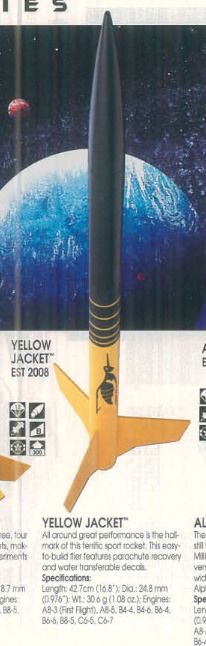
This will be an upscale of what I think is one of the most attractive kits from my first time around in the mid nineties. The Yellow Jacket.
yellow96cat.jpg


Here's the basic plan.
yellow.png


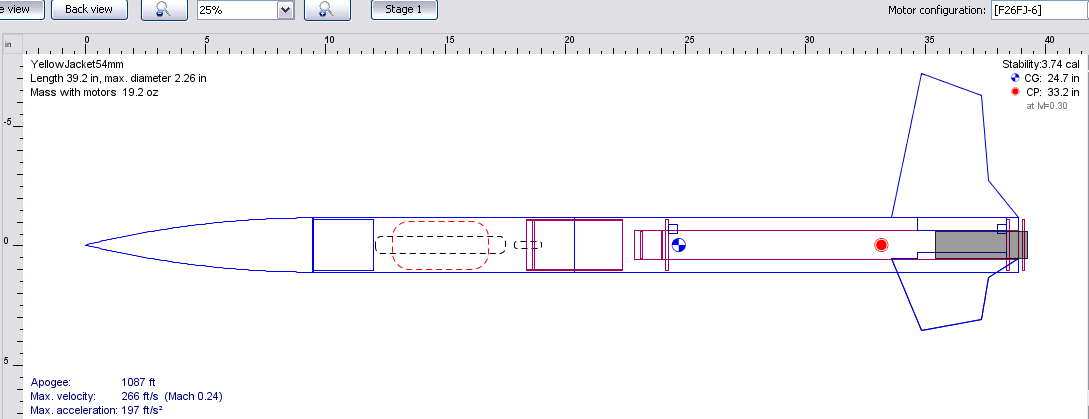
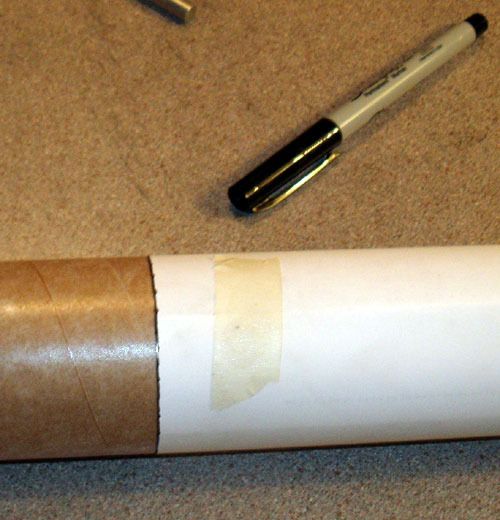
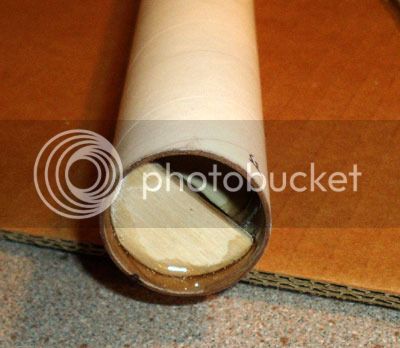
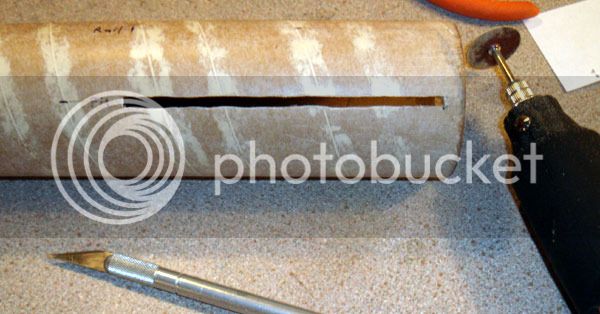
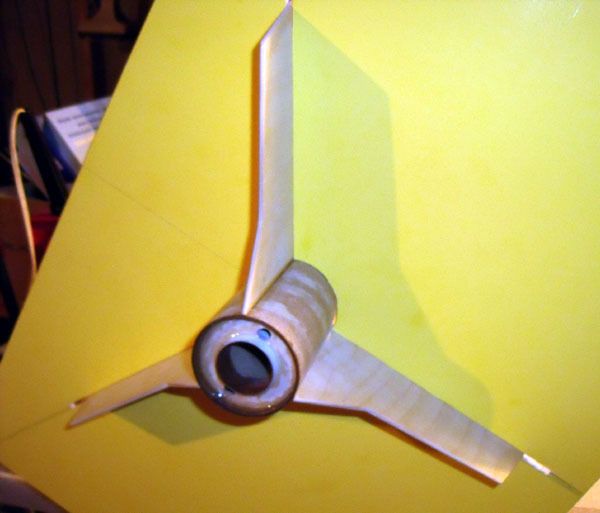
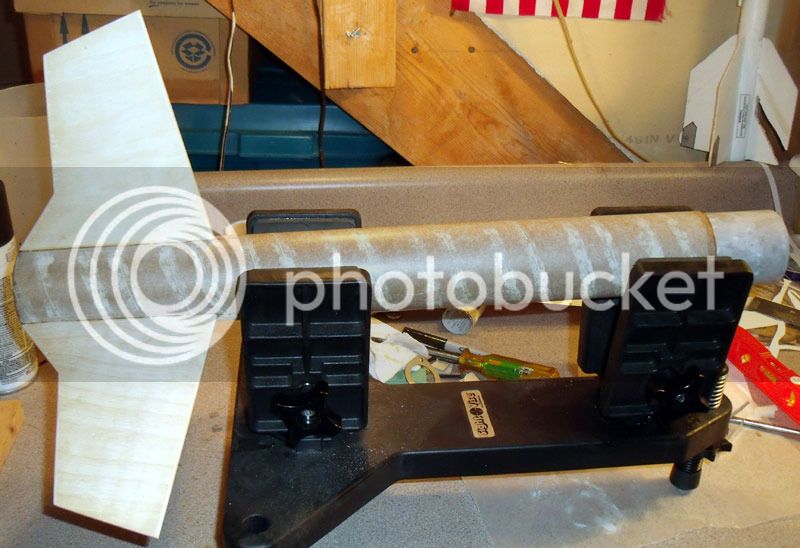
It will be 54mm loc tube, 29mm motor, about 39inches and about 16ounces empty. Plywood fins, through-the-wall. It will be center break zipperless with baffles in the end of the motor tube as inspired by all of qquake2k's awesome build threads. Nylon chute 24 inch, not sure about shock cord yet. It will use rail buttons since the local club requires rails for larger than E. They'll be screwed into blocks glued to the centering rings.

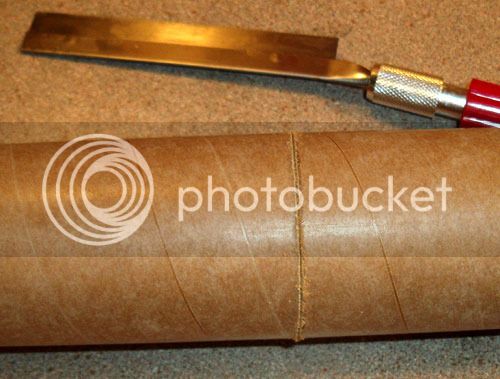
I have a few questions about the center break design. The location of the break is being determined mostly by the look of the original, with the break right where the black half meets the stripes. This leaves me about six inches of tube to fit the chute and shock cord. Will that be enough to fit a 24inch nylon? I've never used nylon and dont know how small it folds. I might have to move the break to below the stripes.

I'm not entirely sure on how to determine the length of the inner tube. I know making it longer and the ring forward will help the ejection pressure, but will moving it too far forward blast the cone off with too much force? The current design has it as long as it is so that the front centering ring (along with the rail button) will be around CG. I do have room to make it extend a few inches into the coupler. By the way, is there a standard coupler length in these center breaks? I'm figuring about 4.5inches so it sticks 1 diameter into each tube.

How many of those half-moon bafles should it have, and is there a trick to how far apart to space them?

How's the CG and CP look, is that good or will the little bit of overstability give problems with it flying into the wind like my Bertha?

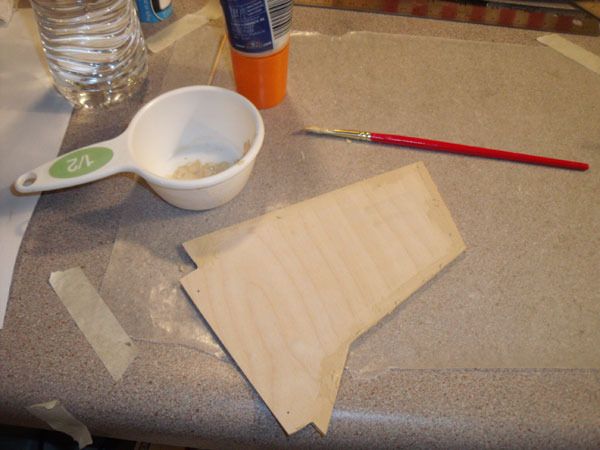
I havent bought plywood yet, is 1/8 going to be good, or should I go 3/16? Typical engine will be an F, but I'd like it to survive on a bigger G if I feel like launching it to 2000ft. It probably wont be used for lv1 since I dont trust it returning from 4000 on single deploy. I'm planning on epoxy for structural bits and wood glue for fillets. Five minute epoxy like from the hardware store, is that what everyone uses?

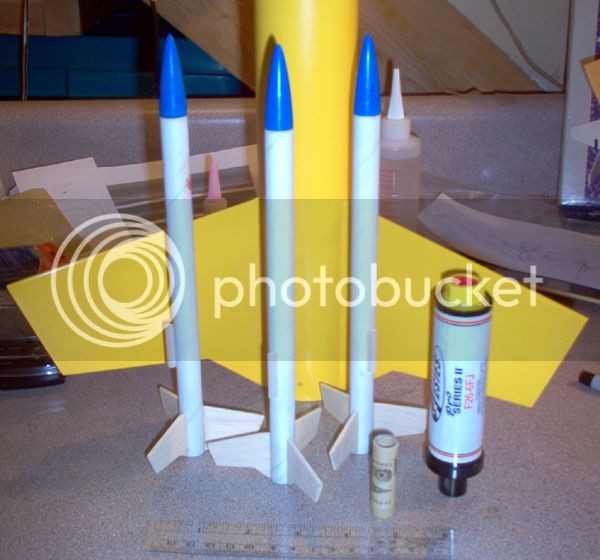
I'll also be building a swarm of bt5 downscales, plus my estes hornet. Ironically, I'm terrified of bees.
 
the bigger question is; where is the cg when you stuff a G80 (or G64) up the pipe :)? rule of thumb design with the biggest/heaviest motors you plan to use( or might use) in mind. 1/8" ply should work fine(note Estes is using 3-ply in 1/8" for the 1st 4pro series rockets).
rex
 
6" of 54mm body tube isn't a lot of volume for a nylon chute and whatever shock cord you use. What about if you lower the break to where the black stripes meet the yellow? That would give you a little more room. Plus you can use a thin mil chute, which will fold up smaller. Most of my builds are 3" or 4", and use 6" long couplers. A shorter coupler should be fine for yours, 4-1/2" sounds about right. My motor tubes go into my couplers about an inch or so. Lately I've been using three half moons, about 1/2"-3/4" apart. 1/8" birch plywood should be more than adequate for this one. I've been getting pretty good stuff from Michael's.

I'll be watching this build with interest, and thank you for the compliment!
 
Thanks for the input.

According to openrocket, switching between the f26, f40, g50, and g80 estes engines only moves my cg around less than an inch. I'll look into reloads later, but the cg should still stay well ahead of cp. Been grabbing estes engines at hobbylobby with the coupon.

I'm using the cheap dynastar nylon chute from apogee, and will probably have to wait until it arrives to see how much room it'll need. I usually fold low power ones in half before wrapping the shroud lines, following that same method would take up all six inches of my top section, so maybe I can fold it in thirds, or maybe I'll move the break. I could always split it within the stripes. It really depends on my shock cord arrangement too. I have 20ft of #300 kevlar on the way, but am used to elastic so dont really know how much to use. Three body lengths at 10ft? Either way it shouldnt take up too much extra space.
 
after playing with the YJ in open rocket, looks like one could down size the fins a bit from what you have (90% of your current size) and keep the overal look. bear in mind that Estes had a bigger difference in engine weight etc. so their stability margin with a C6-5 is down around 1.5 cal. haven't quite managed to dupe your bird yet :), just playing, over 2k feet w/ a G80.
edit
did you notice that your aft centering ring is hanging out in the breeze? :)
 
Last edited:
It really depends on my shock cord arrangement too. I have 20ft of #300 kevlar on the way, but am used to elastic so dont really know how much to use. Three body lengths at 10ft? Either way it shouldnt take up too much extra space.

Keep in mind that Kevlar doesn't stretch at all. If it were me, I'd go more than 10ft. In fact, I'd probably use paracord or something similar, instead of Kevlar. It will stretch a little. With the baffle, you shouldn't need to worry about it melting. In fact, I've even used 5/32" poly cord in similar sized rockets with no problems.
 
did you notice that your aft centering ring is hanging out in the breeze? :)

That's actually meant as an approximation of a metal ring motor retainer.

4000ft on an I? Almost makes me want to go lv1, but then I'd build something heavier I'd be less likely to lose. Those fins look smaller than 90%. I have them at about 5.3in root upscaled, though I dont have an original and dont know for sure the original dimensions. I based it off scans of the fin sheet found here https://www.spacemodeling.org/JimZ/est2008.htm They seem to be set at the correct resolution to be actual size, same with the decals, though if anybody has a real one and can confirm some dimensions that would be nice. I rotated it so it was straight, set it to black and white, saved it as this https://i278.photobucket.com/albums/kk115/Sparkytfl/Forums/fin.png and imported it. Scaling them down to 85% seemed to make things worse, like the fins get lighter so the cg moves a lot farther forward than the cp does. It did increase altitude though.

Here's the file I have as it is right now. A couple of the pieces have forced weights to match the apogee components.

550 para cord? Maybe I'll grab some and see what I think of it. I think I've seen it at camping/gun stores.

View attachment yellowjacket54mm.ork
 
550 para cord? Maybe I'll grab some and see what I think of it. I think I've seen it at camping/gun stores.

Yeah, it's pretty common. You can find it at military surplus stores, too. It has 550lbs breaking strength, so it's plenty strong.
 
the fins I did may or may not be accurate, I found a rocsim file for a 'super yj' and adjusted it to more or less match what you showed...it do however illustrate the wildman principal of ' the biggest motor that will fit' mindset :).
rex
 
looked at your file, and have a suggestion. add a centering ring to the motor mount just forward of the fin tabs (so they but up against it), it will add strength and make it easier to do internal fin fillets (should you want to).
rex
 
The build is under way.

Since I dont have a trustworthy miter saw, I wrapped a piece of paper around the body tubes, traced that, then used a razor saw to circle around the lines. It worked really well. Then I CA-ed the edges and sanded them smooth. Almost cant tell which was the pre-cut end now.
rockets-038.jpg
rockets-039.jpg


The fins were a bit harder to do without any kind of table/band/scroll saw. I made do with what I have, this method has already worked on many other non-rocketry projects:
rockets-046.jpg

I started with some random blade that was already in it to cut around the basic shape, hoping to then use some other method to cut them out. Unfortunately it wasnt fine-toothed enough and did some tearing all the way across my margin and into the fins. I'll have to fill it later. Tried to do the final cut-outs with my new dremel, but it was taking forever. Ended up going back to the jigsaw and using a different blade on it. I dont know what it's called, it has grit along the edge instead of teeth, so it always leaves nice smooth cuts. Sanding them all even is the next task.

I went with 1/8 plywood from Michaels. Hobby lobby had nothing worth using, just a couple warped pieces. Michaels had a lot of warped ones, but had so many that I was able to find a couple good ones. Still with a tiny bit of curve, so I cut the fins so the curve is all in the same direction in case I cant get them totally flat.

Here's my cluttered work area.
rockets-045.jpg


The original plan had a third centering ring at the front end of the fins, but I ended up taking it out since it seemed unnecessary with the fins already bridging the gap between the body and the inner tube. I'll consider adding one, but I only ordered two, and it might be a pain to make one.

I decided to go with the center break at the originally-planned location. The parachute can be folded in fourths and still fits loosely and unfolds easily, while only taking up a little over 3 1/2 inches of the 6ish that I have to work with. I looked at paracord at a surplus store, but it didnt seem to stretch at all, so I'm going to go with either all kevlar, or maybe with a small section of elastic tied in line with the kevlar.
 
There hasnt been a ton of progress in the last week.

rockets-047.jpg

The coupler was excessively loose so I glued a layer of paper around it.

rockets-049.jpg

Stack sanded the fins, filled some of the chips that were formed from sawing, sanded again. Front edges are rounded, outer edges flat, bottoms halfway between rounded and wedge shape.

rockets-051.jpg

Took a cable clamp u bolt, not using the supplied bottom half, but using a thin piece of metal i found in the drawers at lowes. The whole setup weighs less than an eye bolt plus fender washer.

rockets-053.jpg

Epoxied it all together.

rockets-052.jpg

Took a few minutes to build a prototype stand for my smaller rockets. Less than a dollar for the base, a 3/16 dowel, plus some stain and paint from years ago. Its a little crooked. I wish I had a drill press.

rockets-057.jpg

Baffles in.

rockets-058.jpg

Fin slots cut with a combination of dremel and knife.

rockets-059.jpg

Didnt want the rail button covering the designs, so I did a test of locations. Seems like the top black stripe is entirely pointless. It must be just to cover any sloppy paint masking. It looks pretty close to catalog location if I leave it out.
 
rockets-064.jpg

Centering rings and blocks for the rail buttons in place. I chose to glue on the rear ring first rather than try to do internal fillets in the small amount of space. It also allowed me to slowly sand the rear edge of each fin tab until it rested perfectly against the ring at it's correct location.

rockets-067.jpg

I dont remember who I copied here with my foam board alignment tool. I only wish I had cut out the inner corners because the foam got stuck in the epoxy that seeped out of the fin slots.

rockets-071.jpg

Fins on. It then took nearly a week of applying and sanding glue fillets to get my fin edges perfectly smooth.

rockets-073.jpg

First coat of primer on the lower half. Brought out a lot of fuzzies that will have to be sanded tomorrow.

rockets-074.jpg

Nose half. I'm epoxying the nose to the tube. It will make any future repairs a pain, but will make the rocket look much nicer having the seem filled smooth. 300 pound kevlar is already tied through the cone with a palomar knot which I shouldnt have to worry about ever having to retie. It's just tucked inside for now.

I'm still not decided on my shock cord length. I see a range of opinions from three body lengths to five. Still have twenty feet tied on, will probably go with 12-15.
 
Looks nice so far. I don't know how I missed this one----too much work maybe---anyway, I like what I see !!!!!
 
rockets-077.jpg

After a lot of priming and sanding, I moved on to paint. It's finally the right colors. And of course a huge bug landed right in my yellow before I could bring it inside to dry. I might have to hang some drop cloths and paint in the garage.

I'm still not entirely sure how I'm going to do the bee logo. Might experiment with painting with a stencil. Other than the eye, it can be done in one piece. The stripes almost definitely will be painted.

My pictures are also looking terrible now because it turns out my dad lost the charger on his last vacation, my own camera was dropped and broke at a launch, leaving a camera from 2004.

First launch is scheduled for july 28. Probably with an f26-6fj.
 
Last edited:
rockets-082.jpg

Made a mini swarm of bt-5 bees. They weigh .26 ounces each pre-paint. Got a box of 1/2A and openrocket says 426ft on that engine as long as I dont overpaint them. I should've bought more than three nose cones; I built them in assembly line fashion and they went together quickly.

The big one is on its second round of paint. It would be good enough to move on, but apparently paint runs really easily on the smooth surface left after wet sanding. So it'll need another round of sanding and paint. Which gives me time to receive and get a good decal scan from the original kit I just won on ebay.
 
I finally finished it. Waterslides of that size didnt work well so the stripes were masked and painted, while the logo was cut out of monokote. Final weight about 22 ounces. Paint and glue really add up.
rockets-097.jpg


First flight on an f26 was perfect.
yjlaunch.jpg

yjchute.jpg


Then for the second, I tried a g40. The estes ignitor failed. Another one failed. Used a copperhead. Well it did something. It popped, jumped a couple inches, sat a few seconds, then some flames from the bottom for what seemed like five seconds while it sat on the pad, with the ejection finally popping the nose. Heres how it looks now.
rockets-103.jpg

rockets-107.jpg


There goes the month I spent on paint. Luckily its still useable. The inner tube only burned where it stuck out of the back, so I just need to think of a way to build that up again so its even. It does mean that I failed to launch a-g today since I couldnt get the remains out until I got back home to my tools.
 
contact Estes and fill out a MESS form. estes will probably want pictures (which you have). NAR will want the weather conditions(temp) at the time of failure. it did look very nice and still looks pretty good (just has battle scars :)).
rex
 
I found the form on the nar site, but I'm not sure about contacting estes other than the general email form on their site. I'm not available to call them during their customer service hours.
 
the general form on the Estes site will work, might take 3-4 days, but you should get an answer.
 
I think that can be repaired. I looked at the pics on my computers at home. It just needs a little work. How is the aft centering ring?
 
WOW! Beautiful job (sorry for the CATO). This is really weird...I have been thinking about a YJ upscale based on LOC 3" tube...I have it in RS and the fins do seem oversized. My son built the Estes model years ago, and it has always been my favorite...I love the looks of it. Sadly last time I launched it, an enthusiastic youngster recovered it, was running back, and stepped in the middle of it, squashing the bt =8^o May be a moot point now, but I can post the fin dimensions when I get home tonight.
 
The plywood ring held up great since it was coated with CA. It looks like I should be able to cut away whats left of the exposed inner tube, sand it flush with the ring, then epoxy on a new section. Cutting a tube a quarter inch long and having it even the whole way around might be hard though.

This will probably be easier to fix than the motor mount in my estes bullpup. I crushed that going to paint it (stuffed the rolled up newspapers too tight) because the tailcone means that the rear centering ring is over an inch into the body tube and the motor tube extends unsupported. Epoxy on the new tube, wrapped an engine in wax paper and slid it in to make sure the spliced tube was glued on straight.

I actually bought an original on ebay most of the way through the build and can confirm that the fin and decal scans found here https://www.spacemodeling.org/JimZ/est2008.htm are scanned properly with the correct dpi so that when you open them in photoshop they're the right size if you printed them at 100% or set it to whatever percent your up/downscale is. A 3 inch seems like it would be too heavy for Fs and would go fairly slow on a G. I feel 54mm was perfect. A G wont launch it so high that you lose sight, but an F still puts it at what I'd consider high.
 
Back
Top