Finishing a Rocket with Lacquer

The Rocketry Forum

Help Support The Rocketry Forum:

This site may earn a commission from merchant affiliate links, including eBay, Amazon, and others.
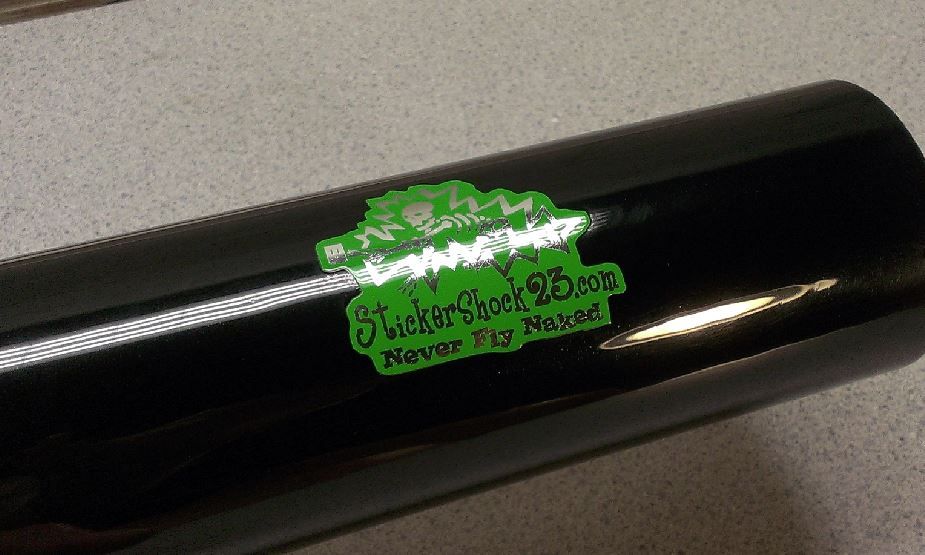
Graphics are done (thanks Mark @ Stickershock)!

I will never, ever, ever paint another large rocket black. Especially when I'm gonna polish the finish. In 2 minutes of handling, this thing ends up being one big mass of fingerprints.

Oh well, just happy to be done :)

Gotta love those graphics.
 
Great job! only problem with lacquer is it cracks as it is not flexible. Ask me how I know.
 
Great job! only problem with lacquer is it cracks as it is not flexible. Ask me how I know.

It's certainly not a modern paint. So this isn't really a secret. It also oxidizes over several years in the sun. When I washed my old 65 Impala, the oxidized paint would coat my windows. Sometime it was so bad I had to clean the windows before I could drive anywhere. Of course this was 25 year old paint exposed to desert sun.
 
The paint on my blue '68 MGB did the same thing. After washing it, the water in the bucket would be blue from all the oxidized paint that came off on the sponge. Lacquer looks great when it's new but it isn't used on cars anymore because it's not very durable. Most modern car paint is urethane.
 
Last edited:
The paint on my blue '68 MGB did the same thing. After washing it, the water in the bucket would be blue from all the oxidized paint that came off on the sponge. Lacquer looks great when it's new but it isn't used on cars anymore because it's not very durable. Most modern car paint is urethane.

Yeah, paint technology has moved forward in the last hundred years or so. Hasn’t it.:)

All paints have pros and cons. On my rockets, oxidization isn’t a problem because the only time they’re exposed to the sun is during a launch. The same goes for crazing, but you can get this from a really thick application too.

On the other hand, it’s easy to work with, and easy to repair and restore. Fixing chips is super easy.

The yellow and black one I posted earlier was an experiment that demonstrates the crazing issue perfectly. Again, this was an experiment to see if I could paint lacquer over enamel. So it has 5 different layers of paint on it, with the enamel applied over white lacquer, then a clearcoat of lacquer to seal it. Then black lacquer followed by clear. This paint job is way to thick and started showing cracks about a year later. Flexibility can be an issue too. So it’s a good idea to use lacquer on harder materials.

My red max, has one thin coat of red, and just enough clear to sand and polish. I built this one as soon as Estes re-released it, whenever that was, and so far it’s holding up perfectly.

Enamels have pros and cons too. Enamel likes the sun, but it will oxidize over time. With either paint, it can be removed with a good polish so long as there’s enough paint to work with.

In addition, enamel will deliver a hard shine and doesn’t need clearcoat to deliver it. Although I like to coat my flat paints with a satin clearcoat to prevent smudges.

I’ll be meting with someone this afternoon to discuss newer paint options and getting the shop set up for it. My only criterion is that I won’t need a fresh air system. So this pretty well eliminates urethanes.

I hope we have the opportunity to cross paths as I really enjoy your results.
 
My only criterion is that I won’t need a fresh air system. So this pretty well eliminates urethanes.

Yeah urethane paint is pretty toxic stuff. A respirator is mandatory equipment when spraying urethane.

I hope we have the opportunity to cross paths as I really enjoy your results.

Same here.
I've been taking lots of pictures during the four color paint process of my Minie-Magg. I started painting 3 weeks ago and I've probably still got another 3 weeks to go. Most of that time is just waiting for enamel to dry. When it's finished I'll post another paint thread on this forum.
 
Does it say something about me that I read the title of this thread as "Finishing a Rocket with Lager"??

:cheers:

G.D.
 
I have a rocket that I am in the process of finishing. When I masked the BT to spray the fins, the tape left a pattern in the paint where I applied it. Also, where I added an additional piece of masking to the top of the BT, there is a noticeable "ring" around the tube. They don't appear to be deep, so will the wet sand and clear coat fix these?

I used 3M auto maksing tape and Testors Model Masters Lacquer (it was the exact right color for the project). I primed with two coats of DupliColor Hi Build primer (mostly sanded off) and one coat of Testors Lacquer primer to cover the gray.
 
Yeah urethane paint is pretty toxic stuff. A respirator is mandatory equipment when spraying urethane.

Same here.
I've been taking lots of pictures during the four color paint process of my Minie-Magg. I started painting 3 weeks ago and I've probably still got another 3 weeks to go. Most of that time is just waiting for enamel to dry. When it's finished I'll post another paint thread on this forum.
PM a link to me. I don’t want to miss it.

I have 4 rockets in the queue, and all are 3 inch upscales of my favorite Estes Rockets.
Mark II – Yellow fins and upper body, black lower body
Red Max
renegade – Flat Black lower body and red from just above the fins to the nose. Mine will be fluorescent orange or metal specks.
A20 Demon – Yellow with a single black fin. The nose cone is supposed to be white but mine will be black if the kevlar comes out ok.

Since I haven’t been able to find fluorescent colors in lacquer, it appears the only option I have for the Mark II, and A20 is enamel. In order to keep the fluorescent paint from smudging EVERY TIME it’s touched, I’ll need to clear coat. I haven’t had any luck with Krylon clear. It’ tends to turn milky and I’ve heard other had the same issue. I know we’ve discussed the idea that we don’t like to clearcoat enamel, but I may have to. Tell me what you’ve found that works.

Does it say something about me that I read the title of this thread as "Finishing a Rocket with Lager"??

:cheers:

G.D.
Yes…yes it does. In fact, That may be the best way to finish one.

I have a rocket that I am in the process of finishing. When I masked the BT to spray the fins, the tape left a pattern in the paint where I applied it. Also, where I added an additional piece of masking to the top of the BT, there is a noticeable "ring" around the tube. They don't appear to be deep, so will the wet sand and clear coat fix these?

I used 3M auto masking tape and Testors Model Masters Lacquer (it was the exact right color for the project). I primed with two coats of DupliColor Hi Build primer (mostly sanded off) and one coat of Testors Lacquer primer to cover the gray.
I keep forgetting about the line of Testors Lacquer paint. Thanks for the wake up call.

It Sounds like you have a good primer base, and that’s 90% of the finish. Although 3M makes the best masking tape on the planet (yes there is a difference) I’ve always used scotch tape to make fine lines. The reason for this is because masking tape will generally allow some paint to “creep” along the edge. With scotch tape, you can actually see the edges seal. In addition the adhesive is gentle on painted surfaces and it doesn’t leave a residue. Here again, make sure you’re using 3M tape. Otherwise you run the risk of residue, and tearing.

When you’re masking, be sure to leave extra tape, and fold the last ¼ inch or so over. This gives you a place to grab the tape when it’s time to peal it off.

Another way to avoid ridges, is to use only enough paint to color the project. As soon as you’re done applying color, remove the masking. This will allow the ridge to lay down.

I think you’ll be ok, don’t try to sand it smooth, just knock it down a little. Remember, the lacquer clearcoat will melt into the surface of your color. This will help it lay down a little more. You’ll be able to remove the rest of it when you wet sand the clearcoat.

Pictures?
 
Here's a pic of what happened at the top of the tube. It's more of a difference in the finish than a scratch (the vertical line next to the big bright spot), but you can feel it with the back of a fingernail.

DSCN1250a.jpg

Here's where I burnished the tape down around the fins.

DSCN1251a.jpgDSCN1252a.jpg

I'm thinking that wet sanding and clear coat will take care of these, but want to make sure, since I still have several decals to apply before I clear coat. And this is going to be a gift to my Father-in-Law.

There isn't a prominent ridge where the two colors join, and I'm not going to try any real sanding at that joint.

I know to paint light colors before dark, but I originally was going to use an enamel for the fins. I changed my mind and decided to go and get a can of DupliColor lacquer to use instead.
 
Here's a pic of what happened at the top of the tube. It's more of a difference in the finish than a scratch (the vertical line next to the big bright spot), but you can feel it with the back of a fingernail.

View attachment 142100
Without being able to examine it up close, it’s hard to tell what’s going on. If it’s not sticking up, AND if it has paint on it, then it should disappear under the clearcoat. If you think your paint is heavy enough, you may want to wet sand this with 800 to see if it will come out.

Here's where I burnished the tape down around the fins.

View attachment 142101View attachment 142102

I'm thinking that wet sanding and clear coat will take care of these, but want to make sure, since I still have several decals to apply before I clear coat. And this is going to be a gift to my Father-in-Law.

There isn't a prominent ridge where the two colors join, and I'm not going to try any real sanding at that joint.
It almost appears that there’s tape residue at the base of the fins. Assuming it is not residue but rather in the paint, then wet sand it with 800 just to smooth it a bit, and etch it. The clear lacquer should melt in far enough to make it go away.

I know to paint light colors before dark, but I originally was going to use an enamel for the fins. I changed my mind and decided to go and get a can of DupliColor lacquer to use instead.
Anytime you can make the preceding base smooth, the better the next layer will look. When applying a lacquer color coat, it’s more important to get a smooth, even, light coat than it is to get a shine. So normally, I’ll wet sand any imperfections with 800 before clearcoat. The clearcoat will remove quite a bit of imperfections on a smooth surface, but making the call on what will and will not go away comes with experience.

If you’re unsure of how it will turn out, replicate the paint scheme on a piece of cardboard. Build it up from sealer to clearcoat, tossing in imperfections & sanding scratches with different grits, and see what you can get away with.
 
Last edited:
If you’re unsure of how it will turn out, replicate the paint scheme on a piece of cardboard. Build it up from sealer to clearcoat, tossing in imperfections & sanding scratches with different gtis, and see what you can get away with.

I did do this with a piece of scrap BT. It turned out pretty well, so I'm going to be wet sanding the next couple of nights and clear coating on Sunday morning.
 
I'm trying out the lacquer finishing process that you describe in this thread, using a spare piece of body tube. I have lots of experience with enamel but not much with lacquer. I'm using DupliColor Perfect Match black lacquer. So far my observations are:
1. Lacquer coats seem to be a lot smoother than enamel coats. With enamel, sometimes I can get a perfectly smooth coat but usually I get some orange peel, which I get rid of during wet sanding. So lacquer shouldn't require as much sanding.
2. Lacquer blushes REALLY easily, but I think it will look okay after wet sanding and polishing.
3. Lacquer coats are a lot thinner than enamel coats. I sprayed 3 increasingly heavy coats, as you described. When I wet sanded the next day, I started seeing some exposed primer within a couple of minutes, and that was with 2000 grit. That doesn't happen with enamel.

So today I sprayed 2 more coats. Again the lacquer went down very smooth. Spraying additional coats of enamel after only 24 hours is almost guaranteed to result in some bumpy texture or even crinkling (which is probably why Duplicolor recommends waiting 7 days). I'll try wet sanding again tomorrow and let you know how it comes out.
 
Nathan

It's not necessary to sand the paint that much. Remember, the paint is for only to get golor down. Sanding the color is just to remove any "nibs" from the paint. And don't worry about blushing. It will go away under the clearcoat, I promise.

Build the clearcoat up gradually and stop when it looks evenly wet. The can says to let it set for a few minutes between coats, but I normally apply all the clear while I walk around the rocket, then walk away and let it sit for 30 minutes before taking it out of the paint room and hanging it up to cure.

BTW, I'm presently doing an enamel job. Flourescent orange and black. I hope to apply the clear this weekend. Now before you tell me " you don't need clear dummy" If I don't clearcoat the orange, it will have a smudge every time I touch it. So it's only to protect the flat paint.
 
Yeah you're right about fluorescent enamel. I only used it one time, and without clear coat. It was flat (non-glossy) and quickly got very smudged up. It also gave off powerful fumes while spraying.

Below are pics showing the results of my paint test. I didn't exactly follow your process. This is DupliColor Perfect Match Toyota metallic black lacquer and enamel clear coat. This was to test several things that I hadn't done before:
- Using Bondo glazing and spot putty to fill tube spirals
- Wet sanding and polishing lacquer
- Applying vinyl decals from Stickershock
- Wet sanding and polishing clear coat

It turned out very well, although not perfectly smooth since I only used one coat of filler primer for this test. The blushing completely cleared up after sanding and polishing the lacquer. And the Bondo works great!

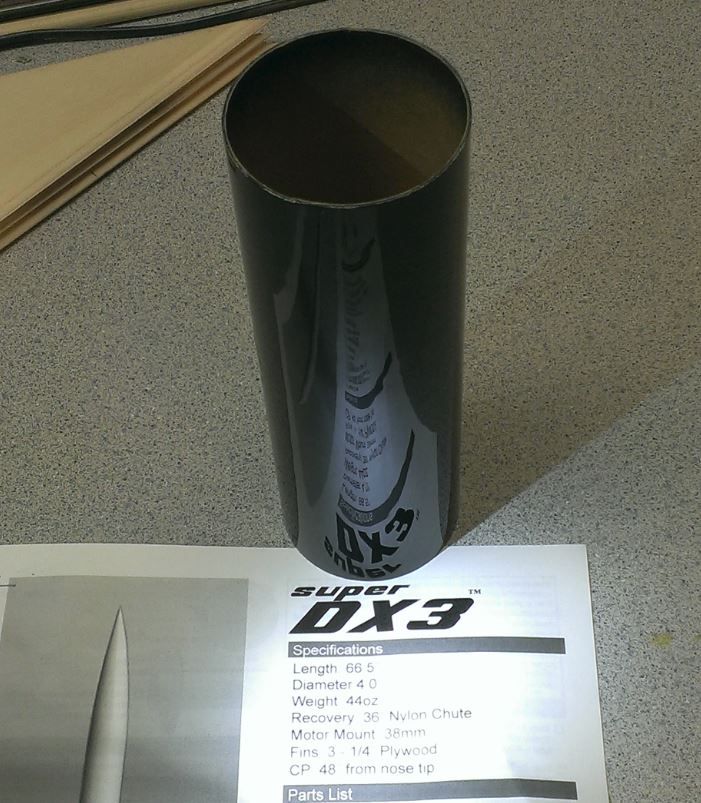
This is exactly what I will be using to finish the Madcow Super DX3 that I'm working on now, except it will get 3 or 4 coats of primer. And nicer decals.

lqpt1.jpg

lqpt2.jpg
 
Yeah you're right about fluorescent enamel. I only used it one time, and without clear coat. It was flat (non-glossy) and quickly got very smudged up. It also gave off powerful fumes while spraying.

Below are pics showing the results of my paint test. I didn't exactly follow your process. This is DupliColor Perfect Match Toyota metallic black lacquer and enamel clear coat. This was to test several things that I hadn't done before:
- Using Bondo glazing and spot putty to fill tube spirals
- Wet sanding and polishing lacquer
- Applying vinyl decals from Stickershock
- Wet sanding and polishing clear coat

It turned out very well, although not perfectly smooth since I only used one coat of filler primer for this test. The blushing completely cleared up after sanding and polishing the lacquer. And the Bondo works great!

This is exactly what I will be using to finish the Madcow Super DX3 that I'm working on now, except it will get 3 or 4 coats of primer. And nicer decals.

Very nice. I'm liking that glazing putty the more I use it. It tends behave quite a bit better if applied over primer. Also, I'm finding that the filler primer tends to shrink over time, so I'm working out imperfections more with lightweight aircraft filler then glazing putty. After that, one coat of regular primer to highlight anything that needs attention, and filler primer only where needed.

The more I think about it, the more I like your idea of lacquer color and enamel clear from a durability standpoint. Although I don't relish the thought of polishing the paint. I'm used to throwing the paint on then letting the clearcoat fix the blushing, and everything else for that matter.

While running some test panels, I remembered an old wet sanding trick from my body shop days some 30 years ago. As you know, the lacquer sands quite a bit easier than the enamel. Next time you're wet sanding enamel, try using hot soapy water. The water doesn't have to be boiling lava hot, just warm really, and get it good and soapy with dish washing or auto washing detergent. Let me know what you think.

To cut down on blushing, here’s something to consider. Allow the paint and rocket temperature to normalize to your painting environment. I keep the paint room at about 70 degrees, humidity around 55%, then let everything set for two hours. All I have to do is tack and spray. It will help prevent “Ghosting” as well.

Now then I have a question for you. I have two cans of Clear Duplicolor enamel that will go on renegade next weekend, since I had to re-coat the fin can. Is there enough difference in rattle can enamel formulas that you prefer one over another? How do you apply the clear to avoid the milkyness?
 
Yes, I thought that an enamel clear coat would be more durable than lacquer clear. Plus I've never used lacquer clear so I wasn't sure if it would polish up as well as enamel. I don't know if it really makes any difference to polish the lacquer color coat before spraying the clear enamel but I figured that it can't hurt.

In my opinion, the advantage of using lacquer for the color coat instead of enamel is
- Lots more color choices, including metallics (Duplicolor Perfect Match rattle cans)
- goes on smoother
- dries a lot faster

I'll try the hot soapy water for wet sanding, but what's the advantage?

Now then I have a question for you. I have two cans of Clear Duplicolor enamel that will go on renegade next weekend, since I had to re-coat the fin can. Is there enough difference in rattle can enamel formulas that you prefer one over another? How do you apply the clear to avoid the milkyness?

I've used clear on four rockets and every time I used Duplicolor clear enamel. So I can't say how it compares to other brands. I've never had a problem with milkyness. It usually looks a little milky for several minutes but clears up as it dries. I spray clear coats the same way I spray other enamel; one light coat, wait about 5 minutes, then one wet coat. My paint room is always about 70°. I haven't used clear enamel on any of the rockets that I've built recently.
 
Yes, I thought that an enamel clear coat would be more durable than lacquer clear. Plus I've never used lacquer clear so I wasn't sure if it would polish up as well as enamel. I don't know if it really makes any difference to polish the lacquer color coat before spraying the clear enamel but I figured that it can't hurt.

Lacquer clearcoat works down faster than the enames will. I work the clear down with 1500, although I plan to try 2000, and then polish it with that 3M stuff in the OP. Application is very easy. On the 2.6 inch Red Max, I would empty a whole can of the Perfexct Match clear and never come close to a rum. It's vary stable even when applied heavy. But again, I'll apply a few light coats to soften up the base. In other words, you really have to try for a run, and it doesn't blush nearly as easy as the color. Stay away from the large blue cans of Dup Clear. That stuff takes forever to harden.

I'll try the hot soapy water for wet sanding, but what's the advantage?
Have you ever used cutting fluid on a lathe or drill press? Same principal.

I've used clear on four rockets and every time I used Duplicolor clear enamel. So I can't say how it compares to other brands. I've never had a problem with milkyness. It usually looks a little milky for several minutes but clears up as it dries. I spray clear coats the same way I spray other enamel; one light coat, wait about 5 minutes, then one wet coat. My paint room is always about 70°. I haven't used clear enamel on any of the rockets that I've built recently.
I'll follow your advice. Well, at least I have the right stuff for this project. I was painting clear on an 3 inch A20 Demon payload bay last weekend, and quit when it started to get a little milky. It cleared up, but like a dummy, I didn't get around to reading the can until it had already set for a couple hours. I hope to finish that job today as well.
 
Nathan, took your advice in applying the enamel. Since I was applying clear over a chrome decal, there was no base paint to deal with.

After prep, I applied a quick light coat, almost a mist, then a heavy coat , but just heavy enough to lay down real nice.

It turned almost solid white, but I refrained from freaking out. Left the paint room and found something to keep me busy for 10 minutes. When I returned, all the clowdiness was gone and it was clear as glass.

So I applied a second coat in the same manner. Same result. So I applied a third, and it still came out great. I'm thinking this could have gone on all day, but at 4 coats per hour it is a S...L...O...W process. I’m budgeting 3 coats per hour on renegade, and planning 4 coats.

So far so good, thanks for the advice.

I’ll post observations after wet sanding and polish.

Now, I want you to try the perfect match clearcoat.
 
Eric, glad to hear that the clear enamel is working well for you. I'm having a significant problem with the black lacquer on my Super DX3. I sprayed a very light coat, then a heavier coat, and everything was looking good until I got to the fins. Then the lacquer developed lots of tiny bubbles over the fillets. The only thing I can think of is that the lacquer isn't playing nice with the epoxy fillets, although there are several coats of primer over the epoxy. And the epoxy is just normal Bob Smith 15 minute epoxy. But that's the only place where the bubbles developed. I sanded the fillets and sprayed a second coat but the bubbles reappears in the exact same spots. So now I'm planning on lightly sanding the whole rocket with 400 grit again and then repainting it with black enamel instead. I may try lacquer again in the future.


UPDATE:
I think I figured out my problem. It was caused by bubbles in the epoxy. I always have some tiny bubbles in the fillets but they normally aren't a problem; they were not visible after being covered with filler primer. But the solvent in lacquer apparently is powerful enough to dissolve the epoxy bubbles because now I have tiny pits, 1 mm or smaller, that extend down into the epoxy. Before I repaint with enamel I need to decide how to fill the pits in the fillets.
 
Last edited:
I ran into the same problem on my big daddy currently under construction.. (since around 2004) Pin holes on the fins.
I used wood hardener on the fins, they dried for around 8 years..... duplicor primer and sealer over.
Current state of the paint job is I started wet sanding the fins, but havent finished.... so I dont know if I will
still have pinholes. I might just take the easy way out, and hit it with clear, sand, then cover with future.
One thing that I have started doing since, is spray the color coats ( and by the way, a third coat of color will almost
certainly cloud up, in my experience), and then spray a couple coats of the clear after the color has tacked off.
I wish I could post a pic, i did a nice blend that way and it turned out well. But, I havent been building or painting lately,
other things have gotten in the way of rocketry.
Finally, Nathan, your paint jobs have inspired me to do much better, and I have a couple that turned out pretty dang nice.
Dont let it go to your head though.
TimE
 
If you guys like the duplicolor paint, there are many more colors available at summit racing. I just painted an aluminum engine block with old ford blue, and it looks great. Now I need to get the dohc heads reassembled, and get them painted.
 
If you guys like the duplicolor paint, there are many more colors available at summit racing. I just painted an aluminum engine block with old ford blue, and it looks great. Now I need to get the dohc heads reassembled, and get them painted.
Is that Duplicolor heat resistant? We used to paint engines with Krylon engine paint which was probably an enamel that was somewhat heat resistant. When we ordered the rings, gaskets, bearings for an engine rebuild we would also order a couple of cans of Krylon in the correct color for that brand of engine. This was not a fancy paint job though, but this was back in the day when Krylon made good paint and could provide a pretty good finish. When we would disassemble an engine for rebuild we would put the steel/iron pieces in a big vat of something like sodium hydroxide and it would remove all of the grease, and paint, so we had to repaint to make the new engine look better and to protect it.

This is a resurrection of a 2013 thread and most of the thread is associated with polishing and clearcoat. I don't know about Duplicolor but other spray paint brands don't do well these days with sanding and polishing. There are new (I think new) clear coat products available. I think for a good clearcoat finish you may need one of the two part catalyzing clearcoats. What I've observed is that there is a way to activate the spray can from the outside and then it is usable within a several day period. It seems to provide a very smooth and shiny clearcoat.

Going back to the real old days- as well as a garage my father also owned a body shop. Back then they typically painted cars with lacquer, or acrylic enamel. I saw them paint a few classic cars with real enamel to provide the correct period finish. The acrylic enamel provides a reasonable finish if applied properly, it has a little bit of orange peel and can't be wet sanded and polished. The lacquer provided a duller finish with more orange peel but it was always wet sanded and then polished to provide a very smooth and shiny finish. It was years later when clearcoat was more commonly used but it had problems, it would sometimes crack with age. When I had one of my cars repainted I told them not to use clearcoat but instead to put on more coats of color. This was a metallic dark gray and it looked very deep.
 
Now most all body shops have switched over to water based colors for the base coat,(due to EPA regulations), then clear coated with 2K urethane. My SIL manages several body shops and says the paint Reps have told him it will be a long time before water based topcoats will be on the market.
 
Back
Top