Estes - QCC Explorer (#3221) Gallery

The Rocketry Forum

Help Support The Rocketry Forum:

This site may earn a commission from merchant affiliate links, including eBay, Amazon, and others.

pick1e

Well-Known Member
Joined
Jun 22, 2011
Messages
538
Reaction score
3
I didn't see a gallery yet for this so I guess it's up to me to start it!

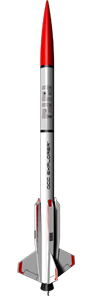
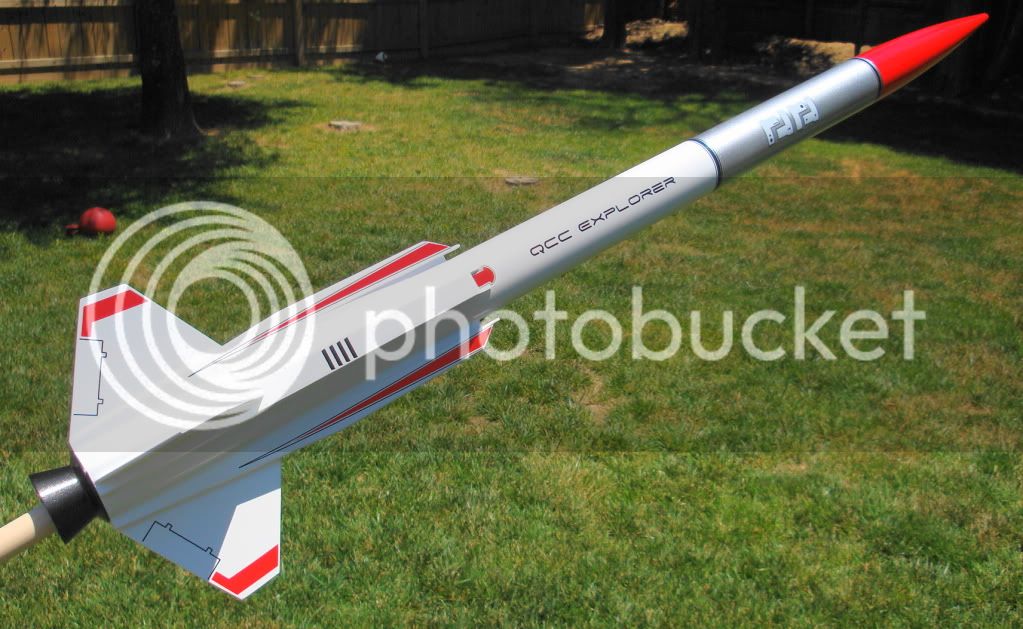
Just finished mine tonight, it was the most fun and rewarding build I have completed so far.

View attachment 87877
 
Last edited by a moderator:
Very nice! I have one in my big box-o-kits waiting to be built. Any tips, tricks or suggestions?
 
Since I built this for my then 6 year old daughter, she chose the color for the NC, not exactly to specs, but it flies great on D's and E's!!

2012-01-10 20.18.49.jpg
 
Any tips, tricks or suggestions?

Not really, built mine according to the instructions and added a baffle. It's difficult to get the long, thin intake decals on straight, a couple of mine are a bit funky up close. I cut up the access hatch decals and applied them in a random pattern. I don't know what top secret kind of stuff is in there but it looks cool...

When you crack yours open, check the decals. Mine only had one side of the intake stripes (first production I guess, all 8 for the left hand side). Estes happily and hastily sent me a corrected set.

Looks great spooks! Can't wait to fly mine.
 
Last edited:
Welcome to the Estes QCC Explorer (#3221) Gallery on TRF.

This gallery showcases the Estes QCC Explorer (#3221) and those rockets derived from it. Particularly appropriate in this thread are the following:


Estes: QCC Explorer: #3221


as well as any upscales, downscales, clones, kitbashes or other derivative works. Even Goonies qualify!


Last edited:
Estes QCC Explorer (#3221) Basic Information.

estes.gif
Estes Industries

MODEL NAME: QCC Explorer Also known as:

NUMBER: #3221

Introduced: 2011
Final Year:
Designer:

Type: Exotic
Motor Mount: 1x24mm
Recovery: Parachute
Stages: 1
Length: 35 in. (88.9 cm)
Diameter: 1.64 in. (42 mm)
Span:
Weight: 5 oz. (141.2 g)

Mfg. Description: Don't let the looks fool you with this Skill Level 4 kit. It may look like it's simple to build but what's under the paint will surprise you! Each simulated air intake/fin assembly is constructed from 12 interlocking laser cut balsa pieces.

The Estes QCC Explorer is a design study on what a Hypersonic Cruise Missile may one day look like. The long slender air intakes along the body would not only supply air to the engine put provide lift while flying to its target. The kit features air intakes built up of laser cut wood and a plastic molded exhaust cone. (Estes 2012 Web Ad)


Advertising Liveries

estes-qcc%20explorer%203221-2011%20cat%20livery.jpg
2011 Catalog
estes-qcc%20explorer%203221-2012%20cat%20livery.jpg
2012 Catalog
estes-qcc%20explorer%203221-2012%20web%20livery.jpg
2012 Web Ad


Face Card(s)


Instruction Header(s)

estes-qcc%20explorer%203221-instr%201.jpg


First post in this thread featuring this rocket.

See Also:
TRF Build Threads
BeerorKid
sodmeister
TarasDad


TRF Applicable Threads

LINKS
EMRR
RocketReviews
Mfg. Page


If you have any additional information on this rocket and/or catalog photos please let us know.
 
Last edited:
Thought I'd put mine in that I finished this week.I built it zipperless and have a baffle in the coupler(3 half moon disc and a top plate with the screw eye that the shockcord attaches to.)8ft of 550lb. paracord.Came in around 71/2oz.Fun build,was the first Level 4 rocket I've built.A big Thank You to Qquake2k who sent it to me,what a great friend he is.:handshake:Lucas Brian.jpg
 
Here's mine. The only pics I have of it are liftoff shots, these are also posted over in the liftoff gallery. Unfortunately, the decals are turned away from the camera in every single one of the pictures! :mad:
The first one is on an Estes E9. I love the sparks deflecting off the blast deflector! As you can see, I went with the standard color scheme. Edit: Oh yeah, I forgot: there's a dragonfly on top of the launch rod. He sure was in for a surprise! :eyepop:
The second one is on an AT E18-7. This was my first reloadable and first composite motor, and the flight went perfectly. Here you can see the tail section pretty well; notice that I didn't use the red triangle decals on the intakes, nor the black stripes on either end of the gray section. I was pleased with the lighter, cleaner look, so I left them off.
Enjoy!

QCC Explorer E18 liftoff 2.jpg

QCC Explorer liftoff E9 1.jpg
 
Last edited:
Nice job Bubba. I like your color scheme. Beautiful pictures Rocketbuilder.
 
All painted up, decals done and ready to fly!

IMG_3554.jpg


Red and white Walmart rattle can applied over Walmart flat white as primer.
 
This is a great flyer. Much like the Big Bertha - very stable flyer, but less fins to break transporting it!

Baffle glued in w 400# Kevlar line and anti-zippering built in (hopefully)
bafflein.jpg

5.2 oz (150 g) painted; Rustoleum #1996 Apple red, Krylon #1606 Pewter gray, gloss white, 2 coats Minwax polycrylic. I too must have got a first run batch - 8 lefty intake decals - I just flipped them over and used them anyway - worked great!

launch01.jpg


Maiden flight on D12-5 and calm winds.
[video=youtube;DeoeAcaxtUQ]https://www.youtube.com/watch?feature=player_embedded&v=DeoeAcaxtUQ[/video]

https://user.xmission.com/~huxley/rockets/qccexplorer/index.htm

Pat
 
Here is my QCC, I stretched it out by adding 5" onto it.
Picture 4560.jpg
 
here is another QCC I flew last weekend(my friends rocket) I rebuilt & repainted most of it after he crashed it. It flew great!
uvs140601-002.jpg
 
OK. After seeing this fly I really need to finish it. Found the decals and instructions today. Did a bunch of filling today and will sand it to morrow and more white primer. I also found a package of E6-4 engines. I don't know how old they are but they look fine.
 

Attachments

  • IMG-1442.JPG
    IMG-1442.JPG
    112.4 KB · Views: 59
Well, look at that! A QCC Explorer thread!

Here's mine that I did earlier in the year. Thus far, it has had only one flight on an AT E30-7, and that ended in the rocket landing in a pond under full parachute. I had an 808 camera on it as well as a JLA3 inside, but both lost their data when they got wet. (They still work) The rocket itself only suffered damage to the forward two-thirds of the body, so I cut that off, got some fresh tubes and decals and rebuilt it to look exactly the same. I did however modify it when doing repairs so now the silver body section is a payload bay, and it now has a custom 21" nylon parachute.20190213_072117.jpg
 
I right now am about 1/2 way through my QCC build. I’m taking my time on construction to get it right. I supported the ram jets underneath with balsa cross members and will do the same with the fins. I’m not to sure if I should use a baffle in place of the BT coupler. Between An 1 1/2” space taken up on the shorter BT and the bottom of the nose cone shoulder don’t leave much room left for recovery package. What do you guys think? Baffle or no baffle? Look how short the upper body tube is.
 
The QCC is a great flier! You'll want to launch it often! :) I def suggest a baffle, tho I'm a baffle guy. :) My QCC has 7.25 inches of room for the parachute and lines. This is plenty of room for my 24" thin mil ripstop nylon chute - it packs very well in there. I generally over-engineer the shock cord and Kevlar lines, but the QCC was before I got into that habit - not a good knot either, but you get the idea:

QCC_Baffle.jpg

There are 4 holes around the front tube end for altimeter
QCC_Baffle2.jpg

Good luck!

Edit: I'd suggest Qualman baffles too - strong and light weight.
 
Back
Top