Estes Mercury Redstone (1921) (2014 Re-Release) question

The Rocketry Forum

Help Support The Rocketry Forum:

This site may earn a commission from merchant affiliate links, including eBay, Amazon, and others.

K'Tesh

.....OpenRocket's ..... "Chuck Norris"
TRF Supporter
Joined
Mar 27, 2013
Messages
22,535
Reaction score
14,936
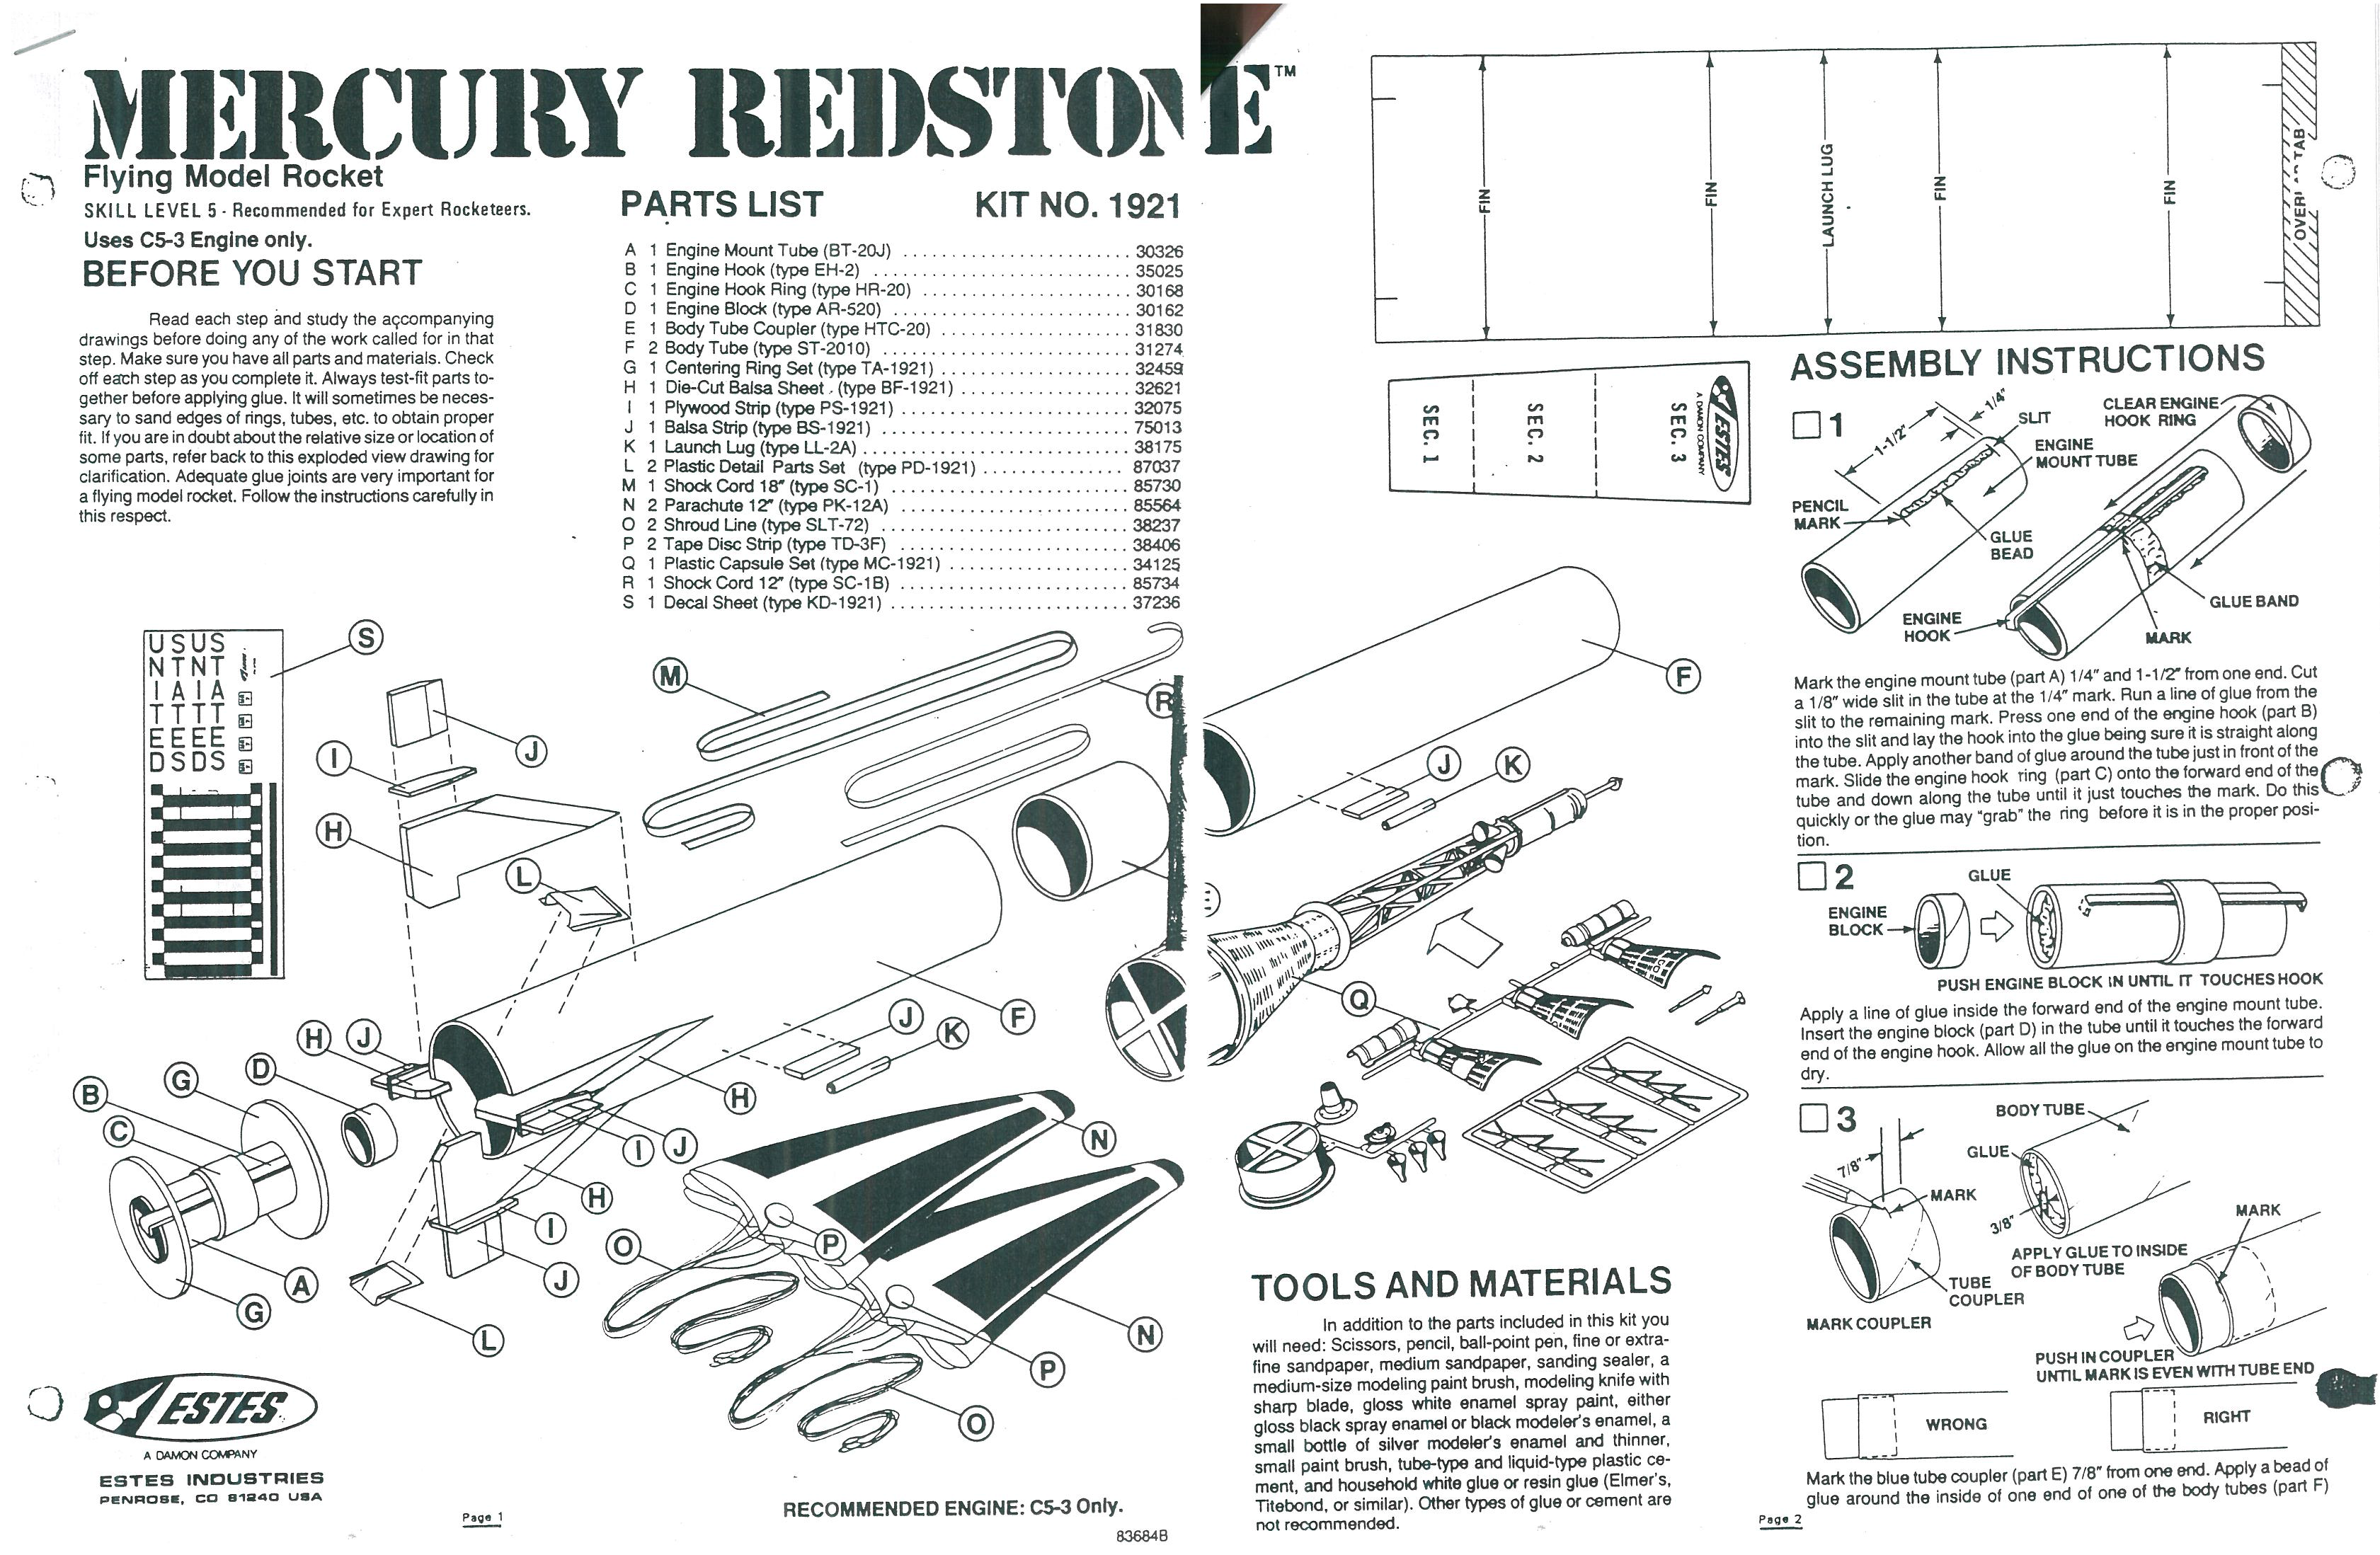
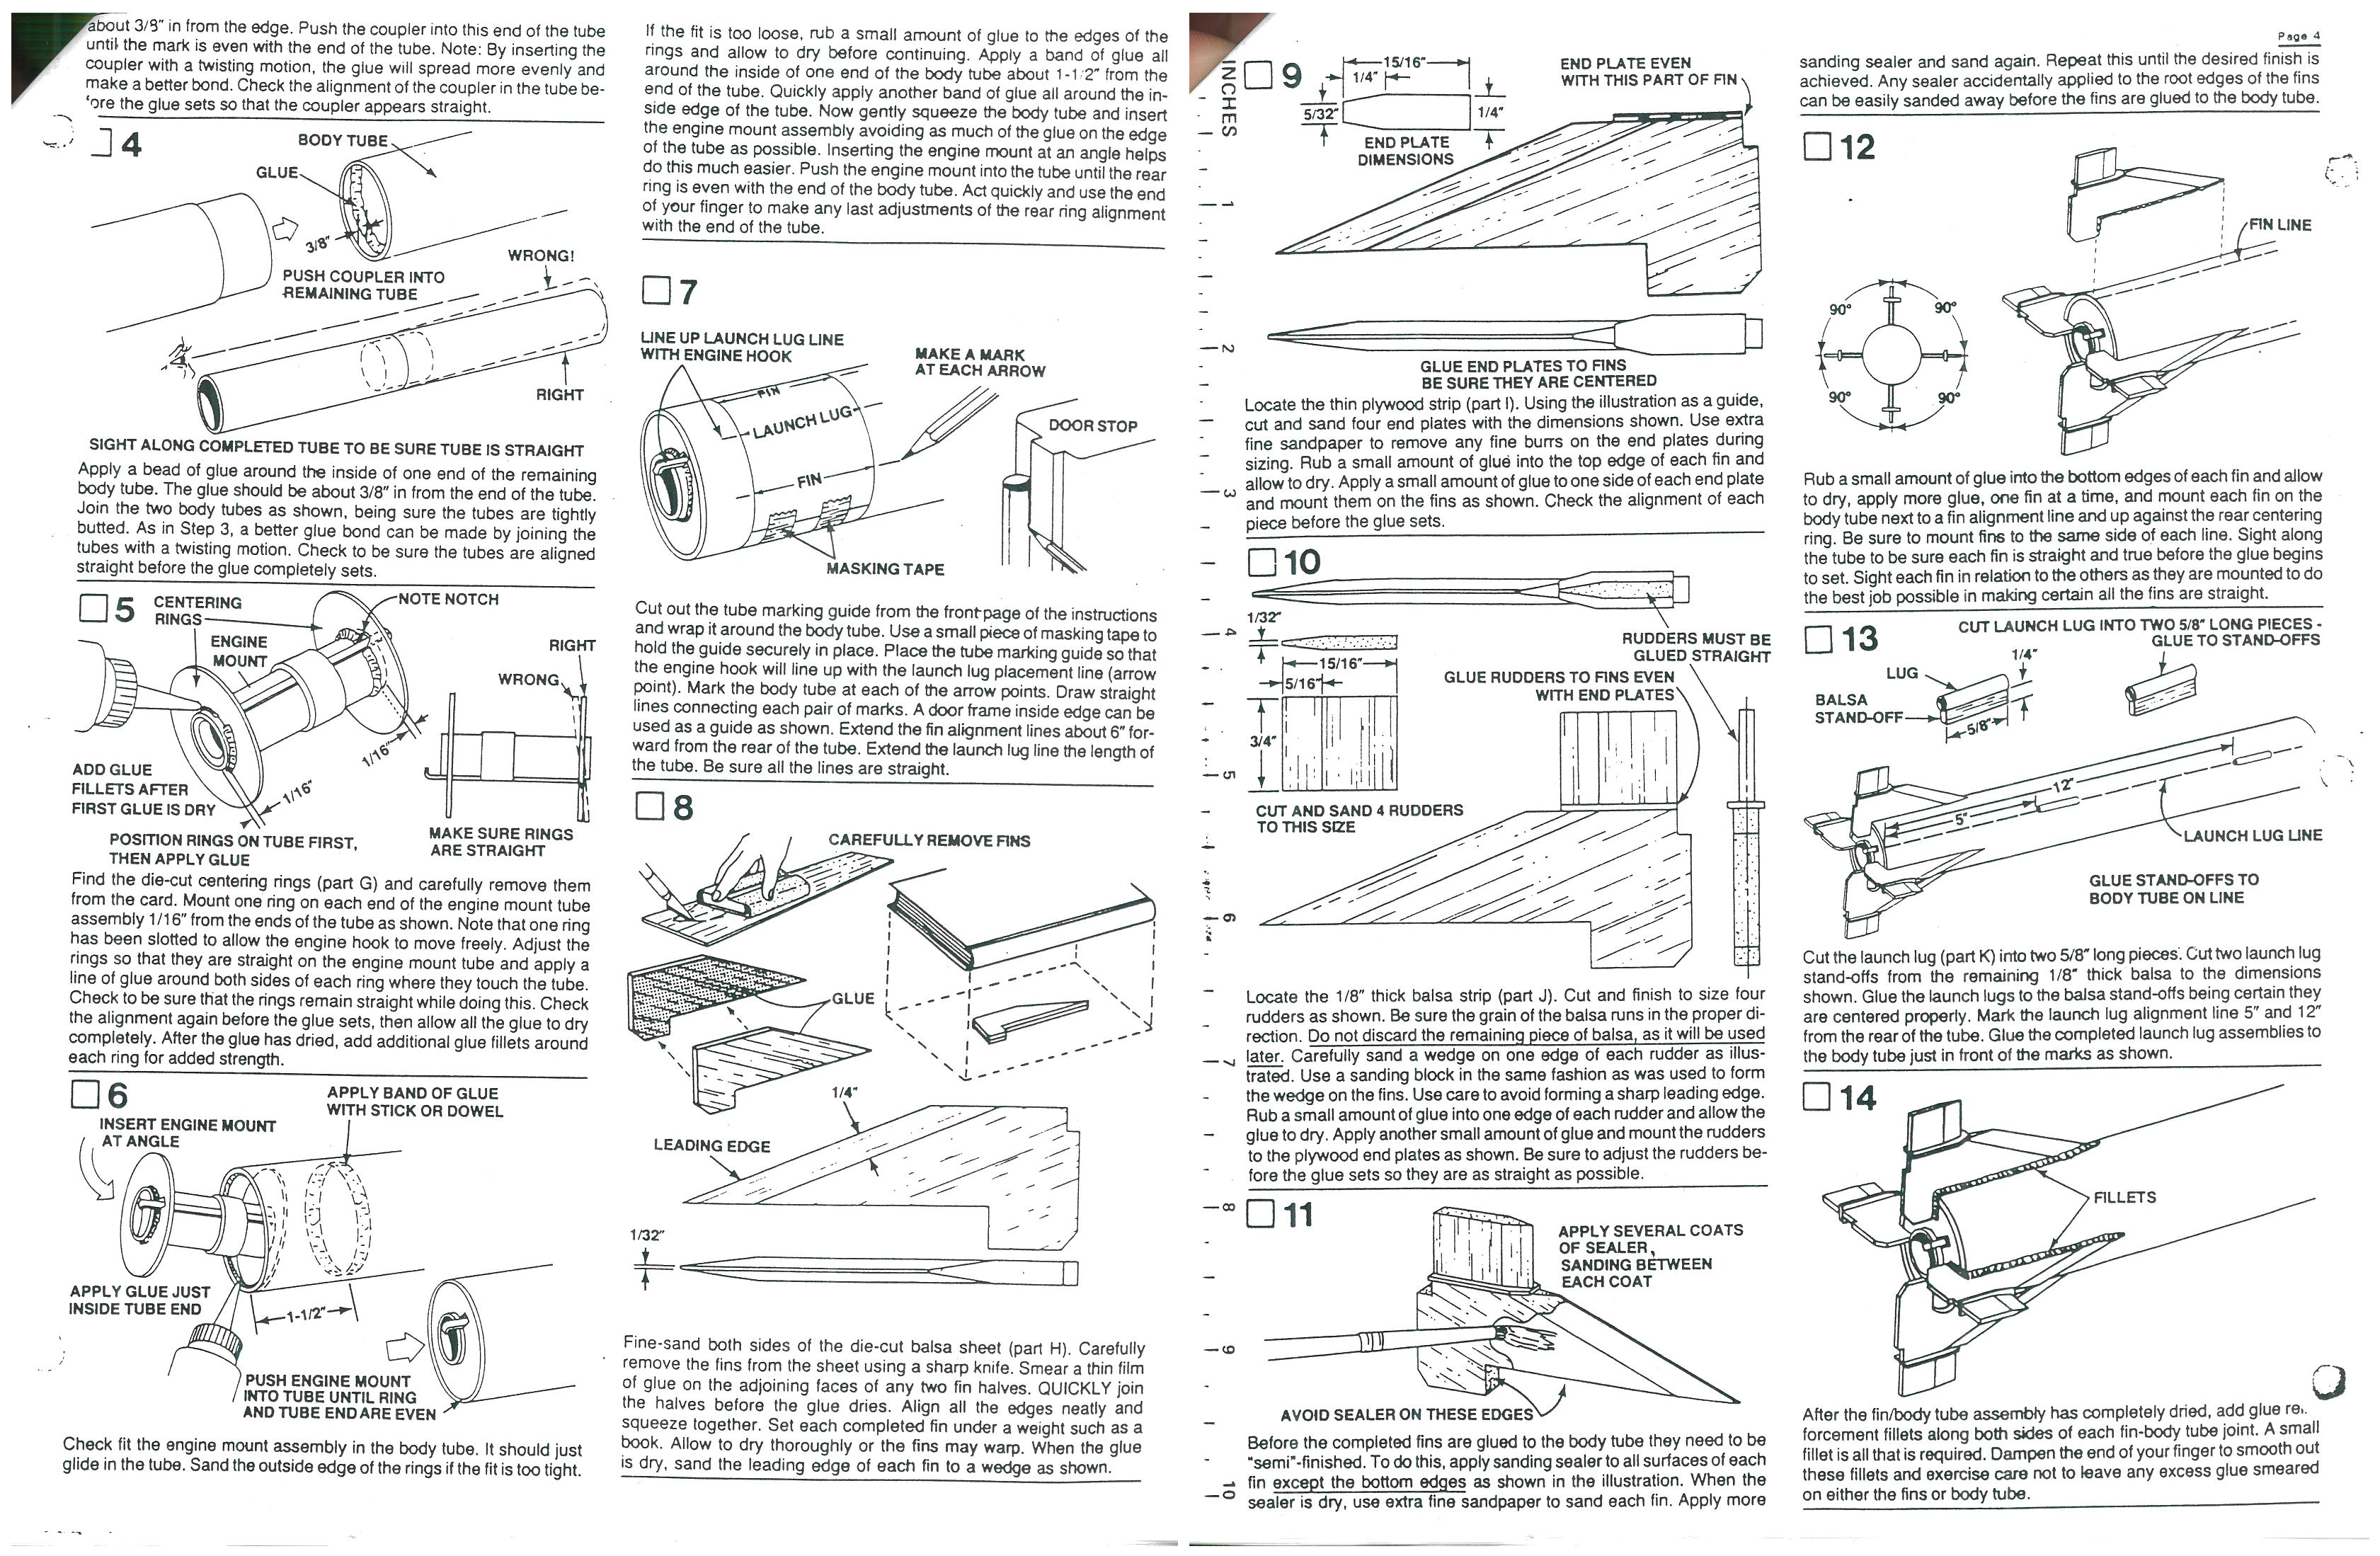
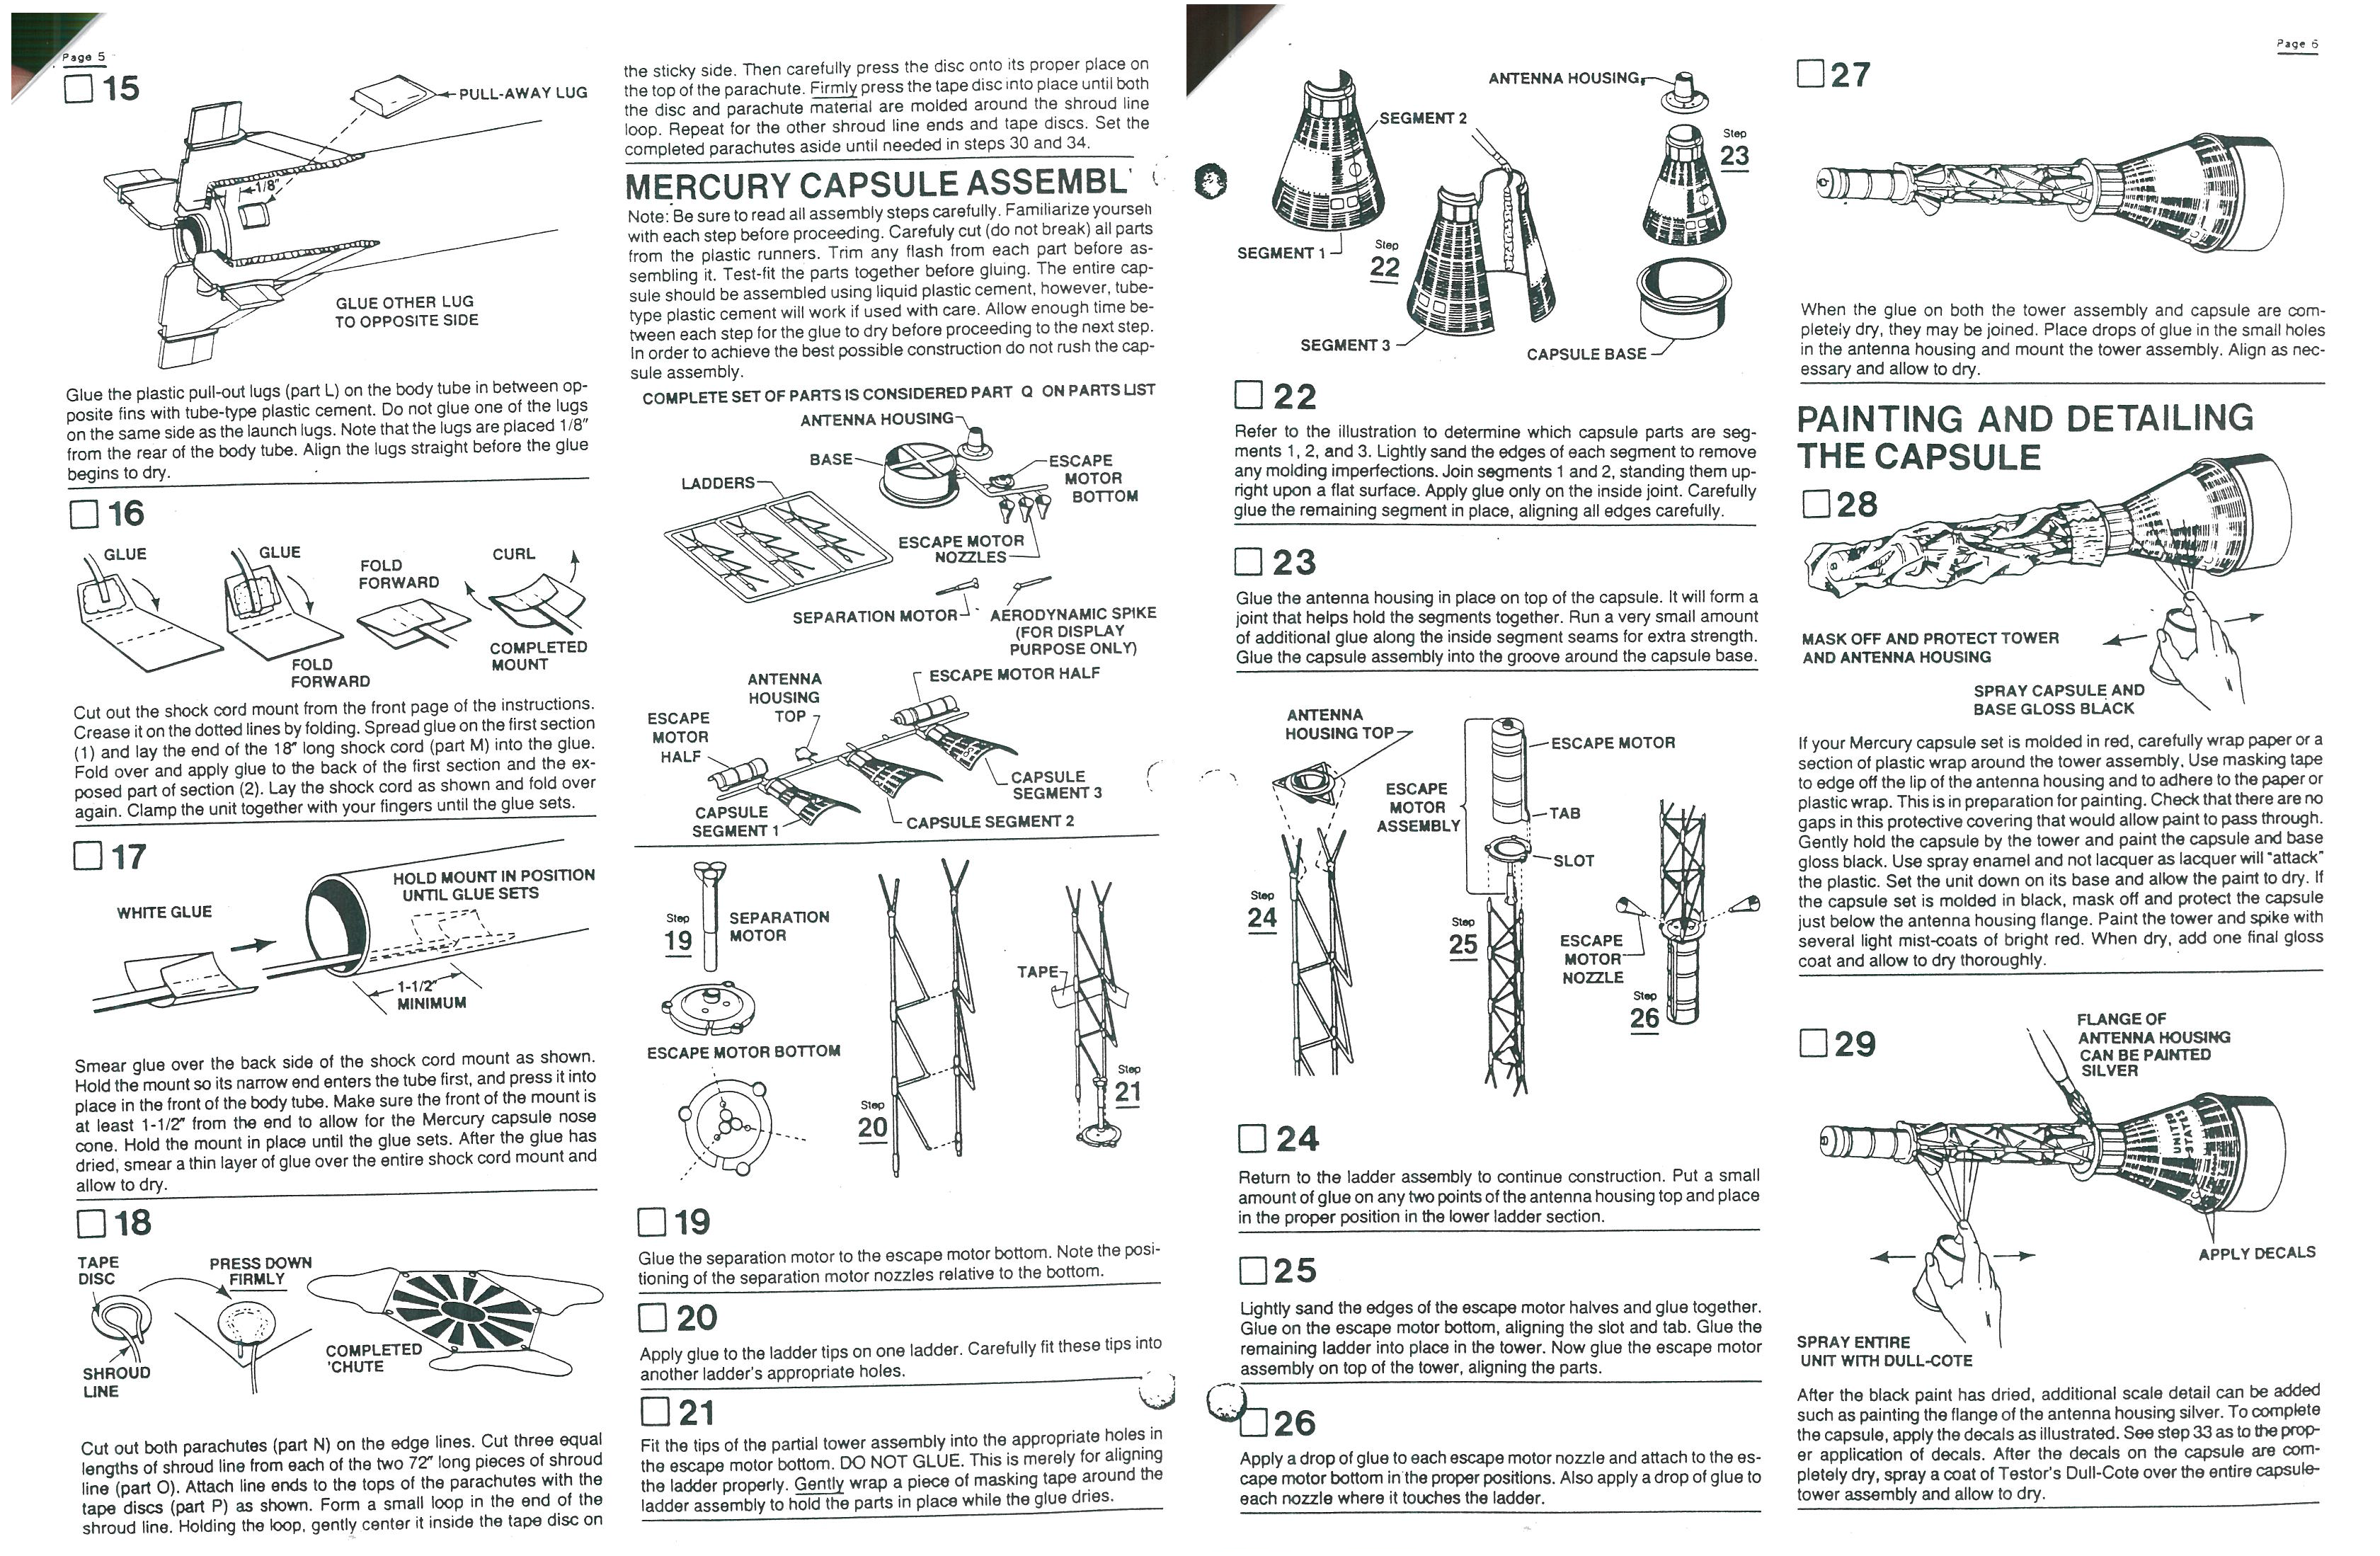
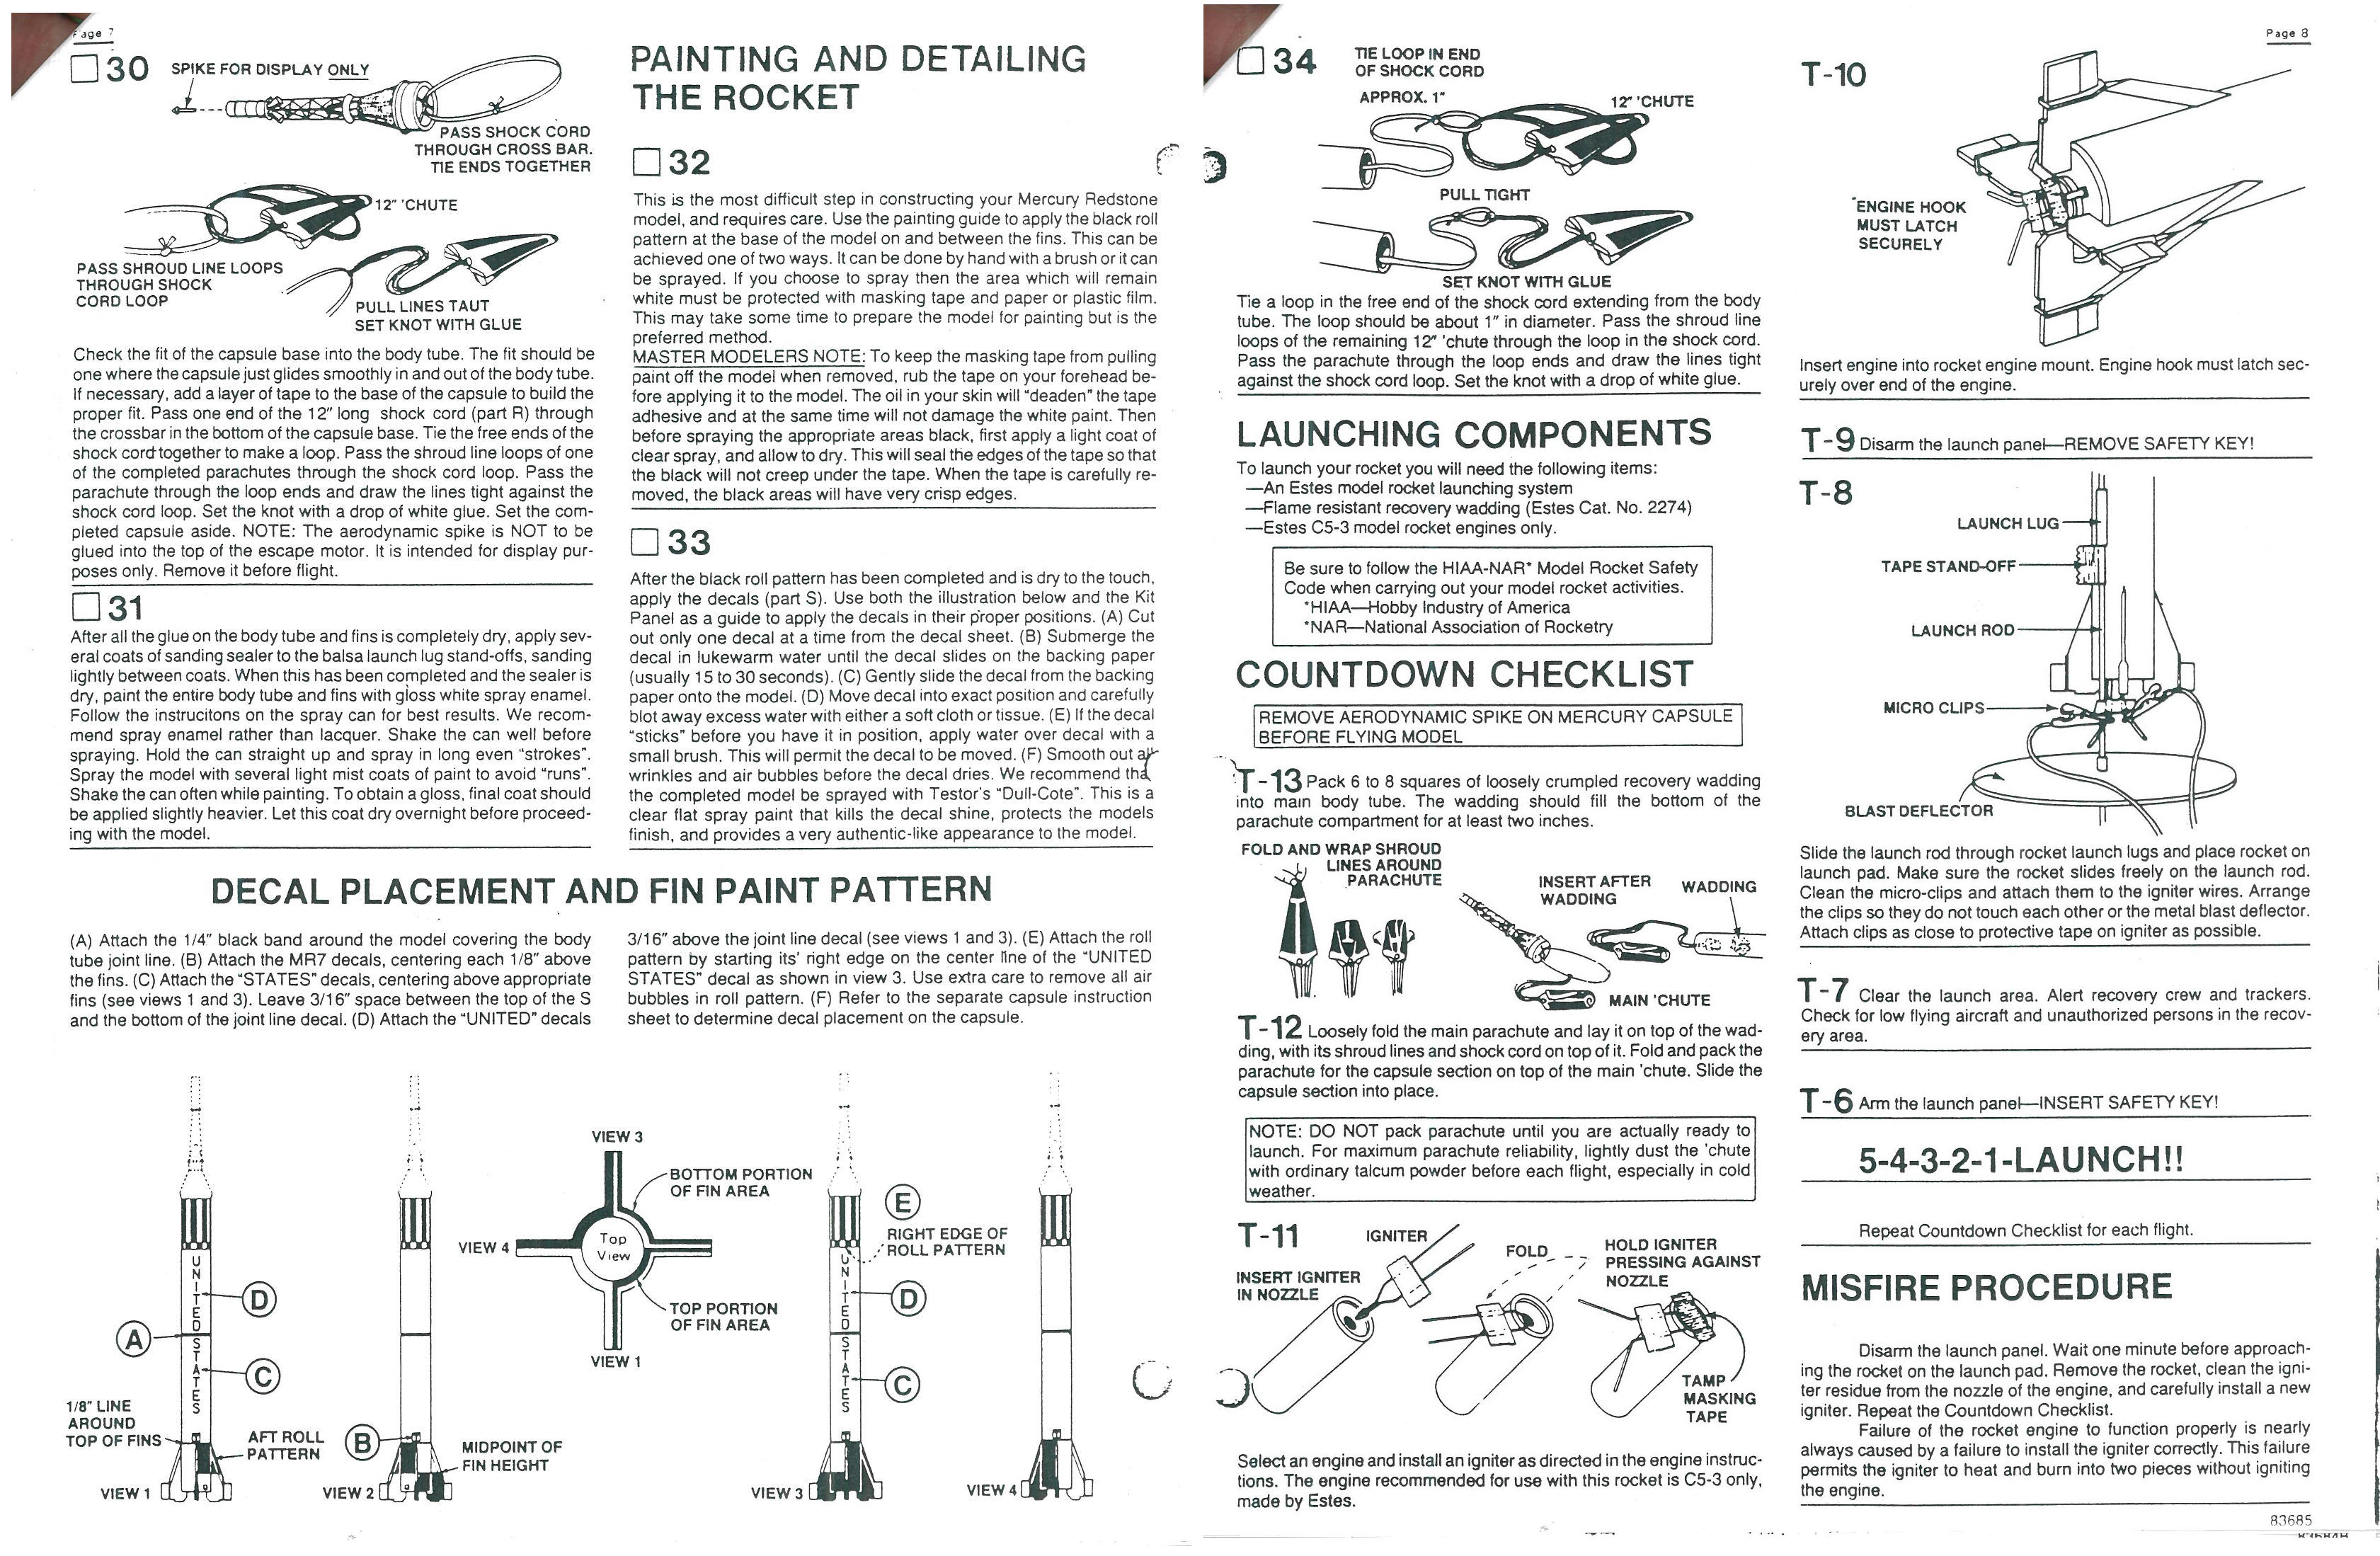
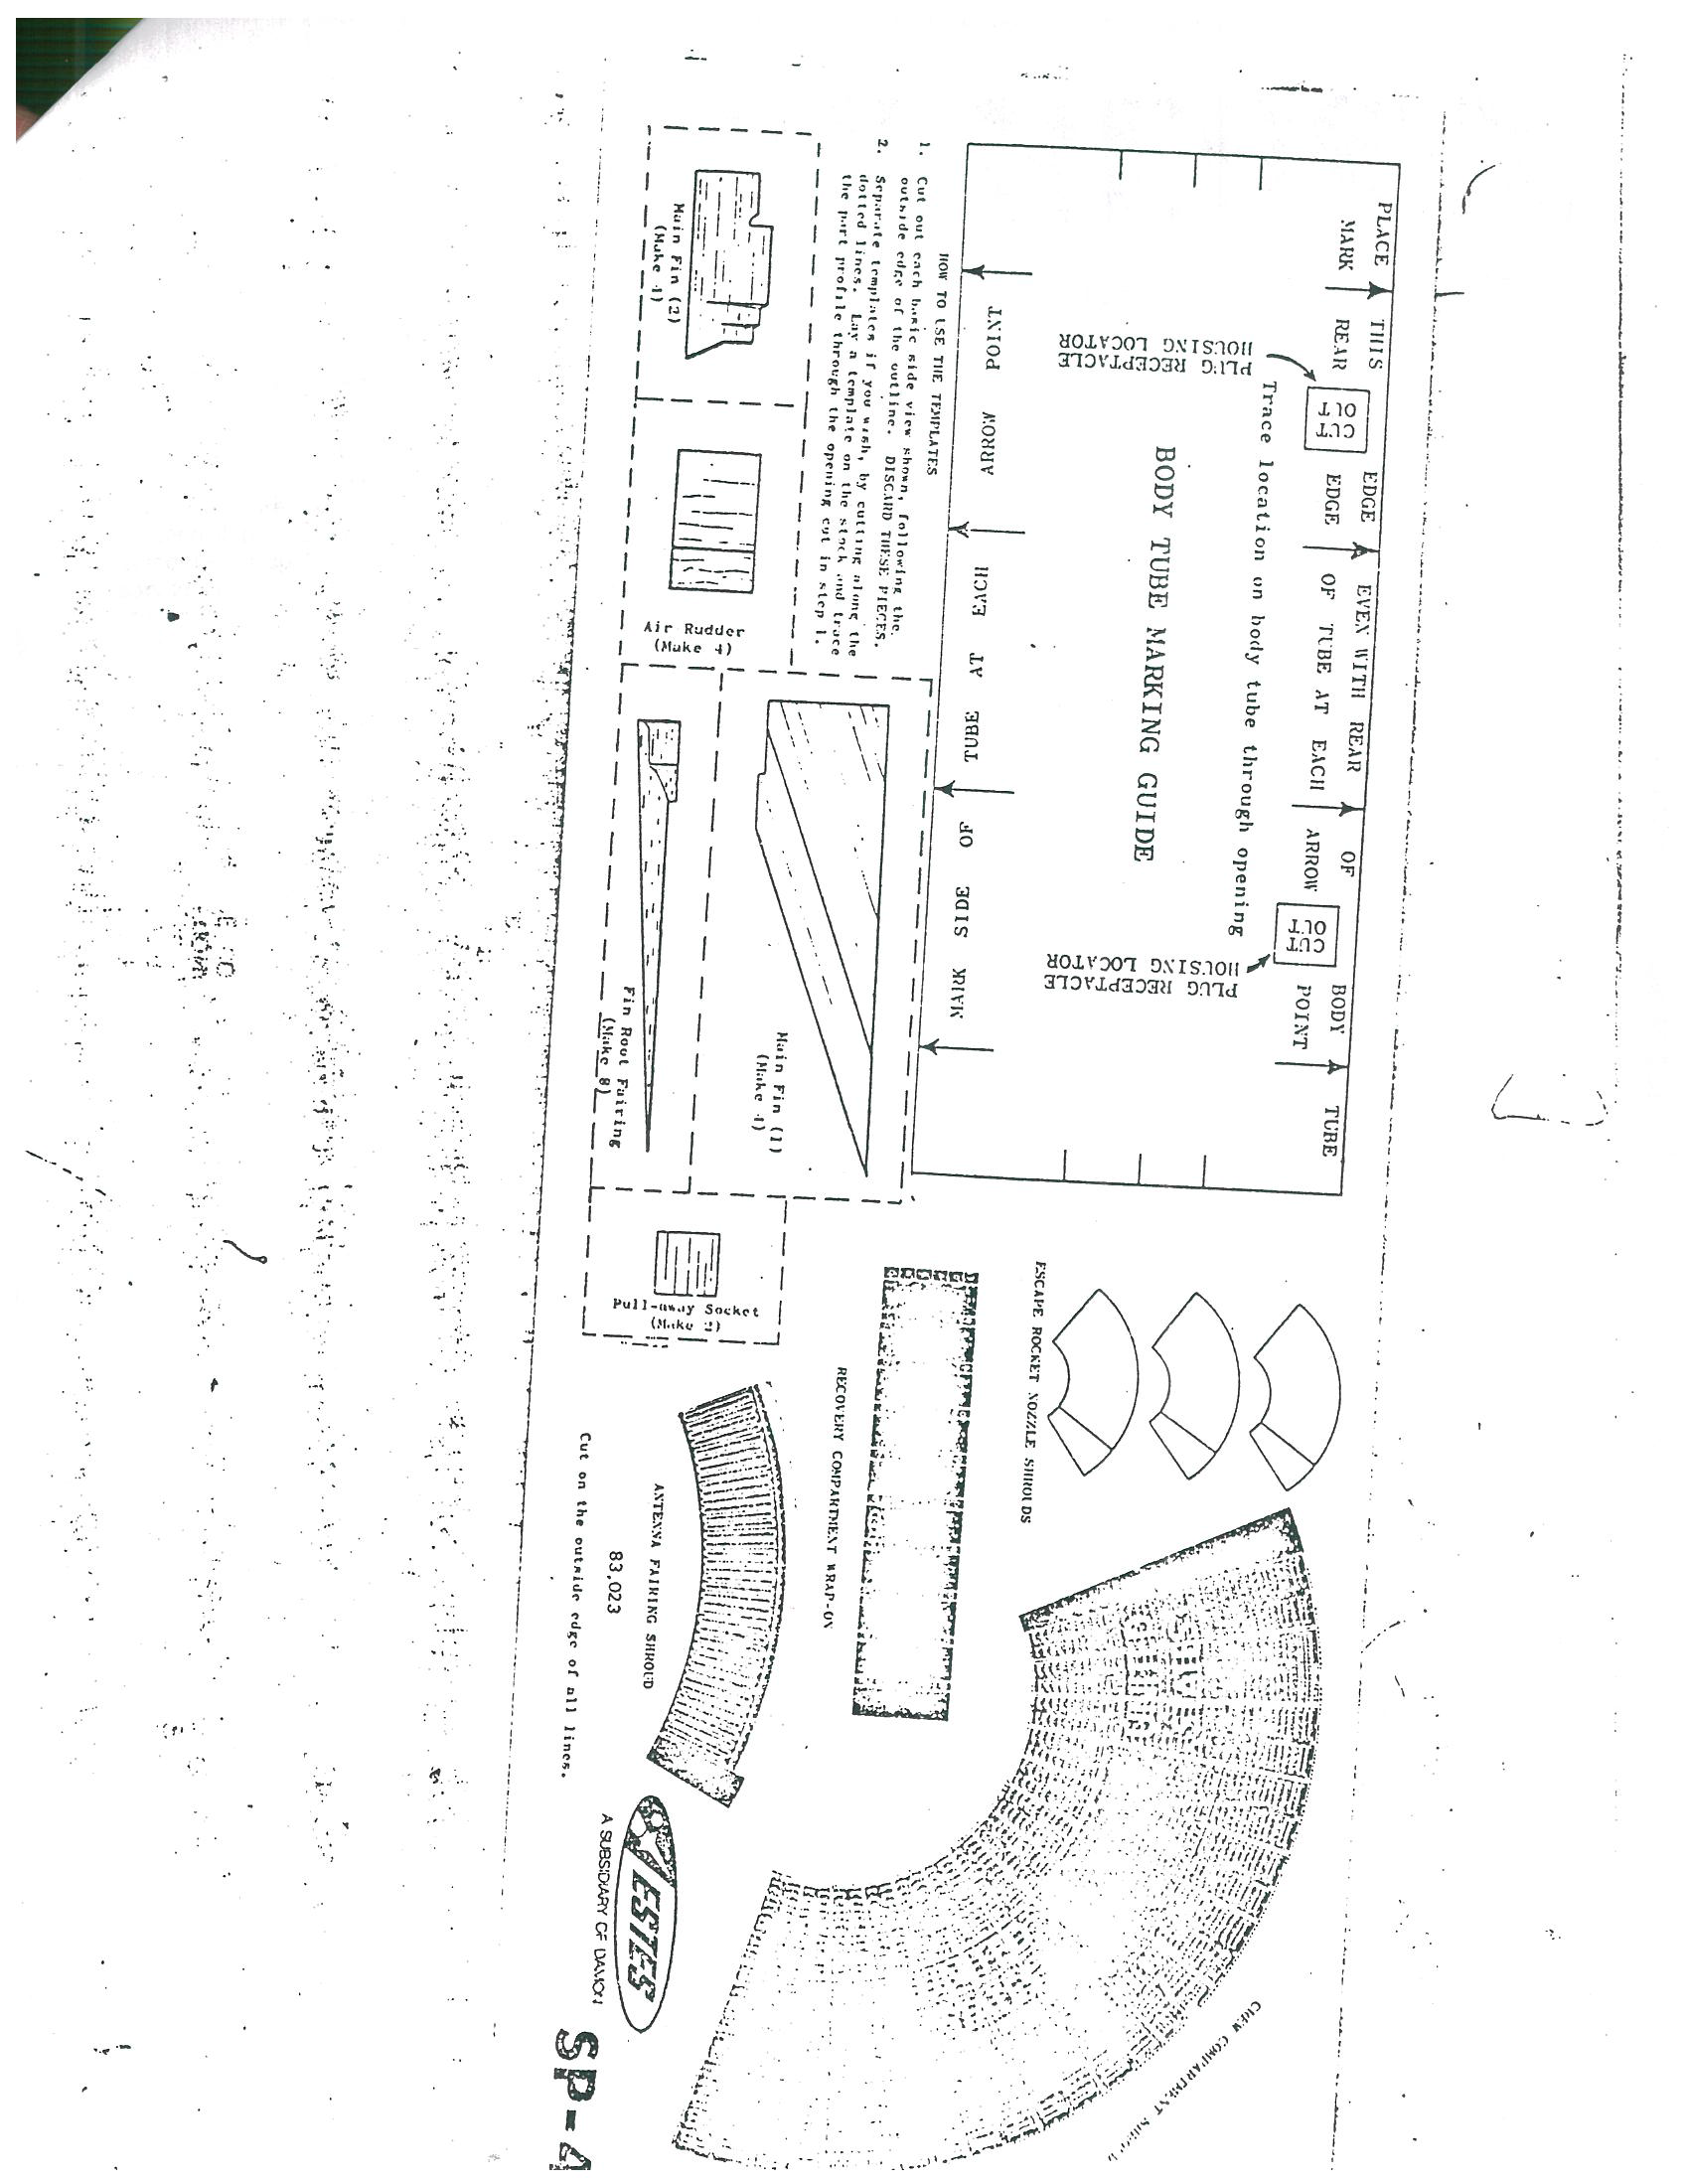
I've been simming the latest incarnation of the Estes Mercury Redstone (balsa fins, single 19.5" long body tube), and I've now got a question about the MMT.

Built stock, would the rocket be able to stand on the fins, or would the engine hook prevent that? My sim says no.

Estes Mercury Redstone (1921)(2014 Reissue) MMT question.png

I can't find the older 1980's version of the instructions to check them against.
 
Last edited:
The stock kit comes with the extended type of engine hook, with the extra finger grip/tab on it. That kind of engine hook does extend past the fins. If you cut that extra part off, then it would not interfere with the rocket standing on the fins alone.

https://www.estesrockets.com/303143-engine-hook-accessory-pack

You are missing a 45-deg chamfer cut on the fin root trailing edge, looks like about 3mm from the corner.
 
Last edited:
On mine, the engine hook touches the table before the fins do.
 
I just pinched my engine hook with pliers and now it sits just fine on the fins.
 
I just pinched my engine hook with pliers and now it sits just fine on the fins.

Me too! I score them with cutters then bend them back and forth.
The extended tab comes off pretty easily. A file takes off any sharp edge.
The hook if flipped over, the cut end is placed up by the engine block.
Finger tabs are for kids!
 
The stock kit comes with the extended type of engine hook, with the extra finger grip/tab on it. That kind of engine hook does extend past the fins. If you cut that extra part off, then it would not interfere with the rocket standing on the fins alone.

https://www.estesrockets.com/303143-engine-hook-accessory-pack

You are missing a 45-deg chamfer cut on the fin root trailing edge, looks like about 3mm from the corner.

Thanks all for the confirmation of my suspicion. I'm trying to sim the rocket as close to stock as I could. I will also be altering the tab for the actual build.

I know that I didn't sim the cut on the fin root. I began this sim without having a printout or actual parts in hand. I was also trying to avoid using a phantom body tube for the main fin (and having to accommodate for the -Y values associated with it).

Does anybody have a scan of the instructions of the 1980's release? I want to double check the locations fo the decals and details against it.

Thanks!
 
Last edited:
I like to keep the finger tabs intact. Every time I recover my rockets and I see the Finger tab folded up from impact, I feel that it may have saved a fin from damage or motor mount centering rings from loosening. I reset the tab (shock absorber) after each flight by straightening it back out.
 
I like to keep the finger tabs intact. Every time I recover my rockets and I see the Finger tab folded up from impact, I feel that it may have saved a fin from damage or motor mount centering rings from loosening. I reset the tab (shock absorber) after each flight by straightening it back out.

I like their functionality too as long as care is taken around the launch pad to ensure the tab doesn't catch the clips, igniter leads, stand-offs...

...
Finger tabs are for kids!
... of all ages !! :)
 
Hi all, just wanted to thank K'Tesh for showing me how to attach a file in here. I sent him the 1921 instructions. I just tried to upload them here, but it is too big for this website (almost 5mb). I will have to think of a plan B. Lol.

If am reading everything right, and just my guess, I think the engine hook issue is due to the fact that the older kit had the older engine mount which doesn't stick down as much. I'll have to get around to building this kit and see if one could move the hook up a bit. I still have to build the 2167 Liberty Bell 7 too, I'm really behind in my kit building! :)

I have also included two body wraps that I found a while ago. These are highly detailed wraps/skins you glue around the body, etc. I don't think there is any issues in reposting these, the author does state that these are meant for personal use only, and I am attaching them as the whole file as it was written. These are the updated files, I do have his older ones which are not as detailed. If there is room I will upload all of them. I haven't looked too closely for the differences, but it does seem like the updated ones have better shading. One quick example, looking at the ports under the "States" word, the newer ones have more detail shading on these ports.

View attachment 296408
View attachment 296409
View attachment 296410
View attachment 296411

Enjoy!
 
Last edited:
I've taken the .pdf file for the instructions and changed it into smaller .png images... They are now uploaded to flickr.


Last edited:
Man I miss the old Estes instructions. The new ones are craptacular.
 
Man I miss the old Estes instructions. The new ones are craptacular.

I think the new ones are fine. The older ones might be perceived to be better (e.g., more detailed with greater information) because they were delivered in a different era and represent what Estes thought the kids of that era could handle. I believe they are doing the same thing today. I think the instructions are a representative of where we are culturally as compared to another time.

Just my :2:.

Greg
 
I would agree that instruction with more detail and greater information are generally considered to be better.
 
[YOUTUBE]hSlvcoz9-I0[/YOUTUBE]


My build has been flying a dozen times with a D motor mount. It's an excellent kit!

Enjoy!
 
Back
Top