


Queeg500
Well-Known Member
- Joined
- Jan 19, 2009
- Messages
- 204
- Reaction score
- 1
Here is an Estes Big Dawg kit I modified to fly on D12 motors. I really love this kind of upgrade conversion because the D12 puts out a lot of noise and long thrust for low power rockets.
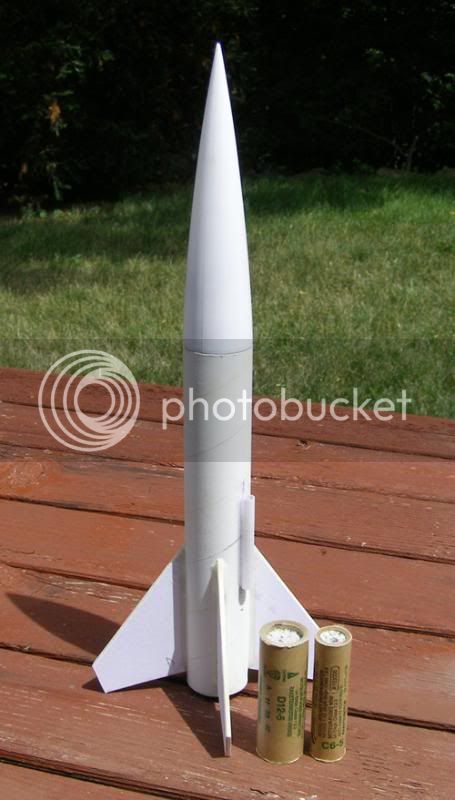
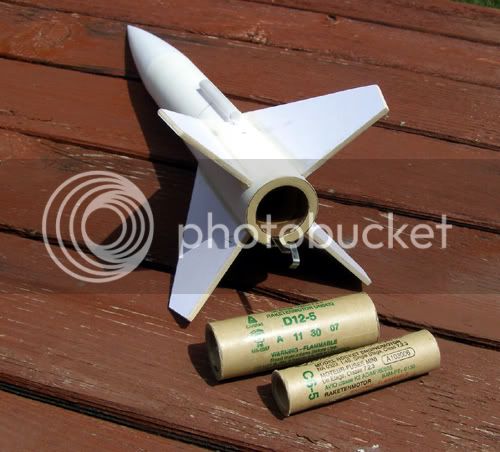
Ok, so to convert your Big Dawg to fly on D12s, get a BT55-50 motor mount from any fine online rocketry store and proceed to build. You might be thinking What does BT55-50 mean? The tube that D motors fit inside is the BT-50 so the BT55-50 code means the item is a D motor mount that will fit inside a BT55 tube. Once you get a motor mount then you can assemble the kit as usual except you will need to trim the fin tabs down so the fins fit flush with the body tube.
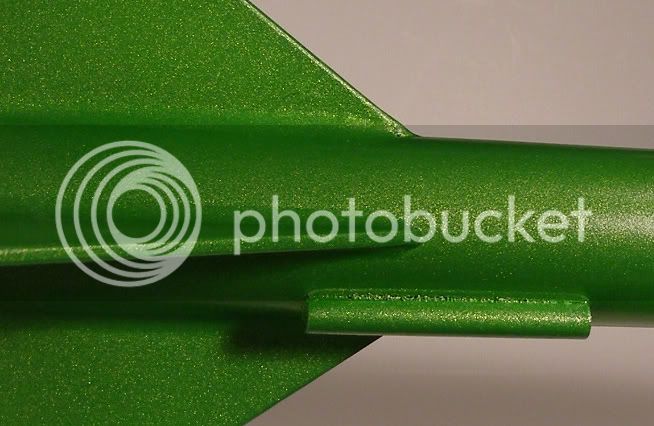
Because this rocket will fly with a heavier engine and therefore fly higher that means it will descend faster and impact harder so I reinforced a few things - paper laminated fins with 100lb. paper, epoxy fin fillets, kevlar shock cord mounted to the forward motor mount ring.
To do a motor upgrade conversion you have to account for the increased weight of the D motor so first I built the rocket completely except for the nose cone. Then I marked off the CG/CP relationship for a C motor. I put in the D motor in, measured the new CG and added nose weight until the CG came close to the original mark. The final weight on the nosecone was 1.3 oz. Total weight on the rocket loaded up is 4.5 ounces.
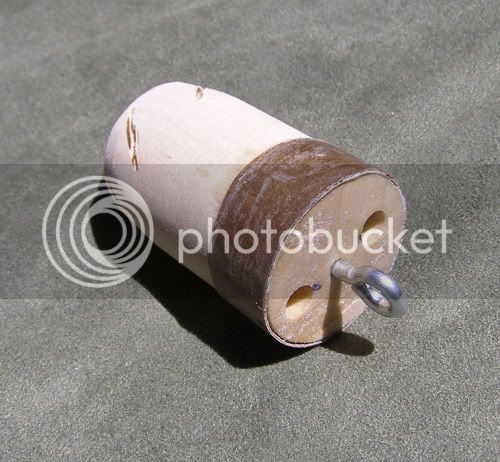
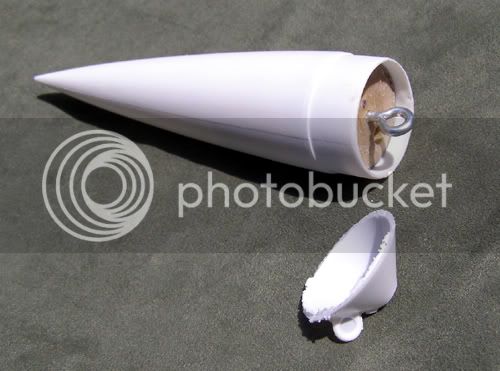
Pity about the BT55 nosecone. It is used by the AMRAAM, Bullpup 12D, the Big Dawg and some others but that attachment ring is way too flimsy even for stock built rockets. I want many flights out of this rocket so I made a plug out of wood that I think does four things - 1. Remove concern about the weak point of contact for the shock cord - metal eyebolt, 2. keep the hollow nosecone feature for ejection - two port holes, 3. hold the nose weight as forward as possible to maintain stability - long plug, and 4. free up more space in the interior.
What I came up with is this object made out of a 1 1/8 inch diameter by 2 inch long dowel sanded to fit inside the nosecone with thin CA soaked kraft paper wound around the aft diameter for a snug fit. The diagonal grooves were made to retain epoxy. The nut is held on the end with epoxy.
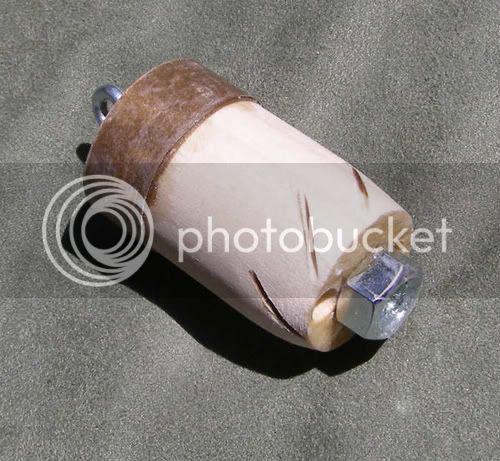
This is the end result:
Here is the Big Dawg was finished with Rustoleum white primer topped with Testors Blazing Black and Lime Ice One Coat Laquer. These are metal flake colors that give a 70's look.
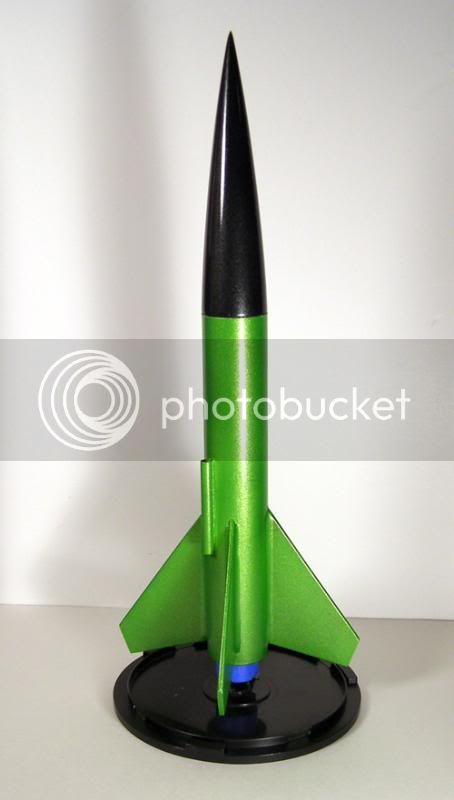
I flew the Dawg last Satruday, 9-26 at Maple Island - Tripoli Southern Minnesota. The flying conditions were very good, clear skies, south winds 5-10mph. The Big Dawg weathercocked albeit slightly. Successful parachute deployment and recovery. Had to do a little walking to recover it though. I got the mod info from EMRR's site and going back over the information it sounds like I made this overstable because the reviewer says he built his Dawg stock - not needing extra nose weight. I have a spare NC55 so I will mod that one, keep it at the 1 oz. weight and see how it flys.
Ok, so to convert your Big Dawg to fly on D12s, get a BT55-50 motor mount from any fine online rocketry store and proceed to build. You might be thinking What does BT55-50 mean? The tube that D motors fit inside is the BT-50 so the BT55-50 code means the item is a D motor mount that will fit inside a BT55 tube. Once you get a motor mount then you can assemble the kit as usual except you will need to trim the fin tabs down so the fins fit flush with the body tube.
Because this rocket will fly with a heavier engine and therefore fly higher that means it will descend faster and impact harder so I reinforced a few things - paper laminated fins with 100lb. paper, epoxy fin fillets, kevlar shock cord mounted to the forward motor mount ring.
To do a motor upgrade conversion you have to account for the increased weight of the D motor so first I built the rocket completely except for the nose cone. Then I marked off the CG/CP relationship for a C motor. I put in the D motor in, measured the new CG and added nose weight until the CG came close to the original mark. The final weight on the nosecone was 1.3 oz. Total weight on the rocket loaded up is 4.5 ounces.
Pity about the BT55 nosecone. It is used by the AMRAAM, Bullpup 12D, the Big Dawg and some others but that attachment ring is way too flimsy even for stock built rockets. I want many flights out of this rocket so I made a plug out of wood that I think does four things - 1. Remove concern about the weak point of contact for the shock cord - metal eyebolt, 2. keep the hollow nosecone feature for ejection - two port holes, 3. hold the nose weight as forward as possible to maintain stability - long plug, and 4. free up more space in the interior.
What I came up with is this object made out of a 1 1/8 inch diameter by 2 inch long dowel sanded to fit inside the nosecone with thin CA soaked kraft paper wound around the aft diameter for a snug fit. The diagonal grooves were made to retain epoxy. The nut is held on the end with epoxy.
This is the end result:
Here is the Big Dawg was finished with Rustoleum white primer topped with Testors Blazing Black and Lime Ice One Coat Laquer. These are metal flake colors that give a 70's look.
I flew the Dawg last Satruday, 9-26 at Maple Island - Tripoli Southern Minnesota. The flying conditions were very good, clear skies, south winds 5-10mph. The Big Dawg weathercocked albeit slightly. Successful parachute deployment and recovery. Had to do a little walking to recover it though. I got the mod info from EMRR's site and going back over the information it sounds like I made this overstable because the reviewer says he built his Dawg stock - not needing extra nose weight. I have a spare NC55 so I will mod that one, keep it at the 1 oz. weight and see how it flys.