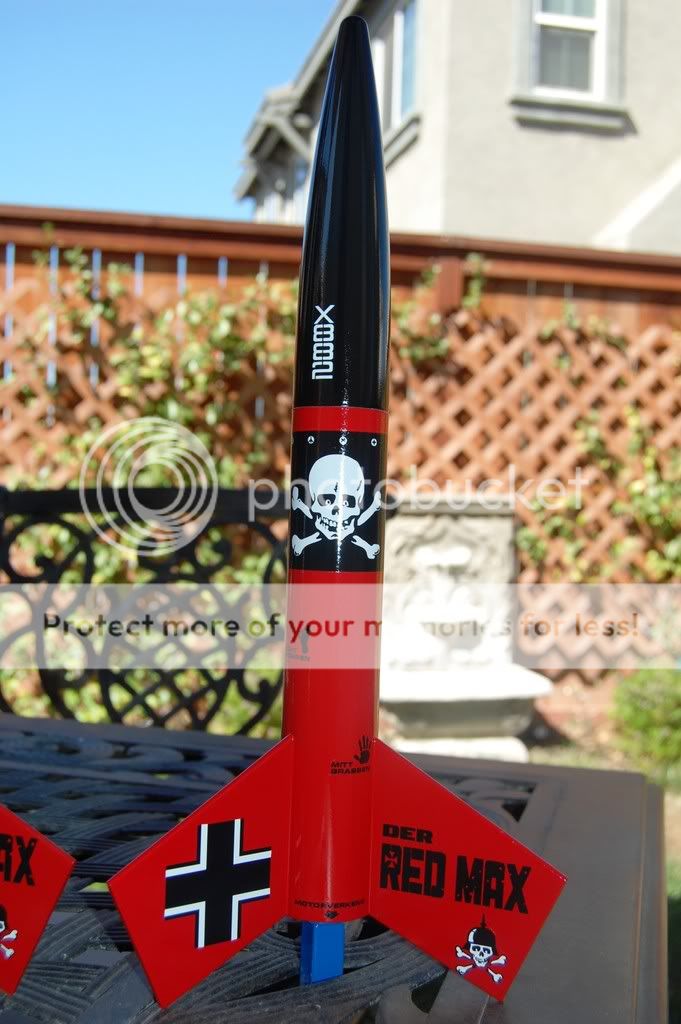
Der Red Max ugly fillets

The Rocketry Forum

Help Support The Rocketry Forum:

This site may earn a commission from merchant affiliate links, including eBay, Amazon, and others.

IBCleary

Member
Joined
Feb 13, 2009
Messages
5
Reaction score
0
Getting back into rockets with my son after 20+ years and I'm having troubles making decent looking fillets. On this rocket I drilled 1/8" holes in the body tube under the root edge of the fin and mixed Greatplanes wood glue with some balsa sanding for extra strength. When I made the final fillet the results were pretty sad. The Pro Wood Glue dries really thin and has no real radius. This has been the norm. I tried to go over them with white glue but no luck, will not stick to the GP wood glue. I've come a long way from the Wizards, and Vikings I bought from selling magazine subsciptions as a kid, but whats the trick for the great looking fillets I see on other rockets. here are some pics of the work in progress.

2507996560100730971S425x425Q85.jpg


2736449290100730971S425x425Q85.jpg


2990367020100730971S425x425Q85.jpg
 
What I do is pretty time consuming compared to other people's methods, but I like mine. I use Titebond III wood glue, and you can find it at most any hardware shop like Lowes or Home Depot. I prepare the surface where the fin will be attached by sanding off the shiny glassine off the tube so the glue will have a stronger bite onto the body tube. I spread a thin layer of the glue on the fin root and then smooth it out with my finger to have a nice even coat of glue on the root. The glue, in the end, should be thin enough to see the wood through the fin. Then I quickly put it in place and hold it in place after making sure it's aligned properly and perpendicular to the body tube. After it's dried, there shouldn't be too much glue, if any at all, that should have come out from under the fin after pressing it in place. This is why I use a little bit of glue, to prevent that, since the glue that comes out from under the root can interfere with the fillets. So then, I squeeze out a relatively thin line of glue along the fin and body tube joint and then smooth it out with my finger by applying a consistent force and running it down along the joint. If my finger picks up a lot of glue, I stop and wipe it off to prevent it from flowing out and around my finger. After that, the glue should be nice and smooth. The glue will shrink, and so I repeat the fillet process typically three to four times to create a layered fillet. The end product should be very smooth, requiring minimal sanding or filling and very strong. The layered fillet will ensure that all the glue is dried as opposed to one thick fillet laid down all at once. A thick fillet could take as much as two weeks to completely dry on the inside.
Is this detailed enough? Haha.
 
thanks josh, patients seems to be my problem. I was trying to find a way to due it in two passes. The new putty rivets seem to make my problems worse. most of the blems are due to the excess putty. Here are the results so far. I can handle criticism with suggestions. :) The paper wrapped fins give me fits also.

2323459400100730971S425x425Q85.jpg

2025184190100730971S425x425Q85.jpg

2669353500100730971S425x425Q85.jpg

2018576920100730971S425x425Q85.jpg
 
I personally don't view fillets as added strength. If you do the double glue technique that should be strong enough. I use fillets more for aesthetics and a smooth finish. I use the old Elmers Glue All and finger technique, one pass is all that is needed. To date I have not had a joint failure.
DSC_0001-1.jpg
 
Getting back into rockets with my son after 20+ years and I'm having troubles making decent looking fillets....The Pro Wood Glue dries really thin and has no real radius....
When I really want a nice radius, I apply slightly thinned elmers wood filler, then sand it down by hand or with sandpaper wrapped around an appropriately sized dowel. This adds no strength, but looks cool. :)

Oh, and welcome back to the hobby! Beware the bug bites much harder the 2nd time around...

I also do this on top of my fillets if they have any defects that can't be filled or will be hard to fix. They look great if it's done this way too.
 
Great looking fins on that tapered tail Paul. Thanks for the input. I'll post final pics when the future dries, but I have a Big Bertha and a Patriot to experiment on next time. I'm not sure the wood paste rivets will add any real strength since I think fins suffer mostly from sheer. The bug has bit. I built a threoretical mach buster back in the day and I'm thinking of a mile buster for a future project. This site is very informative and it would be a big help on the LPR to space thread. :D
 
I always wanted this one as a kid but never did get one. I'm (sort of) getting back into the hobby since my son has received a few Estes starter kits as gifts. Here's my Red Max - in some very poor lighting! I changed the motor to a "D" but haven't gotten to fly it yet. Went out to the park last week and had dead batteries - even the spares!
 
For the final "nice" fillets on my LPR birds I also use Elmer's Wood Filler (Carpenter's filler, not the Pro-Bond stuff). I usually run a bead along the fin joint straight out of the tube and then use my fingertip dipped in water to smooth it out. It usually takes several passes to get it looking nice, and I try and mop up any excess water from the balsa or paper as I go (taking care not to mess up the just completed fillet). As mentioned above, wood filler is pretty easy to work with sandpaper, but I have to be very careful that I don't sand a groove into the fin next to where I'm working on the fillet (the filler is usually harder than the balsa fin). Whatever you do, patience is the key, and practice helps.

Here's a sequence of pics from when I was finishing my Mighty Mick

Mighty Mick 041.jpg

Mighty Mick 049.jpg

Mighty Mick 052.jpg

Mighty Mick 076.jpg
 
I do my fillets the same way and using the same materials as Josh (jj94). The Titebond III just seems to give the best results but it's a somewhat time consuming project. It seems I have more patience these days than way back when.

Small confession here: When a fingertip starts to load up with glue, I use the next one. It's not unusual to see walking into the kitchen with all four fingertips of my right hand coated with dabs of glue. You'd think I just take a wet rag out to the shop with me and avoid all that silliness.:blush:
 
Small confession here: When a fingertip starts to load up with glue, I use the next one. It's not unusual to see walking into the kitchen with all four fingertips of my right hand coated with dabs of glue. You'd think I just take a wet rag out to the shop with me and avoid all that silliness.:blush:

Your shop needs a simple addition:


When I built my basement shop, the utility sink was the first thing I drew into the sketches. I do my all my cleanup in this sink, and the wife stays happy, especially when we paint, and rollers and brushes need cleaning. I wanted to install a urinal in the shop, but she vetoed that, saying the basement bathroom was only a few feet away from the shop door...
:(
 
Last edited:
For most of my rockets, I use yellow glue to attach the fins, then apply one or two "coats" of white glue as fillets. For larger birds and those that I expect might have hard landings, I use epoxy fillets over yellow glue.

Rarely have a failure, or a really bad finish, with either. I probably need to use microbeads with my epoxy to make the sanding easier, though.

I often use wood filler to fill in around the launch lug, just to make painting easier.

And hey, nice looking bird, IB.
 
Back
Top