Delta II 7920H 300 @ 1/70 scale

The Rocketry Forum

Help Support The Rocketry Forum:

This site may earn a commission from merchant affiliate links, including eBay, Amazon, and others.
Joined
Dec 12, 2020
Messages
496
Reaction score
715
Location
Redwater AB Canada
In deciding to proceed with this build I first had to determine if I could actually make nine copies of the SRM and have them all the same. The nose cones and thrust cones were quite small and had to be made from two layers of 28lb paper and secured with packing tape and strengthen with CA. SRMs are made of BT-5 tubes. Since they all came out looking not to bad I’ve decided to proceed with the build. For the main frame tube I’m using a gift wrap tube that is 35 mm in diameter and will be inserting a 24 mm engine mount. The upper payload fairing will be a BT-60 tube with two wraps of card stock.
E651F17C-D53F-4221-B775-EB8742F4079D.jpeg1EABA72D-22CB-4500-980B-F5E9783E6C70.jpegimage.jpg1261523D-ADA8-44E3-91A0-D32E015FC69B.jpegimage.jpg
 
I was going to center the main frame inside the upper payload fairing but the centering rings would only be 3mm wide. Once cut from heavy cardstock they would be quite flimsy. So I decided to line the inside of the fairing with 6 layers of card board. I cut holes with a hole punch into each layer to assist with applying CA to each layer. The main frame then slides in for a tight fit. Constructed two centering rings for a BT-5 Tube for aligning the nose cone transitions, rings and nose cone sphere.
8C7857E5-41A3-4B67-9B51-8D2A8240B222.jpeg92254CC9-9EC2-4F0C-877B-1ADB0D91EEF7.jpeg58AC6002-F483-46E3-A9EF-FACFBA352AFB.jpeg0E6C2167-7492-4144-9946-B212DBE8B7FB.jpeg
 
Completed installing the wraps on the main tube. On the lower wrap I cut areas for the mounting of the fins and the 9 SRMs before installing the wrap. Wraps were applied using 3M double sided tape. Where the openings had been cut in the wrap I removed the exposed adhesive. I cut 18- 3mm x 3mm x 15mm balsa standoffs and hardened them with CA glue. These will offset the SRMs from the main tube 3mm. Three fins are constructed of 1mm clear plastic. I added 3 x 3 x 55mm long balsa strip to each side of the fin root slightly offset so I could sand a curve into the balsa strips to fit the curve of the main tube. I glued these strips to the plastic using RC modellers Canopy glue. Once dry I hardened the balsa with CA glue. Standoffs and fins were then glued to the main tube using wood glue. Upper standoffs in place along with the fins. Still have to install the lower standoffs.
 

Attachments

  • 14A19F5F-566E-4A46-8732-759DF22CA035.jpeg
    14A19F5F-566E-4A46-8732-759DF22CA035.jpeg
    1.6 MB · Views: 0
  • 19C2E088-C35C-46C8-A789-5B8129C92041.jpeg
    19C2E088-C35C-46C8-A789-5B8129C92041.jpeg
    1.5 MB · Views: 0
  • 22ED18F7-3C3E-46C7-AD65-3B91485E9135.jpeg
    22ED18F7-3C3E-46C7-AD65-3B91485E9135.jpeg
    760.2 KB · Views: 0
  • 808A7B8B-26E2-4631-AA78-749DF70F8A49.jpeg
    808A7B8B-26E2-4631-AA78-749DF70F8A49.jpeg
    804.9 KB · Views: 0
  • 6C4A4CC2-0F5C-4289-8845-EEF819189D3A.jpeg
    6C4A4CC2-0F5C-4289-8845-EEF819189D3A.jpeg
    594.5 KB · Views: 0
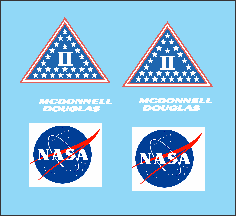
keep the pictures coming, I'll post up a picture of my 40-year-old Delta 2 that I've been restoring and my decals have been ordered, so you can see what they look like.
 
Centring rings and card stock nose cone transitions completed and coated with CA. 15 mm wood sphere on top. All are centred on a eerie BT-5 tube which runs from the nose cone to the bottom of the coupler bulkhead assemble. Weight if required can be added thru the BT-5 tube and then a stopper inserted in the tube to keep the weights at the top. Next up glue the nose cone parts together, then filler in the seams and glue the nine SRMs to the main frame. Haven't quite figured out how I’m going to align all those tubes between the fins.


A0581467-8E89-44A6-92B1-364C1E6A99C6.jpegEDD80951-F99C-46CC-8588-57FF9EDE18DA.jpeg22506DAF-2E93-4A4E-9349-20C8075CC06D.jpegB4E7F99E-D8A4-4E29-ABA6-29828287ECAE.jpeg5B43A983-F8EA-4206-A55C-99C95883DDD4.jpeg
 
Centring rings and card stock nose cone transitions completed and coated with CA. 15 mm wood sphere on top. All are centred on a eerie BT-5 tube which runs from the nose cone to the bottom of the coupler bulkhead assemble. Weight if required can be added thru the BT-5 tube and then a stopper inserted in the tube to keep the weights at the top. Next up glue the nose cone parts together, then filler in the seams and glue the nine SRMs to the main frame. Haven't quite figured out how I’m going to align all those tubes between the finsView attachment 561826
so where did you get the decals from?
 
It’s not decals, they are full tube wraps. I searched rocketreviews.com for Delta II AND
opened Scratch-Delta II by Bob Harrington. Once that’s open I hit “Caltech web site”for the plans which contain the body wraps. Bob built his differently as I used tubes for the main frame and SRMs.
 
It’s not decals, they are full tube wraps. I searched rocketreviews.com for Delta II AND
opened Scratch-Delta II by Bob Harrington. Once that’s open I hit “Caltech web site”for the plans which contain the body wraps. Bob built his differently as I used tubes for the main frame and SRMs.
very nice :goodjob:
 
"Haven't quite figured out how I’m going to align all those tubes between the fins."

Toothpicks, piercing through side of srm and through srm attachment/standoff points. Then once aligned, glue each in place.
 
I ordered my decals and they will be shipped out. computer messes with the images somewhat.
u6nOsRv.png
 
Ssecured the SRMs to the balsa standoffs using RC Modellers Canopy glue. Eyeballed the alignment and did not use pins. each one was glued on separately and prior to next one going on a fillet of the same glue was applied to the balsa standoff and the SRM. The nice thing about the Canopy glue is it dries crystal clear. Applied numbers to the SRMsusing double sided tape. The model was then clear coated. payload fairing to be completed yet along with launch lugs and chute install.
 

Attachments

  • image.jpg
    image.jpg
    813.2 KB · Views: 0
  • image.jpg
    image.jpg
    759.2 KB · Views: 0
  • image.jpg
    image.jpg
    737.2 KB · Views: 0
Ssecured the SRMs to the balsa standoffs using RC Modellers Canopy glue. Eyeballed the alignment and did not use pins. each one was glued on separately and prior to next one going on a fillet of the same glue was applied to the balsa standoff and the SRM. The nice thing about the Canopy glue is it dries crystal clear. Applied numbers to the SRMsusing double sided tape. The model was then clear coated. payload fairing to be completed yet along with launch lugs and chute install.
:goodjob: :bravo:
 
Payload fairing completed with the install of the wrap. Launch lugs installed and 18” chute. Total wt 5.1 oz and height 23”. 24mm engine mount. Will do a swing test later to check stability and add nose if required. 9603B994-45E9-4A1D-99A3-27BD6614D6BC.jpeg
 
Launched the Delta II June 24th. Added 15.7 grams nose weight and flew on an Aerotech E30-4T with an 18" chute recovery. The rocket lost 2 clear plastic fins at about 100' elevation. Sheared right off but the rocket's flight continued straight up. On landing the two booster nozzles sustained impact damage on touchdown. All damage is repairable. Delta II 4386 (3).JPG
View attachment Delta II Launch C.mov
 
I tried flying mine on a C6-5 and it went up about 15-ft turned 110° and dough into the ground so one of the older guys looked up and said you need a bigger motor show the next time I'm going to send it up more to the 20 so now I took off 2 in of the top of the airframe....Got a coupler and new piece of airframe glued in place so now have to work on getting the nose come straightened out. I was thinking about having a friend of mine make a 3 D nosecone that has the bulbous section in it, but I was wondering how that would work with a launch rod?
 
I tried flying mine on a C6-5 and it went up about 15-ft turned 110° and dough into the ground so one of the older guys looked up and said you need a bigger motor show the next time I'm going to send it up more to the 20 so now I took off 2 in of the top of the airframe....Got a coupler and new piece of airframe glued in place so now have to work on getting the nose come straightened out. I was thinking about having a friend of mine make a 3 D nosecone that has the bulbous section in it, but I was wondering how that would work with a launch rod?
To get past the bulbous nose cone construct a stand-off big enough to clear the nose cone and glue the launch lug to that.F5226334-DE6A-433A-9C43-A8C45B419033.jpeg
 
DFR Technologies Delta II and III kits, from circa 2011, had builder glue launch lug on/between two SRMs. On the visible side of the SRMs, not between the SRMs and the main airframe.
 
Back
Top