


It looks like Callie did her usual great job creating the graphics for you.
You are using an out of date browser. It may not display this or other websites correctly.
You should upgrade or use an alternative browser.
You should upgrade or use an alternative browser.
D-Day themed Der Big Red Max builds...
- Thread starter James Duffy
- Start date
Help Support The Rocketry Forum:
This site may earn a commission from merchant affiliate
links, including eBay, Amazon, and others.
James Duffy
Well-Known Member
- Joined
- Jan 19, 2009
- Messages
- 1,445
- Reaction score
- 1,733
It looks like Callie did her usual great job creating the graphics for you.
Absolutely, I'm really impressed with the quality of the printing and cutting that they did on the vinyl for this project, and I look forward to using more of their stuff.
James
James Duffy
Well-Known Member
- Joined
- Jan 19, 2009
- Messages
- 1,445
- Reaction score
- 1,733
I like the bumper max the best. I wish I could see that one fly. Should be awesome!
Here you go!
James Duffy
Well-Known Member
- Joined
- Jan 19, 2009
- Messages
- 1,445
- Reaction score
- 1,733
I must have missed it in the build but how did you ignite the second stage?
The sustainer is ignited by a PerfectFlite miniTimer4 in the nose cone of the booster. The setup also uses a piston assembly to reduce the possibility of motor damage to the nose. I'll cover the assembly of the electronics sled and piston base when the parts arrive, but the assembly and operation will be very similar to the setup used in my Bumper WAC several years ago, and detailed starting in this post: https://www.rocketryforum.com/threads/revisiting-the-estes-maxi-brute-v-2.140236/page-2#post-1692064
James
James Duffy
Well-Known Member
- Joined
- Jan 19, 2009
- Messages
- 1,445
- Reaction score
- 1,733
The Mustang Max flew successfully today!
More later,
James
More later,
James
Sweet flight for a sweet bird.
hball55
Well-Known Member
I received some V2 decals from Stickershock that had some swastika decals. I was about to use them on my 4” Der Red Max because many of my waterslide decals tore when I tried to apply them. Thinking twice stopped me from using them, as I figured my club might not let me fly a rocket with swastikas on it.
James Duffy
Well-Known Member
- Joined
- Jan 19, 2009
- Messages
- 1,445
- Reaction score
- 1,733
Received a cool package in the mail today, a custom 24" parachute that I can swap between the two models. Steve Riegel of Front Range Rocket Recovery suggested a custom black/white radial design that would mimic the invasion stripes of both the Mustang Max and Dakota Max rockets. This, I thought, was a fantastic idea. Take my money, please!

Can't wait to fly these with this great chute!
James
Can't wait to fly these with this great chute!
James
James Duffy
Well-Known Member
- Joined
- Jan 19, 2009
- Messages
- 1,445
- Reaction score
- 1,733
The laser-cut bits for the piston staging mount arrived yesterday from Mike Nowak at Galactic Manufacturing. Fit on the parts was flawless, so you should contact him immediately and buy several.
Here's a view of the parts pre-assembly:

...and a view of the mount assembled with epoxy.

A pair of 1/2" square pecanpineoakspuce blocks were glued to the interior surface of the nose cone to serve as mount points for the piston base. Small mounting screws will engage with holes drilled into the endgrain.

A PerfectFlite miniTimer4 is mounted onto the piston base, and the wiring for the switch and power (a 9v battery) is installed. The battery will be installed on an inside surface of the nose cone using velcro.


Scrap lengths of BT-5 and BT-20 tubing are nested to create the piston, which will engage with the piston base at the aft end, and an A3-4T motor in the second stage at the forward end. A Q2G2 igniter is soldered to lengths of wire wrap wire, which will connect to the timer and extend up the length of the piston tube.

The piston, base, and igniter all integrate together for use. The piston gets really funky after use and needs to be replaced after each flight, but does a great job of protecting the nose of the booster.

Here's how the piston base looks when installed in the aft end of the nose cone.

I plan on flying this at our next AARG club launch in early May, and will be sure to grab photos of the prep process at that time.
James
Here's a view of the parts pre-assembly:
...and a view of the mount assembled with epoxy.
A pair of 1/2" square pecanpineoakspuce blocks were glued to the interior surface of the nose cone to serve as mount points for the piston base. Small mounting screws will engage with holes drilled into the endgrain.
A PerfectFlite miniTimer4 is mounted onto the piston base, and the wiring for the switch and power (a 9v battery) is installed. The battery will be installed on an inside surface of the nose cone using velcro.
Scrap lengths of BT-5 and BT-20 tubing are nested to create the piston, which will engage with the piston base at the aft end, and an A3-4T motor in the second stage at the forward end. A Q2G2 igniter is soldered to lengths of wire wrap wire, which will connect to the timer and extend up the length of the piston tube.
The piston, base, and igniter all integrate together for use. The piston gets really funky after use and needs to be replaced after each flight, but does a great job of protecting the nose of the booster.
Here's how the piston base looks when installed in the aft end of the nose cone.
I plan on flying this at our next AARG club launch in early May, and will be sure to grab photos of the prep process at that time.
James

James Duffy
Well-Known Member
- Joined
- Jan 19, 2009
- Messages
- 1,445
- Reaction score
- 1,733
The P-51 Max flew again yesterday at the Austin Area Rocketry Group launch.
The field is 600 acres+, and I had to land on the one !^&*(^ road on the whole thing. Damn...
BTW, there is a Israeli F-16 Big Red Max (Der Sand-Colored Mentsch?) on the workbench right now. More photos soon as that project moves along.
James
The field is 600 acres+, and I had to land on the one !^&*(^ road on the whole thing. Damn...
BTW, there is a Israeli F-16 Big Red Max (Der Sand-Colored Mentsch?) on the workbench right now. More photos soon as that project moves along.
James
modeltrains
Well-Known Member
- Joined
- Jun 29, 2011
- Messages
- 1,872
- Reaction score
- 757
Thai is a nice little detail.
I'm especially pleased with how the fuel filler markings worked around the rail buttons.

James Duffy
Well-Known Member
- Joined
- Jan 19, 2009
- Messages
- 1,445
- Reaction score
- 1,733
The Der Big Red Max armada at this dojo has grown again, with the addition of an Israeli F-16 themed reinterpretation. Vinyl for this one also came from Callie Graphics.


The grey on the belly and nose cone were done with Tamiya spray lacquer, as was the light sand base on the upper side. The green and dark brown bits were they airbrushed with Tamiya acrylics, after which a clear lacquer overcoat was applied to protect the paint. If the winds aren't too bad it will fly at the Austin Area Rocketry Group launch tomorrow.
I have another DBRM in primer, and had originally planned a Texas ANG F-16 scheme for that one. That may change to a "Ghost of Kyiv" MiG 29 version, though.
Last edited:
GuyNoir
Well-Known Member
LOVE the scorpion tail marking!
James Duffy
Well-Known Member
- Joined
- Jan 19, 2009
- Messages
- 1,445
- Reaction score
- 1,733
How many DBRM does this make for you? Let's see the complete line up!
Not as many as one might think. Two 4" versions (Der Bumper Max, Hello Kitty Max) and three 3" examples (C-47/CG-4 Max, P-51 Max, and Israeli F-16 Max/Mentsch). There is one more 3" in primer and two kits on the shelf thanks to the recent Amazon sale.
I'll try to line them all up for a photo soon.
James
James Duffy
Well-Known Member
- Joined
- Jan 19, 2009
- Messages
- 1,445
- Reaction score
- 1,733
LOVE the scorpion tail marking!
There are all sort of cool options to choose from on the Callie Graphics site:
https://callie-graphics.com
James Duffy
Well-Known Member
- Joined
- Jan 19, 2009
- Messages
- 1,445
- Reaction score
- 1,733
During painting and finishing of the Israeli F-16 Max I snapped a few photos that may be of interest. The first shows the painted airframe before the vinyl bits were applied.

The nose cone was painted with Tamiya AS-7 Neutral Gray (USAAF) lacquer, while the belly was sprayed using TS-32 Haze Gray lacquer. The belly was then masked off and the topside of the airframe was sprayed with TS-46 Light Sand. After studying some photos of real IAF F-16s, it seemed that hard mask lines would be inappropriate, so I decided to freehand these with acrylics and an airbrush, using XF-21 Sky (a light green) and XF-52 Flat Earth for the brown. Finally, the belly masking was removed.
Anticipating that the acrylics would be more prone to damage and scratching than the lacquers, the whole thing was sprayed with TS-13 Clear lacquer.

Next, the vinyl was applied. For the scorpion tail art tiny tape flags were applied to the edges of the fin as alignment guides.

The refueling guide marks were applied in line with vertical stabilizer fin, and tape flags with hash marks were used to assure alignment.
This was a really fun, low pressure project, and only took about 6 hours total to complete.
The nose cone was painted with Tamiya AS-7 Neutral Gray (USAAF) lacquer, while the belly was sprayed using TS-32 Haze Gray lacquer. The belly was then masked off and the topside of the airframe was sprayed with TS-46 Light Sand. After studying some photos of real IAF F-16s, it seemed that hard mask lines would be inappropriate, so I decided to freehand these with acrylics and an airbrush, using XF-21 Sky (a light green) and XF-52 Flat Earth for the brown. Finally, the belly masking was removed.
Anticipating that the acrylics would be more prone to damage and scratching than the lacquers, the whole thing was sprayed with TS-13 Clear lacquer.
Next, the vinyl was applied. For the scorpion tail art tiny tape flags were applied to the edges of the fin as alignment guides.
The refueling guide marks were applied in line with vertical stabilizer fin, and tape flags with hash marks were used to assure alignment.
This was a really fun, low pressure project, and only took about 6 hours total to complete.
- Joined
- Jan 27, 2009
- Messages
- 4,495
- Reaction score
- 2,969
This is almost as bad as me trying to see how many different century series r/c rocket gliders I could make out of cosmic interceptor kits
James Duffy
Well-Known Member
- Joined
- Jan 19, 2009
- Messages
- 1,445
- Reaction score
- 1,733
Finished up another DBRM yesterday, using a set of F-16 vinyl from Callie Graphics. This scheme is an homage to a Texas ANG fighter painted to look like one of the Jenny trainers the unit used post-WWI. Here's a photo stolen from the web:

..and here are a pair of views of the model.


This should fly at the Austin Area Rocketry Group launch this weekend.
I still have a pair of unbuilt DBRM kits on the shelf. Ideas?
James
..and here are a pair of views of the model.
This should fly at the Austin Area Rocketry Group launch this weekend.
I still have a pair of unbuilt DBRM kits on the shelf. Ideas?
James
GuyNoir
Well-Known Member
I still have a pair of unbuilt DBRM kits on the shelf. Ideas?
Something British from the Battle of Britian.
Awesome work James!
James Duffy
Well-Known Member
- Joined
- Jan 19, 2009
- Messages
- 1,445
- Reaction score
- 1,733
Ask, and ye shall receive.Something British from the Battle of Britain.


Tune in to my Virtual NARCON session next weekend and you can see the whole project come together.
https://www.accelevents.com/e/narcon2023
James
")
I visited the National Museum of World War II a couple of weeks ago and when I saw this Douglas Skyraider I immediately thought about this thread. I highly recommend this museum if you have an interest in WWII aircraft.


I happened across this photo on facebook.

I happened across this photo on facebook.
Last edited:


- Joined
- Aug 6, 2022
- Messages
- 3,212
- Reaction score
- 2,905
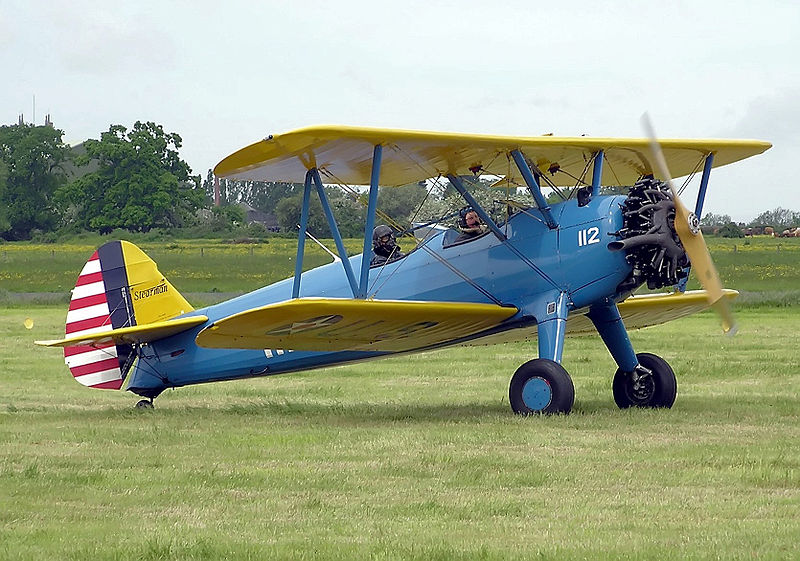
I like these concepts. Might have to start off with the classic Stearman yellow and blue.
Similar threads
- Replies
- 14
- Views
- 861
- Replies
- 18
- Views
- 787
- Replies
- 22
- Views
- 2K
- Replies
- 42
- Views
- 3K