Calling all odd-rocketeers, IT'S MILLER TIME!

The Rocketry Forum

Help Support The Rocketry Forum:

This site may earn a commission from merchant affiliate links, including eBay, Amazon, and others.

chadrog

Well-Known Member
Joined
Sep 27, 2010
Messages
6,854
Reaction score
21
With a club contest coming up end of July, I really need to get cracking on this. The contest involves an upscale (or downscale) of anything. The rules of the event can be found elsewhere, but I will refrain from posting a direct link.
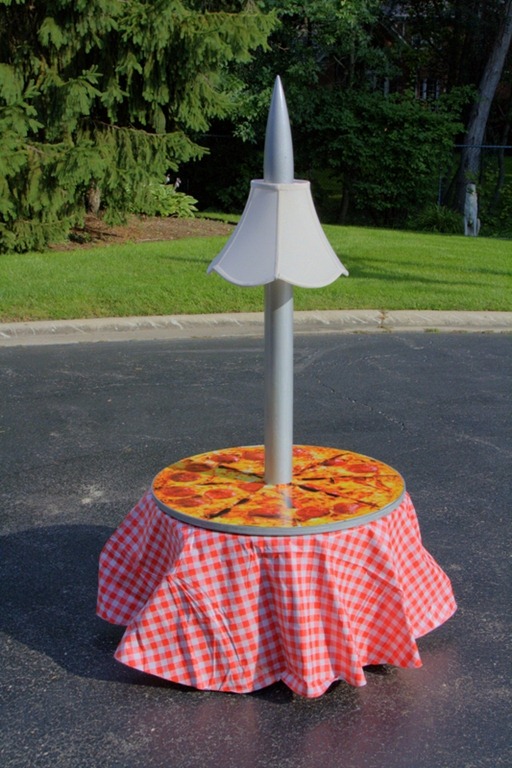
Several months back I saw this specimen at my local watering hole, and they were happy to put it on the side for me after it's job was done there. So I've been staring at it for quite a while and kinda have a plan...
What I have so far: A plastic bottle, 29mm motor mount, 38mm stuffer tube, sheet of 1/8" Lexan. Stuffer tube will have a 1/4" ply ring at the bottom (on outside of bottle) to serve as a thrust plate / motor retention mount surface.
My thought for fin profile was something along the lines of the Estes Mosquito - long swept back to pull the CP back. I'm not even going to attempt drawing this up in roc-sim, so I figured that would be my best bet. I know that makes it very susceptible to landing damage, but that's not a concern at this point.
My questions lie in mounting the fins to the stuffer tube - building a "ship in a bottle" comes to mind. I'd like to keep it kinda clean, but also strong enough for flight. Any thoughts?

PIC_2427.jpg

PIC_2425.jpg
 
If I'm understanding your question correctly, it sounds like something I've been doing in my Starbucks rockets. I have been making the fins through the cup (bottle), using my Dremel to cut slots in the plastic cups at the appropriate places and then gluing the fins to the motor mount/tube that ran inside the bottle. Then I used five minute epoxy to make fillets where the fins and cup met.

So far this has done quite well for me as I have several rockets done like this and through numerous launches have only had one fin come loose. And that was because somebody talked me into putting an E30 into it (it was designed for D12) and the tube was a little short for the extra oomph of the composite ejection charge. The rocket came down tumbling while the nose floated away under parachute. It came loose from the internal connection, but would take a mere 5 minutes to repair (but I retired it).

My main concern is getting the lexan to stick, because I don't think it will. I think I have an idea though. Going to mock- up a fin tab tomorrow with an interlocking ring that will be fit to the stuffer tube. I want to stick with the clear fins if possible to not take away from the bottle itself. What did you use for your fins on the cup? I'll try to find it, I don't remember off hand.
 
Foam it, it will look like it is full of beer!!!

The thought did cross my mind, and I haven't ruled it out. Not only will it hide any ugliness of my building inside the bottle, it will also support and obscure the internal structure of the rail button support I'm thinking about. I bought a foam kit and various other items from U.S. Composites awhile back for a different project, so I probably will go that route as a practice run - have never used the stuff before.
 
Wasn't able to get to it yesterday, I'll have more time today. Sorry to keep everyone waiting...:D
 
While waiting for paint to dry, I'm finally able to get back to this one. Made the centering rings today, figured I'd show everyone how I do it. First, a simple layout.layout.jpg
Then it's to the drill press to start the hole for the stuffer tube. 1 5/8" forstner bit about 1/16" deep.
predrill.jpg
After the pilot is drilled, I drill 1/4" through what remains.
pindrill.jpg
Over to the scroll saw to rough cut the O.D.
cutout.jpg
 
After they're rough cut, they get a dowel pin pressed through the center hole. Pin is then chucked in the cordless drill, then spun in the sanding jig to finish the O.D. The outside of these rings are rather meaningless, so long as they fit through the neck of the bottle.
finish od.jpg
Then it's back to the drill press to finish the 1 5/8" hole. At this point, you want something other than your hand to hold onto the work piece - I use a channel-lock type pliers.
finish drill.jpg

Sand any rough edges, and you have as good a set of rings as you need - in about twenty minutes.

For this project, they need to be notched as well. I've decided to put tabs on the fins that will interlock with the rings. Back to work...
 
I decided to knock out the rail button mount before the fins, just to get one more quick job off the list. A simple mount, consisting of a 1" wide strip of lite ply 6" long, two T-nuts, two nylon spacers, rail buttons, and #6-32 screws. The mount being 1/2" away from the inside of the bottle will allow the foam to encapsulate the whole works.
PIC_2440.jpgPIC_2441.jpgPIC_2442.jpg
 
Moving on to the fins, I like how the mortise/tennon-ish mock-up turned out - should keep the fins on until it lands anyway. Time to start making the real parts.
PIC_2443.jpgPIC_2444.jpgPIC_2445.jpg
 
Great looking build, Chad. Gonna have it ready by ECOF?
 
Chad,

We should do a drag race at ECOF - Pizza vs. Beer!
Of course, I'm assuming the pizza will survive LDRS........

flyingpie.jpg
 
Last edited:
Great looking build, Chad. Gonna have it ready by ECOF?

ECOF is the goal, this being my entry for Kelly's Challenge. It is progressing nicely, shouldn't be a problem to have it ready.
 
Chad,

We should do a drag race at ECOF - Pizza vs. Beer!
Of course, I'm assuming the pizza will survive LDRS of course.


flyingpie.jpg

My son and I just recently staged a rocket off of a saucer- a beer staged off of a pizza seems even better! I sure hope it makes it through LDRS, I'd love to see it fly.
 
Made up a full size fin template today, close enough to what I envisioned I guess. Heading out for some wings n' trivia soon, maybe I'll get a start on the real fins later.....pause.....pause.....pause.....NOT! But maybe.

This shows the fin locked into the centering ring.finloc.jpg

Full fin template installed, this just might work.fullfintemp.jpg
 
To make the actual fins, I started by tracing the template onto the Lexan. I rough cut the blanks, then taped all three together with carpet tape to cut all three as one. Scroll saw made quick work of it, leaving a fairly clean edge. Hit them on the belt sander, a quick swipe with a 180 block, a little 400 wet/dry, good enough for me.
lexanfins.jpg

Dry fit of all parts (outside the bottle) was good, time to put it all together.
 
Fins are installed with the upper notched ring in place, and slathered with 60min. epoxy.PIC_2452.jpg

Was a bit of a challenge to get it all lined up and locked in through the space between the neck of the bottle and the stuffer tube, but not as bad as anticipated.PIC_2453.jpg

Gonna go do some experimenting with foam now, this could get ugly.:confused:
 
WARNING! Open the foam cans from U.S. Composites with extreme caution! Maybe this is known, but it's new to me. After unscrewing the plastic cap from the one gallon steel can of Part B, I found a bung in the hole (settle down now...). I thought it was a nice touch for preserving the product. As I gently pushed the blade of a knife between, BOOM! The bung shot out like a bullet, bouncing off the ceiling, and landing in a location still unknown. Had I had my face over the can, I'd be in a world of hurt right now. After changing my pants, I got on with the job at hand. I added two drops of yellow food coloring to a small amount of each part, finding that part B accepted it while part A would not. I mixed them together anyway, and came out with a somewhat beer colored foam. It's not perfect, but it's a start.
foamtest.jpg
 
I went with a brown bottle on mine, i do like the clear filled with beer!

beerf 3.JPG

38 mm mount
 
Last edited:
Due to mother natures stinginess with the rain, I've been dragging my feet a bit on this one. I (almost) filled it with foam about a week ago, with mixed results. Being my first time using the stuff, I was pretty much flying blind.

First lesson learned - a 1/2" wide gap is nearly insufficient for pouring this stuff in. It foams so fast, I was not able to get it all into the bottle, and made a bit of a mess. On the bright side, I overestimated the amount to mix. Had I been able to pour it all in, I would have had an even bigger mess - horse apiece, I guess.

Second lesson learned - Shore up any weak points of the container to be filled. I assumed the foam would just expand into the void upward, but apparently it will also build some expanding force outward. It bulged the bottle a tad at the fin slots. I sealed each side of each fin/slot joint with blue tape, not realizing there would be any significant pressure present - there was a bit. Not too bad.

All in all, I'd say the adventure was a semi-success. I learned a lot that will help in future ventures. Just need to top it off now.

PIC_2466.jpg
 
Chad,

It looks great. I just hope we aren't waiting until Midwest Power to see it go
 
Seems like it came out perfect - looks like it's 3/4 filled with beer now.

A closer look reveals the messiness, nothing that can't be scraped off though. I'm going to top it off with uncolored foam, hopefully it will look the part. I might just let it run over and down the side a bit, and core the top for a "nose cone". How did the pizza do?
 
Due to mother natures stinginess with the rain, I've been dragging my feet a bit on this one. I (almost) filled it with foam about a week ago, with mixed results. Being my first time using the stuff, I was pretty much flying blind.

First lesson learned - a 1/2" wide gap is nearly insufficient for pouring this stuff in. It foams so fast, I was not able to get it all into the bottle, and made a bit of a mess. On the bright side, I overestimated the amount to mix. Had I been able to pour it all in, I would have had an even bigger mess - horse apiece, I guess.

Second lesson learned - Shore up any weak points of the container to be filled. I assumed the foam would just expand into the void upward, but apparently it will also build some expanding force outward. It bulged the bottle a tad at the fin slots. I sealed each side of each fin/slot joint with blue tape, not realizing there would be any significant pressure present - there was a bit. Not too bad.

All in all, I'd say the adventure was a semi-success. I learned a lot that will help in future ventures. Just need to top it off now.

View attachment 90667

Hey, that came out great! It does look just like beer. Nicely done.
 
Hey, that came out great! It does look just like beer. Nicely done.

Thanks for the props, I won't tell if you won't tell. OK, I'll tell. Being opaque it much more resembles a hefeweizen than a pilsner, I'm just being picky now.

hefe.jpg
 
It's a little more than I was looking for, but it does kinda look like "The Champagne of Beers" now.
PIC_2471.jpg
 
Those clear fins are really, well, CLEAR! Sort of like Wonder Woman's Airplane.

They are deceptively invisible - me and the stable half have been trippin' over this thing for a couple weeks now!
 
Back
Top