I just did this yesterday on a Madcow Adventurer 3...
I epoxy the top centering ring in place on the motor tube at least 1/4 inch from the top of the motor mount. (remember to install the eye bolt and shock cord if you're using one). Less than 1/4 of an inch from the top and you might get epoxy into your motor tube. (see below)
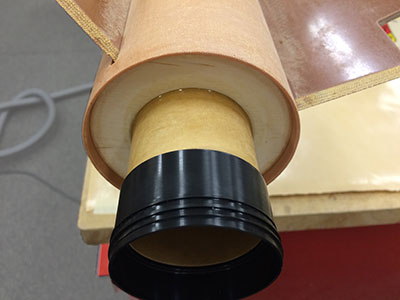
Then I dry fit the aft centering ring and the part of the retainer that fits on the motor tube. I want the retainer part to be pretty snug on the motor tube.
I get a good idea where the top centering ring will end up in the booster tube, then with a dowel I ring the inside of the booster tube with epoxy about 1 inch below where the top centering ring will end up.
Then I insert the motor tube into the booster tube until the top centering ring it's almost at the epoxy,
Then I slide~wiggle~push the aft centering into the booster tube so the motor tube will be aligned,
I point the booster tube upright and slowly push the motor mount in until it's almost to it's correct location.
NOTE: tilt the booster tube upright and push the motor tube in slowly so the epoxy being pushed up by the top centering ring will level out on top of the centering ring and not spill over into your motor tube. Remember it's only 1/4 inch from the top? ..... live and learn...
Then I screw on the retainer cone and slowly push everything into place so that the cone is where I want it to end up against the booster tube. Done!!!
Set the whole thing upright to cure.
NOTE: do not unscrew the cone yet. Leave it on until everything is cured. Then unscrew the cone, pull off the retainer on the motor tube, remove the aft centering ring and it's time to do fins and rail buttons.
NOTE2: I usually put two small screws into the aft centering ring to make it easy to put it in or pull out as needed.


")