Building the Estes Little Joe II: Tips, Tricks, and Modifications

The Rocketry Forum

Help Support The Rocketry Forum:

This site may earn a commission from merchant affiliate links, including eBay, Amazon, and others.
It is interesting that the Estes 2016 Catalog mentions the D12-3 and E12-4 for this kit. Weather is a factor, it seems that they would be fine on a very calm day, but with any wind, the E30 would be a better choice. I remember reading that the tester wasn't happy with a couple of the flights, so to be safe in all conditions they now only recommend the E30.

True. I can see why a D12 was not universally recommended for all weather. But I'm going fly mine first on a D12-3, on a calm day, and see how it goes. I've flown a lot of models bigger and heaver than this on D12 power.

The E30 just turns me off. It's not an Estes thing, it's a thrust level thing (I've seen a lot of scale model fly on a E30 that would have looked nicer boosting on an E15). One moment it is on the pad, the next it is streaking off crazy fast. I do not like for scale models to do that, unless it's realistic (like say the old Sprint ABM).

So when I go with more than a D12, my first choice for an E will be the E15. I have flown my 1/39.5 scale models with E15-4's, and those weigh about twice what this kit does. I also understand that the E20 is pretty much like an E15, I looked at the thrust curves and they do look alike. Reload-wise, I'd probably use an E18.

Also as I said a few messages up, if a person modified the model to fly on 29mm engines, I think the Estes E16 and F15 would fly it very nicely.
 
Last edited:
I'll probably use a bit of CA on these parts when I build mine, especially the launch lugs. I'm not sure if that's the alternative you're looking for though.

CA in general does not bond to plastic very well.

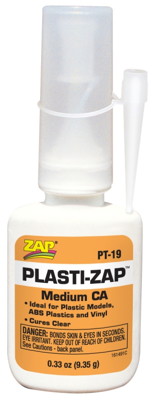
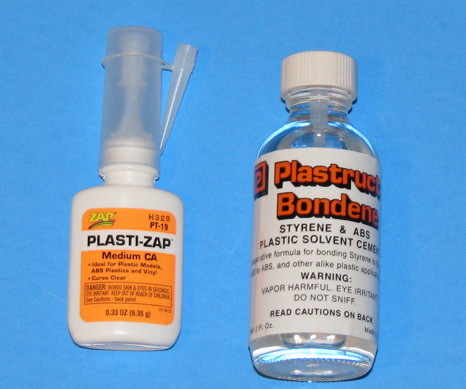
The one CA I have used for bonding plastic to non-plastic (like wood or graphite to plastic) is Zap brand's "Plasti-Zap". It is a CA made for the purpose of bonding to plastic. Still not as good for plastic-to-plastic bonds as the proper kind of solvent cement that is meant for say ABS to styrene. But in this case, indeed I may go for that so that on a really hard landing the fins can pop rather than the wrap rip.

5OI1iZH.jpg


It can be hard to find in hobby shops. But I do plan to go hobby-shop hopping tomorrow (checking out two stores i've never been to which are about a 30% detour from the main one I'm going to). So I may go for Plasti-Zap if I can find it rather than Weld-On 16 or an equivalent ABS-Styrene cement. Will also depend on the date on the price sticker, if it's over a year old it won't be as strong (which is why i have none I can use right now, been 2-3 years since I had a project that needed it and over time it went bad).

If I find a good ABS to Styrene cement I will get that too, even if I do use Plasti-Zap for the fins. If only to attach the lugs. I do not want to repeat that nightmare with lugs popping off too easily

- George Gassaway
 
Last edited:
Thanks for the tip on Plasti-Zap. I might have to hunt some of that stuff down. I only have one local hobby shop in my area. If they don't have it, I'll have to order it online.

I do agree with you on the E30 not being "right" for this model. Let alone the fast un-scale lift off, the Blue Thunder propellant would give off the wrong visual effect while the White Lightning would be ideal.

I currently have an unopened pack of E18-4W's in my box. That's what I plan to use in mine. I'm just wondering if I would need a longer 3/16 inch launch rod. I have looked around for 6 foot 3/16 inch stainless steel rods but they're a bit pricey. I think $22 was the cheapest I saw.
 
Last edited:
scale.php


So, I wanted to get a nice photo of the model outside, clear blue sky, moon in the background.

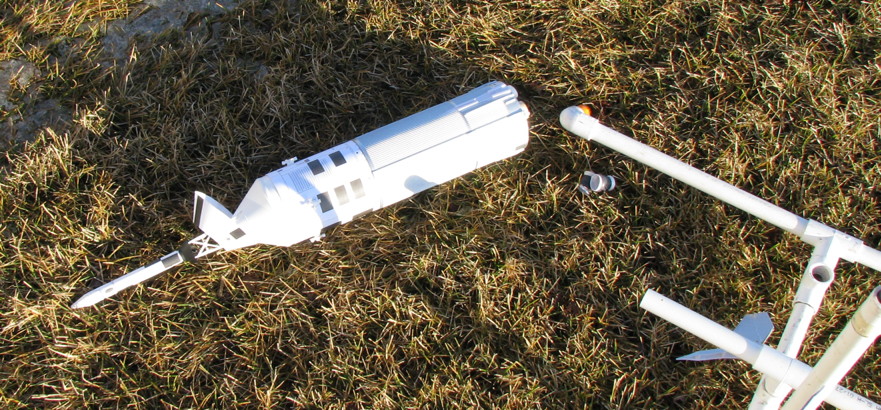
Set it up on a pad. It was windy, the model rotated around the rod a bit. I was dealing with that. And then….

iG5fz5p.jpg


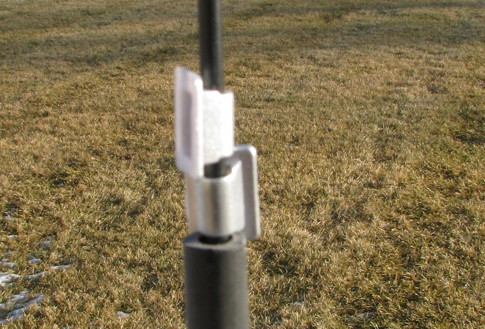
While on the rod, the end of the body tube had been supported on the 3/8” post. But the last rotation due to wind, it slipped enough to no longer be held by the 3/8” post, and fell down about an inch to the lower launch lug, then hit the lug. Well, that hit knocked lower lug off, letting it fall more, and of course the top lug broke off. So, the model fell to the ground and broke off all four fins!

mWEXY3m.jpg


So, yep, as Brent mentioned, the very plastic cement shown in the instructions….. does not glue the plastic fins to the body wrap like it should.

OX7pVvB.jpg


And does not glue the lugs on properly either. If I had used Plastruct's liquid Plastic-Weld for the lugs, I think they would have held, but I was concerned about it running and not filling gaps like tube glue so went with the tube glue.

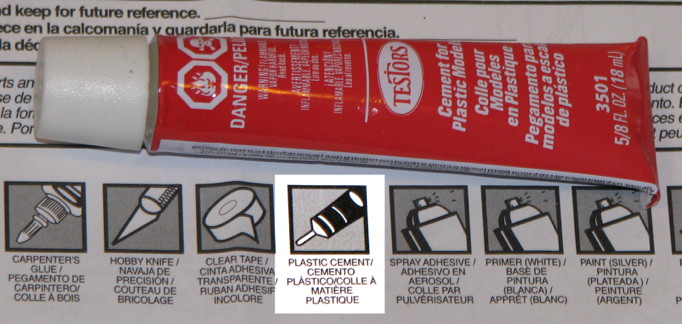
I am REALLY ticked off that the WRONG glue was shown in the instructions. If I had made a different choice for a glue and it worked badly, that would be my fault. But the instructions just say Plastic Cement, and shows a tube of glue just like Testor’s, including the same oval shape where the name is on the Testor's tube. No warnings to use a special glue that bonds ABS to styrene.

So, yeah, anyone who has built theirs with tube glue that is NOT formulated to bond ABS and styrene together, your fins (and lugs) are likely to pop off far more easily than they should.

Can anyone recommend a glue that will join ABS to styrene, that i am likely to find locally or in a hobby shop? I do not want to wait to mail order some, unless absolutely necessary.

So far I have found this online but do not know if I may be able to get Weld-on 16 locally.
https://www.eplastics.com/Plastic/abs-glue


Now, I DO have Plastruct’s Plastic-Weld in a bottle. But it is so thin that I’m concerned that it would run. I need to use anther kind of “thick” high viscosity cement.

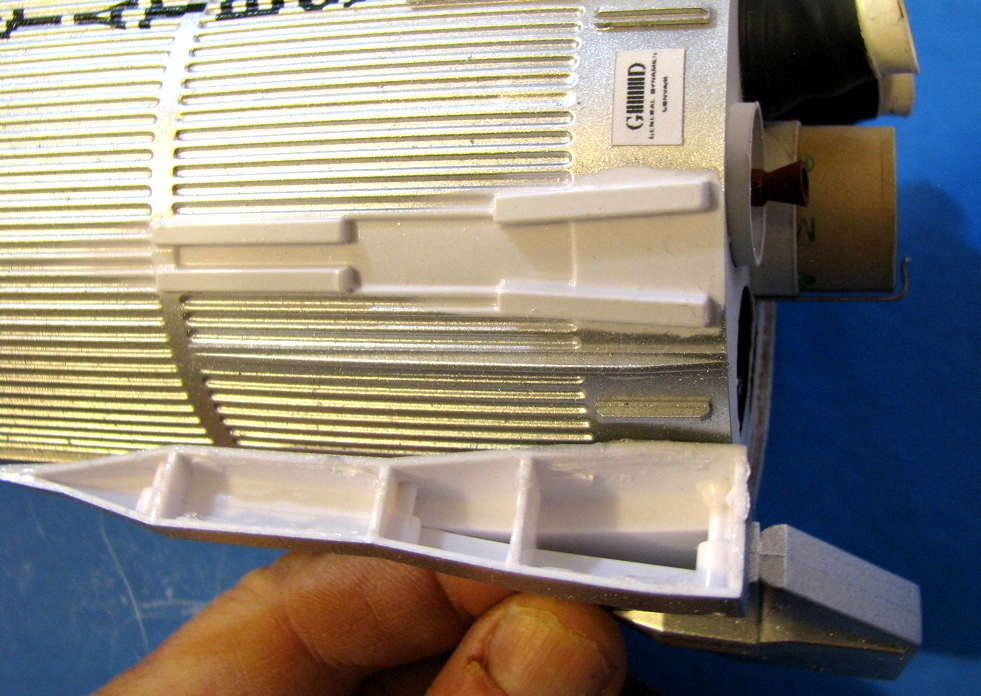
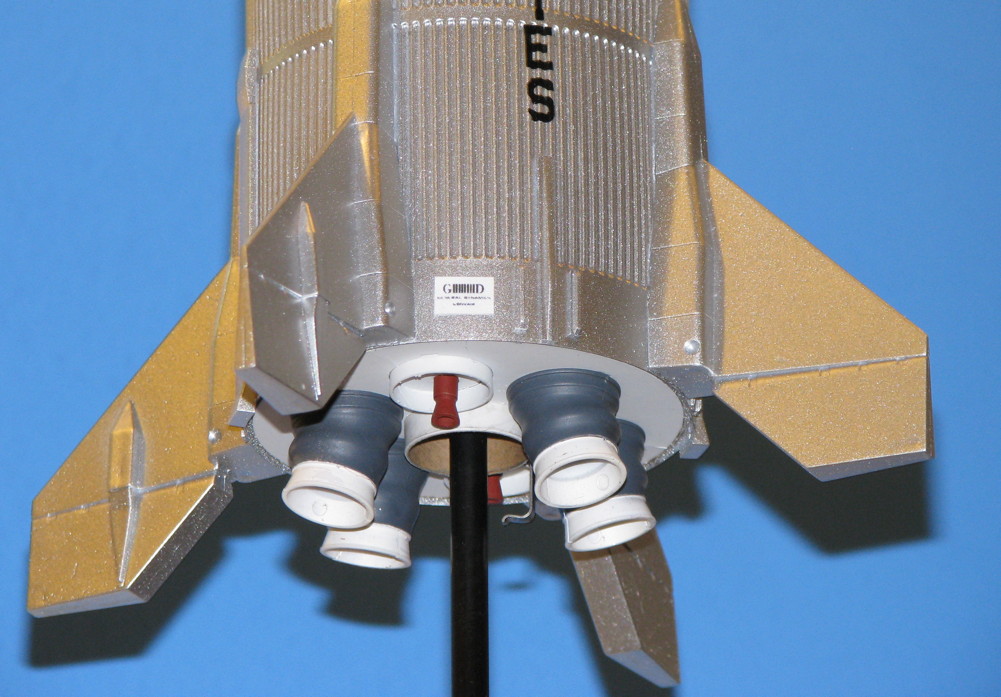
Below is a photo of the model, showing one of the fins and the main body. All of the Testor’s glue is on the inside of the fin, none is on the wrap, it is totally glue-free. Also, sad surprise now….. I had added the General Dynamics / Convair plaques.

I do not know when I'll fix it.

- George Gassaway

LrxQvui.jpg

I may as well see if my launch lugs will pop off as easy as the fins before I finish painting. I may go with some rail buttons as I don't have the rear centering ring on yet. Will have to see how easily they pop off. Sorry yours was looking fantastic.
 
James had mentioned the use of Parafilm for masking. It's an excellent product and can be found online from many sources much cheaper than MicroMark. I got 250' of it for about $33 a few years ago. That same quantity from MM would be about $120! It's a laboratory product used for sealing glassware and can be found online, especially at EBay, in long lengths at reasonable prices.
 
I am very sorry to see what happened to your model. The plastic glue image in the instructions is just that and image stating to use plastic glue. All the different types of glue are represented by a generic type image. I never use plastic glue from a tube. The plastic glue I use when assembling Estes plastic parts is Tenax. CA works great too.


John Boren
 
So......

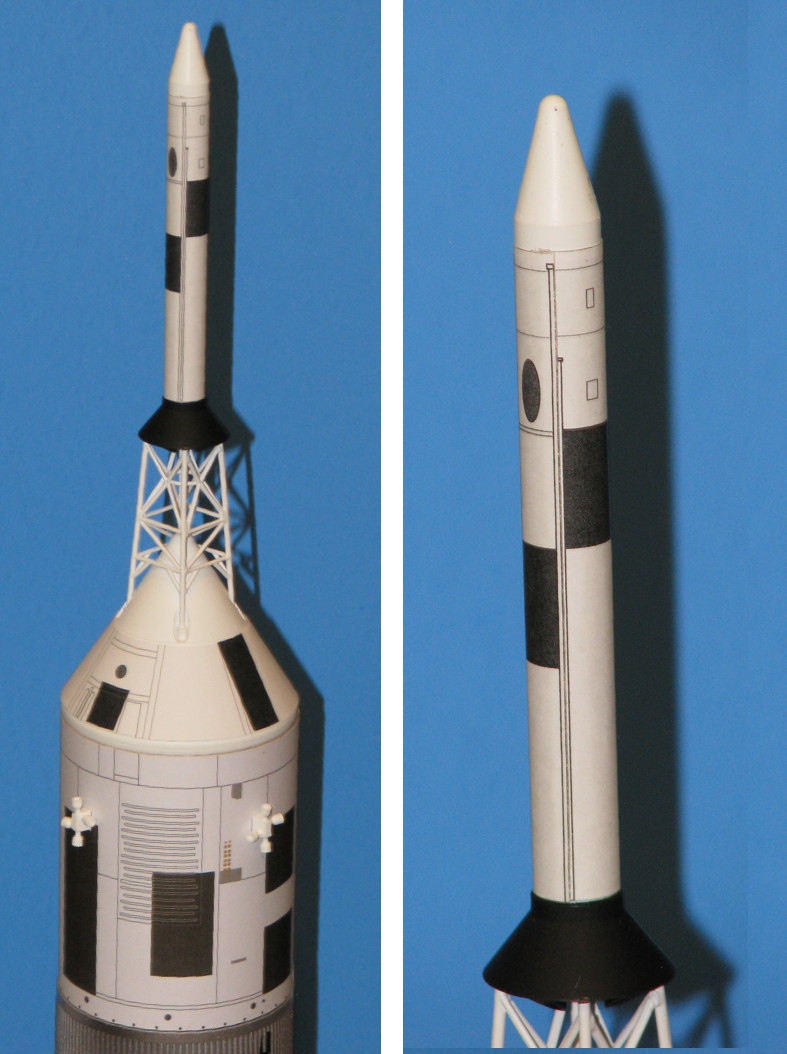
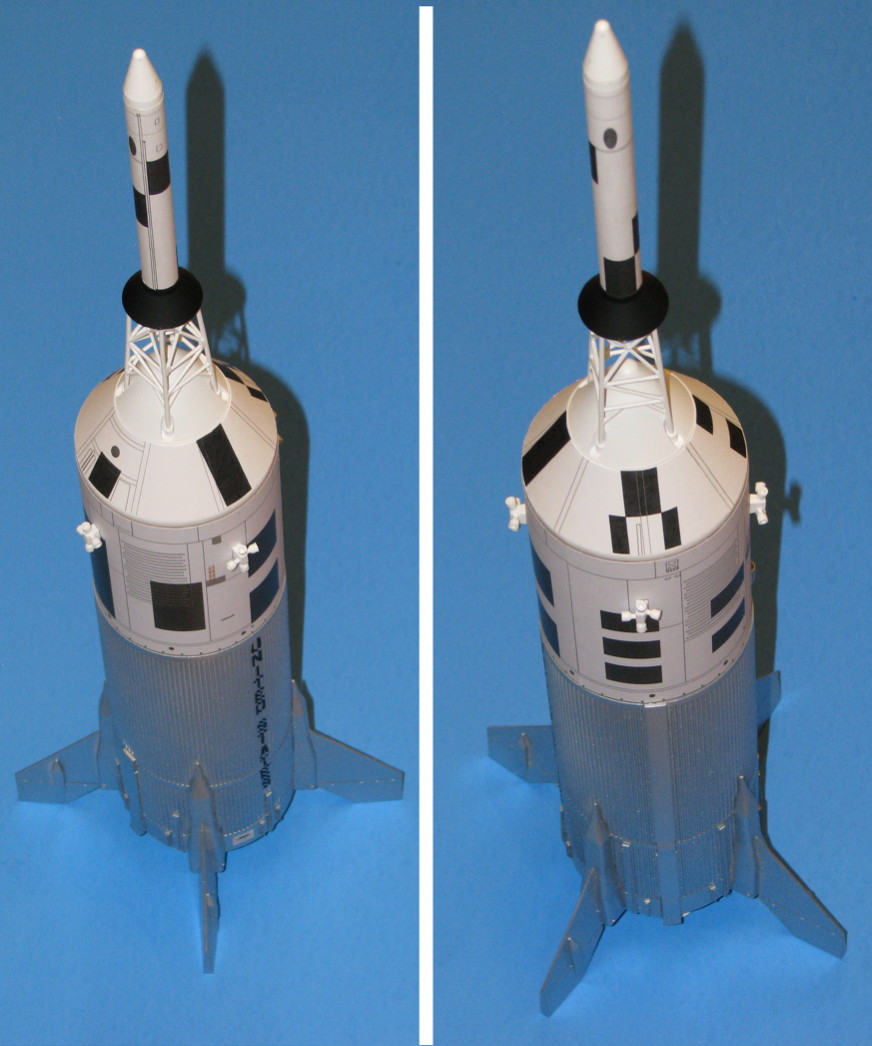
I took some pics of the Apollo part of the model, which was not damaged.

eH6h3pY.jpg


Busy with other stuff most of Saturday, so may not have anything else to post till Sunday night.

- George Gassaway
 
Pulled on my launch lugs they seam solid. I am going to leave them alone. I did lightly sand the spots where I glued them on.
 
I took a different approach when I built my Maxi-V2 a few years ago--I put 2 part foam inside the fins after the halves were joined together, then used polyurethane glue for the joints. If you give the foam overflow a place to go, to prevent pressure build up, foam does a great job with plastics. An unusual approach, but it works.
 
Nothing is trickier to paint than a metallic surface, so chintzing out on paint is probably not wise. Over the years the Tamiya spray lacquer paints have always yielded great results for me

You're right about the Tamiya paints. great stuff I picked up the colors you recommended. I payed more for the paints then the kit.

Paul
 
Last edited:
scale.php


So, I wanted to get a nice photo of the model outside, clear blue sky, moon in the background.

Set it up on a pad. It was windy, the model rotated around the rod a bit. I was dealing with that. And then….

iG5fz5p.jpg


While on the rod, the end of the body tube had been supported on the 3/8” post. But the last rotation due to wind, it slipped enough to no longer be held by the 3/8” post, and fell down about an inch to the lower launch lug, then hit the lug. Well, that hit knocked lower lug off, letting it fall more, and of course the top lug broke off. So, the model fell to the ground and broke off all four fins!

mWEXY3m.jpg


So, yep, as Brent mentioned, the very plastic cement shown in the instructions….. does not glue the plastic fins to the body wrap like it should.

OX7pVvB.jpg


And does not glue the lugs on properly either. If I had used Plastruct's liquid Plastic-Weld for the lugs, I think they would have held, but I was concerned about it running and not filling gaps like tube glue so went with the tube glue.

I am REALLY ticked off that the WRONG glue was shown in the instructions. If I had made a different choice for a glue and it worked badly, that would be my fault. But the instructions just say Plastic Cement, and shows a tube of glue just like Testor’s, including the same oval shape where the name is on the Testor's tube. No warnings to use a special glue that bonds ABS to styrene.

So, yeah, anyone who has built theirs with tube glue that is NOT formulated to bond ABS and styrene together, your fins (and lugs) are likely to pop off far more easily than they should.

Can anyone recommend a glue that will join ABS to styrene, that i am likely to find locally or in a hobby shop? I do not want to wait to mail order some, unless absolutely necessary.

So far I have found this online but do not know if I may be able to get Weld-on 16 locally.
https://www.eplastics.com/Plastic/abs-glue


Now, I DO have Plastruct’s Plastic-Weld in a bottle. But it is so thin that I’m concerned that it would run. I need to use anther kind of “thick” high viscosity cement.

Below is a photo of the model, showing one of the fins and the main body. All of the Testor’s glue is on the inside of the fin, none is on the wrap, it is totally glue-free. Also, sad surprise now….. I had added the General Dynamics / Convair plaques.

I do not know when I'll fix it.

- George Gassaway

LrxQvui.jpg

Oh no!!! I'm sorry to see this happened. Your Little Joe II is such a nice example of this rocket built. Heartbreaking. Hopefully you get it fixed and everything will be good again soon. :-/
 
Oh no!!! I'm sorry to see this happened. Your Little Joe II is such a nice example of this rocket built. Heartbreaking. Hopefully you get it fixed and everything will be good again soon. :-/

Yes, sorry to hear it but thanks for the heads up here. This does not bode well for landings with those low hanging fins.

I seem to recall bad stories about plastic cements and certain scale Estes kits over the years - like the Star Wars series....some disassembled under thrust, using certain plastic cements.
 
Yep

Issues like these are why I refuse to use Testor's tube cement. The liquid is ok but the tube stuff especially the non toxic tube stuff really sucks.
 
Yep

Issues like these are why I refuse to use Testor's tube cement. The liquid is ok but the tube stuff especially the non toxic tube stuff really sucks.

The tube stuff is pretty good for many purposes when gluing styrene to styrene. The Problem is the kit uses ABS for the vac-formed wrap, but then recommended Testor's type Tube Glue which does NOT stick (melt and bond) to ABS.

Testor's liquid cement in a bottle is not good for ABS. And is not as good for styrene as Plastruct's Plastic-Weld. I usually only use Testors liquid cement when either I am out of the Plastic-Weld and can't wait to get more, or for some reason need a "weaker" liquid cement.

What I got during my hobby store trip around town today was Plasti-Zap (CA made for bonding with plastic), and also Plastruct's "Bondene", for ABS and Styrene. I have never used Bondene before (it's a thin liquid type). I'm going to glue some plastic scrap parts tonight with Plasti-Zap and Bondene and check out the bond tomorrow. Then I'll choose which to use and glue the fins back on. Will probably use the Bondene for the lugs in any case.

UPDATE Feb 29th - I made a terrible mistake, by TRUSTING the Bondene!

DO NOT USE BONDENE!!!


See message #177 for more info: https://tinyurl.com/jbr6upn

BTW - the Bondene.... I do not recall seeing before. I stopped by a new-to-me hobby shop that caters mostly to trains and plastic models. No R/C at all, though a few model rockets (this is a big reason I had not gone there before, no R/C stuff and nowhere near the rocket choices of the other shop. But still I wish I'd found out about them and gone there long ago). A treasure trove of modeling supplies and tools (as long as you are not looking for R/C supplies or airplane supples. Some balsa but not much better than Michael's supply of wood) And that is where I found the Bondene. And also found "Solvaset" there, the very powerful decal setting/softening solution, so I got a bottle for future projects.

- George Gassaway

xC8jfzU.jpg
 
Last edited:
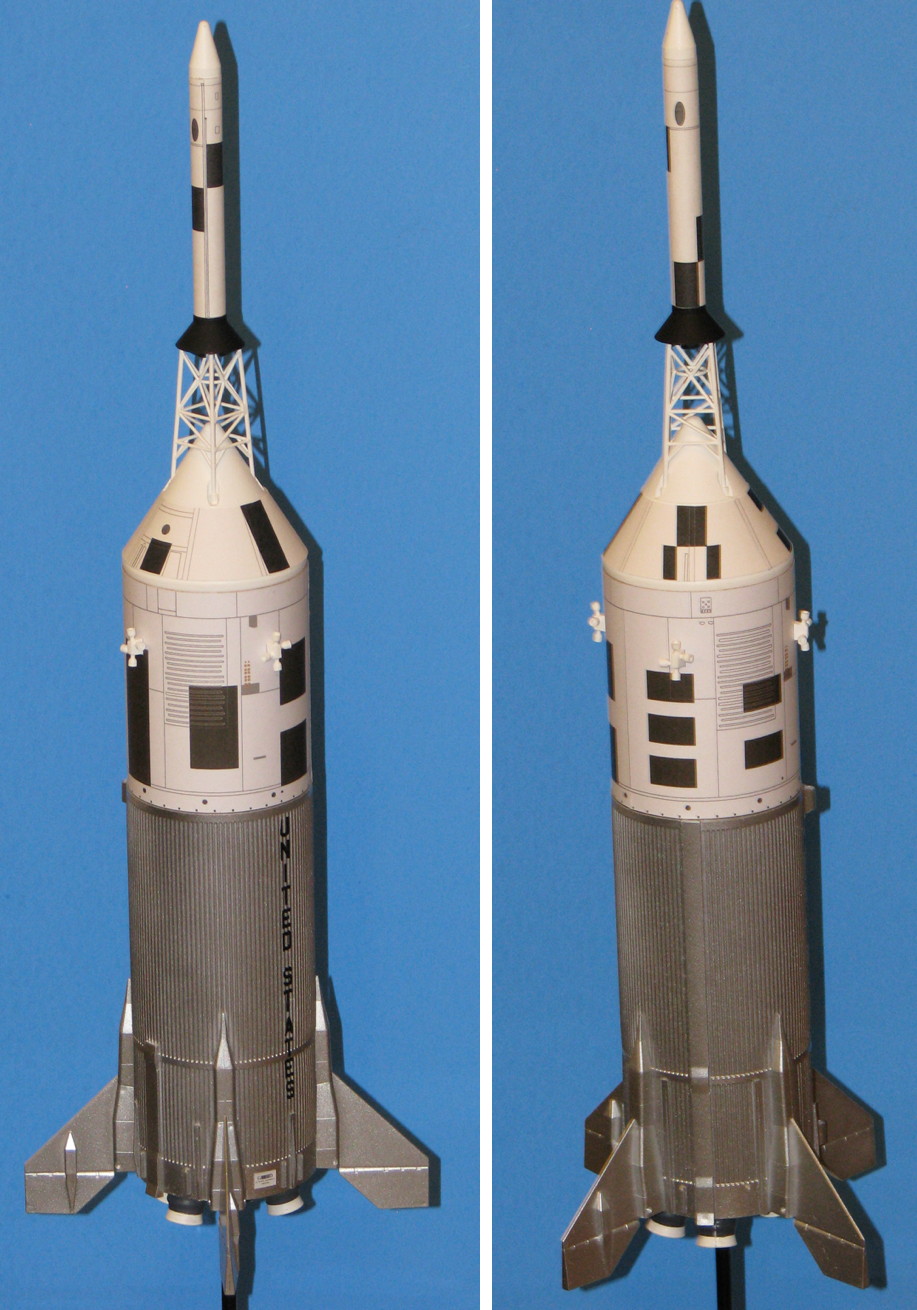
Great job George! I can see you are a true rocketeer. When the chips are down you pick yourself up and come back even stronger than ever. She is looking great after the mishap. Guess it's better to get all the problems ironed out before first flight. Just like with the full scale ones.
Keep them flying George!
 
Nice repair job George. After your mishap, I was worried that my fins (attached with Testor's liquid cement) would be subject to the same problem yours was. I gave one on my fins just the slightest push to the side and heard cracking. I knew this was the adhesive, so I pushed just a little more, and the fin popped right off. Thinking I could not use my Plastruct adhesives without damaging the paint, I looked for alternatives. What I ended up using was Loctite epoxy for plastic and roughing up all adjoining surfaces to give more surface area for adhesion. I will wait the indicated 24 hours for a full cure before any kind of strength testing.

I re-did all four fins and the launch lugs. I have my fingers crossed that the Loctite product will hold.

How are the wraps coming George? If my re-attached parts are as strong as needed, I will be ready for them.

Steve
 
Doing some on-line searching, Plastruct Bondene, Tenax 7R, and Ambroid Pro Weld all have as their main component methylene chloride (dichloromethane) (some have MEK as well). It's really expensive in those little 2 ounce bottles. Just like other rocket supplies (dog barf comes to mind) buying in bulk can save you a lot of monry. Some paint strippers use this as a main ingredient as well (it will remove cured epoxy). If you can find it, Savogran Superstrip Industrial Strength Stripper, contains Toluene, Methanol and Methylene Chloride - and should serve as an excellent welding-type cement for plastics. Read the labels or check MSDS of other paint strippers and you might find other brands.

[edit]

After a bit more internet work, I found that Kleen-Strip KS-3 Premium Stripper, contains methylene chloride, a bit of methanol, and possibly a touch of stoddard solvent. Home Depot lists it for $22.98 a gallon. Amazon has Plastruct Bondene for about $4 a bottle, and Tenax for about $8.
 
Last edited:
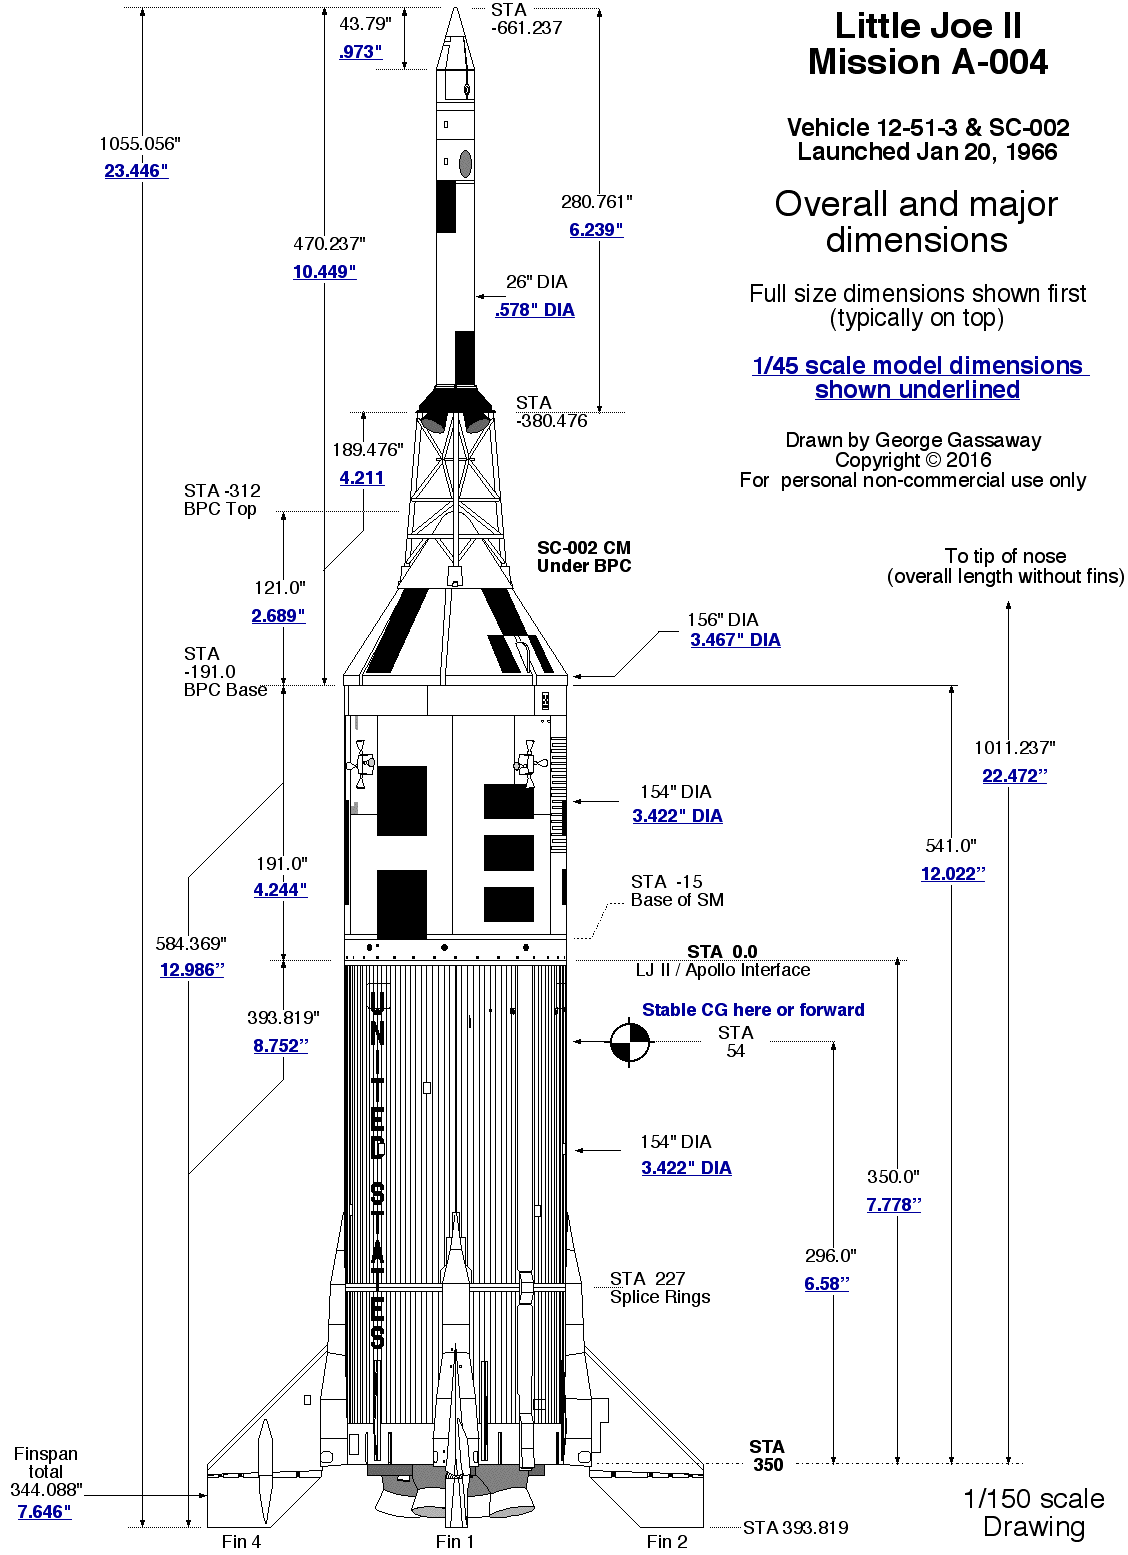
I have the wrap files done for the Service Module, BPC, and LES motor. Also the General Dynamics / Convair plaque. I’m uploading them and writing up a post about how I used them. So I expect to post those later tonight.

While I was working with old Little Joe drawings, I modified one to show the dimensions at 1/45 scale. Also, to note the “Proven to be Stable” CG location. Two models I did that had the CG a bit aft of there, sometimes flew straight, and sometimes went unstable. When there or forward, always stable.

Update - made a correction and some tweaks to the drawing, including using blue text for the 1/45 dimensions

- George Gassaway

o6ilVN2.gif
 
Last edited:
Doing some on-line searching, Plastruct Bondene, Tenax 7B, and Ambroid Pro Weld all have as their main component methylene chloride (dichloromethane) (some have MEK as well). It's really expensive in those little 2 ounce bottles. Just like other rocket supplies (dog barf comes to mind) buying in bulk can save you a lot of monry. Some paint strippers use this as a main ingredient as well (it will remove cured epoxy). If you can find it, Savogran Superstrip Industrial Strength Stripper, contains Toluene, Methanol and Methylene Chloride - and should serve as an excellent welding-type cement for plastics. Read the labels or check MSDS of other paint strippers and you might find other brands.

[edit]

After a bit more internet work, I found that Kleen-Strip KS-3 Premium Stripper, contains methylene chloride, a bit of methanol, and possibly a touch of stoddard solvent. Home Depot lists it for $22.98 a gallon. Amazon has Plastruct Bondene for about $4 a bottle, and Tenax for about $8.

If you go by the "Buy It By the Gallon" route, please let us know if it works the same. I do woodworking and buy solvents by the gallon, but decided to buy a bottle of Plastruct since I didn't want to do testing, and figured the little bottle would probably last me for years anyway.

But it is always good to know if there are cheaper ways to accomplish the same thing.

$20 is a lot of money for me right now. I usually don't need more than an ounce at a time. I have a few contacts at OU that would give me a wee dram of solvent from their lab (if they haven't all retired or moved on). Come to think of it, if I could talk *them* into buying a gallon...
 
General notes for creating the wraps.

These are PDF files, I hope they work for everyone. On my Mac, for whatever reason “Preview” did not work for them reliably , but GraphicConverter does. So if they do not work for your favorite graphics software, try some others.

All of the wraps have size rectangles. Measure the prints to confirm if they are the correct size. You may need to enable edge to edge printing, and be sure they are set to print at 100%. If when you open, if you are asked for DPI, chose 300 DPI.

I do not have a laser printer. I printed them on an inkjet printer, at high quality. Then I went to OfficeMax and had the SM Wrap printed in color, due to the yellow circles on two of the RCS thruster panels. I printed the BPC and LES wraps on a self-service B&W copier. I noticed later that the paper for the SM was a brighter white than the BPC and LES. So, I got the BPC and LES motor wraps re-printed on the color copier (for technical reasons, supposedly, the paper used in the “Color” copies won't work in a B&W self-service copier. OK, whatever). However, I did not end up changing the BPC wrap to the brighter paper. It looks more notable in the pics than in person.

I chose not to use self-adhesive label paper for these because I was concerned about applying the wraps accurately enough to be properly aligned when the seam met the overlap. Others may prefer to use adhesive paper anyway.

Now to begin with the wraps:

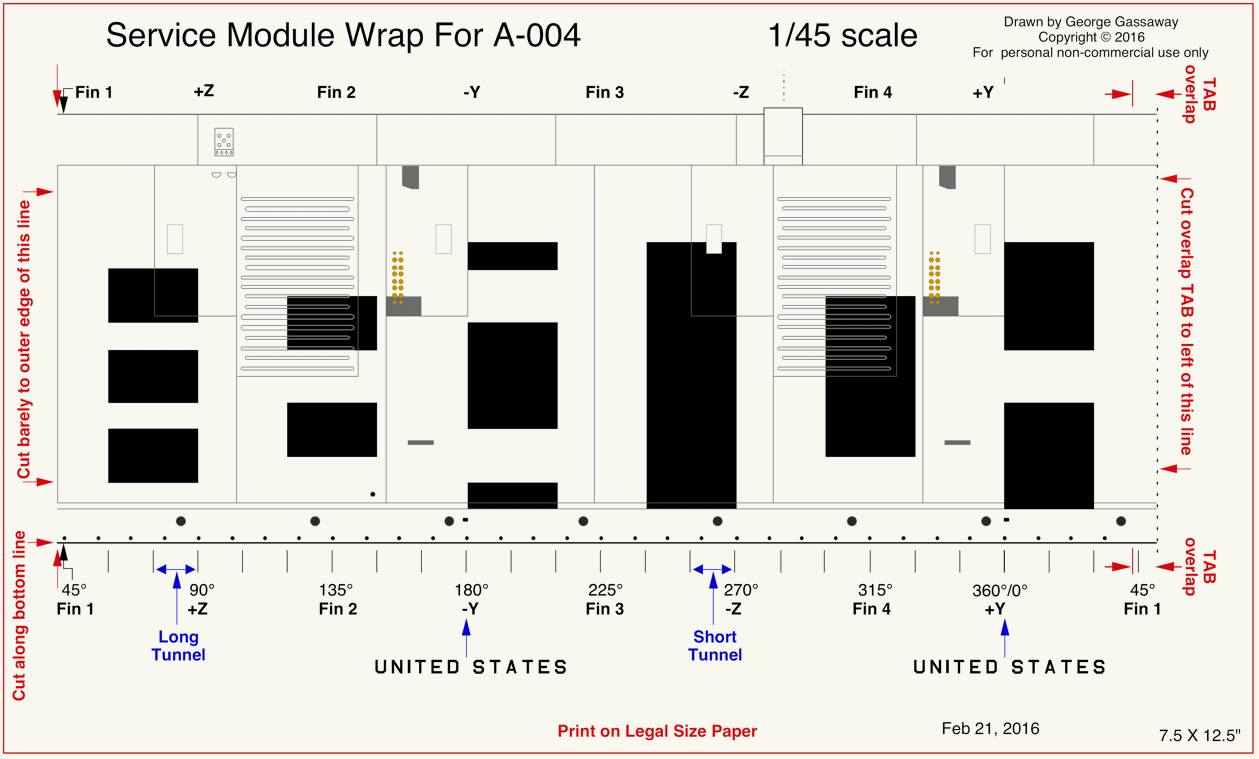
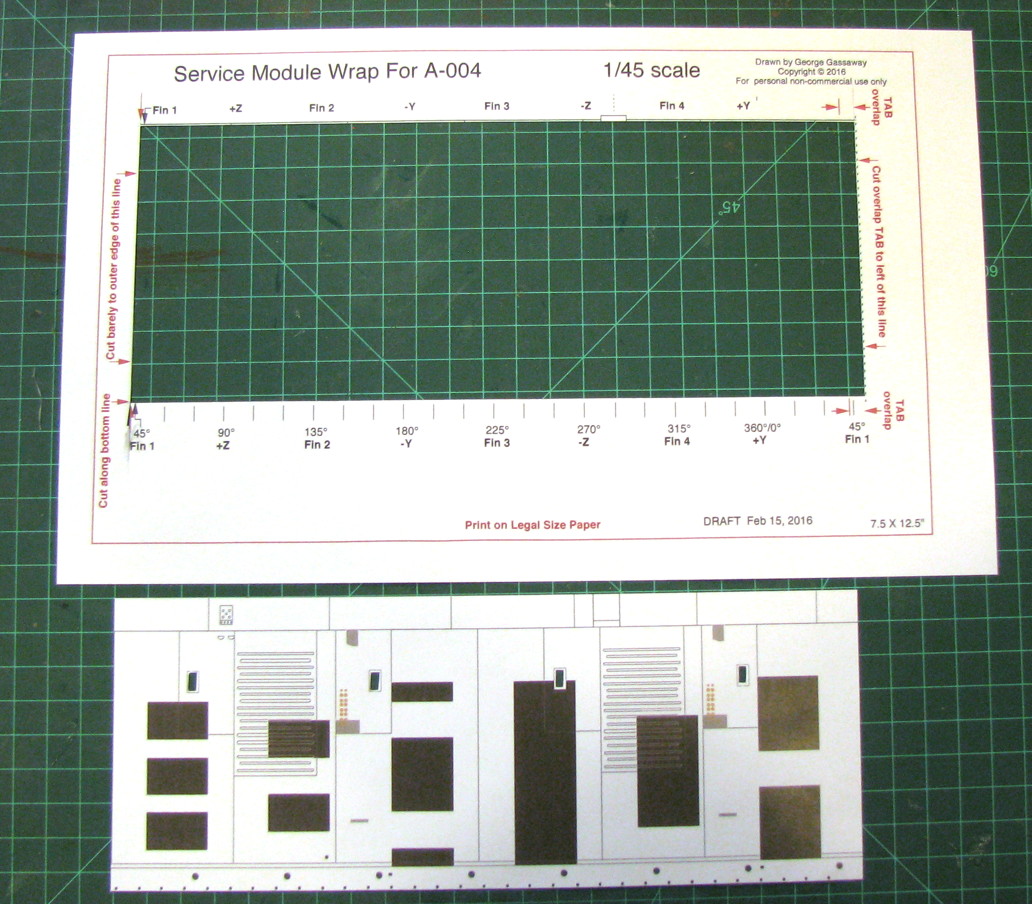
Service Module Wrap.

PDF file at: https://www.mediafire.com/view/607f1pw2jh2618r/SM-WRAP_145_Shift_to_Fin_1-.pdf

WT2j5Yg.gif


Note this one needs Legal size 8.5 x 14" paper. The rest can use 8.5 x 11" paper. In the GIF above, I had to jump thru some hoops to convert it, which introduced a very pale yellow tinge. But the PDF file is fine, it's only the above GIF, which is not intended to be printed anyway.

The wrap was cut out along the left edge of the black line on left, so that the line would appear after wrapping. The right side of the wrap, was cut just to the left of the dotted line, as a tab area. Note that there is no ending edge for the tab, so that any minor variations in width would allow a bit of margin of error

tCOauGT.jpg


Before beginning to apply the wrap, I cut out most of the rectangular areas for the RCS Quad locations, so that later the glue would attach to the tube, not soak into the wrap.

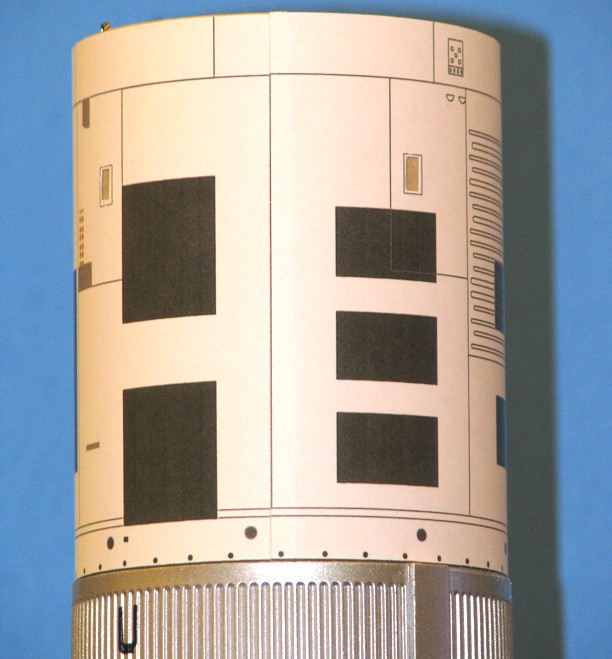
The wrap had a 1/4” wide 1/2” long piece of double sided Scotch Tape applied to the underside of the tab area, half-way up. The wrap was placed on the body in the correct location to line up as indicated. Note that the overlap line is NOT at Fin 1, it is a bit left of Fin 1 because the long Service Module panel line used for the seam is not aligned with Fin 1. When correctly located, the left edge of the +Y and -Y black roll markings are aligned with the middle of the UNITED STATES lettering, and that the right edge of the triple black marking at +Z is even with the right edge of the long systems tunnel.

The small piece of double sided tape helps to keep the wrap “tab” from moving, but does act a bit like a pivot point to allow the wrap to be adjusted in alignment. Now, before actually applying the wrap, I had placed the wrap face-down and applied double sided tape along the other edge, the edge near Fin 1, to stick not doubt 1/4 to 3/8” of the paper. Then I sued a metal straight edge and sharp blade to trim off the excess double sided tape along the edge and also along the top and bottom. When applying the wrap, when I brought it all the way around, I Pulled it tight and carefully placed the middle of the overlap over the tab, making sire it was aligned to match the other parallel lines. Once in place in the middle, then I pressed the rest of the paper down to complete the tape seam. This worked well, the resulting seam is not very noticeable compared to the printed line along most of the seam.

mQIXoMV.jpg
 
Last edited:
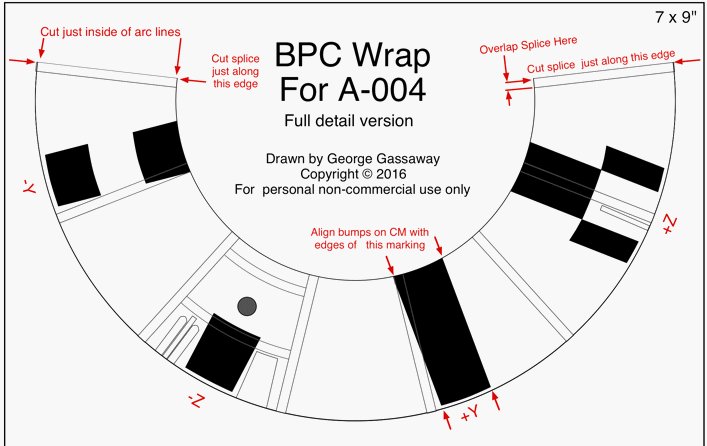
BPC Wrap.

PDF file at: https://www.mediafire.com/view/fv0i5hpjmmdys9r/BPC_Wrap_A-004_v2.1-Layer#1.pdf

tsewsfe.gif


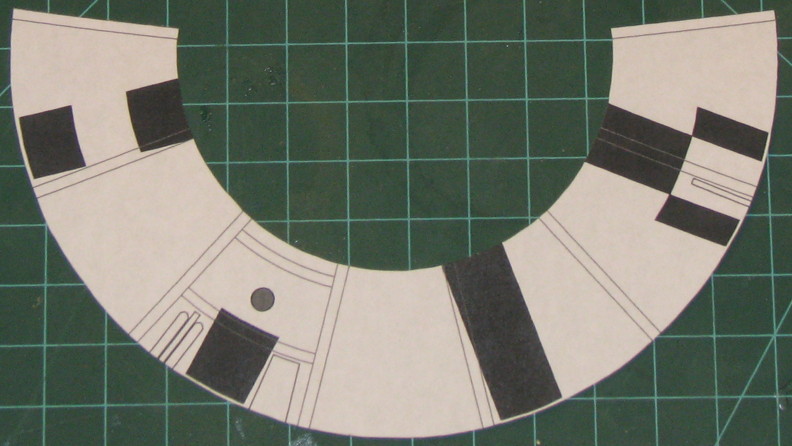
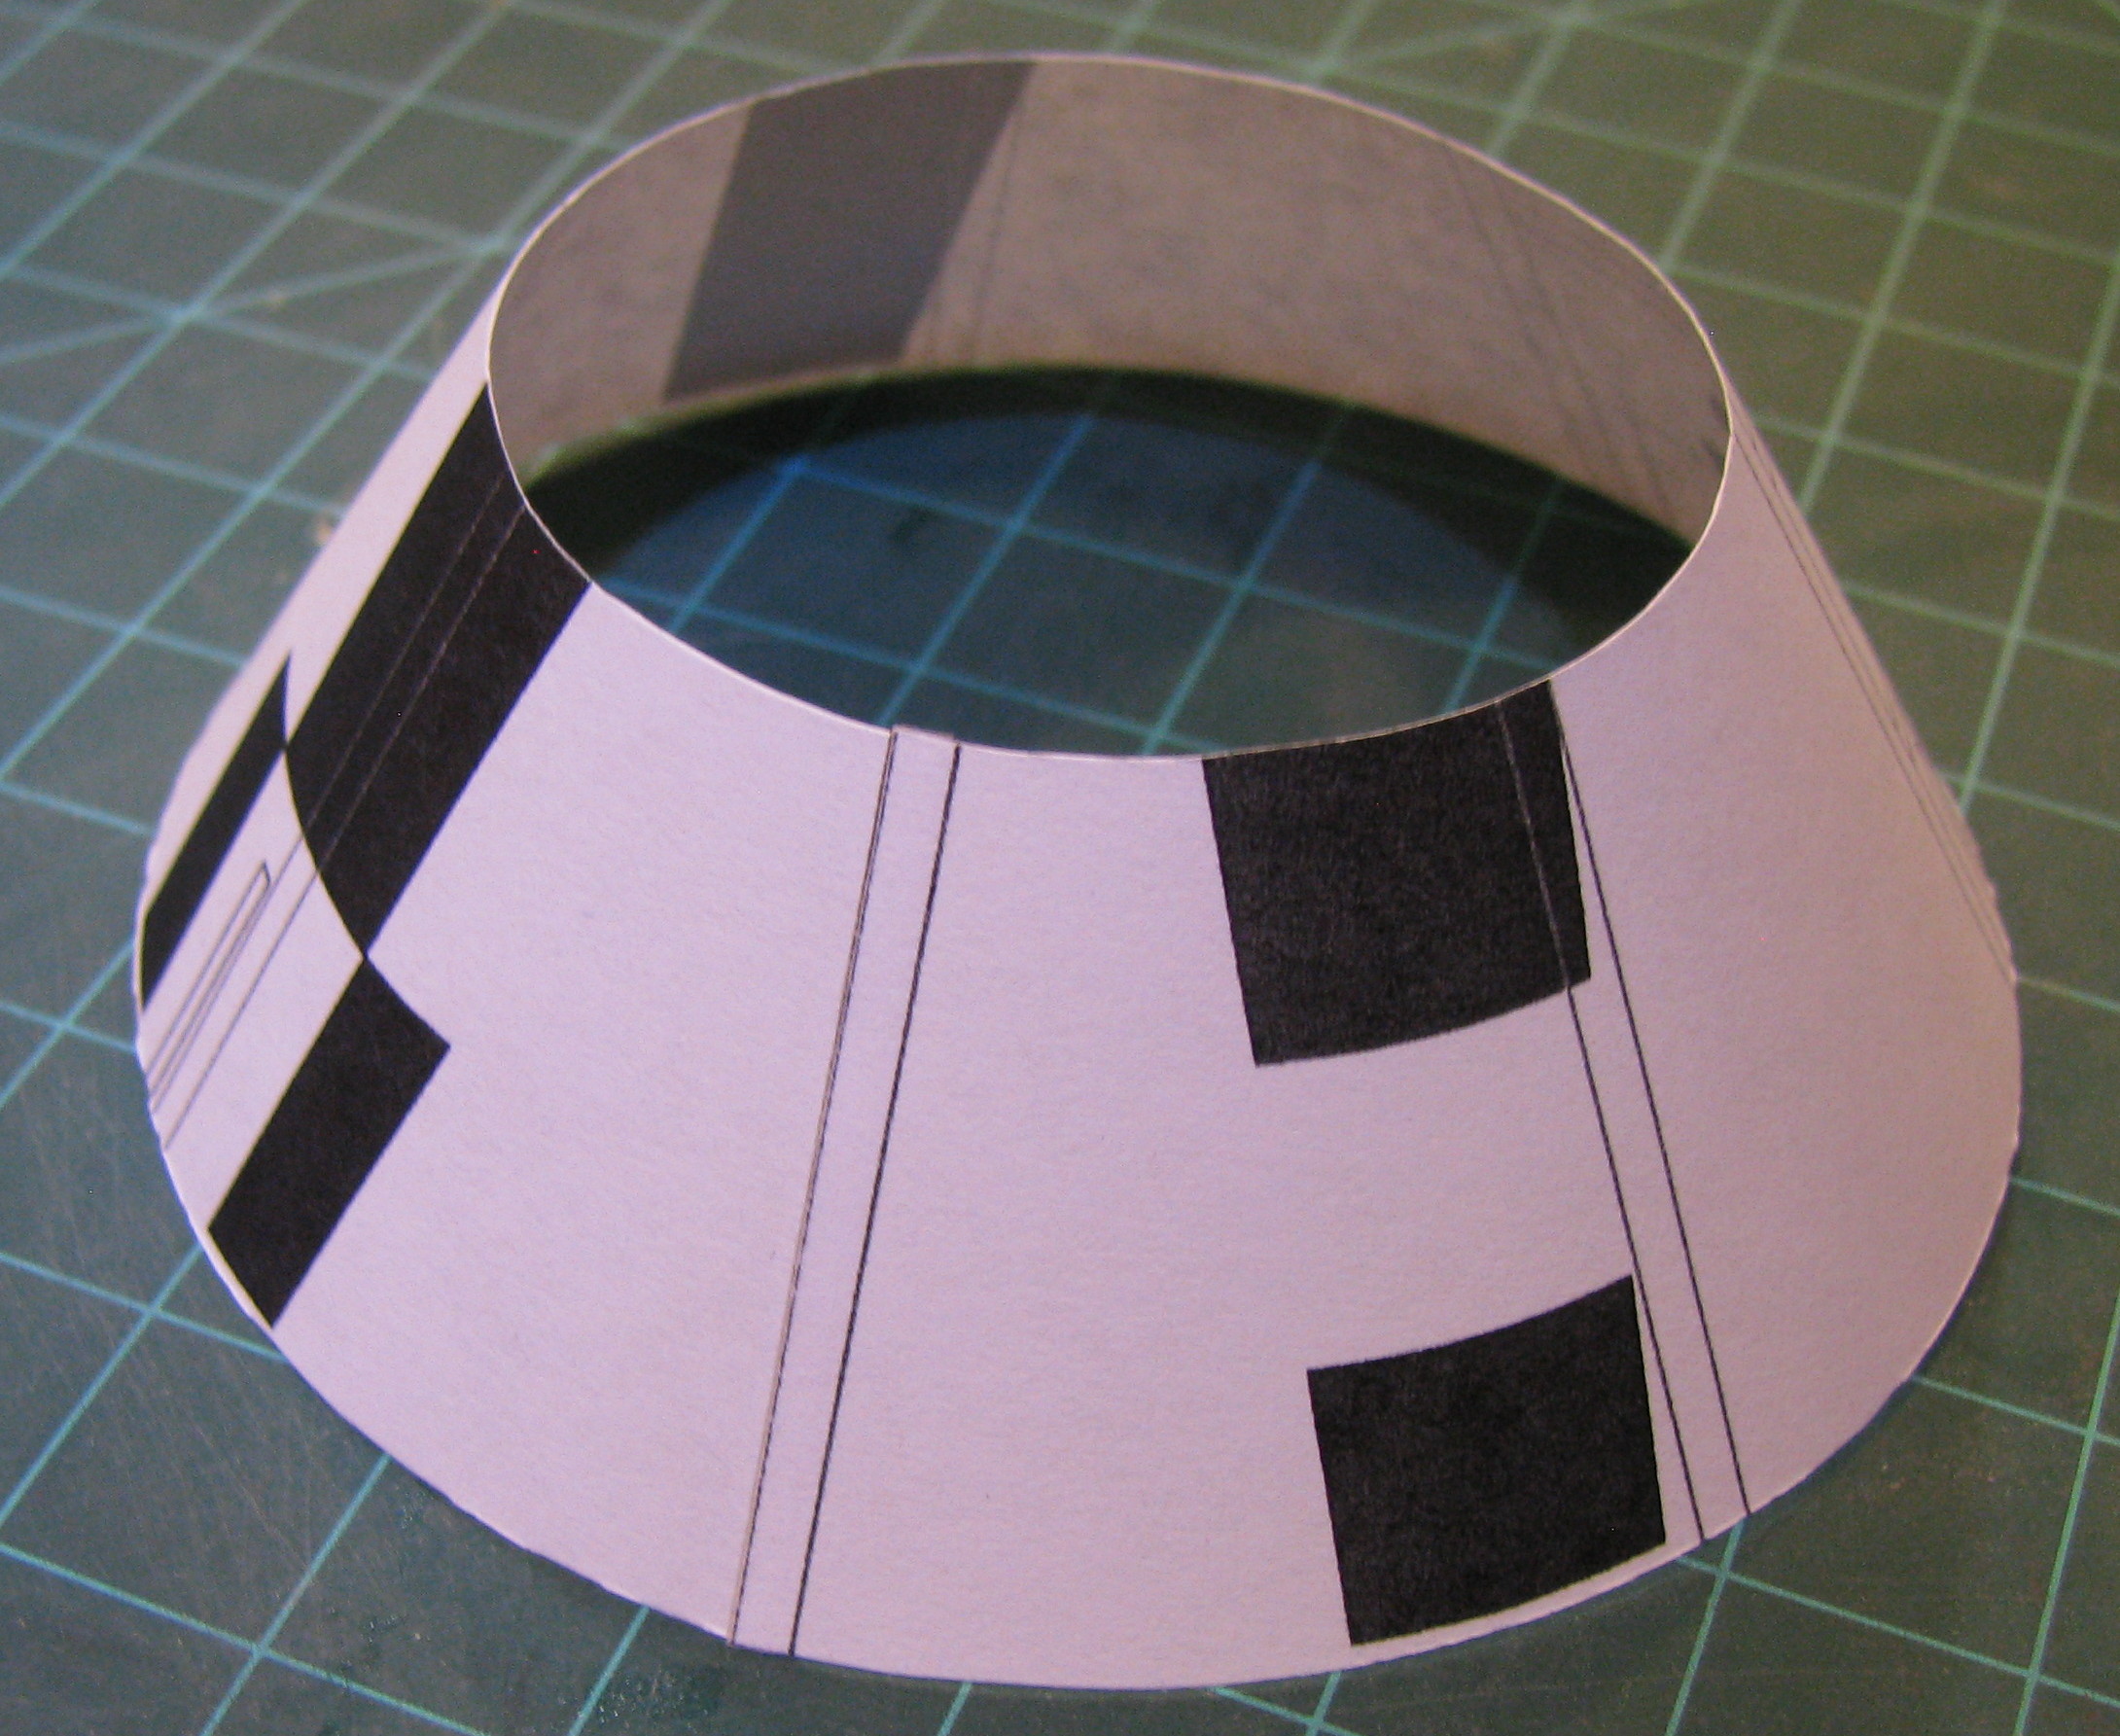
This wrap was cut just inside the radius lines, so that there are no black radius lines visible. The outer edges are cut so that there are two splice joints, one at each end.

uQBYmkC.jpg


As with the SM wrap, the BPC wrap was placed face down to apply double sided tape to one of the splice joints. The tape was applied to about 3/32” along the edge, then a metal straight edge was used to aid in using a sharp blade to cut off the excess tape. The wrap was then curled into a cone, the splice joints aligned to overlap each other, and the tape pressed into place to secure the edges. In the photo below, the splice joint shown in the middle (no black marking) is the actual one that was spliced.

0zBt8Ed.jpg


To hold the wrap in place, I just used a couple of small pieces of double sided tape under the +Y and -Y locations to keep it from sliding loose. Note that the capsule has “tick marks” molded into it. Those tick marks are aligned with the black roll marking for +Y, so use them to align the wrap.

CnXvyS9.jpg
 
Last edited:
LES Motor Wrap.

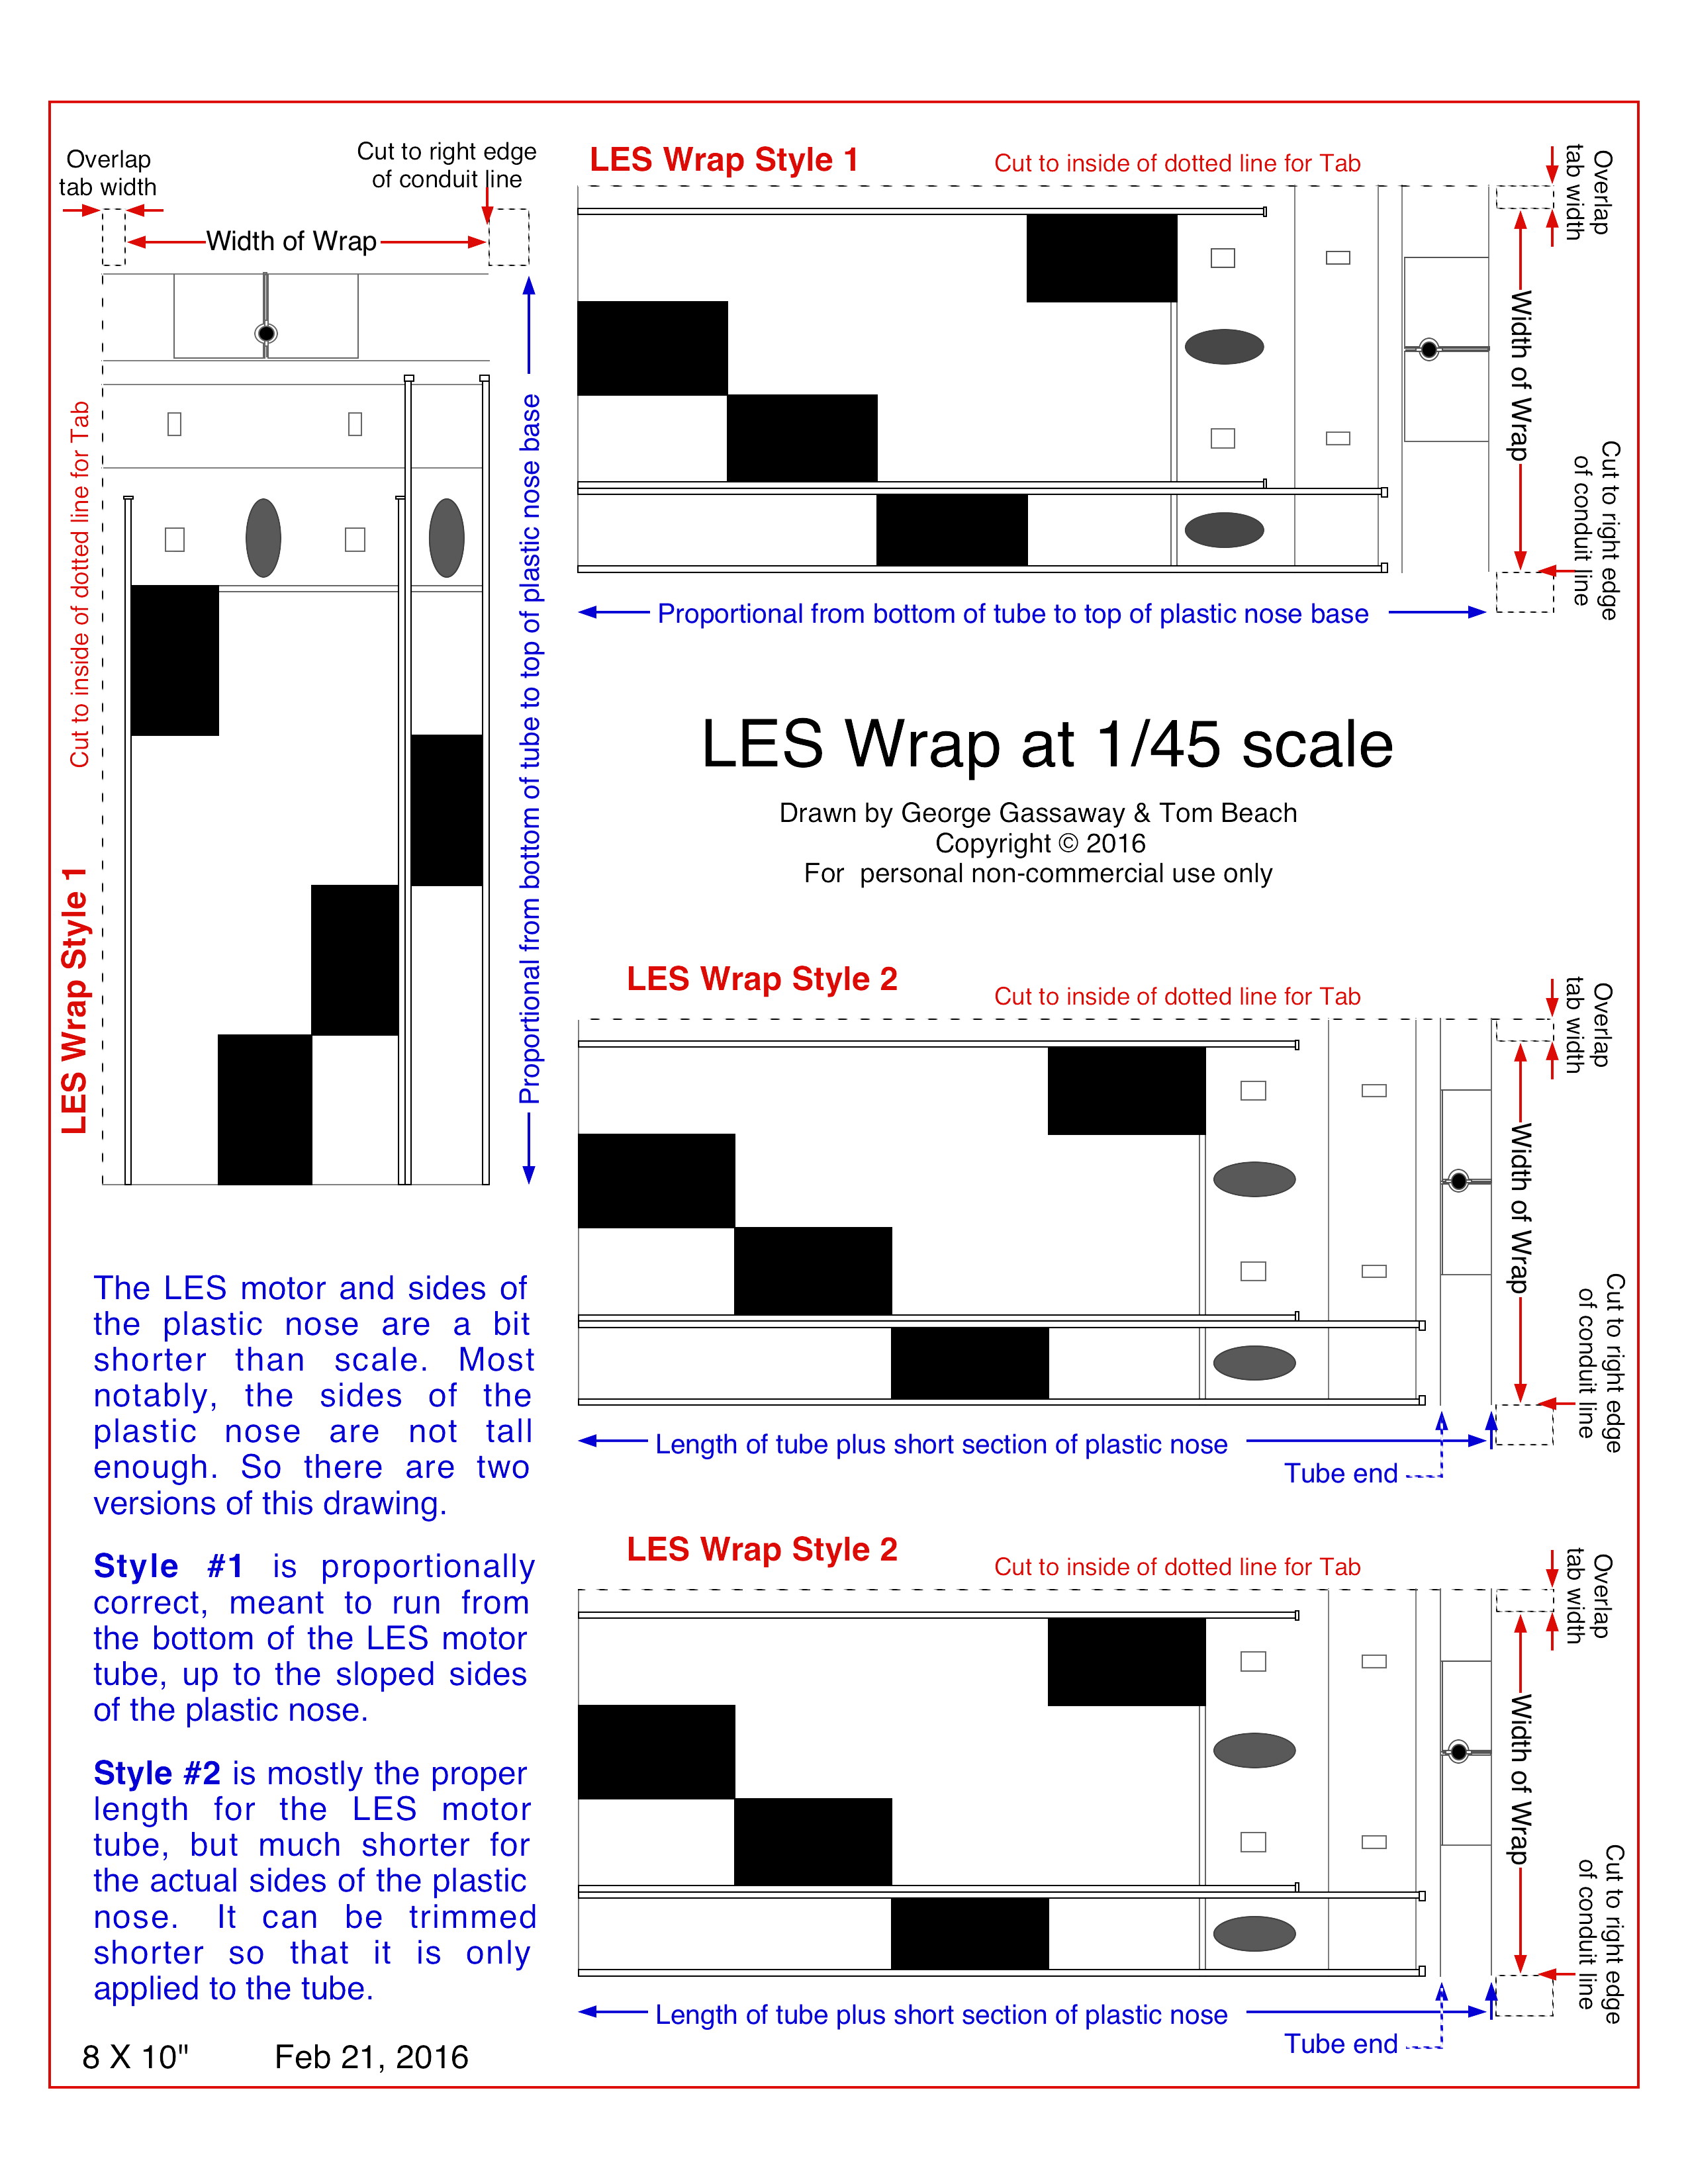
PDF file at: https://www.mediafire.com/view/37z3b3v9292i6j9/LES_MOTOR_WRAP_145_3.0-Laye.pdf
mQ3DcRJ.jpg

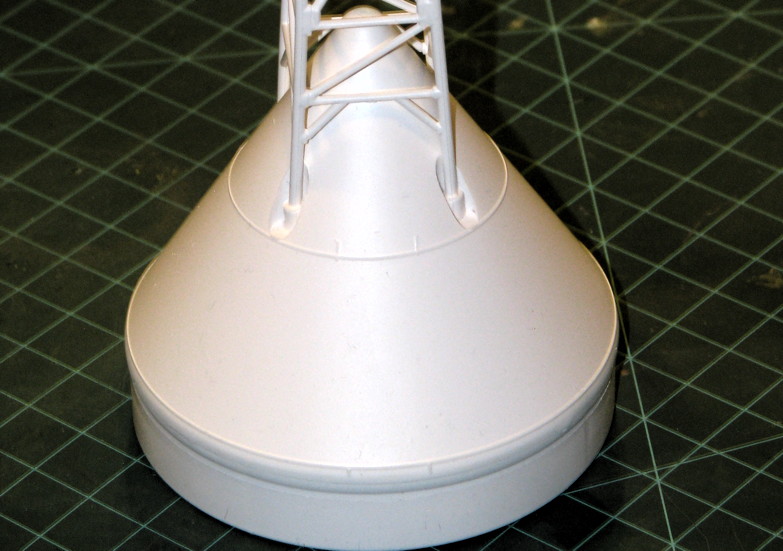
See the note on the wrap explaining the purpose of the two styles, due to the kit’s LES motor and nose cone parallel sides being shorter than they should be. Choose which. On mine, I had not yet made any modification to reflect the discrepancy. What I ended up doing was to use the #2 style, and cut away the upper part that included the canard and pitch motor. That is what I recommend. Those who want to be extra-accurate, then can use style #1 and make up their own conical wrap (Canard outline) for the LES nose tip.

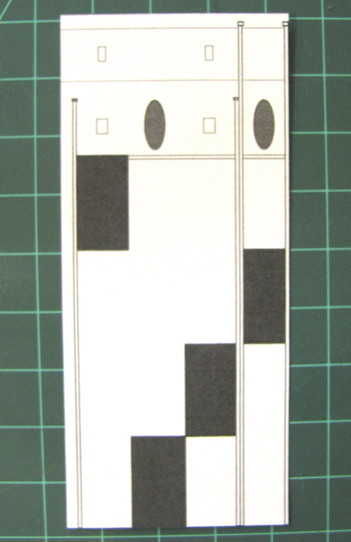
This wrap is cut carefully so that the conduit along the right edge will butt up against the conduit line on the left edge. There is about 1/4” overlap

ZJhzG5u.jpg


This one is hard to get to curl well, so I first wrapped it around a 1/2” dowel, careful to to crease it. Once it got some curl into it, then I wrapped it around a 3/8” dowel, To help to compress it, I used some scrap paper to wrap over it, taped the scrap paper tight, and let it sit overnight.

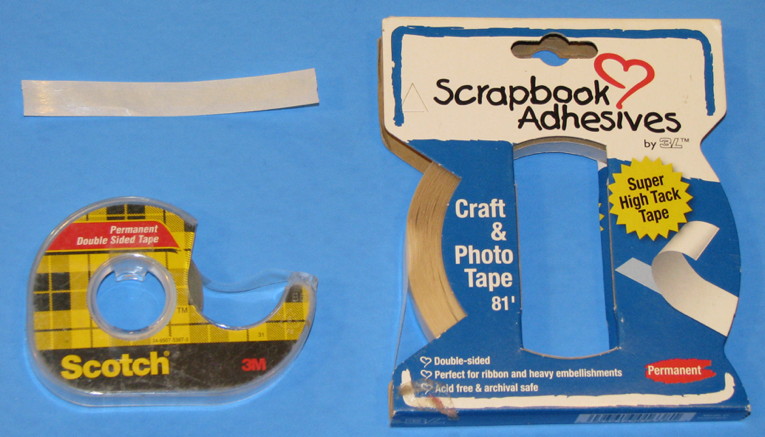
To prepare to apply the wrap, I used a pencil to draw a parallel line on the LES tube (I will note that the tube was NOT painted, and NOT glued). In a previous attempt, I found that the yellow scotch tape was not tacky enough. So I used some high-tack scrapbook tape.

MYa55hq.jpg


I unwrapped the LES wrap, and placed it face down. Due to the curl, I placed a rule over it, parallel, and applied the high-tack tape to the overlap edge, for about 1/8-3/16” width. Then I applied at about 1/4” width of the high-tack tape to the other side. Each time there was excess tape overhanging the edge, which required trimming as with the other wraps.

For applying the wrap, I placed the wrap onto the tube, even with the bottom end, and along the parallel pencil line. Then I slowly wrapped it around. It was a little bit off the first try, so I went back, adjusted a bit, then resumed. Finally got neat the overlap, and the parallel lines were aligned. So I pressed the middle of the seam into place along the overlap, and seeing that was tight enough I worked up and down to get it secured. I was pleased with how well it fit, just the right circumference for the two conduits to butt up exactly like they were intended to. So, the seam is not easy to see.

1dP95P5.jpg


When you DO glue the LES motor in place, be sure that it is aligned properly with the tower legs. The side with the conduits is aligned with the same side as the Hatch. Oops, in the photo above..... I do not have the LES tube aligned correctly with the tower legs. But the good thing is that it is not glued on yet. :)
 
Last edited:
Back
Top