DaveAllen
Active Member
- Joined
- Aug 4, 2014
- Messages
- 31
- Reaction score
- 0
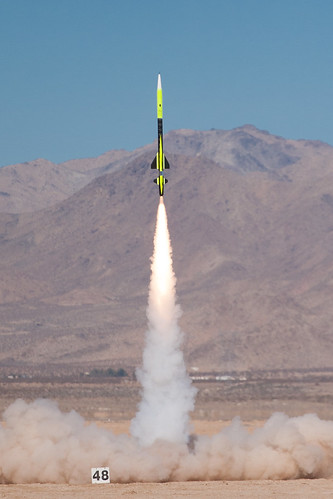
This is the build process of our Level 3 Certification rocket, FULL THROTTLE.
This build is one that I've been looking forward to for a very long time, ever since we completed our Level 1 & 2 a few years back.
I've also been working with my son so he could complete his NAR Junior1 and working with some of our current rockets and coming up with new design ideas (Boattails, Nosecones, Cameras, and most of all Altimeters).
We were able to take the time to document the build as we went through it. This whole process actually began a few years back with a kit we purchased from Wildman Rocketry, at one of the LDRS's. He had it sitting there at the side of his trailer and I thought "Wow, that looks sweet!" it turned out to be an Eagle Claw.
As we dove into the build, we started to realized even though this is a really cool kit, we needed to go BIGGER, so we went FULL THROTTLE!
So we decided to upgrade to a 75mm to achieve the Level 3 and carbon fiber components to help keep it as light as possible, but still trying to keep with the Eagle Claw theme. After working with OpenRocket, we finally came up with an overall design to be able to keep it under 18lbs. total including chutes, chords, tracers, camera, altimeters. etc. (just minus the motor).
This build included:
4" Carbon Fiber main airframe ------------ Rocketry Warehouse
4" Carbon Fiber upper airframe ----------- Rocketry Warehouse
3" (040) Carbon Fiber motor tube -------- Rocketry Warehouse
12" Carbon Fiber Coupler ------------------ Rocketry Warehouse
Filament wound ---------------------------- Rocketry Warehouse
Nosecone
Tailcone
Motor retainer ------------------------------ Giant Leap Rocketry
AV bay bulkheads -------------------------- Proline Rocketry
Chutes -------------------------------------- Rocketman Chutes
3' Drogue
12' Main
These first videos are showing the beginning of the build. This is part one and two with more to follow. I'm not sure how many parts this will come out to, but so far this is what I've got to share with you ......... JUST CLICK ON THE PICTURE ITSELF TO PLAY THE VIDEOS
This is a video showing the first part of the Level 3 build:
[video=youtube;D_qpmWxb11s]https://www.youtube.com/watch?v=D_qpmWxb11s[/video]
and this is part two of the Level 3 build:
[video=youtube;YlVYjQHuOC8]https://www.youtube.com/watch?v=YlVYjQHuOC8[/video]
We would like to thank some of the following people, programs, and suppliers who really helped us during this build process:
Rocketry Warehouse
OpenRocket
Rocketman Chutes
Aerotech
Sportsmoke
Wildman Rocketry
Perfectflite
Bay Area Rocketry
Aeropoxy
Stickershock
Giant Leap Rocketry
McMaster-Carr
Coast Airbrush
Aircraft Spruce
And a special thanks to:
Rocketry Organization of California (ROC) -- Thanks to all the officials for their help and support
Last edited: