Build: Estes Patriot

The Rocketry Forum

Help Support The Rocketry Forum:

This site may earn a commission from merchant affiliate links, including eBay, Amazon, and others.

Handeman

Well-Known Member
TRF Supporter
Joined
Jan 18, 2009
Messages
9,126
Reaction score
1,942
Location
Stafford, VA
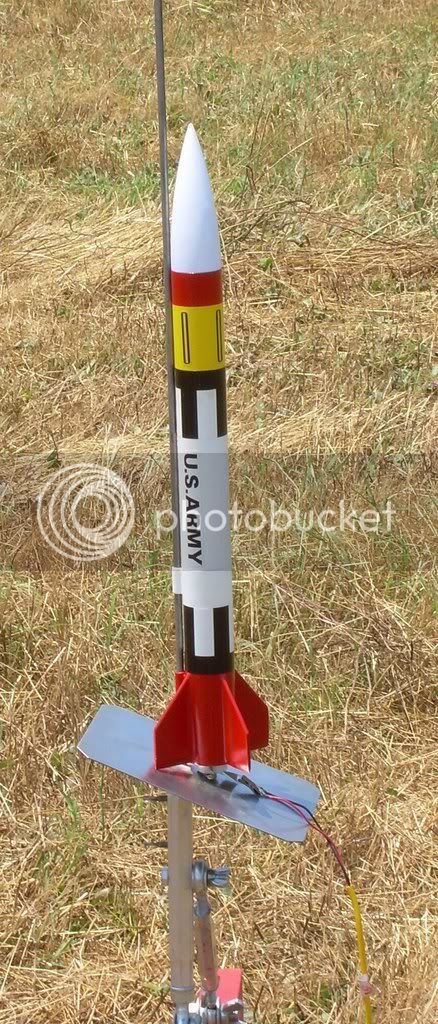
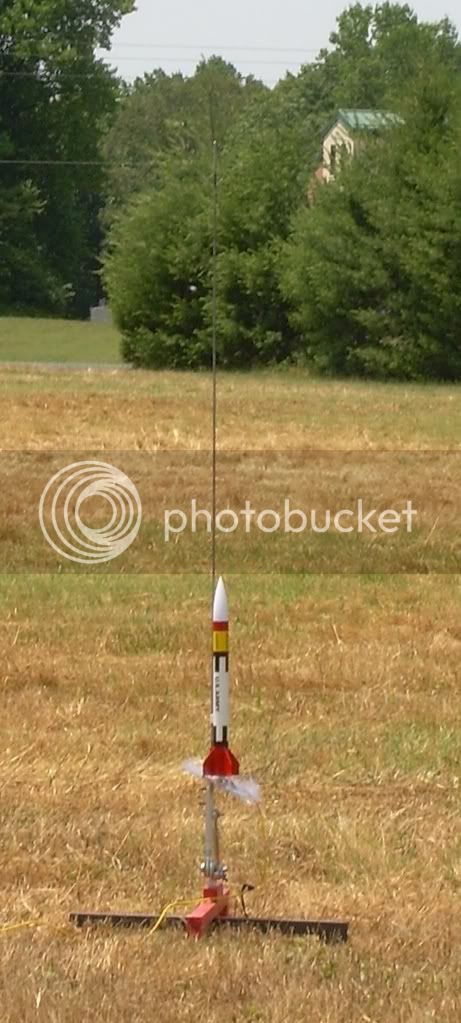
Before anyone says I have this in the wrong forum, let me say, this is a modified build of the Estes Patriot with a 24mm MMT and it flies on D- F motors. It's firmly in the MPR range.

I had done a build thread on this in TRA BC (Before Crash). Since it doesn't look like it's coming back any time soon, I will repost the build here.

This is the standard Estes Patriot kit in 18mm. Since it is a kit with good instructions, I will concentrate on the changes I made.

Lets start with a pic of the kit and another of the parts. The extra sheet of wood is the 3mm 3ply plywood I made the fins from. It is available from Michael's Craft stores and others for a dollar or two.

The kit.jpg

Parts 001.JPG
 
The first step was to build a baffle. I took one of the red tube couplers and cut two circular peices of the 3mm wood that just fit into the coupler. I then used double sided tape to tape them together and tape them to a peice of 1" pine. Then I drilled the holes through the peices. The tape keeps the peices from splintering when the drill goes through them. see pic 1

I then glued one of the end peices and glue it into the baffle. I used wood glue to glue it in the coupler, then coated the face of the end peice with epoxy to protect it from ejection gasses. I then tied a peice of Kevlar shock cord to the bottom peice and epoxied that to the inside of the coupler.
I bought a bag of two stainless steel scrubbers from the dollar store. That's enough to make about 30 baffles this size. I cut off some and stuffed the baffle full.

I then notched the top peice of the baffle, pressed it slightly into the coupler, enough to make a fillet, and glued it in place.

Baffel Parts.JPG

Baffle w SST Scrubbers.JPG

Baffle.JPG
 
The next step was to make the fins. Since I was going to use a 24mm MMT and fully intended to fly this on 24/40 composite reloads up to a F39T, I decided to use through the wall mounting.

I calculated the length of the tabs I would need on the fins by subtracting the diameter of my MMT from the diameter of the BT and dividing by 2, then add about 1/32 that can be sanded off later while dry fitting the parts.

I also needed to calculate the length of the tabs and where they were going to be on the fin. This was based on where I wanted the centering rings. This is a builder choice type of decision. I made mine about 1 1/2 inches long.

Next was to put the motor mount together. For a MMT I used the sleeve that 29/40-120 reload grains come shipped in. It turns out this tube is the perfect diameter for 24mm motors. I marked the tube where I wanted the CRs to go. I positioned them so the MMT would be flush with the bottom of the body tube, the fin tabs would slide between the CRs and the bottom of the fins were also flush with the bottom of the BT.

I then made the CRs by using double sided tape to tape two pieces of 3mm plywood together and drilling a 1" hole in the center with a fostners bit. Once this was done, I laid the piece of card board the original 18mm CRs came out of, over the ply pieces and traced the outer diameter.

I just eyeballed the placement. You will be surprised at how close and accurate you can be. The key is to use the double sided tape so the center hole always stays aligned while you sand down the outer diameter. What you want to do to ensure the MMT is parallel to the BT is mark the inner or outer face of the CRs and make sure they are aligned the same when installed on the MMT. That way the centerline might be off very slightly, but the centerline will be parallel to the body.

The third pic here is the jig I use for sanding. I use 1 x 2 pine to make a box on a piece of 1/2 ply. Then attached a piece of 1/2' ply on top with a hole slightly bigger then the sanding drum I have from my drill press. There is a hold in the 1/2 that just fits the vacuum hose for my small shop vac. This setup will suck up 90% of the dust generated.

TTW Fins.JPG

Centering Rings.JPG

Sanding CR.JPG
 
While building the motor mount, I glued the forward CR in place.

For positive retention of the expensive motor casings, I roughen up the surface of two 6-32 nuts with 60 or 80 grit sand paper. Then drilled two small holes, just large enough for 6-32 screws on opposite sides of the remaining CR. Put a 6/32 screw through the hole and put the nut on with th rough side away from the CR. Tighten until snug and align the nuts to have the least amount of over hang. I then put a little Vaseline on the threads of the screw. Make sure, you don't get any on the face of the nut. Then use JB Weld to epoxy the nuts in place on the CR.

Use a file or grinder to remove any of the nut that is over hanging the inner or outer edges of the CR.

In the picture you will see the MMT with the forward CR glued on, the aft CR with two screws holding the nuts in place for gluing, the baffle and fins. The tabs on the fins have the corners angled to clear the fillets between the MMT and the CRs.

Custome Parts.JPG
 
The next step is to cut the slots in the BT. Use the fin guide that comes in the instructions. Mark the fin positions on the BT. Rotate the fin guide 3mm in either direction and mark the fin position again. This marks the width of the slots. Us a straight edge of a peice of paper, wrap it around the BT, matching up the edges of the paper where they over lap. Use this to mark the top and bottom of the holes you will need for your fin tabs.

Use a NEW exacto blade. I clamp a dowel (broom handle) in a vise and use that to hold and steady the BT while cutting the slots. The closer the dowel is to the inside diameter of the BT, the more steady it will be.

Cutting fin slots.JPG
 
I used a standard HPR technique to install the MMT and fins. Put two screws into the aft CR so they just go through the nuts glued on to the inside of the CR. Side the CR onto the MMT. Position the MMT in it's final position in the BT. Using epoxy or wood glue, I don't believe it matters, both will be strong enough, put a glue fillet inside the BT and glue the FORWARD CR in place. DO NOT glue the aft CR in at this time, it is only there to align the MMT.

Once the glue on the forward CR is dry, remove the aft CR and install the fins through the slots. Sand down any extra on the tabs to the fins sit flush against the BT. Put glue fillets between the fin and MMT, fin and BT, and forward CR and MMT and CR and BT. Once again, you can use epoxy or wood glue. Either way, you don't need large fillets.

Fin Can 001.JPG
 
Once all the internal fillets are finished and dry, complete the fin can by installing the aft CR, making sure the nuts and screw ends are in the gaps between the fins and glue it in place. Once that is done, glue the baffle half way into the the forward end of the BT and put external fillets between the fins and BT. I used two 3/4" long 1/4" launch lugs on the fin can. One at the top, the other between the fins. At the bottom would have been best I think. This size lug has worked well and you really want a 1/4" rod for the E & F motors.

After that, use the remaining coupler to attach the two remaining BTs, and assemble and finish as per the instructions.

Check your stability before you fly. I use this for night flights and have a small LED light in the nose cone. It only weighs 0.8 oz and stays in the nose cone all the time. Every flight has been stable so far. You may not need any nose cone weight, but check to make sure.

This is a very solid, durable MPR that will really get some legs and grab some sky on composite E and F loads.

Have fun!

P anti zipper.jpg

DSCN0998.jpg
 
Thank you for the build thread. I finally picked one up a couple weeks ago and was going to do the same. Are the screw heads the only thing that but up against the motor for retention or do you have a plate you install?
 
Some notes about my flights. All flight have been with a "Kids Adventure Lite" in the nose cone (found at Walmart). This is a small toy LED light the attaches to a headband. I removed it and set it for flash when launching at night. Otherwise, it just stays in the rocket. It weights about 0.8 oz.

The first flight was on a D12-5. This is WAY to short of delay for this. It ejected too soon, broke the snap swivel on the chute and the rocket fell. There was NO damage at all. The fin can is really solid and the upper half is light enough it wasn't hurt. I wouldn't recommed this method of recovery, but it didn't bother this Patriot.

The next flight was on a D12-7 at night. Very cool and it seemed like it was still nose up when it deployed, but it didn't damage the chute and recovered just fine. Was actually easier to find in the tall grass a night with the light then in the day time.

All night flights have been on D12-7s just because the BP motors put out a log more spares and look much cooler at night.

The next flight was a day time flight on a D12-7 and it seemed that the delay was too long. Don't know if the first D12-5 had a short delay and this D12-7 had a long delay, but it's beginning to look like either will work.

Next flight was a E18-7W. Sims say 1,600 ft. but seemed like it was higher. 12" chute seem to take forever to come down, which is another reason I think it got higher then the sims.

Had another night flight on a D12-5 that worked pretty well. Guess that first D12-5 must have had a short delay.

Next launch will have to try a F24 or F39. I'll let you know how it goes.
 
Thank you for the build thread. I finally picked one up a couple weeks ago and was going to do the same. Are the screw heads the only thing that but up against the motor for retention or do you have a plate you install?

Actually I took a couple of washer and bent them at 90º and use them with the screws. Here's a couple of pics.

Motor Retention 01.JPG

Motor Retension 02.JPG
 
You have modified the rocket very well. Sounds like you had a good launch (well sorta). Have any pics or vids?
 
You have modified the rocket very well. Sounds like you had a good launch (well sorta). Have any pics or vids?

Actually I only have one of the Patriot on the pad. No movies. I always take a camera along and with the memory card, it can take movies for an hour. Most launches I'm lucky to take 2 or 3 pics by the time I get home. I just get too busy to bother taking pics.

Patriot01.jpg


You can see just a little smoke on this one, guess I was a little quick on the shutter.
Patriot02.jpg
 
It looks great on the launch pad. Keep us posted when you launch it with an F motor!
 
Back
Top