Sorry, should have included a link: https://www.jcrocket.com/plastic-nose-mods.shtml
You are using an out of date browser. It may not display this or other websites correctly.
You should upgrade or use an alternative browser.
You should upgrade or use an alternative browser.
Avionics Pictorial Thread - Post Yours
- Thread starter DRAGON64
- Start date

Help Support The Rocketry Forum:
This site may earn a commission from merchant affiliate
links, including eBay, Amazon, and others.
TimeBandit
Active Member
- Joined
- Sep 24, 2012
- Messages
- 29
- Reaction score
- 1
Yes! mpitfield. I had one failure. The manual calls for .2 grams of powder and I put a "scosche" extra in both wells. When the Drogue fired it was with too much force and caused the Main Co2 cartage to overcome the spring and pushing it into the pin. It was not enough to fully puncher the seal, but enough to bleed the cartage and the hole thing come down on it's droge. When they say .2 grams they mean it.
Yes! mpitfield. I had one failure. The manual calls for .2 grams of powder and I put a "scosche" extra in both wells. When the Drogue fired it was with too much force and caused the Main Co2 cartage to overcome the spring and pushing it into the pin. It was not enough to fully puncher the seal, but enough to bleed the cartage and the hole thing come down on it's droge. When they say .2 grams they mean it.
Yes I would agree that the BP recommended should be adhered to with attention when assembling! I have had two failures, that I would take ownership on, and I feel that both were also due to too much BP causing an over-energetic charge.
The first failure had the same effect as your result. In my case the cartridge hit the pin in the cartridge housing cap assembly with enough force that it too was lodged into the pin assembly and the spring was not powerful enough to dis-lodge it. This also resulted in the 8 gram cartridge slowly leaking, failing to pressurize and result in a separation. However I had an engine backup charge which saved the rocket. On further inspection of the C02 cartridge I also suspected that the end cap, which is what is punctured, may of been made with a different material than other C02 cartridges. So there may be potential for failure based on the type of C02 cartridge as some appear to be harder than others...just an unsubstantiated theory based on empirical evidence.
The second failure resulted in the cartridge hitting the pin with such force that it actually bent the cartridge housing cap assembly and broke my altimeter bulkhead, resulting in the loss of those two components. However the spring was able to release the C02 cartridge and the 12 gram cartridge in that case, did do it's job, so the drogue deployed nominally.
I ended up removing the system from that rocket and rebuilding the recovery system using a more traditional method. As of right now I have two full Peregrine kits, minus one cartridge housing cap assembly, that I am not using but would like to use again. I am just a little light in the confidence based on my two failures.
My take on the experience is that the system works but it is not a forgiving system that has a thin margin for error. Somewhat like an ARRD but with the ARRD I have more confidence as there is a physical feeling or feedback when it is assembled correctly, at least one that I feel I can recognize...well I believe I do!
Last edited:
- Joined
- Jan 17, 2009
- Messages
- 669
- Reaction score
- 10
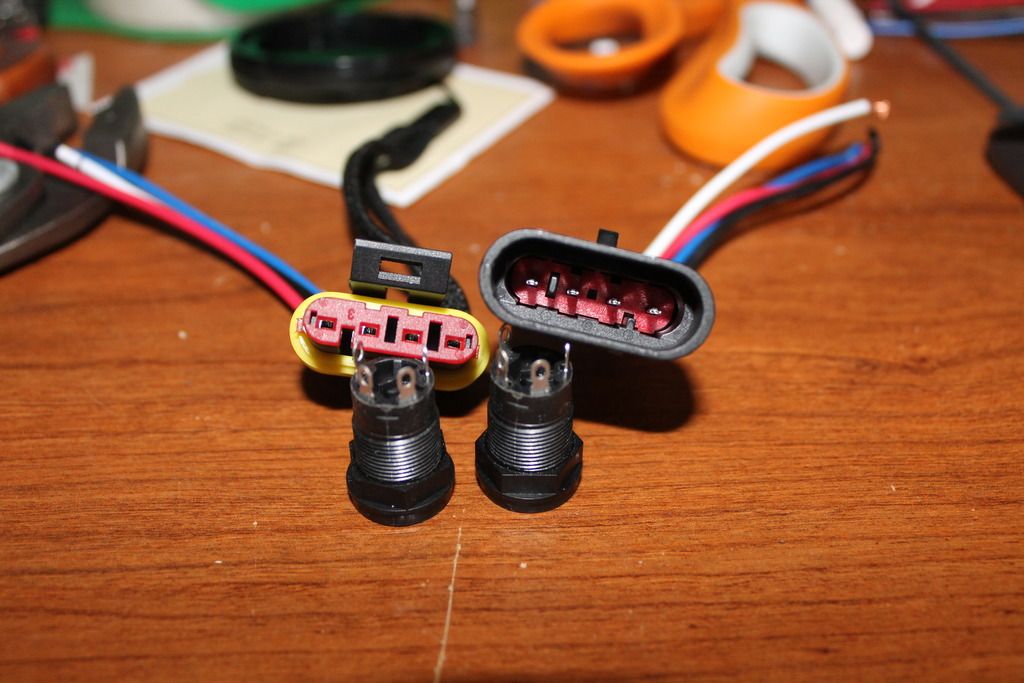
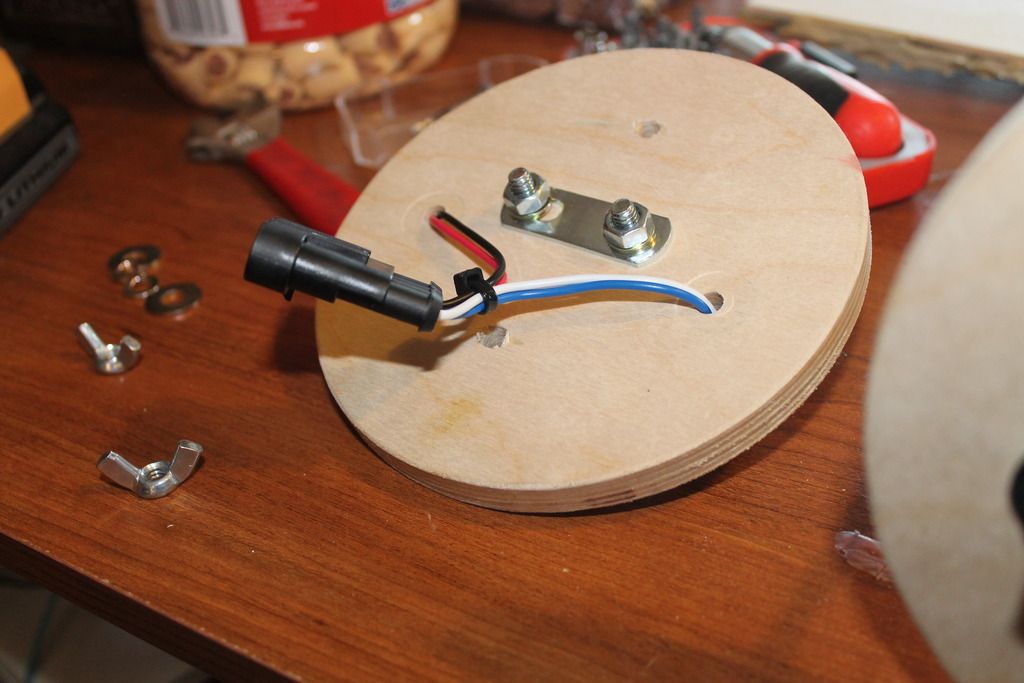
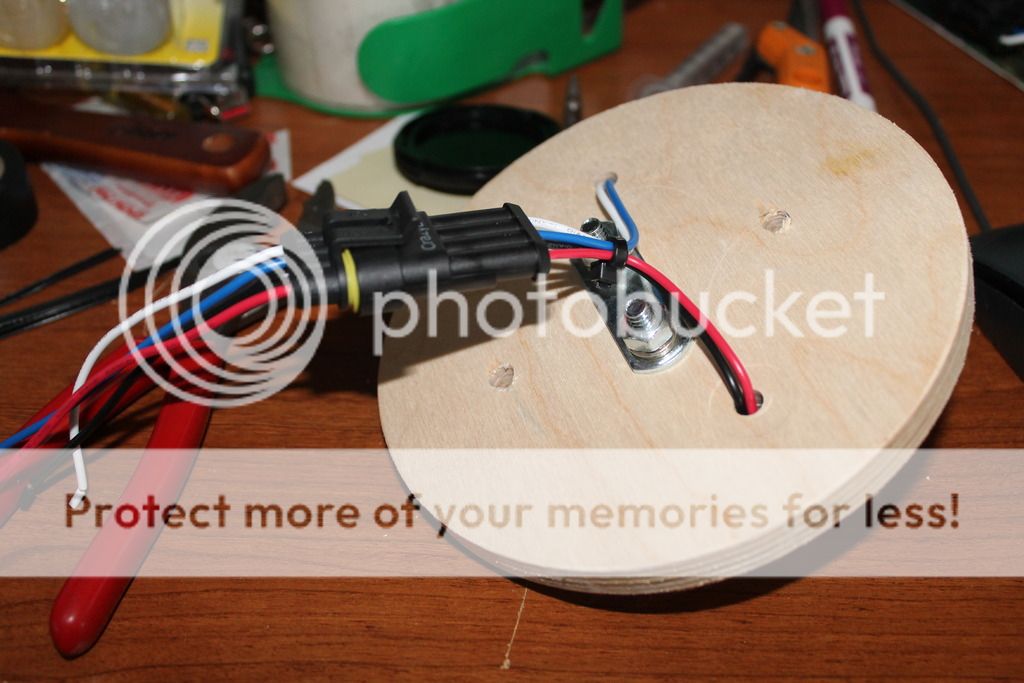
My latest effort at a swappable board arrangement. The base unit fits a 54mm coupler. Lipo battery, RRC2+ altimeter and screw switch. The power harness is set up so the switch plugs into it. This on the larger diameter boards I can mount another switch and use that one. The 3" plate in these pics has clearance holes so the 54mm plate will sit down flat and be held with a pair of screws into pemnuts. The ends on the 54mm board are pressed on. The small 4-40 studs are the terminals and also keep the bulkheads and board lines up as a single unit. I didn't have the charge terminal wiring done when I took these.
Next up is to make a pair of new ends for the 3" size that will center the 1/4-20 rod with a pair of boards, one each side. Each gets a 54mm plate (I have two altimeters!) and this will get me modular full redundant dual deployment in a 3" rocket. Good practice for my L3.
I will arrange this a bit better later when I'm not on my phone...
N


- Joined
- Jan 23, 2009
- Messages
- 5,977
- Reaction score
- 4,091
Yes I would agree that the BP recommended should be adhered to with attention when assembling! I have had two failures, that I would take ownership on, and I feel that both were also due to too much BP causing an over-energetic charge.
Peregrine recommends Pyrodex not BP correct? Have you tried Pyrodex P? I have never had any issues using the supplied vial and Pyrodex P, even when a pinch more than recommended.
bdureau
Well-Known Member
- Joined
- Dec 20, 2011
- Messages
- 539
- Reaction score
- 246


This is a 100% homemade one for a 4 inches rocket
A couple of my altimeters:
AltiDuo 180 and AltiMulti with a bluetooth wireless module so that I do not have to open the payload to download the flight data.
3D printed screw switches made with stainless steel blind nuts and allen screw ( so that I can screw and unscrew them many time).
and 3D printed spacer for the rod.
I use a couple of li-ion batteries
I can provide the CAD files for anyone interrested in printing them
Peregrine recommends Pyrodex not BP correct? Have you tried Pyrodex P? I have never had any issues using the supplied vial and Pyrodex P, even when a pinch more than recommended.
Ah no I was not aware, I guess more fool me and I should pay more attention to the instructions. I know there are differences in the performance between the two Pyrodex being less dense so when measured by weight I wonder what the net effect would be?
TimeBandit
Active Member
- Joined
- Sep 24, 2012
- Messages
- 29
- Reaction score
- 1
I must have overlooked that too. I'm in the prosess of moving the system to another project and will test it with Pyodex.
Last edited:
rharshberger
Well-Known Member
- Joined
- Jun 16, 2011
- Messages
- 6,390
- Reaction score
- 2,685
This is the AV bay from my L3. It's my favorite so far...
Missile Works Dual 98mm 3D printed sled with a MW RRC3 and a RRC2+. There is enough room to stack two more sleds just on the 1/4" rods. Plus I could put something else on the 3/8" rods if I really needed the functions. The kicker is that I'm not a data junkie in the least. All I want to know is how high it went. Where it landed will be great once Missile Works get his RTX thingy finished.
Sorry about the blur on the first pic. You get the idea, though.
Adrian
Last edited:
Here is a 3" avionics package I am working on for a resurrection project. I disassembled another build to obtain most of the parts, and I ordered a 3D printed sled from Additive Aerospace (Landru). Landru's products really help to build lightweight avionic packages.


My latest effort at a swappable board arrangemen
Wingarcher, I realize that this is nearly a 4 year old thread, but that forged ring sitting on the threaded rod in the second photo, what is that piece of hardware, and where did you get it? I'm looking for something like that, and haven't been able to find it. Did you disassemble a large swivel?
Nice design, by the way.
blackjack2564
Crazy Jim's Gone Banana's
It's called an "eye nut" or lifting eye nut. try eBay and search here for best price: https://www.ebay.com/sch/i.html?_fr...RC0.A0.H0.Xeye+nut.TRS0&_nkw=eye+nut&_sacat=0
be sure to look at shipping price, some of cheapest have high price shipping. thy just thread on your av-bay tie rods
Grainger or local hardware store may have them. Be sure to match to your threaded rod as: 1/4-20 [20 is threads per inch] matches treaded rod 1/4 -20.
be sure to look at shipping price, some of cheapest have high price shipping. thy just thread on your av-bay tie rods
Grainger or local hardware store may have them. Be sure to match to your threaded rod as: 1/4-20 [20 is threads per inch] matches treaded rod 1/4 -20.
It's called an "eye nut" or lifting eye nut.
Ah! Thank you. That name now seems obvious, given what an "eye bolt" is!
captbk
Well-Known Member
I dont use big bulky lifting eyes anymore, I use these now. They dont take up near as much room as a regular eye Since they are metric you will need metric nuts for the threads. https://rover.ebay.com/rover/1/711-...0001&campid=5338413729&icep_item=142891131618
I dont use big bulky lifting eyes anymore, I use these now
Thanks, captbk. They look clean and compact, and a definite space saver. I also just found these "Rocketry Nuts" by Prairie Twister Rocketry:
https://ptrocketry.blogspot.com/p/rocketry-nut.html
Thanks, captbk. They look clean and compact, and a definite space saver. I also just found these "Rocketry Nuts" by Prairie Twister Rocketry:
https://ptrocketry.blogspot.com/p/rocketry-nut.html
These work well. I have used them on a few projects.
These work well. I have used them on a few projects.
Good to hear that you liked them. I just ordered a pair.
- Joined
- Jan 11, 2013
- Messages
- 6,450
- Reaction score
- 957
It's called an "eye nut" or lifting eye nut. try eBay and search here for best price: https://www.ebay.com/sch/i.html?_fr...RC0.A0.H0.Xeye+nut.TRS0&_nkw=eye+nut&_sacat=0
be sure to look at shipping price, some of cheapest have high price shipping. thy just thread on your av-bay tie rods
Grainger or local hardware store may have them. Be sure to match to your threaded rod as: 1/4-20 [20 is threads per inch] matches treaded rod 1/4 -20.
Wow, those are really cool Jim..
Just on a side note,,
I just spent quite a few bucks on the perfect "Ridgid" brand Aluminum handle strap wrench.
It's specific to hold motors from turning when trying to disassemble a stubborn one after a flight..
I've been to too many launches and seen too many people walking around
looking for a methode to get stubborn enclosures off, that don't seem to want to get started turning..
This has happened so often that I know a few guys that have super strong hands,
that's where I send them, but nowhere near as good as this strap wrench..
It was expensive but it'll be worth it when folks needs it..
Anytime anyone needs it, it'll be in my truck..
Teddy
blackjack2564
Crazy Jim's Gone Banana's
Gee Teddy.... I have just been informed that both One Bad Hawk as well as Wildman both sell "eye nutz" I knew you both sold eye bolts, BUT did NOT know you guys also sold "eye nuts".
Now I do.... for eyenuts look here:
https://www.onebadhawk.com/welded-stainless-steel-eyes.html
Now I do.... for eyenuts look here:
https://www.onebadhawk.com/welded-stainless-steel-eyes.html
..Gee Teddy.... I have just been informed that both One Bad Hawk as well as Wildman both sell "eye nutz" I knew you both sold eye bolts, BUT did NOT know you guys also sold "eye nuts".
Now I do.... for eyenuts look here:
https://www.onebadhawk.com/welded-stainless-steel-eyes.html
Grease or anti-size work pretty good before the closures become stubborn. On AT hdw, not tightening the 1st closure but just barely snug will come off easier when a motor is still warm.
DaveW6DPS
Well-Known Member
There are several photos in this write-up. The other side of the board has the Stratologger CF, with the same style of mount.
https://rocstock.org/learn/advanced/mounting-a-big-red-bee-gps-tracker/
https://rocstock.org/learn/advanced/mounting-a-big-red-bee-gps-tracker/
TimothyG
Well-Known Member
View attachment 380176 View attachment 380177
Tons of inspiration in this thread helped me make my first 3D printed sled. I’d still change a bunch but it’s been a valuable lesson.
That is pretty. You should do a build thread.
- Joined
- Oct 2, 2011
- Messages
- 971
- Reaction score
- 542
From a 5" Shape Shifter. The charge canisters have some putty on the bottom so when I slide them into the holders it seals the bay. As with all my bays, the charges are wired directly to the altimeters. I have also eliminated most all switches and have gone to twist and tape.
View attachment 268735
View attachment 268736
View attachment 268737
View attachment 268738
Titan,
What are the pieces used to bolt down the charge wells. I have not had any luck finding such a screw device at the hardware store? What are they called
Paul
Titan II
Well-Known Member
- Joined
- Aug 23, 2013
- Messages
- 2,019
- Reaction score
- 1,157
Titan,
What are the pieces used to bolt down the charge wells. I have not had any luck finding such a screw device at the hardware store? What are they called
Paul
The hollow metal assembly is for the top of a lamp. Go to the lamp parts section of Lowe's or Home Depot. I think it may be called a nipple. I used that and two nuts. I then inserted a plastic bushing in from the top and filled the bottom with epoxy. The epoxy is then drilled out for the wire. There is no metal to wire contact.

- Joined
- Oct 2, 2011
- Messages
- 971
- Reaction score
- 542
Brilliant. Thank you sir
Similar threads
- Replies
- 22
- Views
- 2K
- Replies
- 17
- Views
- 2K
- Replies
- 16
- Views
- 1K
- Replies
- 42
- Views
- 3K
- Replies
- 39
- Views
- 3K


