You are using an out of date browser. It may not display this or other websites correctly.
You should upgrade or use an alternative browser.
You should upgrade or use an alternative browser.
Apogee Zephyr Build/Level 1 Cert Project
- Thread starter Patternflyer
- Start date


Help Support The Rocketry Forum:
This site may earn a commission from merchant affiliate
links, including eBay, Amazon, and others.
- Joined
- Dec 21, 2020
- Messages
- 256
- Reaction score
- 1,011
AC, I can't tell you how excited I am to see your progress! She's looking real good! Very clean build! What color scheme are you going with? I'm sticking to the facecard photo from the package. I've gotten the base white and the green fin tips done. Now I need the black nose cone and inner part of the fins. Waiting between coats is a true test of patience! LOL
Keep up the good work and thanks for the updates. I look forward to seeing more! My Part 7 should be up in a week or so, or whenever I get the painting done.............
Thanks this has been a fun build for sure. The card stock Zephyr looks sooo good with this rocket I'm looking forward to your next video! I have been thinking up a different design in my head to match some of my other rockets for this one. I hope it turns out good it's going to require some additional modifications and vinyl graphics design. I'll keep things posted on your thread.
Arpak
Well-Known Member
Love to see fellow Zephyrs out there, I named mine Tuna (because its got a blue fin... eh?..... eh??)
Patternflyer
Well-Known Member
- Joined
- Dec 1, 2020
- Messages
- 195
- Reaction score
- 193
Arpak, that is a sweet looking Zephyr! I am anxious to release my next video, but waiting for paint to dry is a true test of patience! Lol. I love the blue trim! If I ever build another one, I may customize the paint like you did with my own design, but I enjoy duplicating the face cards on all my builds for my first attempts.
Can you tell us more about that camera mount? Looks sleek!
Can you tell us more about that camera mount? Looks sleek!
Arpak
Well-Known Member
Arpak, that is a sweet looking Zephyr! I am anxious to release my next video, but waiting for paint to dry is a true test of patience! Lol. I love the blue trim! If I ever build another one, I may customize the paint like you did with my own design, but I enjoy duplicating the face cards on all my builds for my first attempts.
Can you tell us more about that camera mount? Looks sleek!
Thanks so much! I was really happy how the blue turned out, although it's a bit funny I accidentally picked the exact color of my masking tape. I made a thread about the camera system here if you want to read about it. https://www.rocketryforum.com/threads/nosecone-1080p-vtx.164831/
Patternflyer
Well-Known Member
- Joined
- Dec 1, 2020
- Messages
- 195
- Reaction score
- 193
Painting and decals are done. Here’s the next video!
- Joined
- Dec 21, 2020
- Messages
- 256
- Reaction score
- 1,011
The Zephyr turned out amazing! Your prep work and painting are spot on and it shows in the final product congrats!! The time and effort at this final stage makes it all worth while. Hope you continue the thread with video of your L1 flight soon. Great job and thanks for sharing. 
- Joined
- Dec 21, 2020
- Messages
- 256
- Reaction score
- 1,011
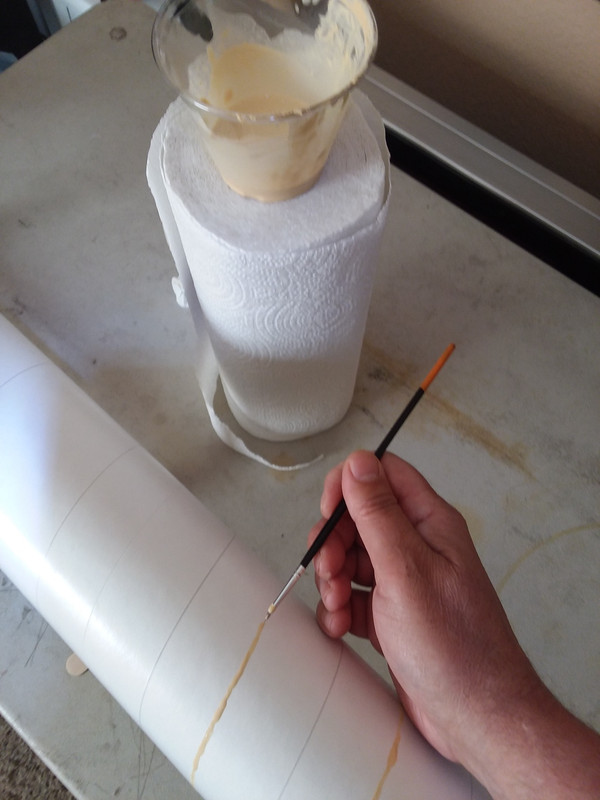
Back on the Zephyr filling spirals today.
Painting and decals are done. Here’s the next video!
I must say job well done !
Looks great and your videos were excellent!
The zephyr is a great looking/flying bird.

Beautiful work!! Great documentation too!!
Simon Auty
Well-Known Member
- Joined
- Jun 9, 2019
- Messages
- 125
- Reaction score
- 140
Is there any reason why the motor tube is the length it is?
My thinking is why couldn’t it be cut just above the forward centering ring so that I can reach the eyebolt to replace the recovery harness any time I need to
My thinking is why couldn’t it be cut just above the forward centering ring so that I can reach the eyebolt to replace the recovery harness any time I need to
Arpak
Well-Known Member
Is there any reason why the motor tube is the length it is?
My thinking is why couldn’t it be cut just above the forward centering ring so that I can reach the eyebolt to replace the recovery harness any time I need to
Putting an I500/J270 lengthed motor in has it stick out about 2 inches, although you're probably right in that it doesn't matter too much.
My thinking is why couldn’t it be cut just above the forward centering ring so that I can reach the eyebolt to replace the recovery harness any time I need to
See my sig.
Here's how I handled that "replace" problem. It's braided kevlar. The only reason it's braided is because all I have is 100# thread and I wanted it stronger. My idea was that if I ever need to replace shock cord deep down inside the tube, it's probably going to be easier to undo that quicklink than anything else I can think of. Probably overthinking it.
Magic words are "if I ever need" ... not seeing this as even a possibility now.

I would do the same thing as long as you can reach it. Not sure deep the forward center ring is?See my sig.
Here's how I handled that "replace" problem. It's braided kevlar. The only reason it's braided is because all I have is 100# thread and I wanted it stronger. My idea was that if I ever need to replace shock cord deep down inside the tube, it's probably going to be easier to undo that quicklink than anything else I can think of. Probably overthinking it.
Magic words are "if I ever need" ... not seeing this as even a possibility now.
View attachment 455313
that's the thing about the zephyr. the forward ring is deep inside, impossible to reach unless you have friendly offspring with long skinny arms to do it for you. It's about 3' down inside a 4" tube. I can't reach it bare handed. My idea was that it would be easier to unscrew the quick link than attempt to tie/untie any knot on the eyebolt. my thoughts were I could maybe get a sink wrench down in there to do it.I would do the same thing as long as you can reach it. Not sure deep the forward center ring is?
In my case, I hope the kevlar stays, and if I need to replace the shock cord, I just tie it to that loop on the end of the kevlar which reaches almost to the top of the tube.
What I would do is a couple things. Maybe use a thicker piece of Kevlar and get a Nomex shock cord protector to cover it. Just to add another measure of protection. Another option is installing a baffle system. I mean if you can barely reach the center ring it makes it difficult to even try to unscrew it. Sink would work probably, but how long would it take to do it? One thing nice is you do have options.that's the thing about the zephyr. the forward ring is deep inside, impossible to reach unless you have friendly offspring with long skinny arms to do it for you. It's about 3' down inside a 4" tube. I can't reach it bare handed. My idea was that it would be easier to unscrew the quick link than attempt to tie/untie any knot on the eyebolt. my thoughts were I could maybe get a sink wrench down in there to do it.
In my case, I hope the kevlar stays, and if I need to replace the shock cord, I just tie it to that loop on the end of the kevlar which reaches almost to the top of the tube.
It's kevlar, don't need nomex. I used that because that is all I have - 100# thread. It's fine for most of my L/MPR stuff. I felt it wasnt strong enough alone for a high power motor, hence the braiding.What I would do is a couple things. Maybe use a thicker piece of Kevlar and get a Nomex shock cord protector to cover it. Just to add another measure of protection.
I would just like to state how frustrating it is to watch someone who is good at rattlecan painting. I hear a voice in my head the whole time saying "Look how easy it is! What is wrong with you to have so much trouble with it?"Painting and decals are done. Here’s the next video!

Rocket looks great!
just my two centsIt's kevlar, don't need nomex. I used that because that is all I have - 100# thread. It's fine for most of my L/MPR stuff. I felt it wasnt strong enough alone for a high power motor, hence the braiding.
there's nothing easy about using rattle cans, it just takes practice and once you find a brand that works for you stay with it.I would just like to state how frustrating it is to watch someone who is good at rattlecan painting. I hear a voice in my head the whole time saying "Look how easy it is! What is wrong with you to have so much trouble with it?"
Rocket looks great!
JasonB
Well-Known Member
I just finished my Zephyr and will be going for Level 1 cert on the 20th. My students are so excited, as am I. My oldest, turning 18 on the 19th was so excited he had his parents order his Zephyr kit.
I too have built one of these bad boys... if it does not get canceled on sat i will be getting my LVL 1 in NV with ROCKONN Club
")
Last edited:
Good luck what motor are you going to use?I too have built one of these bad boys... if it does not get canceled on sat i will be getting my LVL 1 in NV with ROCKONN Club
JasonB
Well-Known Member
H182-14A. ~ 2000ft
I280DM-15A ~ 4000ft
Probably the H motor so I dont have to chase it... I have a jolly logic chute that should keep me from chasing it to far
weather has be crappy here ... need to finish getting the paint laid down and some custom decals on.
I280DM-15A ~ 4000ft
Probably the H motor so I dont have to chase it... I have a jolly logic chute that should keep me from chasing it to far
weather has be crappy here ... need to finish getting the paint laid down and some custom decals on.
Sounds goodH182-14A. ~ 2000ft
I280DM-15A ~ 4000ft
Probably the H motor so I dont have to chase it... I have a jolly logic chute that should keep me from chasing it to far
weather has be crappy here ... need to finish getting the paint laid down and some custom decals on.
With my zephyr L1 flight i went with CTI -h133 blue streak went to about 1400 feet which here in CT was a comfortable height with the field not being huge but the motor was a great fit for the zephyr
Keep an eye with the weather/wind make sure to have good thrust of the pad to get her going quick
Patternflyer
Well-Known Member
- Joined
- Dec 1, 2020
- Messages
- 195
- Reaction score
- 193
Sorry I haven't been in the forum as much as I would have liked to be these last few weeks, but I would like to thank all those that offered their compliments. The funny thing is that I DO struggle with rattle cans as much as the next guy, probably even more so! But I have found that prep work is 90% of what leads to successful paint jobs. The better the rocket looks unpainted will determine how good it looks painted.
I just uploaded Episode 7, which is the final video prior to the maiden flight, which I plan on doing this Friday. Just crossing my "T's" and dotting my "I's" now.
I just uploaded Episode 7, which is the final video prior to the maiden flight, which I plan on doing this Friday. Just crossing my "T's" and dotting my "I's" now.
Last edited:
Sorry I haven't been in the forum as much as I would have liked to be these last few weeks, but I would like to thank all those that offered their compliments. The funny thing is that I DO struggle with rattle cans as much as the next guy, probably even more so! But I have found that prep work is 90% of what leads to successful paint jobs. The better the rocket looks unpainted will determine how good it looks painted.
I just uploaded Episode 7, which is the final video prior to the maiden flight, which I plan on doing this Friday. Just crossing my "T's" and dotting my "I's" now.
Nice job nice attention to detail looks like she’s ready to fly
Good luck sir !!
JasonB
Well-Known Member

multiple cans of sandable primer in my quest to fill sp ... good sand paper is worth the extra cost. 3M Pro Grade Precision from home depot is wonderful compared to stuff of same grit I got from Amazon or Harbor Freight.
I am dreading doing more of the base lol...
next rocket I am going to try masking in between the spirals and trying 2 in 1 sandable/filler primer ...
this is my first HP rocket ... just got into model rocketry a month or two ago...


thanks for letting me hang out and learn
Patternflyer
Well-Known Member
- Joined
- Dec 1, 2020
- Messages
- 195
- Reaction score
- 193
Wow! You’ve come a VERY long way in only a couple months! Good luck on your Zephyr. Please update us as you progress! Looking forward to how yours turns out!
Patternflyer
Well-Known Member
- Joined
- Dec 1, 2020
- Messages
- 195
- Reaction score
- 193
Thanks Adam! Hopefully Episode 8 will be the best one yet!Nice job nice attention to detail looks like she’s ready to fly
Good luck sir !!
It will be !!!!Thanks Adam! Hopefully Episode 8 will be the best one yet!
Similar threads
- Replies
- 16
- Views
- 538
- Replies
- 4
- Views
- 885
- Replies
- 25
- Views
- 885
- Replies
- 3
- Views
- 230