Apogee X-15 Tips and Observations Thread

The Rocketry Forum

Help Support The Rocketry Forum:

This site may earn a commission from merchant affiliate links, including eBay, Amazon, and others.

markschnell

Well-Known Member
TRF Supporter
Joined
Feb 10, 2009
Messages
478
Reaction score
365
Location
Avon Park, Florida
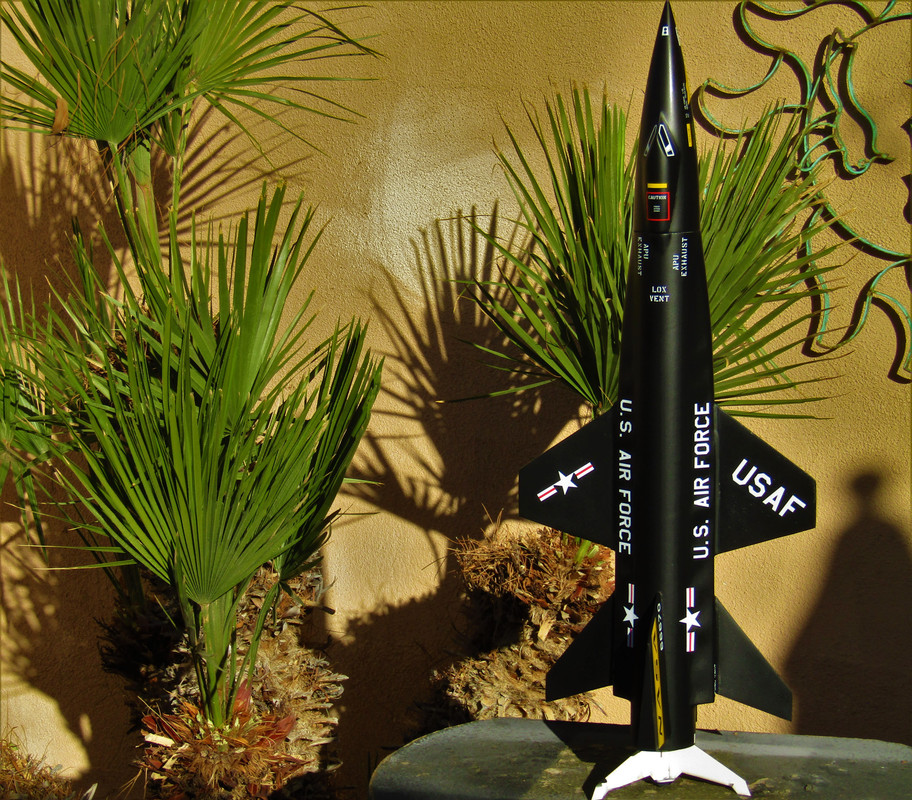
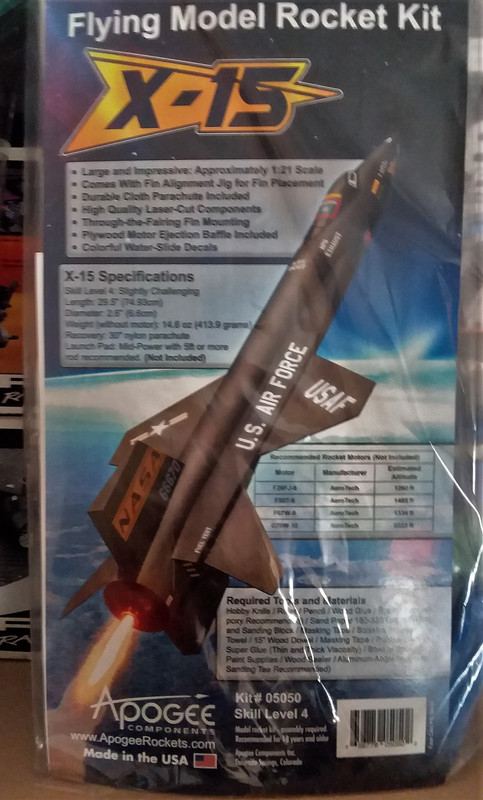
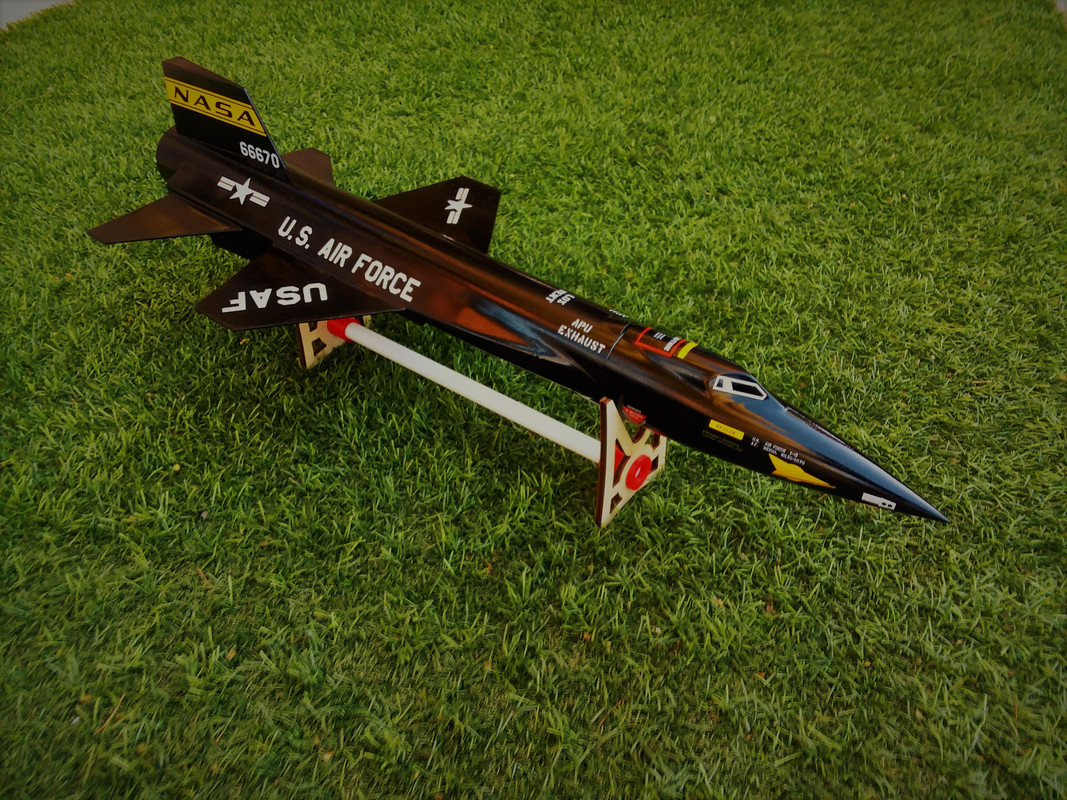
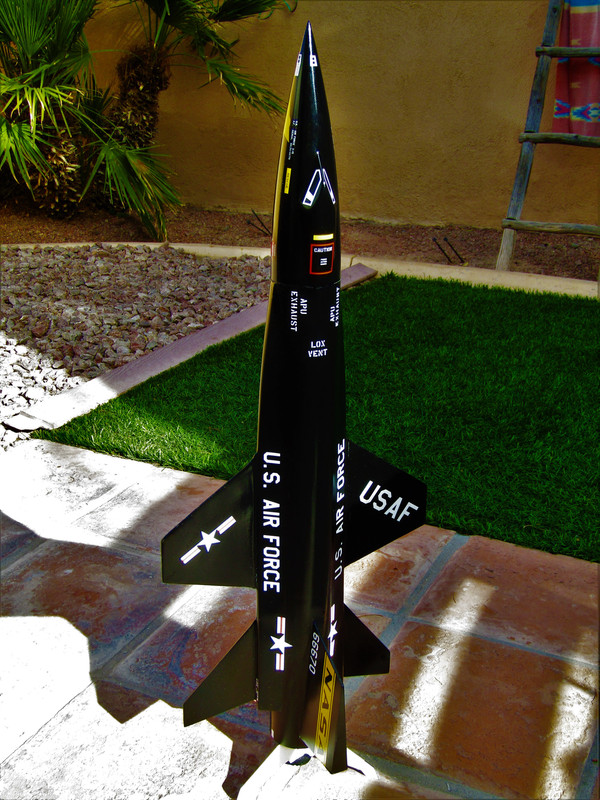
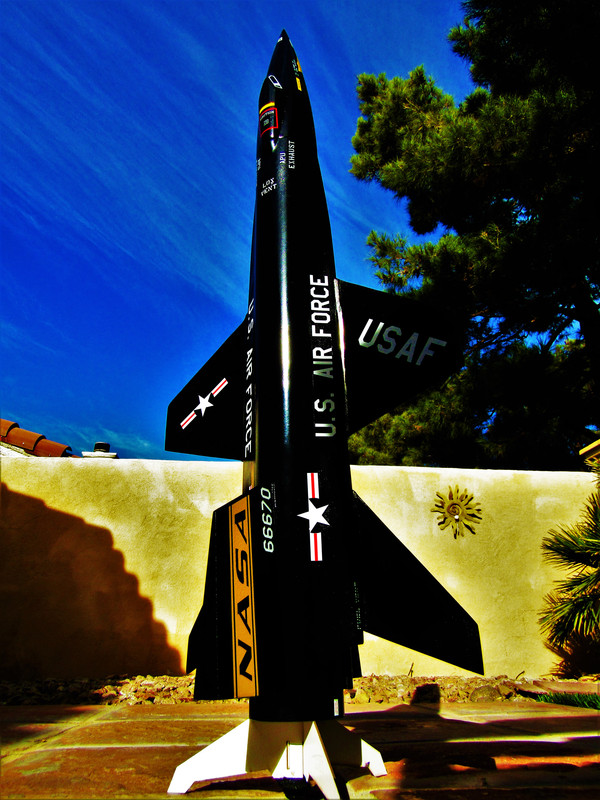
Hey everyone. Got my Apogee X-15 kit. I'm really excited about this kit and the rocket plane it's based on. I thought I'd start this thread so that people could post some tips. This is not a full on build thread. I'm sure some people will do that sometime soon, but I don't have the patience to remember to take all the pics and to post them. But, I do have the wherewithal to post some individual tips to maybe help others. Please feel free to post your tips here. Also, feel free to link to your build thread too.

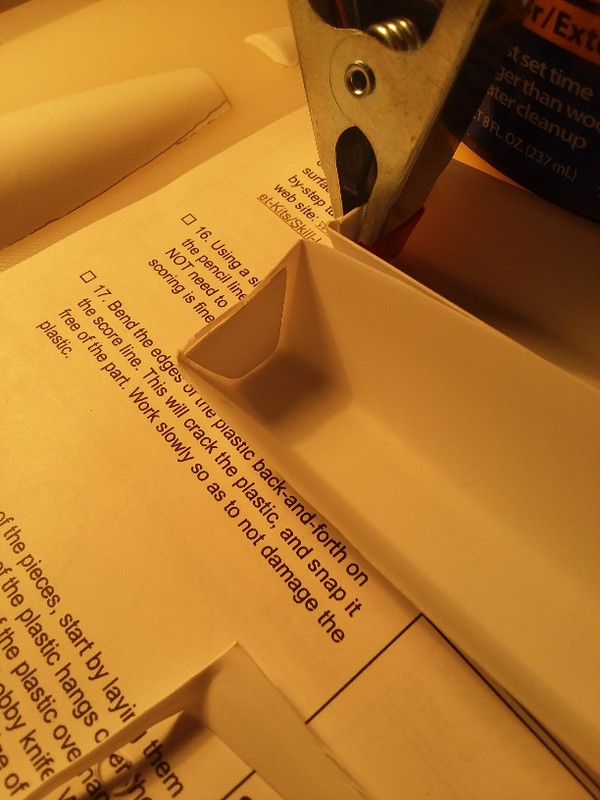
Here's my first tip: Watch the video on Apogee's site for cutting out the vacuum formed sheet!! I was kind of freaked out when I first opened the kit and saw the lack of definition on some of the edges. Tim Van Milligan shows you on the video exactly how to mark the lines and cut it out. I haven't cut it yet but it completely made sense after I watched the video and I have marked up very clean cut lines thus far. I'll take my time and get it right.
 
Here's my question for those of you with more experience with vacuum formed stuff - The instructions call for the long side fairings and the canopy pieces to be glued down with thin CA. I get that, I know about capillary action, yada, yada, yada. But will the thin CA be enough to glue down that whole piece onto the body tube securely? I'd be afraid that a good bump would knock it loose, that the thin CA might get brittle over time. I have double-checked the instructions and it doesn't seem to say anything about any kind of reinforcement or fillet in the fairing to body tube joints. Where the fins and tail pieces go through the fairings calls for an epoxy fillet (they recommend rocketpoxy).
 
Here's my question for those of you with more experience with vacuum formed stuff - The instructions call for the long side fairings and the canopy pieces to be glued down with thin CA. I get that, I know about capillary action, yada, yada, yada. But will the thin CA be enough to glue down that whole piece onto the body tube securely? I'd be afraid that a good bump would knock it loose, that the thin CA might get brittle over time. I have double-checked the instructions and it doesn't seem to say anything about any kind of reinforcement or fillet in the fairing to body tube joints. Where the fins and tail pieces go through the fairings calls for an epoxy fillet (they recommend rocketpoxy).
If you are concerned use a medium CA and you could also use an accelerator once they are properly in place. I'm sure that Apogee will post additional videos regarding this process. If not you can always contact them.
 
Here's my question for those of you with more experience with vacuum formed stuff - The instructions call for the long side fairings and the canopy pieces to be glued down with thin CA. I get that, I know about capillary action, yada, yada, yada. But will the thin CA be enough to glue down that whole piece onto the body tube securely? I'd be afraid that a good bump would knock it loose, that the thin CA might get brittle over time.

CA will suffice.
It's not as strong, nor as durable, as epoxy. But epoxy is heavier and X-15 is already marginally unstable, thus the warnings against using an engine retainer.
Curing epoxy generates exothermic heat that can deform and melt vacuum-formed plastic, so it's best to stick with CA.
https://www.westsystem.com/instruction-2/epoxy-basics/epoxy-chemistry/CA has been strong enough for me on SR-71 and Saturn-V builds, though I don't expect those joints to last forever.

I have double-checked the instructions and it doesn't seem to say anything about any kind of reinforcement or fillet in the fairing to body tube joints. Where the fins and tail pieces go through the fairings calls for an epoxy fillet (they recommend rocketpoxy).

Vacuum-formed plastic fairings are purely decorative, and non-load bearing. I would not worry about reinforcing or filleting them.
Fins are another matter altogether.
Following the instructions seams to be a sensible thing to do here.

HTH
 
Last edited:
A few suggestions to this thread regarding the vaccum-form plastic fairings. The rear end back by the motor is very thin and will give out when attempting to form to the body tube w/ a hobby knife. I reinforced this section by cutting some material left over and super glued them in place. I did choose to fill the seems on the fairings which should result in a better finish when time to paint.

20201217-142311-resized.jpg

fillets.jpg
 
A few suggestions to this thread regarding the vaccum-form plastic fairings. The rear end back by the motor is very thin and will give out when attempting to form to the body tube w/ a hobby knife. I reinforced this section by cutting some material left over and super glued them in place. I did choose to fill the seems on the fairings which should result in a better finish when time to paint.

I did that exact same thing with the the end of the fairings. I'm just now ready to put the fins and tail pieces on. With the epoxy fillets, is that just regular epoxy? They recommend rocketpoxy in the instructions but I don't have any of that and don't want to wait a week or two to get some sent to me.
 
I used RocketPoxy from Apogee and went overboard on the masking lol. Nice work on the fairing support!

Since Apogee is taking their time in posting this most important (IMHO) instructional video, I'm curious about how you did those fillets. Did you use the forming tools that help to form the fillets or did you just use the tools God gave you at the end of your arms. I just watched a video that was posted on Youtube about how to make fillets and it looks pretty involved. Seems like if I had to wait as long as it seems on those videos it would take all day to do all the fillets on this rocket. What was your experience? Thanks.
 
Since Apogee is taking their time in posting this most important (IMHO) instructional video, I'm curious about how you did those fillets. Did you use the forming tools that help to form the fillets or did you just use the tools God gave you at the end of your arms. I just watched a video that was posted on Youtube about how to make fillets and it looks pretty involved. Seems like if I had to wait as long as it seems on those videos it would take all day to do all the fillets on this rocket. What was your experience? Thanks.

To be honest I'm spending more time on this build then I expected which is fine. I was hoping those videos would of been up awhile back and trying to hold out but began the build anyway. Truth be told this was my first experience with epoxy fillets and I was slightly hesitant about screwing the build up. I watched the Zephyr fillet video and followed those steps. I shaped and sanded one of the included wood mixing tools with a more pointed edge to shape the fillets. I didn't use the dye because of the darker color and everything went 100%. My concern during the fillet process is the seam of the vaccum-form rails in correlation to the main rocket tube. Instructions aren't clear in this area about addressing the seam. I experimented with the bottom side of the rocket and did a thin adhesion gap fillet on the rails and let them adhere for 24hr. The radius transition between the vaccum rails and main body are extreme in circumference so not much filler is needed and the epoxy will form a new seam that needs major intense sanding to make flush.

I then used elmers wood filler to blend the epoxy seam between the two pieces. More work then anticipated but unless you perform a perfect free hand x-acto knife lazer cut in step #16 those edges will show in the end after the rocket is painted. The Apogee Prototype X-15 and Tim's Introduction X-15 Rocket video you can clearly see the difference.

Tim-X-15-seam.jpg
 
To be honest I'm spending more time on this build then I expected which is fine. I was hoping those videos would of been up awhile back and trying to hold out but began the build anyway. Truth be told this was my first experience with epoxy fillets and I was slightly hesitant about screwing the build up. I watched the Zephyr fillet video and followed those steps. I shaped and sanded one of the included wood mixing tools with a more pointed edge to shape the fillets. I didn't use the dye because of the darker color and everything went 100%. My concern during the fillet process is the seam of the vaccum-form rails in correlation to the main rocket tube. Instructions aren't clear in this area about addressing the seam. I experimented with the bottom side of the rocket and did a thin adhesion gap fillet on the rails and let them adhere for 24hr. The radius transition between the vaccum rails and main body are extreme in circumference so not much filler is needed and the epoxy will form a new seam that needs major intense sanding to make flush.

I then used elmers wood filler to blend the epoxy seam between the two pieces. More work then anticipated but unless you perform a perfect free hand x-acto knife lazer cut in step #16 those edges will show in the end after the rocket is painted. The Apogee Prototype X-15 and Tim's Introduction X-15 Rocket video you can clearly see the difference.

Good catch on the photo. Makes me feel a bit better. Thanks for sharing your process.
 
If one wants a good read about the X-15's test pilots, get a hold of a copy of Michelle Evans, "The X-15 Rocket Plane, Flying the First Wings to Space."
Astronaut Joe H. Engle is the only living pilot of the X-15 program.
Ms. Evans book was published in 2013. Her research spanned years before and was able to interview most of the pilots/mission support personnel. If they were deceased, their surviving family members. Most of the pilots were still living in the late 80's, 90's and early 2000's when she was doing research. It's a good read about the pilots. Not as so much technical but really gives the reader what sacrifices the pilots made to be in the program.
I emailed Michelle Evans about my impression of Neil Armstrong that he was a regular guy and didn't want to dwell upon Apollo 11 and the moon mission. There are historical texts that cover that.
Michelle said I was dead on with that supposition. Armstrong made it clear he was only going to discuss the X-15 and nothing else at their interview. She said in her reply that he was very friendly, graciously and tried hard to answer her questions about his part in the X-15 including his "longest flight" in the ship.
I believe if one wanted to talk aeronautical engineering with Neil Armstrong, he'd be most gracious to have that discussion with anyone. Just don't mention the moon.
Kurt Savegnago
 
I then used elmers wood filler to blend the epoxy seam between the two pieces. More work then anticipated but unless you perform a perfect free hand x-acto knife lazer cut in step #16 those edges will show in the end after the rocket is painted. The Apogee Prototype X-15 and Tim's Introduction X-15 Rocket video you can clearly see the difference.

I went back to Apogee's site and saw what you mean. The prototype that Tim is holding in the video doesn't have a seam at all between the fairing and the body tube, at least not that I can see. But, the one in the launch photo you showed above clearly does. Here's the good thing, though. Looking at actual photos of the X-15 you can see that that seam is fairly prominent. The "seamless" prototype is actually less scale than the launched version, and the ones we're building. So that means I might do something to strengthen that seam, but scale-wise it's supposed to be there. If you go to the Smithsonian's site they have loads of photos of it up close. It's a modeler's dream site, actually. I'm attaching a pic from there below.
NASM-SI-2007-12576.jpg
 
Last edited:
I went back to Apogee's site and saw what you mean. The prototype that Tim is holding in the video doesn't have a seam at all between the fairing and the body tube, at least not that I can see. But, the one in the launch photo you showed above clearly does. Here's the good thing, though. Looking at actual photos of the X-15 you can see that that seam is fairly prominent. The "seamless" prototype is actually less scale than the launched version, and the ones we're building. So that means I might do something to strengthen that seam, but scale-wise it's supposed to be there. If you go to the Smithsonian's site they have loads of photos of it up close. It's a modeler's dream site, actually. I'm attaching a pic from there below.
View attachment 444604

Thanks for the link! I CA glued the seam twice for extra precaution. The rails have some bowing flex in the mid section which might cause the seam to separate from the body tube (last thing you want after your project is complete and in service). Might be over thinking this but better safe then sorry.

I'm basing some of my build from a replica 1:72 scale model # 66671 I built up by Monogram. Some excellent photo's for true scale realism can also be found in the book Hypersonic the story of the North American X-15 by Dennis R Jenkins & Tony R. Landis. Nothing beats a real life example at the Smithsonian.

The next question is gloss or matt black. :oops: 
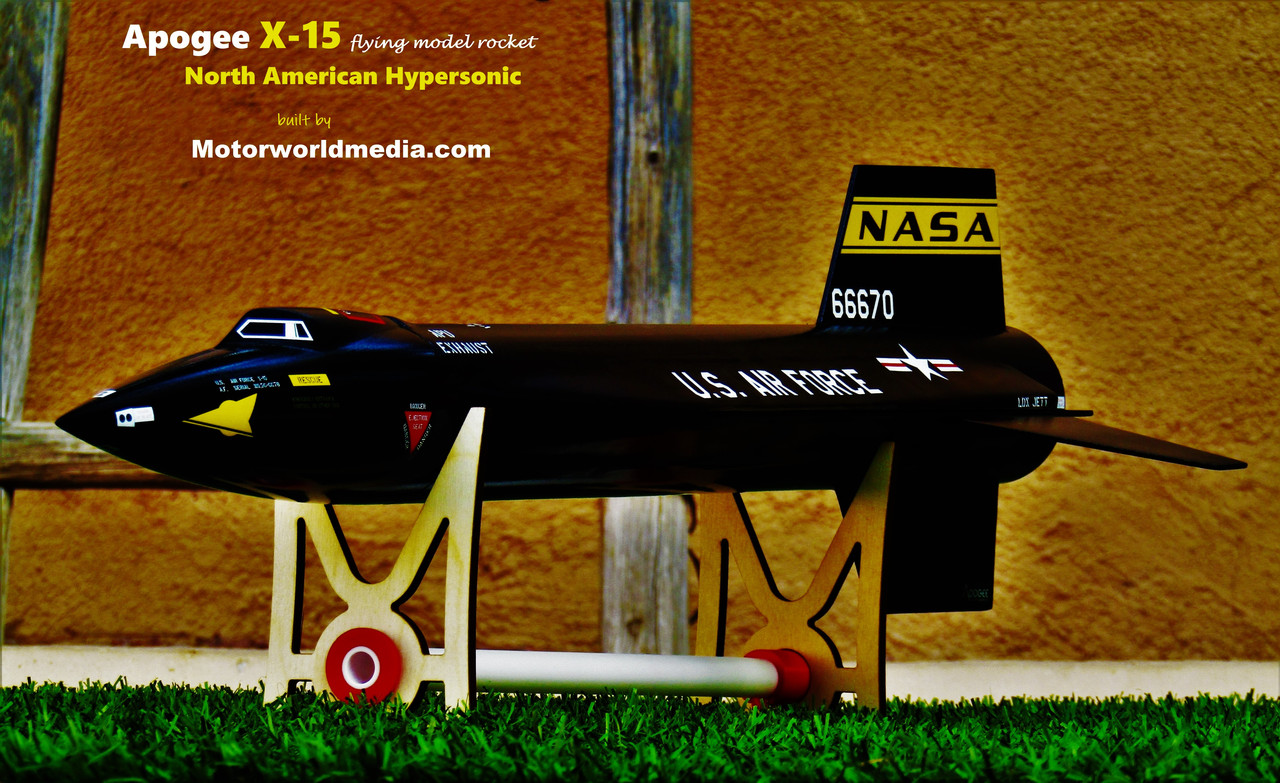
The decals might not adhere too well with matt black.

X-15-monogram-sig.jpg
 
Yeah, @Astronaut Chesseball , I've got a little of that bowing too, especially on the bottom. I saw on yours that you had a small gap at the back of the left fairing. I have the same exact thing, I'm assuming it's just because of the vacuum forming of that side. Will take a little extra gap filling attention.

Gloss for the decals to go on and then a matte clear finish after that on mine. Though, I've seen a few pre-flight photos where the X-15 almost looks glossy. From what I understand, they weren't actually painted, that is just the actual color of the metal alloy the skin was made of. Kind of like the pre-flight colors of the Gemini and Mercury capsules.
 
Still waiting to add the protective matte finish. Happy with the results on this build makes the hours invested worth while. Built to 100% Apogee Components spec's with the addition of a #220 Parachute Swivel and custom quick release attachment retainer. I added the left side top stars/bars from a second water slide decal sheet.

Excited to send it. :)

MWM-X-15.jpg


MWM-X-15-Side.jpg


x15.jpg


X-15-tall.jpg


X-15-on-Deck.jpg
 
Awesome! Just got my order of Rocketpoxy yesterday, so that's my next step. Hopefully I can get to that in the next few days.

Great and easy to work with excellent selection for filling the seams. As you can see the vacuum rail seams are non existent :) which was my main concern during the middle portion of the build.
 
Great and easy to work with excellent selection for filling the seams. As you can see the vacuum rail seams are non existent :) which was my main concern during the middle portion of the build.
How well does it sand? I've tried sanding the regular, run of the mill type of epoxy before and it doesn't sand well at all. Seeing how great yours looks really has me excited to get mine done. Unfortunately, I'm slammed right now with about five different irons in the fire. o_O
 
How well does it sand? I've tried sanding the regular, run of the mill type of epoxy before and it doesn't sand well at all. Seeing how great yours looks really has me excited to get mine done. Unfortunately, I'm slammed right now with about five different irons in the fire. o_O

The amount of time I spent on sanding & smoothing the seams was way more then anticipated. 😳 
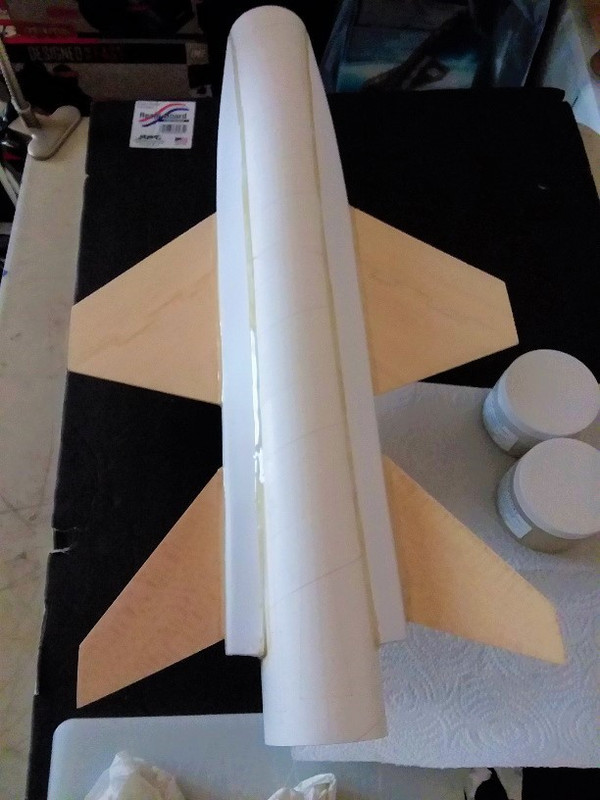
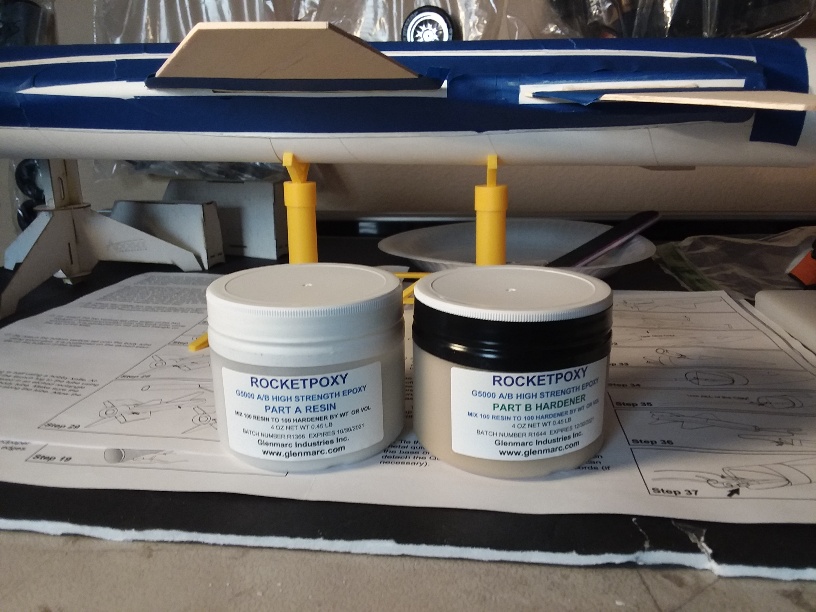
The epoxy needs to be laid out very very thin to minimalize the sanding and your correct it doesn't sand well. I created a invisible seam using CWF filler on both sides of the rocketpoxy seam and smoothed that out flush with the main body tube. The structural integrity is majorly increased in the vacuum rails using this method. I'm sure there's some other techniques and filler putty's out there that would require less effort. Note: when masking the body tube run the tape across your pants a few times so it doesn't damage the paper on the body tube upon removal.

Tim from Apogee set the bar high with his beautiful X-15 as expected with all his amazing rockets. I put forward my best effort in a attempt to replicate the rocket in the 1st introductory video. Always learning as I go which keeps the building process interesting. Keep us posted on your build, hoping others will share as well.
 
I think I need to try the rocketpoxy on another kit first. Maybe I'll do the new Der Big Red Max I've got on the way. I'm going to let it firm up a bit before I apply it and also use alcohol to smooth it out before it dries, like they show in their demonstration video. This is all new stuff to me.
 
I think I need to try the rocketpoxy on another kit first. Maybe I'll do the new Der Big Red Max I've got on the way. I'm going to let it firm up a bit before I apply it and also use alcohol to smooth it out before it dries, like they show in their demonstration video. This is all new stuff to me.

The R-P is great stuff use on the fillets for sure on the X-15. About to start a Zephyr for L1 certification. Happy building!
 
If you're going to add the external fuel tanks like the A2 version then be sure to check for stability before flying.
Remember, it's marginally stable built stock.
Also, the A2 was 28 inches longer, so you'll need to extend the airframe.
That should help the stability a little.
Probably will still need to add extra nose weight.
Let us know what the sims show.

This one I'm sure is going to be for display only I thought all about this while building the first one.
 
If you really wanted to get into the details of this kit is get a grey sharpie and mark the riveted panels before spraying the matte finish. I think that would look cool, but the marker has to be very thin to make it look good. Has anyone flown their yet? If I bought this kit I would probably use one of those 32" plastic Dynastar chutes and cut a substantial spill hole in it to eliminate any swing action. Also would cut down on the weight of the rocket.
 
Back
Top