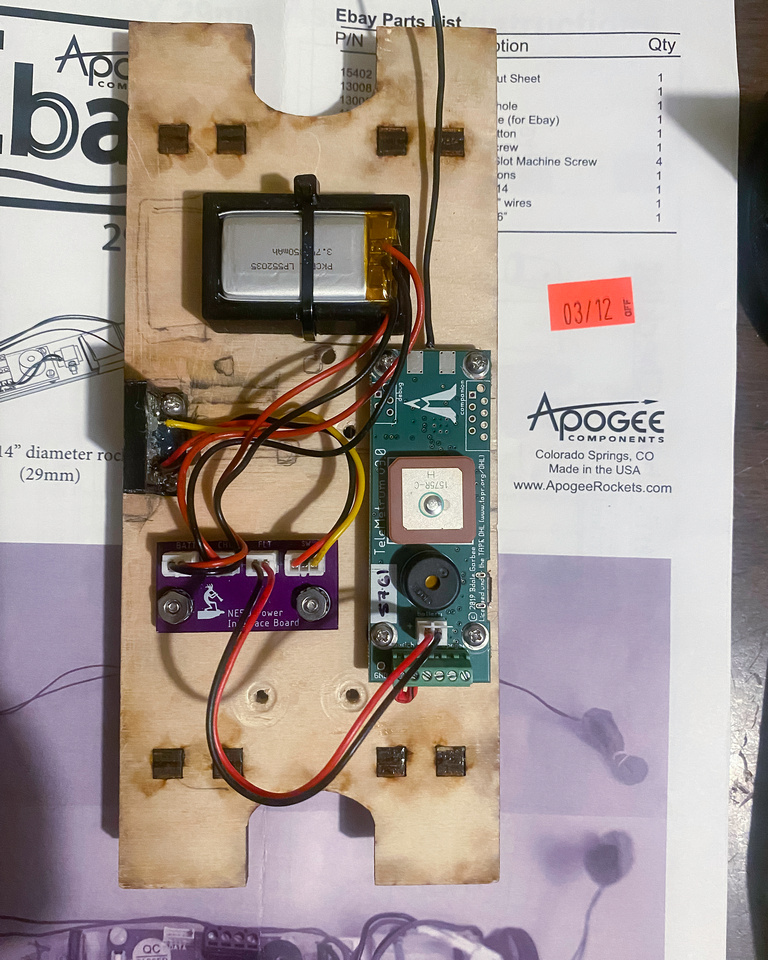
In this photo you can see the Av Bay sled for a LOC Graduator. There's a 3D printed battery box (recessed screws hold it to the sled) that will hold a pair of 110mAh batteries. Only one installed for now. When I finish the dual deploy conversion I'll add the second battery. The white and black rings are 3D printed spacers used to hold the circuit boards off of the wood. There are also some tiny rectangles with holes in them in the bag that fit the TeleMini. The white PCB is used as a wiring interface. The 3 terminal (ST-3) connector is for a Featherlight magnetic switch but it'll work with a single pole switch. Just use the two outside wires. All of the parts were drawn in Fusion 360. I used parameters on most of them so I can scale up or down as needed.
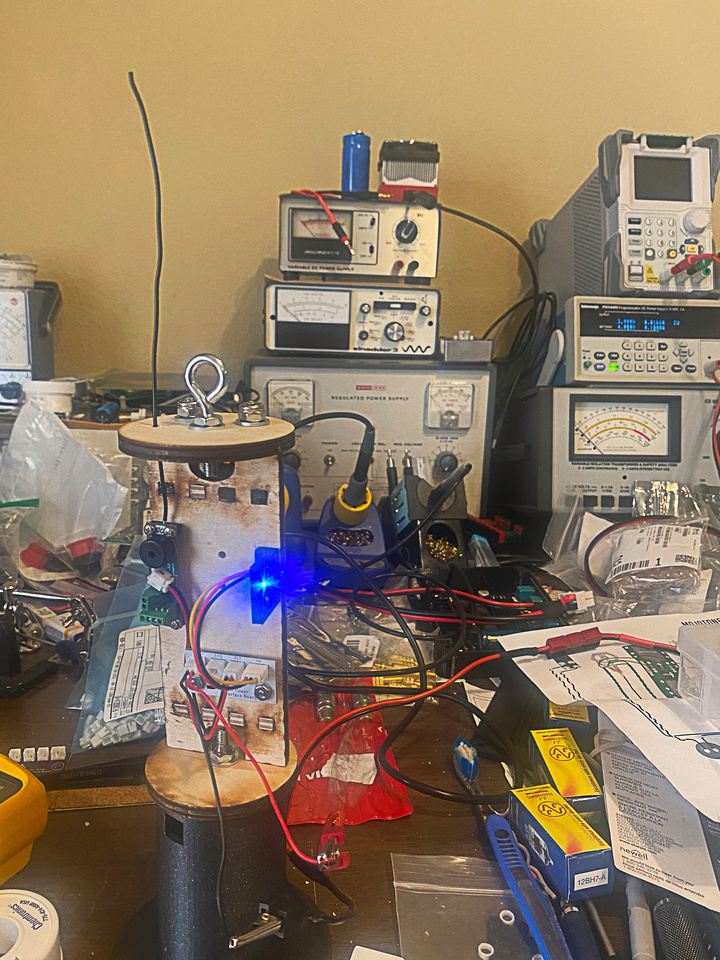
Here's the finished Av bay (doing some testing to see how much current the TeleMini draws. (50mA on transmit)
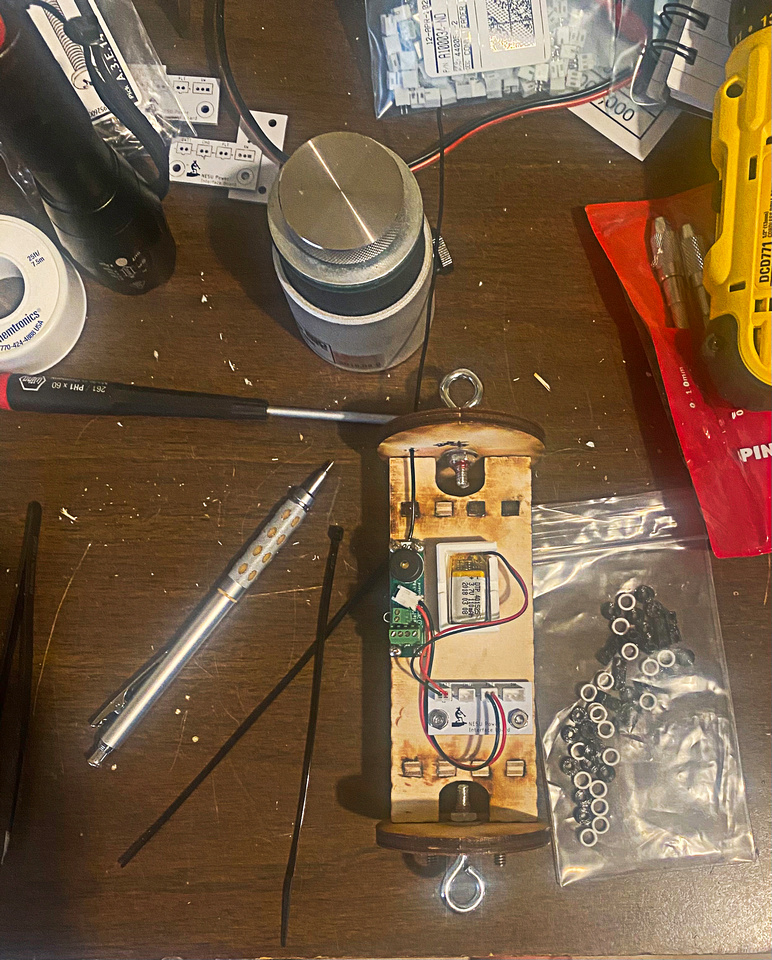
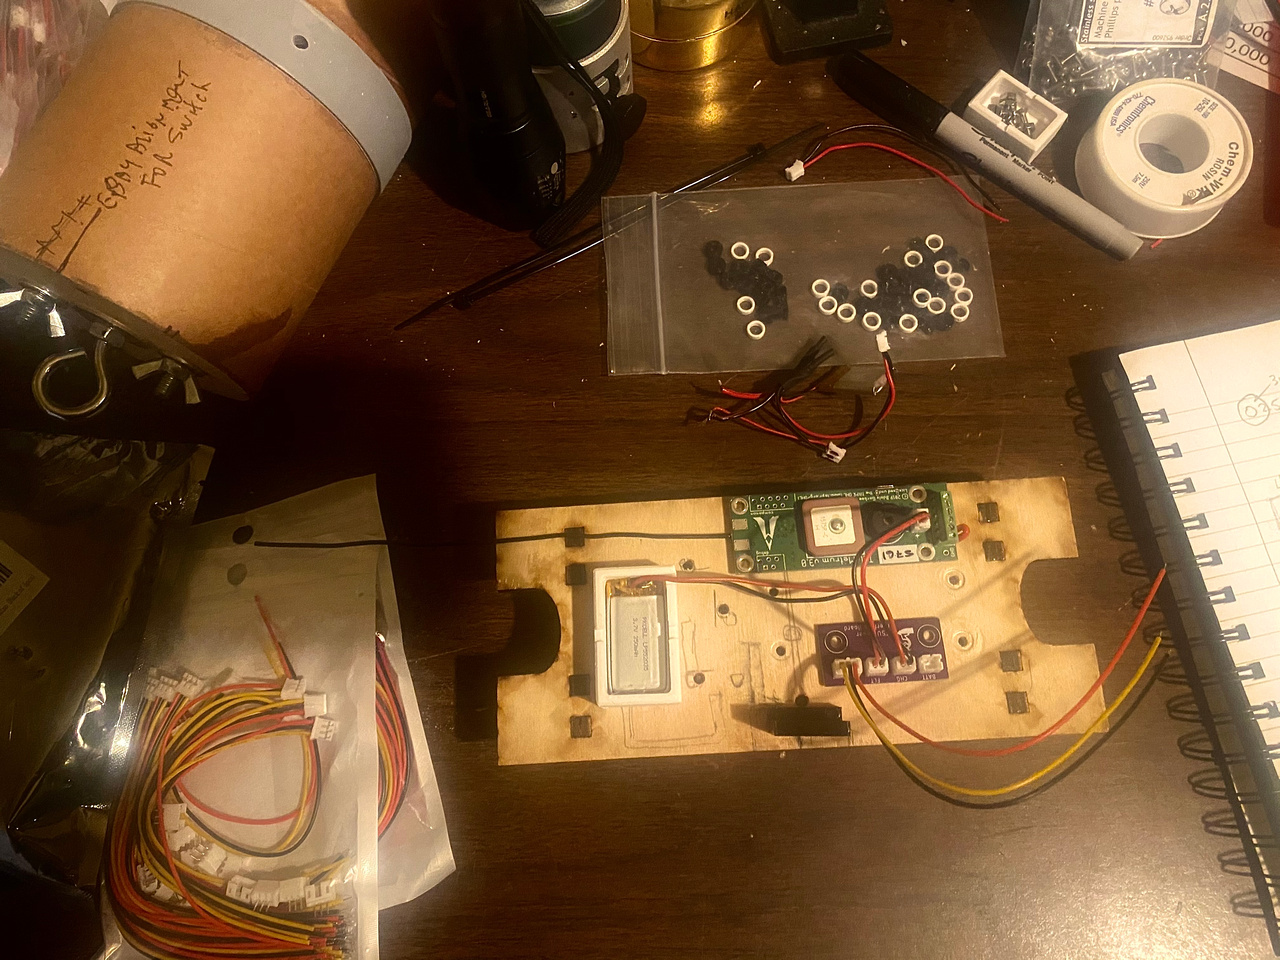
And here's the mockup of the Av Bay that's going in my LOC IV. The sled is all drilled and scratched on because I removed the wad of wire and connectors in the photo, above the sled. It was finished and working but I hated the workmanship (mine). The kludge of wire is what I am replacing. It'll all be plug and play when I'm done. This battery box will hold (2) 350mAh batteries and that's what I'll fly with, Total mAh available will be 700 mAh. The flight this weekend won't need it but I'd like a little extra weight toward the nose for this flight plus a little more time for tracking might be handy. The box design took a few seconds to create because I used parameters in Fusion 360 to set the dimensions of the small box shown above. The first one took a few hours... because I'm not very good with F360, yet.
Single deploy, motor ejection so the computer is a little bit of overkill BUT the sagebrush around here hides really big rockets so the GPS tracker could come in handy.
The black thing at the bottom of the sled is a 3D printed bracket that holds a Featherlight magnetic switch. As has already been mentioned, the switch just pops in. You can't tell but the "tube" side if the bracket is hollow so the board components, including the LED, face the outside. The hole in the band on the coupler is to be able to see that the switch is on or off. 3-48 screws (and some CA) hold the bracket to the sled. Epoxy would probably do just as well.
Barring anything unforeseen I'll fly The LOC IV this weekend. It's Level 1 cert time. I'm not vernous or thingany... not at all...
Here's the finished Av bay (doing some testing to see how much current the TeleMini draws. (50mA on transmit)
And here's the mockup of the Av Bay that's going in my LOC IV. The sled is all drilled and scratched on because I removed the wad of wire and connectors in the photo, above the sled. It was finished and working but I hated the workmanship (mine). The kludge of wire is what I am replacing. It'll all be plug and play when I'm done. This battery box will hold (2) 350mAh batteries and that's what I'll fly with, Total mAh available will be 700 mAh. The flight this weekend won't need it but I'd like a little extra weight toward the nose for this flight plus a little more time for tracking might be handy. The box design took a few seconds to create because I used parameters in Fusion 360 to set the dimensions of the small box shown above. The first one took a few hours... because I'm not very good with F360, yet.
Single deploy, motor ejection so the computer is a little bit of overkill BUT the sagebrush around here hides really big rockets so the GPS tracker could come in handy.
The black thing at the bottom of the sled is a 3D printed bracket that holds a Featherlight magnetic switch. As has already been mentioned, the switch just pops in. You can't tell but the "tube" side if the bracket is hollow so the board components, including the LED, face the outside. The hole in the band on the coupler is to be able to see that the switch is on or off. 3-48 screws (and some CA) hold the bracket to the sled. Epoxy would probably do just as well.
Barring anything unforeseen I'll fly The LOC IV this weekend. It's Level 1 cert time. I'm not vernous or thingany... not at all...