Estes Optima 3" upscale

The Rocketry Forum

Help Support The Rocketry Forum:

This site may earn a commission from merchant affiliate links, including eBay, Amazon, and others.

Cabernut

Well-Known Member
Joined
Oct 15, 2015
Messages
1,384
Reaction score
9
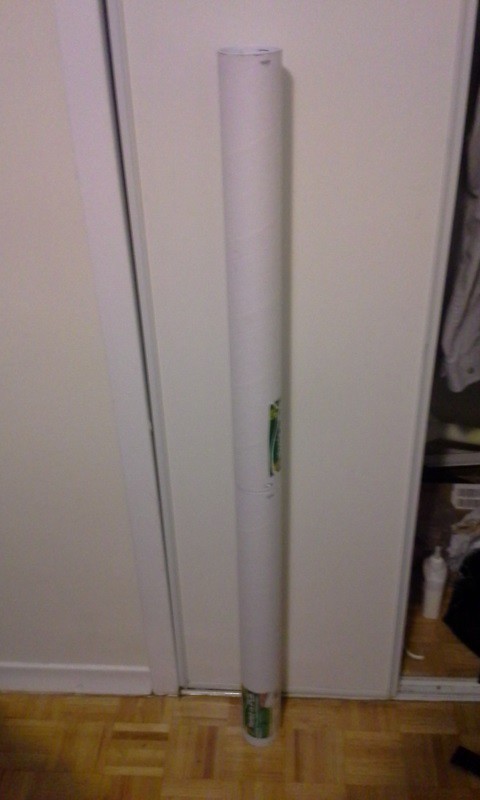
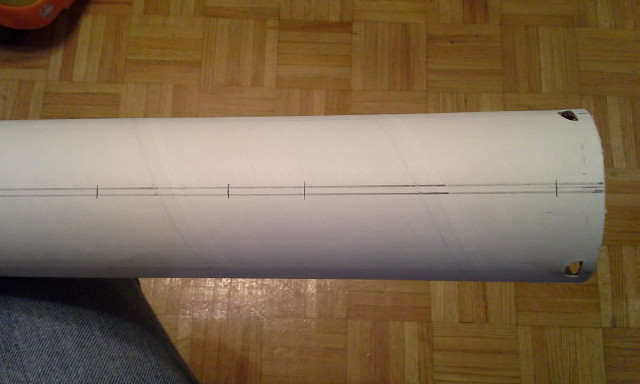
It hit me the other night what to do with the 3" mailer tubes I still have...


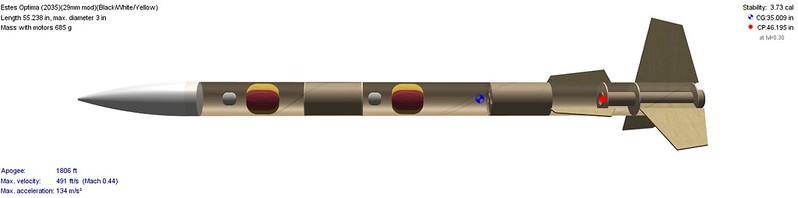
An Optima upscale! I barely remember the Optima from back in the day. I believe it was out of my(Mom's) price range at the time.

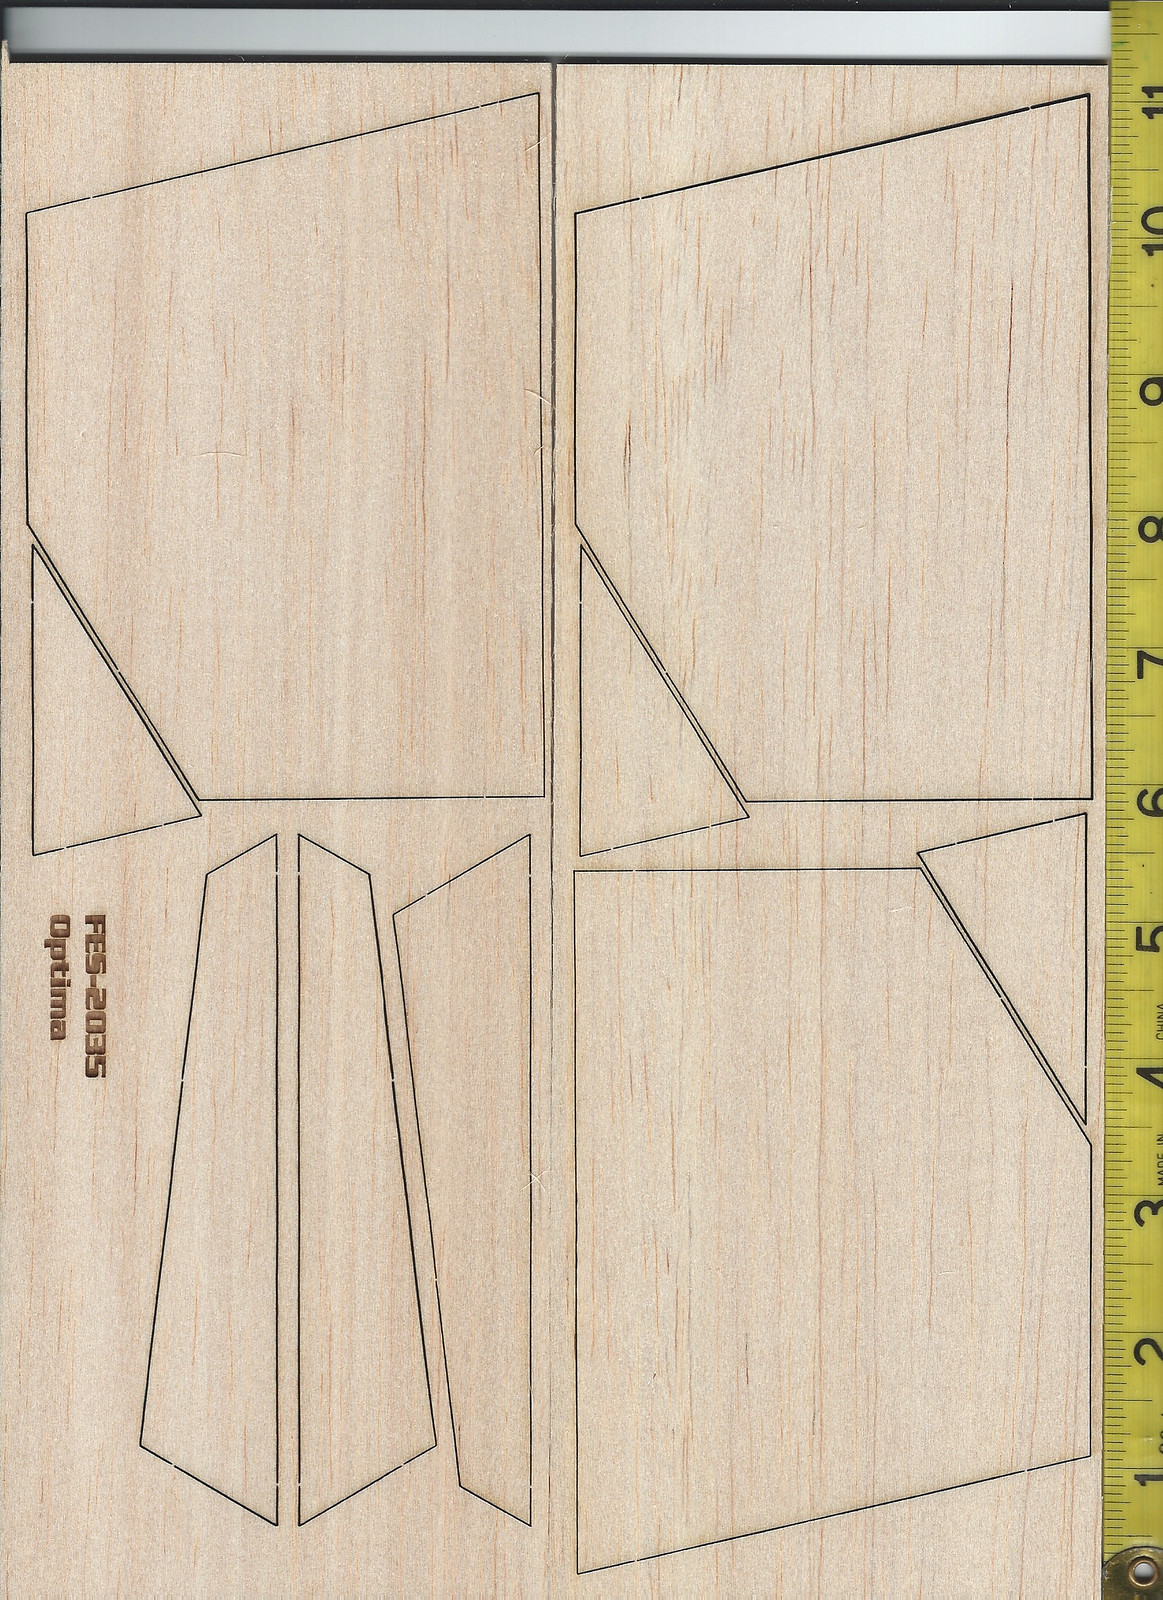
I'm thinking I'll do it PSII-style with 29mm MMT and TTW plywood fins. I could just buy a Scion and convert from there, but living on the north side of the border makes that a bit complicated to obtain.

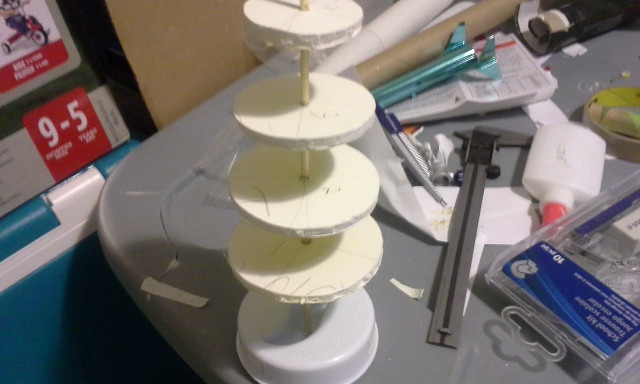
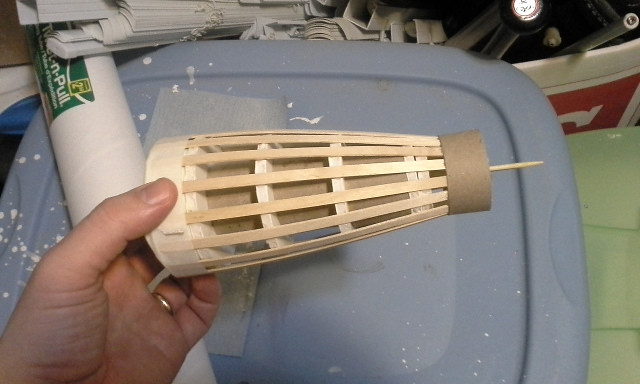
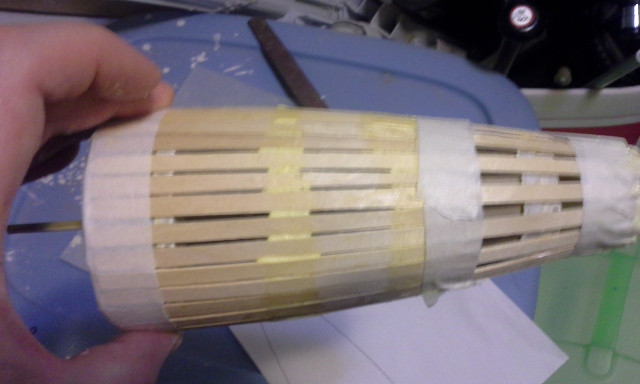
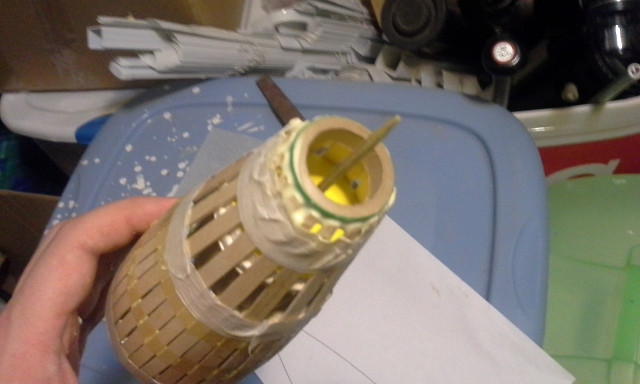
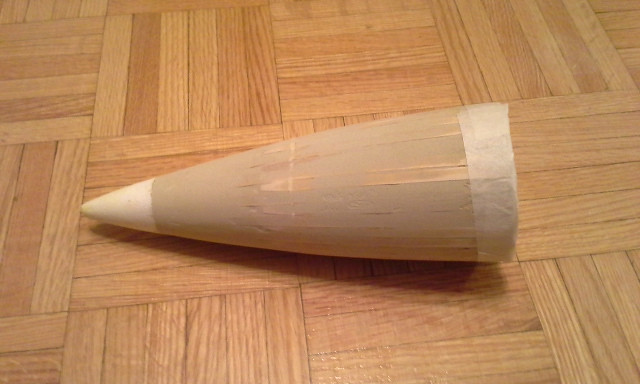
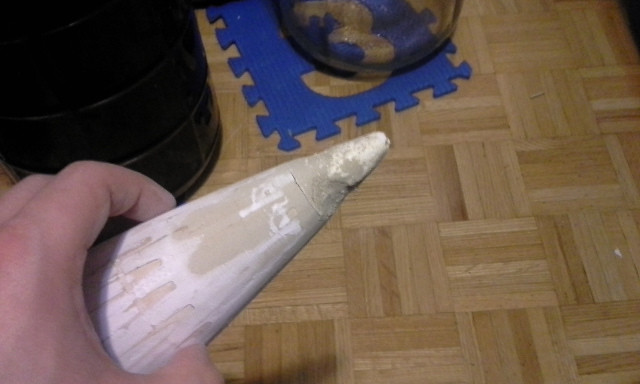
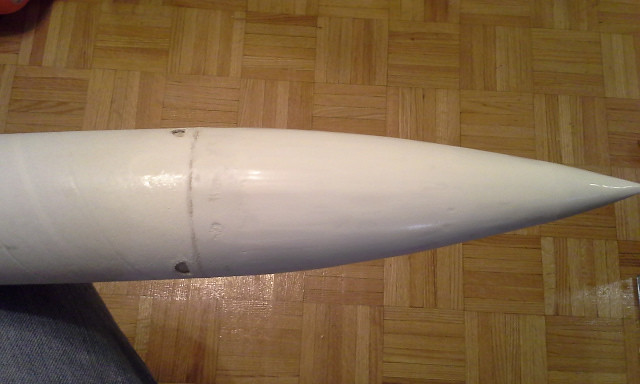
For the nose cone, I'll try my hand at fabricating a nose cone as these tubes are slightly wider than the usual 3" tube, they have a 3" I.D. (7.95cm OD, 7.62 ID) Could probably use a standard 3" tube as a coupler. This also means that The usual 3" nose cones would require some fiddling to fit and look right.

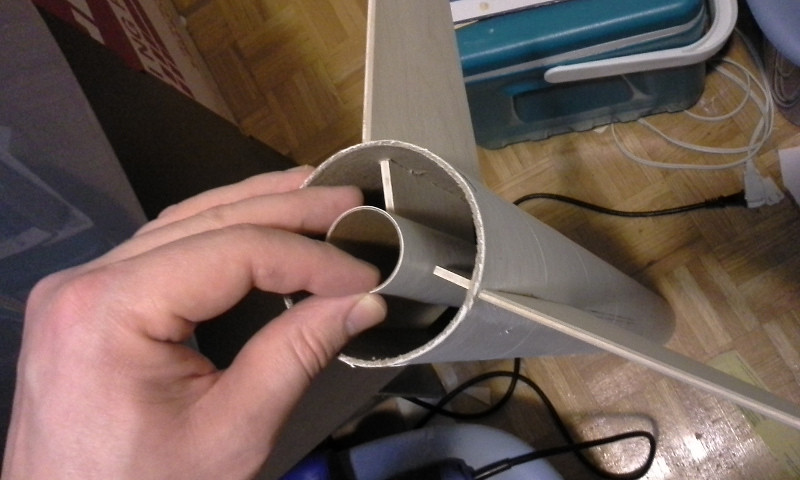
One thing I'm not sure of at this stage, while I'm tinkering with OR, is the stuffer tube.
Would this be necessary or beneficial with 29mm motors in a 3" tube?
Should I scale that part exactly, basically extending the 29mm tube up to where it would be scale-wise?

Any guidance/advice/comments are greatly appreciated.
 
Last edited:
FYI the standard 3" Loc nosecone and Pinnacle 3" nosecones fit 3" mailing tubes, the Estes 3" is undersized.

With 29mm motors, CTI and AT reloadable motors a stuffer tube probably isn't necessary, since the ejection charges can be modified.

The Inside diameter is really close to Loc 3" tubing so the couplers will work as well. The OD is slightly larger than the Loc tube.
 
Last edited:
Optima upscale :) :) :)

I'm kinda of fan of this rocket. I wouldn't worry too much about a full stuffer tube. As long as you don't overpack it, a normal ejection charge should be fine.
 
if you need a scale for the fins....

14000909199_f63fc76705_h.jpg
 
That is the scan you sent me to make my DD 2.6 HP version. Worked perfectly to build an OR file from which to get a beautiful set of laser cut fins.
 
if you need a scale for the fins....

14000909199_f63fc76705_h.jpg

Sweet, thanks! It's nice to see a scan with measurements so I can double-check my printouts.

I'm currently tackling the hardest part - a custom nose cone with the correct ratio. I'll try the wooden stringer technique from one of Apogee's newsletters. If I just can't get it, then I'll shell out the cash for a plastic one and continue on.
 
I have a couple questions:
First, should I use 1/8" or 3/16" ply for the fins? My current design has 1/8" plywood. I would like to attempt my L1 cert on this rocket down the road so perhaps 3/16" is a safer bet?

Second, should I have deployment separation in the middle as shown below, or up more forward? I would like to leave room for converting to DD later on as well.

Here is a rough draft of what I'm planning so far
(mailer tubes I have are 25.7" long each)
OR draft 1.png
View attachment Estes Optima 3in upscale mailer tube 29mm.ork
 
I have a couple questions:
First, should I use 1/8" or 3/16" ply for the fins? My current design has 1/8" plywood. I would like to attempt my L1 cert on this rocket down the road so perhaps 3/16" is a safer bet?

Second, should I have deployment separation in the middle as shown below, or up more forward? I would like to leave room for converting to DD later on as well.

Here is a rough draft of what I'm planning so far
(mailer tubes I have are 25.7" long each)
View attachment 279372
View attachment 279373

1/8" birch plywood will hold up to most L1 motors in the I impulse range, the Vmax and Warp9 motors are the only one's that there might be a problem with. 3/16" while safer is probably unnecessary.

If converting to DD at some point you have the choice of a cable cutter if built stock, personally I would build it traditional style DD with a upper and lower payload bay, and the AV-Bay in the long coupler in the center.

What about FG for the fins? Wouldn't a tip-to-tip FG job on the fins could extend the range that a 1/8" thick finned rocket could take?

I agree with rharshberger, for me, now having a Binder Design Velociraptor, I can appreciate the way that it separates for single vs dual deploy. Using the Velociraptor as my model, and the paint scheme as my guide, I'd build the rocket to break the rocket at the color separation joints. When Jolly Logic's new device finally hits the shelves, you might be able to get away with only one parachute (stored in the middle section), have an AV bay in the forward coupler joint. You could then have either a reserve chute in the forward section, or use it for a payload.


In the attached .ork file, you'll see I've added in the Velociraptor's baffle.

View attachment Estes Optima (2035)(29mm mod)(Black,White,Yellow) 3 inch upscale Dual Deploy.ork
 
What about FG for the fins? Wouldn't a tip-to-tip FG job on the fins could extend the range that a 1/8" thick finned rocket could take?

I agree with rharshberger, for me, now having a Binder Design Velociraptor, I can appreciate the way that it separates for single vs dual deploy. Using the Velociraptor as my model, and the paint scheme as my guide, I'd build the rocket to break the rocket at the color separation joints. When Jolly Logic's new device finally hits the shelves, you might be able to get away with only one parachute (stored in the middle section), have an AV bay in the forward coupler joint. You could then have either a reserve chute in the forward section, or use it for a payload.


In the attached .ork file, you'll see I've added in the Velociraptor's baffle.


Indeed laminating the fins with 2 layers of FG each side will do wonders, for the capability of 1/8" ply. My L2 rocket seen below has a layer of 7oz and a layer of 3oz on each side of the fins, and they are pretty stiff, as for doing tip to tip, just glassing the fins prior to assembly will be plenty. A rocket built with a mailing tube weighs a bit more than one built with Loc airframe. The only reason I used the 2 different weights of FG was to have thin, tightly woven layer on top to prevent "print through" of the larger weave from the 7oz FG cloth. Just glassing the fins shouldn't add a lot of weight. My clone of the 3" FrenzyXL pictured below weighs in at 6.5lbs RTF, the airframe has two wraps of 3oz FG. and its DD.

LastDayofBuild3.jpgLastDayofBuild2.jpgL2projectDay11-1.jpg
 
Last edited:
What about FG for the fins? Wouldn't a tip-to-tip FG job on the fins could extend the range that a 1/8" thick finned rocket could take?

I agree with rharshberger, for me, now having a Binder Design Velociraptor, I can appreciate the way that it separates for single vs dual deploy. Using the Velociraptor as my model, and the paint scheme as my guide, I'd build the rocket to break the rocket at the color separation joints. When Jolly Logic's new device finally hits the shelves, you might be able to get away with only one parachute (stored in the middle section), have an AV bay in the forward coupler joint. You could then have either a reserve chute in the forward section, or use it for a payload.


In the attached .ork file, you'll see I've added in the Velociraptor's baffle.

So if I understand this correctly, for a DD setup, the drogue is released upon motor eject and the main is released by the AV bay at whatever altitude it's set for? Whereas for single deploy, the drogue is replaced with the main and the forward section will be empty? Sounds like what I'm looking for. Thanks!

As for the nose cone, I've made a bit of progress.

Here are the wooden stir sticks I started with, sorted out all the crooked ones.


Then measured/calculated and drew circles on foamboard with a protractor, cut them out and positioned them on a wood skewer which was attached to the mailer tube end cap to create this odd contraption


I also inserted sections of a toilet paper tube to hold the spacing while I started attaching the sticks, which have all been sanded down narrower at one end. Started with 16 of them, evenly spaced. Held with CA for now


Then I cut 16 more at about 2/3 of the length of the others, inserted them in the gaps.


I found the perfectly sized thing to hold the ends together at the tip. The 29mm motor block that I thankfully didn't install during my Ventris build.


I haven't figured out what I'll use for the tip. I have plenty of styrofoam that I suppose I could cut and shape easily enough...
 
Last edited:
So if I understand this correctly, for a DD setup, the drogue is released upon motor eject and the main is released by the AV bay at whatever altitude it's set for? Whereas for single deploy, the drogue is replaced with the main and the forward section will be empty? Sounds like what I'm looking for. Thanks!

As for the nose cone, I've made a bit of progress.

Here are the wooden stir sticks I started with, sorted out all the crooked ones.


Then measured/calculated and drew circles on foamboard with a protractor, cut them out and positioned them on a wood skewer which was attached to the mailer tube end cap to create this odd contraption


I also inserted sections of a toilet paper tube to hold the spacing while I started attaching the sticks, which have all been sanded down narrower at one end. Started with 16 of them, evenly spaced. Held with CA for now


Then I cut 16 more at about 2/3 of the length of the others, inserted them in the gaps.


I found the perfectly sized thing to hold the ends together at the tip. The 29mm motor block that I thankfully didn't install during my Ventris build.


I haven't figured out what I'll use for the tip. I have plenty of styrofoam that I suppose I could cut and shape easily enough...

Its easy enough to shape the nose from a piece of balsa or basswood block available from most hobby shops.

As to the DD question, for best results the drogue is deployed by the same altimeter that deploys the main chute and the motor ejection is used as a backup by either modifying the delay (if reloadable motor is used) or by choosing a longer delay than the sim predicts, example if the sim says the delay should be 5 seconds and the only motor you can find has a 7 thats okay, the altimeter will fire an ejection charge seperate from the motor at apogee for the drogue and if that doesn't do the trick then the motor delay goes off a couple of seconds later and hopefully does it. Most deployment capable altimeters are two channel one for main and one for drogue/apogee. If you prefer motor eject many if not all deployment altimeters can be set for Apogee +1 second, and the motors delay (if adjustable) is adjusted to fire at the time the sim states.

Single deploy is exactly as you described the drogue chute is replaced by the main (the simplest method). You can still do single deploy with an altimeter if you desire, I actually prefer electronic deployment as its more reliable and accurate than motor deploy.
 
Last edited:
So if I understand this correctly, for a DD setup, the drogue is released upon motor eject and the main is released by the AV bay at whatever altitude it's set for? Whereas for single deploy, the drogue is replaced with the main and the forward section will be empty? Sounds like what I'm looking for. Thanks!

You've got it... However, when launched as a single deploy, the forward section (and/or the nosecone) could be used for an additional payload (e.g. a can of soda (or bottle of water), a candy bar, or something more serious like a raw egg).

As for the nose cone, I've made a bit of progress.


Do you have any concept of just how COOL that nosecone is? Man, I'm really jazzed about that. I'm stuck here in China, without a hobby shop, and without a build, and this is giving me ideas.

BTW: I found a toy store with Gundam models (about 8' x 4' of them). Problem is, I don't give a damn about Gundam. I want rockets, or scale spacecraft (real or SciFi), aircraft, armor, ships, and boats.
 
Last edited:
You've got it... However, when launched as a single deploy, the forward section (and/or the nosecone) could be used for an additional payload (e.g. a can of soda (or bottle of water), a candy bar, or something more serious like a raw egg).


Do you have any concept of just how COOL that nosecone is? Man, I'm really jazzed about that. I'm stuck here in China, without a hobby shop, and without a build, and this is giving me ideas.

BTW: I found a toy store with Gundam models (about 8' x 4' of them). Problem is, I don't give a damn about Gundam. I want rockets, or scale spacecraft (real or SciFi), aircraft, armor, ships, and boats.

Dude china invented rockets... talk about lame....


This stringer nosecone looks AMAZING.


As for fins, I used 3/16" on my 1:1 scale Optima. More for landings than anything else. Flown on an H268R :) (and about 25 other various flights) Planning to stick an I200W in there next summer.

The fins on the Optima rocksim file I found online are slightly off. I've cut all mine from tracings.
 
Last edited:
Whelp.. the nose cone gets better... then worse. Nothing I can't fix though. Minor setback. Spray Paint + Styrofoam = BAD IDEA.

So after spending an hour carefully crafting a conical styrofoam nose tip, I glued it to the top, covered the rest in wood filler. Once dried, I attached it to my electric drill and spun it while holding a sanding block. Beginning to look really good. Way better than I though it was going to turn out.


I thought, why not spray a bit of primer paint so I can better see the high and low spots. To my horror, the styrofoam tip half-melted before my eyes. :y:
It never occured to me that that would happen. After the paint was dry, I filled up the "eaten parts" with a bit with some more wood filler and sanded down the rest of the nose cone again.


I think what I'll do here is make a paper cone tip and glue it on what remains . After that I'll do another round of filling and sanding before attaching a coupler to the bottom to make the shoulder.
 
Last edited:
Nose cone is almost done. I took a paper cone loaded with epoxy and smooshed it into place. Now solid and pointy!

I also printed out a template for the fins. Holy moly that's a big f'in fin! Each one needs 6" x 8" of plywood. At my LHS, enough plywood for the fins would only cost about $10 however there's also half a dozen bulkheads that may be needed... Has anyone had any luck buying thin plywood from a Home Depot or something? I'm trying to straddle the fine line between quality and economy here.
 
No plywood that a home improvement store sells is appropriate for a rocket, IMHO. After buying all sorts of hobby store plywood and seeing garbage quality, I bought 1/8" laser cut fins in 5 ply. Under 3 days and under $15 delivered from https://dfrtech.com/ for all 6 fins on my 2.6" version.

One idea, before you commit and cut fins, have you run the sims with a 38mm motor tube and an adapter for 29mm? I wish I had gone 38mm so much, I sourced parts for another booster section!
 
Last edited:
Go to Michaels or Hobby Lobby with their 50% and 40% coupons they sell the Midwest brand hobby plys which are ok for up to L1 rockets.
 
No plywood that a home improvement store sells is appropriate for a rocket, IMHO. After buying all sorts of hobby store plywood and seeing garbage quality, I bought 1/8" laser cut fins in 5 ply. Under 3 days and under $15 delivered from https://dfrtech.com/ for all 6 fins on my 2.6" version.

One idea, before you commit and cut fins, have you run the sims with a 38mm motor tube and an adapter for 29mm? I wish I had gone 38mm so much, I sourced parts for another booster section!

Agreed on Home Depot plywood not being flight quality. The good stuff from my LHS isn't that expensive anyway considering I'll probably spend another $75 or so before it's flight-ready.

As for 29mm vs 38mm, I think for this build I'll keep it 29mm for simplicity sake. I'm targeting an F,G,H motor range so 29 should be plenty. An H135W sims to 2500 ft, that's far enough.
 
Progress on the nose cone. I made a 3" shoulder, glued it in place. Then I fit the nose cone on the end of the front tube and started the fill / sand / prime cycle.


Notice the half-oval shaped holes in the tube? The tube came that way. I'm wondering if I can use them for recessed screws that hold the nose cone on semi-permanently yet don't interrupt airflow.

I also measured very carefully to outline the fin placement on the lower tube. I'll try to make it out to the LHS on Monday to pick up some plywood sheets.


Then comes a lot of cutting. Fins, tubes & couplers all need to be cut to size. Sunward has a the perfect motor mount for under $9 so I'll pick that up when I can as well.
 
Last edited:
Today I picked up a 12" x 24" sheet of 1/8" Revell birch plywood. I laid out the patterns for each fin and thought "how the heck am I going to cut this?" Then I remembered my Black & Decker cordless jig saw!
Made it so easy.


Then after cutting them out, I clamped them together and sanded the edges to make sure they're all equally shaped.


After that I rounded the leading edges at a 45deg angle and the trailing edges at about 30deg. Then sanded the entire thing with 400 grit. I also cut out the front fins from some 1/8" balsa stock. Fin sets complete!


I also cut the tubes to length and made two couplers from spare tube using this method(minus the fiberglass strip):
https://www.rocketryforum.com/showthread.php?130472-How-to-video-make-a-coupler

I then assembled the front coupler/future AV bay. I might build a baffle in the lower coupler, which will come later.


Here it is assembled so far - 56 3/4" tall.


I also got to cutting one fin slot but by then my back was killing me so I'm calling it a night.
 
Last edited:
I have a few of those mailer tubes. I always wanted to try it, but never got around to it. Gave me inspiration for another rocket idea! Mailer tubes come in all sizes. 3" seems to be the favorite.

I haven't built a Starship Rocket (Fantasy) of some type. Mostly scale and Sport stuff. I guess I can use my limited imagination and come up with a Mailer Tube Rocket :)
Mail tube Link.....
https://www.officedepot.com/a/produ...ssionid=0000iIujyPrN4GfrIhW4EgRf5V0:17h4h7c4g
 
These were $2.50 each at the dollar store. About 25" long. So far I've spent $15.60+tax up to this point on materials.
 
Nice...cost savings and cool rocket. Whats not to love about rockets :)
I am fishing for a design now, that will be a cool upscale!
Dollar store is cheaper..lol!
Thanks
 
Friday & Saturday I tried my hand at making my own plywood centering rings. It was way more difficult that I thought without a drill press. I made 4 that were looking like this:


It's hard to tell from the pic but they were getting a bit off center(maybe 1-2mm) which doesn't work well for a centering ring. I went ahead and ordered some from Sunward. I'll save these for something else, maybe making a baffle. One I turned into a bulkhead for the nose cone. Not glued on yet.


I also fine-tuned the fit of the fins to make good contact with the body tube and motor mount.


I may model a baffle after the Velociraptor one that K'Tesh posted earlier. I have some durable 1" tubing that would probably work well.

As for the AV bay, I'll use a "dummy" one for now where I can glue in the bulkheads. Then when I eventually get to converting it to DD, I'll swap out the dummy one for a real one.

 
Last edited:
The motor mount arrived from Sunward and I couldn't wait to get it in place. First I test-fitted everything to make sure it would go together easily once glued. I glued on the mid and fore centering rings, leaving off the aft so I can do internal fillets. Then I used a dowel to place plenty of glue about 9" in. The fore CR is 10.5" from the aft end. Everything lined up perfect. I used wood glue and worked fast so it didn't get stuck on me.
Optima_3_build_19.jpg
Optima_3_build_20.jpg
Optima_3_build_21.jpg

Then I realized I forgot something... How am I going to attach the shock cord? :facepalm: 
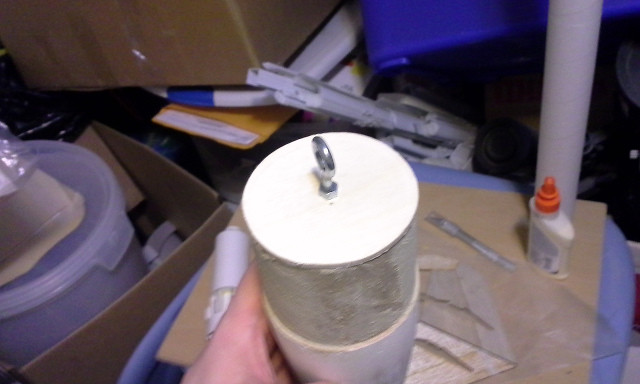
I guess I'm now committed to building in a baffle and attaching from there.
Optima_3_build_22.jpg

Which brings me to my quandary: Which baffle would be effective and yet easy to install into a coupler that's already in glued in place? I'm leaning towards the Centuri-style and just drill a series of holes in two plates.
 
Back
Top