Estes Partizon PSII

The Rocketry Forum

Help Support The Rocketry Forum:

This site may earn a commission from merchant affiliate links, including eBay, Amazon, and others.

Construct_VA

Well-Known Member
Joined
Dec 23, 2014
Messages
94
Reaction score
13
Location
Richmond, VA
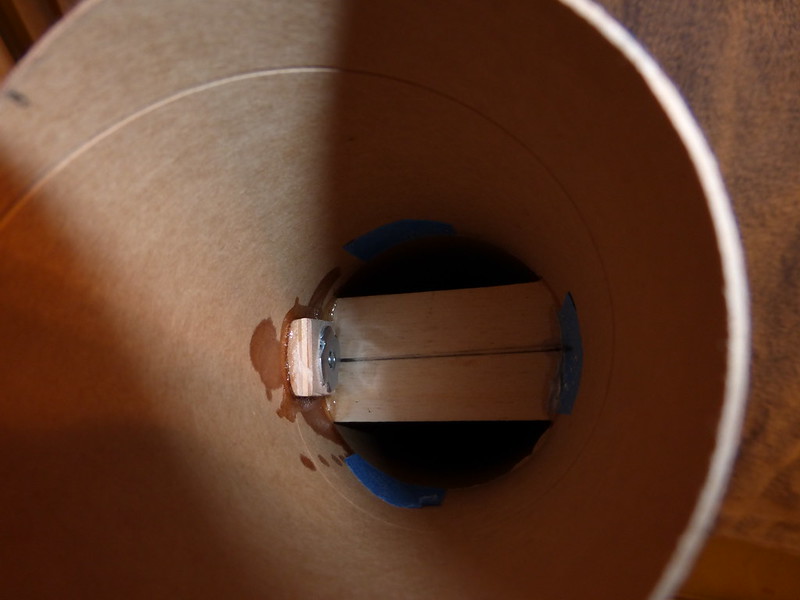
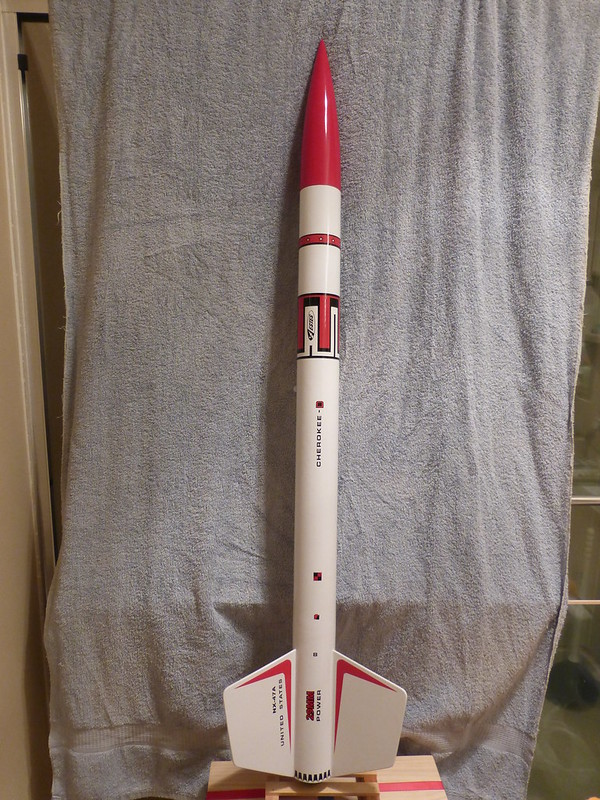
My wife got me the Estes Partizon kit for Christmas....whoop..whoop....It seems to be similar to the Estes Argent kit. I plan to use this for both mid power and high power (once I achieve certification) so I will be doing some of the modifications that have been suggested for the Argent. One thing I am not sure about is nose weight. Do I need to add additional weight? If so, any idea how much?

I'm sure I will have more questions as the build progresses. Thank you in advance for your help.
 
Working on mine as well. I wasn't thinking I would need any extra nose weight since I didn't add any on my Argent. I am adding a baffle to the Partizon which I didn't do on the Argent though.

Jim
 
Working on mine as well. I wasn't thinking I would need any extra nose weight since I didn't add any on my Argent. I am adding a baffle to the Partizon which I didn't do on the Argent though.

Jim

Cool.....Are you constructing the baffle yourself, or did you purchase it?
 
The Partizon is a long narrow rocket and should actually be "over-stable" with just about any 29mm motor you might put in it. No nose weight should be required.
 
I'd 2nd the idea of adding a baffle to the Partizon. Its upper body tube coupler lends itself well to having a baffle and/or shelf for the parachute. Personally, I'd ditch the launch lugs and use rail buttons though. Also, I built my damaged Argent based rocket ((the Cherokee D (29MM Powered upscale))(as well as all subsequent PSII kits)) with internal fillets, which means that the aft CR doesn't get glued in place until after that's done.
 
Last edited:
The Partizon is a long narrow rocket and should actually be "over-stable" with just about any 29mm motor you might put in it. No nose weight should be required.

Thank you sir. I just found the RockSim file for the Partizon and it says the same thing.

I'd 2nd the idea of adding a baffle to the Partizon. Its upper body tube coupler lends itself well to having a baffle and/or shelf for the parachute. Personally, I'd ditch the launch lugs and use rail buttons though. Also, I built my 2nd Partizon based rocket ((the Cherokee D (29MM Powered upscale))(as well as all subsequent PSII kits)) with internal fillets, which means that the aft CR doesn't get glued in place until after that's done.

Switching to rail buttons and a baffle are definitely on my list of modifications to the stock kit. Would you recommend purchasing a baffle kit or making one?
 
Would you recommend purchasing a baffle kit or making one?

I make my own... a variation of the 1/2 moon baffle

15410032410_663297a854_c.jpg


Oh, and modifying a Partizon into something else? How about this?

20016215415_956e96dd22_c.jpg


Mind you, it was actually an Argent and a separate nosecone, but a Partizon works well for this.

I know that the CG/CP markings are odd... Mark's (Stickershock) has corrected them now.
 
Cool.....Are you constructing the baffle yourself, or did you purchase it?

I order some bulkheads from Balsa Machining and I'm creating the baffle in the lower coupler based on the design of one of Apogee's baffle kits. I will incorporate an eye bolt for shockcord attachment. Here's some pics. Now I'm wondering if I should put the baffle in the bottom coupler or the top coupler. My original plan was to put it in the bottom coupler and make a popsicle stick shelf in the top coupler. Does anyone have any experience with either option?

Thanks -Jim

Partizon 2.jpgPartizon.jpg
 
Last edited:
you will need 6 - 8" of body tube for your chute and shock cord. for my current project I glued a couple of centering rings together then glued the sandwitch into the tube.
Rex
 
I order some bulkheads from Balsa Machining and I'm creating the baffle in the lower coupler based on the design of one of Apogee's baffle kits. I will incorporate an eye bolt for shockcord attachment. Here's some pics. Now I'm wondering if I should put the baffle in the bottom coupler or the top coupler. My original plan was to put it in the bottom coupler and make a popsicle stick shelf in the top coupler. Does anyone have any experience with either option?

Thanks -Jim

View attachment 278664View attachment 278665

Top coupler... It'll act as a shelf, preventing the parachute and shock cord from falling too far inside the rocket. It will also prevent them from snagging on the rail buttons' bolt. It also keeps the weight forward (improving the CG/CP locations). It will be easier to remove the shock cord and parachute (if you ever want or need to swap it out). And besides, popsicle sticks might not hold up to the violence of motions of the recovery with the shock cord thrashing about.
 
Last edited:
Never thought about the popsicle sticks getting thrashed. Thanks, I think I'll go with the top coupler for the reasons you suggested.
 
Top coupler... It'll act as a shelf, preventing the parachute and shock cord from falling too far inside the rocket. It will also prevent them from snagging on the rail buttons' bolt. It also keeps the weight forward (improving the CG/CP locations). It will be easier to remove the shock cord and parachute (if you ever want or need to swap it out). And besides, popsicle sticks might not hold up to the violence of motions of the recovery with the shock cord thrashing about.

Thanks. So IF i decide to utilize dual deployment, would I be ok to put the electronics in the lower coupler? Also, do you see an issue using rivets in the lower coupler to give me the option of switching to dual deployment in the future?
 
Full disclosure: I'm only L1, but I build a lot... I'm guessing I've got 60(ish) rockets built, and the remaining 190(ish) in various stages of assembly (some only needing the shock cord glued in, or paint and decals applied) and they'll remain that way until I can get them to me here (in the People's Republic of China), or I return to the US. I have never built (to completion) a dual deploy rocket, but I have given a lot of thought to it (I have 4 dual deploy rocket projects in various stages of assembly).

If you're going for DD, then what I'd do is check out one of the Binder Design Velociraptor Build Threads (and the .ork/.rkt files associated with them). Then build it like that. I've got a modified BD Raptor that is getting the Velociraptor's recovery system installed... You can see it here.

Basically, You mount your baffle in the aft body tube's coupler, the AV Bay in the fwd coupler. Make it so that the fwd airframe can be disassembled to allow you access to the AV bay.

So when the motor deploys, the drogue pulls out of the middle body tube segment, then the main is deployed from the fwd body tube segment.

Oh, and I have no experience using rivets. Based on my conversations with Mike Fisher (owner of Binder Design), I'd epoxy the baffle to the fin can, and I like using blind nuts (T-nuts) for holding the remaining airframe together.
 
Last edited:
Got it. I will most likely keep it simple and rely on the motor ejection. I was kicking around the possibility of DD. Thanks again for the info.
 
I was looking through some build threads and I noticed in one of the Argent builds that an eyebolt was added on the nose cone to take the place of the stock mount. Would this make sense to do as added protection? I wasn't sure of adding a baffle on the upper coupler along with an eyebolt on the nosecone would begin to affect the stability of the rocket.
 
I was looking through some build threads and I noticed in one of the Argent builds that an eyebolt was added on the nose cone to take the place of the stock mount. Would this make sense to do as added protection? I wasn't sure of adding a baffle on the upper coupler along with an eyebolt on the nosecone would begin to affect the stability of the rocket.

Usually adding weight at the nose (or in the upper coupler in this rocket) of a rocket doesn't have negative affects on stability, it can have an effect on max altitude if its over the optimum weight.
 
I started the Partizon build today by assembling the motor mount. I left out the thrust ring as advised and did not install the aft centering ring so I can do the internal fillets. Next up is creating the ejection baffle that will be installed at the upper coupler location.

image.jpg
 
I built my Partizon mostly stock. I added an eyebolt and Kevlar to the top CR and I made the upper coupler into an A/V bay. Used Kevlar in the top as well. I also added 1010 rail buttons and got rid of the lugs. Did my L1 cert on it. I love this rocket. Much more durable than it seems.

I have flown it on an H165R and I flew my Argent on an I200W. Beautiful flights. The Argent hit 3100'. The altimeter is having issues though. Blew both charges at the top. Luckily we have a huge field.
 
I started the Partizon build today by assembling the motor mount. I left out the thrust ring as advised and did not install the aft centering ring so I can do the internal fillets. Next up is creating the ejection baffle that will be installed at the upper coupler location.

Good Choice! Keep posting pics!
 
Excellent! Indeed, keep posting! I will also be building a Partizon (after the Probe competition), so will definitely be following along.
 
Today I got the engine mount installed as well as the coupler on the 2nd tube section. I applied a thin layer of carpenters wood glue to the aft to the 1st tube section to provide a little extra strength prior to installing the final centering ring. With all the snow we are having, I haven't been able to work on the baffle components.

image.jpg

image.jpg
 
Looks good.
Just for future reference, a lot of builds will use the forward centering ring as a place to put in an eyebolt for shock cord attachment.
That would be an alternative to mounting it inside the sidewall of the airframe like most Estes LPR kits, which always made me a little nervous for larger projects.

Of course if you have a long body tube on a fin can, any long narrow distance requires pre-installation of some kind of leader to attach the shock cord to.
Internal fin support inside also a good thing before you attach bottom centering ring, especially for fins that extend below the body tube and hit first under chute (this is my upscale Astrobee 1500).

My Cosmodrome Aerobee Hi included steel leader which worked pretty good for the shock cord attachment. I started using that method on a lot of projects, big to small.
Check out pg. 2 here:

https://www.cosmodromerocketry.com/Instructions/AerobeeHi/instructions_ABHI2.pdf

CR MMt eyebolt.jpgCR MMT shock cord eyebolt.jpgThrough The Wall fin.jpg
 
Last edited:
Looks good.
Just for future reference, a lot of builds will use the forward centering ring as a place to put in an eyebolt for shock cord attachment.
That would be an alternative to mounting it inside the sidewall of the airframe like most Estes LPR kits, which always made me a little nervous for larger projects.

Of course if you have a long body tube on a fin can, any long narrow distance requires pre-installation of some kind of leader to attach the shock cord to.
Internal fin support inside also a good thing before you attach bottom centering ring, especially for fins that extend below the body tube and hit first under chute (this is my upscale Astrobee 1500).

My Cosmodrome Aerobee Hi included steel leader which worked pretty good for the shock cord attachment. I started using that method on a lot of projects, big to small.
Check out pg. 2 here:

https://www.cosmodromerocketry.com/Instructions/AerobeeHi/instructions_ABHI2.pdf

View attachment 280503View attachment 280504View attachment 280505


Thank you for the info. On this one, I will be installing a baffle at the upper coupler location. I will be using an eyebolt in the baffle to attach the shock cord. I was considering making this dual deploy at first, but I ultimately decided to keep it simpler and rely on motor ejection.
 
Thank you for the info. On this one, I will be installing a baffle at the upper coupler location. I will be using an eyebolt in the baffle to attach the shock cord. I was considering making this dual deploy at first, but I ultimately decided to keep it simpler and rely on motor ejection.

Keeping it simple is good.
I have DD rockets for high wind drift days and non DD for fun flights on calm days.

I still use motor ejection even with electronics and DD. I've always looked at motor ejection as a freebie, and a good back up in case the battery goes dead or some other problem befalls the electronics.
With a long delay in the motor, it's just too good of a back up not to use.
At least breaking the airframe in two if the electronics fails it gets out of a ballistic dive and gives some drag.

On my first Level 2 attempt with my Binder Raptor, the main charge did not eject the main.
But the airframe separated and survived intact and I was able to reload and go again.
Got the L2 that same afternoon.
 
So for the baffle, I am planning to construct a half moon setup. For the top portion, I would like to lay it out as pictured. My intention of the design is to allow for the attachment of an eye bolt for the shock cord. The top portion would be cut out of 3/8" plywood for additional strength to hold up to the shock cord forces. Does anyone see a potential issue with the slightly reduced opening size (shaded area)? FYI: The Partizon body tube is 2.5 inches in diameter.

image.jpg
 
So for the baffle, I am planning to construct a half moon setup. For the top portion, I would like to lay it out as pictured. My intention of the design is to allow for the attachment of an eye bolt for the shock cord. The top portion would be cut out of 3/8" plywood for additional strength to hold up to the shock cord forces. Does anyone see a potential issue with the slightly reduced opening size (shaded area)? FYI: The Partizon body tube is 2.5 inches in diameter.

I keep the baffles simple,by making them first as 3 bulkheads (solid), then stacking them and cutting approximately 1/3 off the circle creating a flat side), I drill the center (before or after cutting the 1/3 off) and use a dowel down them middle to attach my screw eye for the shock cord. I then put the disks in the coupler tube alternating the flat sides in the usual manner. The dowel also prevents the red caps (if used from AT loads) from breaking the bottom disk out, or at least it hasn't happened yet.
 
I have a Partizon I built last year and its completely stock with the exception of an eye bolt in the forward CR for the harness to mount to. No baffles, no AV bay, no eye bolt in the NC. As pointed out earlier, this rocket is super stable. I didn't have any issues with things shifting aft at takeoff and ruining the stability. I would say don't bother, except you are using it as the harness mounting point now, which is great. LOC does that with their bigger rockets for example.

As for rail buttons, I imagine the benefit is pretty minimal (if there is any) on a rocket like this. The Estes PSII rockets are easy to build and super fun to watch because in the grand scheme of things, they are typically slow (I know you can epoxy a Nike Smoke together and explode it into the atmosphere on an H410, but that is not the "typical" launch day for people flying their first mid-power rocket). So I don't know... if you want practice installing them, go for it, but typically, for low and mid power, they aren't this "must have" upgrade that people make them out to be. If you sand, glue, and fillet a set of lugs correctly, they will last longer than buttons will.
 
Got it. I will most likely keep it simple and rely on the motor ejection. I was kicking around the possibility of DD. Thanks again for the info.

Jolly Logic chute release, or deployment computer in the payload with a line out to a cable cutter, are both perfect for this situation. That way you are still using motor deployment near apogee but simply restricting the drag until a lower altitude.
 

Latest posts

Back
Top