Newbie question on Pull Pin type switch and Static Pressure Holes

The Rocketry Forum

Help Support The Rocketry Forum:

This site may earn a commission from merchant affiliate links, including eBay, Amazon, and others.

kcobbva

Well-Known Member
TRF Supporter
Joined
Nov 8, 2015
Messages
1,401
Reaction score
78
Hello. I’m new to the board and after an 11 year hiatus, am finally checking my bucket list by building my first HPR going for my level 1 certificate. After getting a StratologgerCF and reading the accompanying document, which was an excellent read, I believe it makes sense to build an “always-on” type SS-10T type switch with pull pin. (less chance of mechanical failure in my mind). After coming to that decision I searched the board and found a few conversations, but I’m curious if anyone can recommend where to pick up a brass tube and matching sized pin? Seems I can find some online here and there but not close to matching diameters. Also curious what diameter would be best? I was thinking 1/8” ID on the tube with a matching pin size.

Then, that led to a second question. I’m building the Madcow Torrent and it appears that every discussion, and video instruction sets show making the single ¼” Static Pressure hole. Again, after reading that manual and researching it appears a better strategy is to use 3 or 4 1/8” holes. If so, would the pull pin type scenario work well with that smaller diameter hole? I can assume if it fits in an 1/8” ID tube, then it’d fit through the pressure hole.

I’d sure value an experienced point of view on this. Thanks.
 
IMHO AV bays seem almost like light-sabers in that each seems personalized and there are so many ways to do them, so mine may not be "right" or suit your needs.

However you're in luck since I have an SLCF with the set up you've noted as well as 3 sample holes around 1/8" on my Punisher. I just mounted the switch in-line so that a rod pushed in through one of the sampling holes will slowly push down on the lever. I just used coat hanger wire with some masking tape and it proved fine since the way I have the switch mounted, there isn't any pressure pushing the pin out.

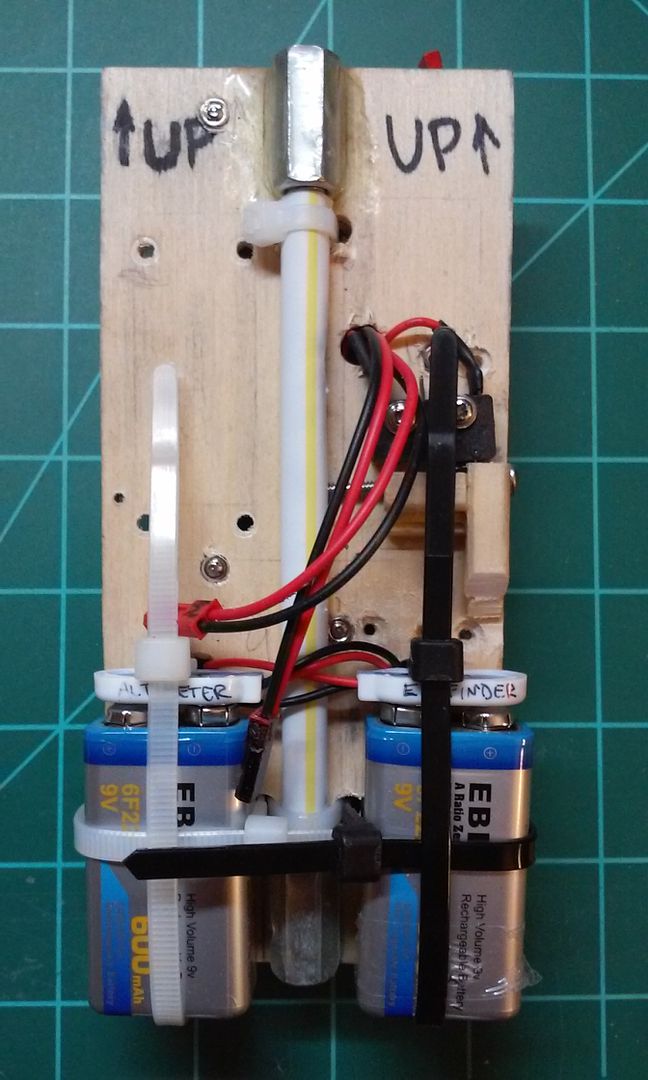
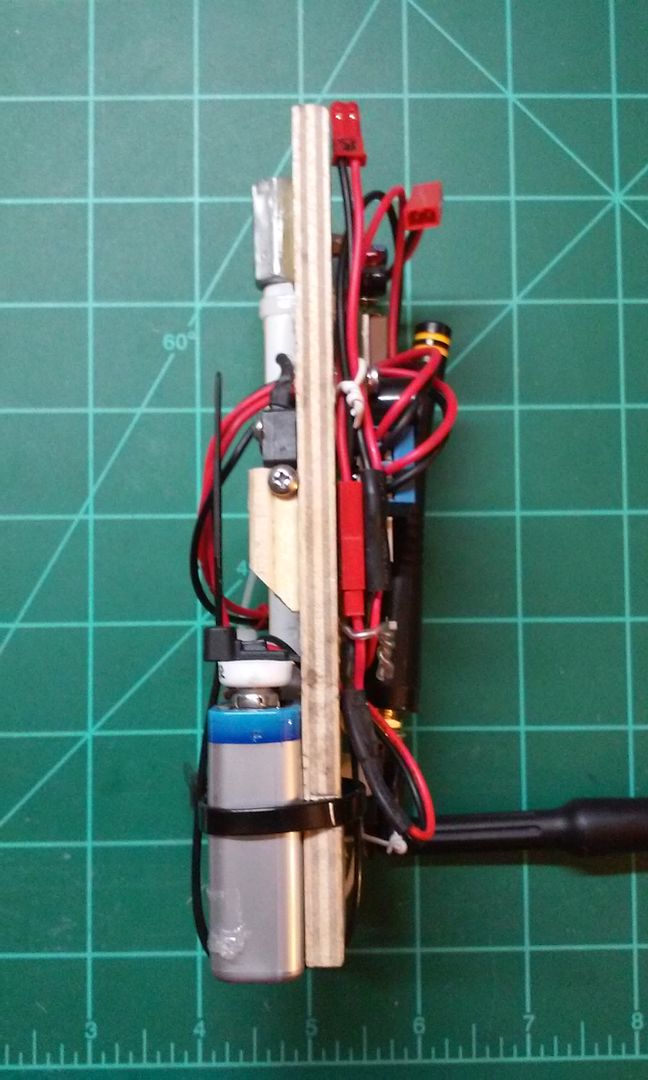
Here's a pic of my AV bay set up. It's my first, so it may not be ideal...my next one has nothing but batteries on one side so that if they bust loose (like in a lawn dart or even severe deceleration), they don't destroy anything along the way. To retrofit this bay, I built a "ramp" out of wood so the batts would deflect away from the switch. However this bay has the heavy batteries in-line to not mess up the rocket balance and also the switch is in-line with the center rod, so the safety can be inserted directly towards the center of the rocket rather than at an angle.

Front view (switch is on the right with a screw in it as temporary safety key when out of the AV bay)...note that I mounted the switch upside down so the lever won't switch off on high acceleration/boost...I also trimmed the lever shorter so it's lighter and not likely to click off on deceleration:
2015-10-20%2020.52.55.jpg


Side view (notice how temporary "safety rod"/screw" is in-line with the center...the wood ramps/shroud also serve as guides to also keep the rod from slipping out):
2015-10-20%2020.53.56.jpg


2015-10-01%2012.54.00.jpg
 
Last edited:
I also have a Madcow 4" AV bay I recently completed and that one was tougher since there are two rods going down the sides which don't allow the same set up; however I figured out a workaround and mounted the switch sideways with the metal lever pointing towards the sampling hole. In that case, since the lever has pressure against the rod/safety device, I had to ditch the "coat hanger & masking tape" safety rod and instead threaded the sampling hole an used a bolt for positive secure safety when off. I don't have pics of it right now, but can if you need. Maybe see what others can post. :)
 
Last edited:
Your local hobby shop may carry the K&S brands of hobby metal tubes, rods,squares, etc K&S makes rods that will fit perfectly in their tubing. Hobby Lobby may also carry K&S.
 
KenECoyote - Very nice! thank you. I like the batteries on the flip side. My ebay won't allow two on the back, but I'd highly considered a redundant setup and then decided to wait for the next rocket there. I appreciate the quick response and detailed pictures! I like the two battery setup on the flip side. I obviously have the same Madcow E-bay you talked about. that'd be interesting to see what you did there.

Rich - Hobby Lobby is a great idea and I was just there three days ago. Now I have to go back and see if they carry the K&S stuff. oh darn! :) Thanks!
 
Last edited:
Very nice! thank you. I like the batteries on the flip side. My ebay won't allow two on the back, but I'd highly considered a redundant setup and then decided to wait for the next rocket there. I appreciate the quick response and detailed pictures!

No problem at all and welcome to TRF! Always nice to have a new member choose us. :grin:

However please note that while I researched AV bays a bit at first, I ended up going my own route after doing preliminary research, so mine may not be conventional and may have possible flaws which I haven't accounted for yet. On the other hand, I've openly shown my av bays to others at launches for opinions and have only heard positive and no suggestions for improvement...yet. :)

Also while I do plan on redundant systems going forward, since this is my first av bay, I decided on going simple and tested and only used one SLCF. So I would support your decision as well, but I'd add that you should test as much as possible (I found a high power hand vac worked well). The other battery is for an Eggfinder and I do plan on adding an Eggtimer Quark as a second back up at a later point.
 
I built a "pressure chamber" last night with two jars and a vacuum sealer and flew the alt with Christmas lights multiple times to validate it functioned properly. Worked like a champ. Eventually I'll get to testing in the yard with charges to validate proper separation, and then hopefully go smile at the successful launch.
 
I built a "pressure chamber" last night with two jars and a vacuum sealer and flew the alt with Christmas lights multiple times to validate it functioned properly. Worked like a champ. Eventually I'll get to testing in the yard with charges to validate proper separation, and then hopefully go smile at the successful launch.

Nice! I don't have a pressure chamber, but plan on making one so i can thoroughly test my altimeters before using in the field.

For my backyard charge tests, I followed the SLCF instructions by taping off the extra sampling ports (leaving one open), then I used a Ryobi 18V cordless hand vac and it seemed to work very well for me. The pressures were ridiculously low (would register in the ~250-500' altitude range); however the charge firing would go as planned, which was the point of the backyard tests.

At the recent club launch I had the hand vac on my table and one of the club heads asked what that was for (probably thinking I'm a neat nut). I explained it was for my dd testing and they said no way! I then just grabbed the bay (which was hooked up with two igniters), brought it over to a nearby mound of dirt along with the vac, put it down and turned it on. At the same time a well know rocketry vendor was onsite and saw me with the vac on and the bay and yelled "you must be kidding!". I just put the vac to the sample port, heard the beeps stop...stood back and watched as the drogue igniter fired...then the main igniter fired. They seemed amazed! I then yelled out to them that I could "teach them some things about rocketry!" and we all had a good laugh. :) Again, this isn't for altitude/pressure testing, but it's good for igniter & charge testing.

Anyone else out there got any bay pics? I can't be the only one! :wink:
 
My pressure chamber was an empty pickle jar - turn a funnel upside down on top of it, little end up, and use a shop vac on the little end. Worked great. The jar needs to fit inside the large end of the funnel of course.
But this thread is about av bays, I have yet to build any
As for the brass tubing and rods, Lowes sells some down here and you can an assortment on amazon with various size tubes and rods, some square, brass and copper. But they are just bits and pieces and more or less a grab bag. I was lucky and got a couple tubes and rods that match and some that can probably be used for charge wells.
 
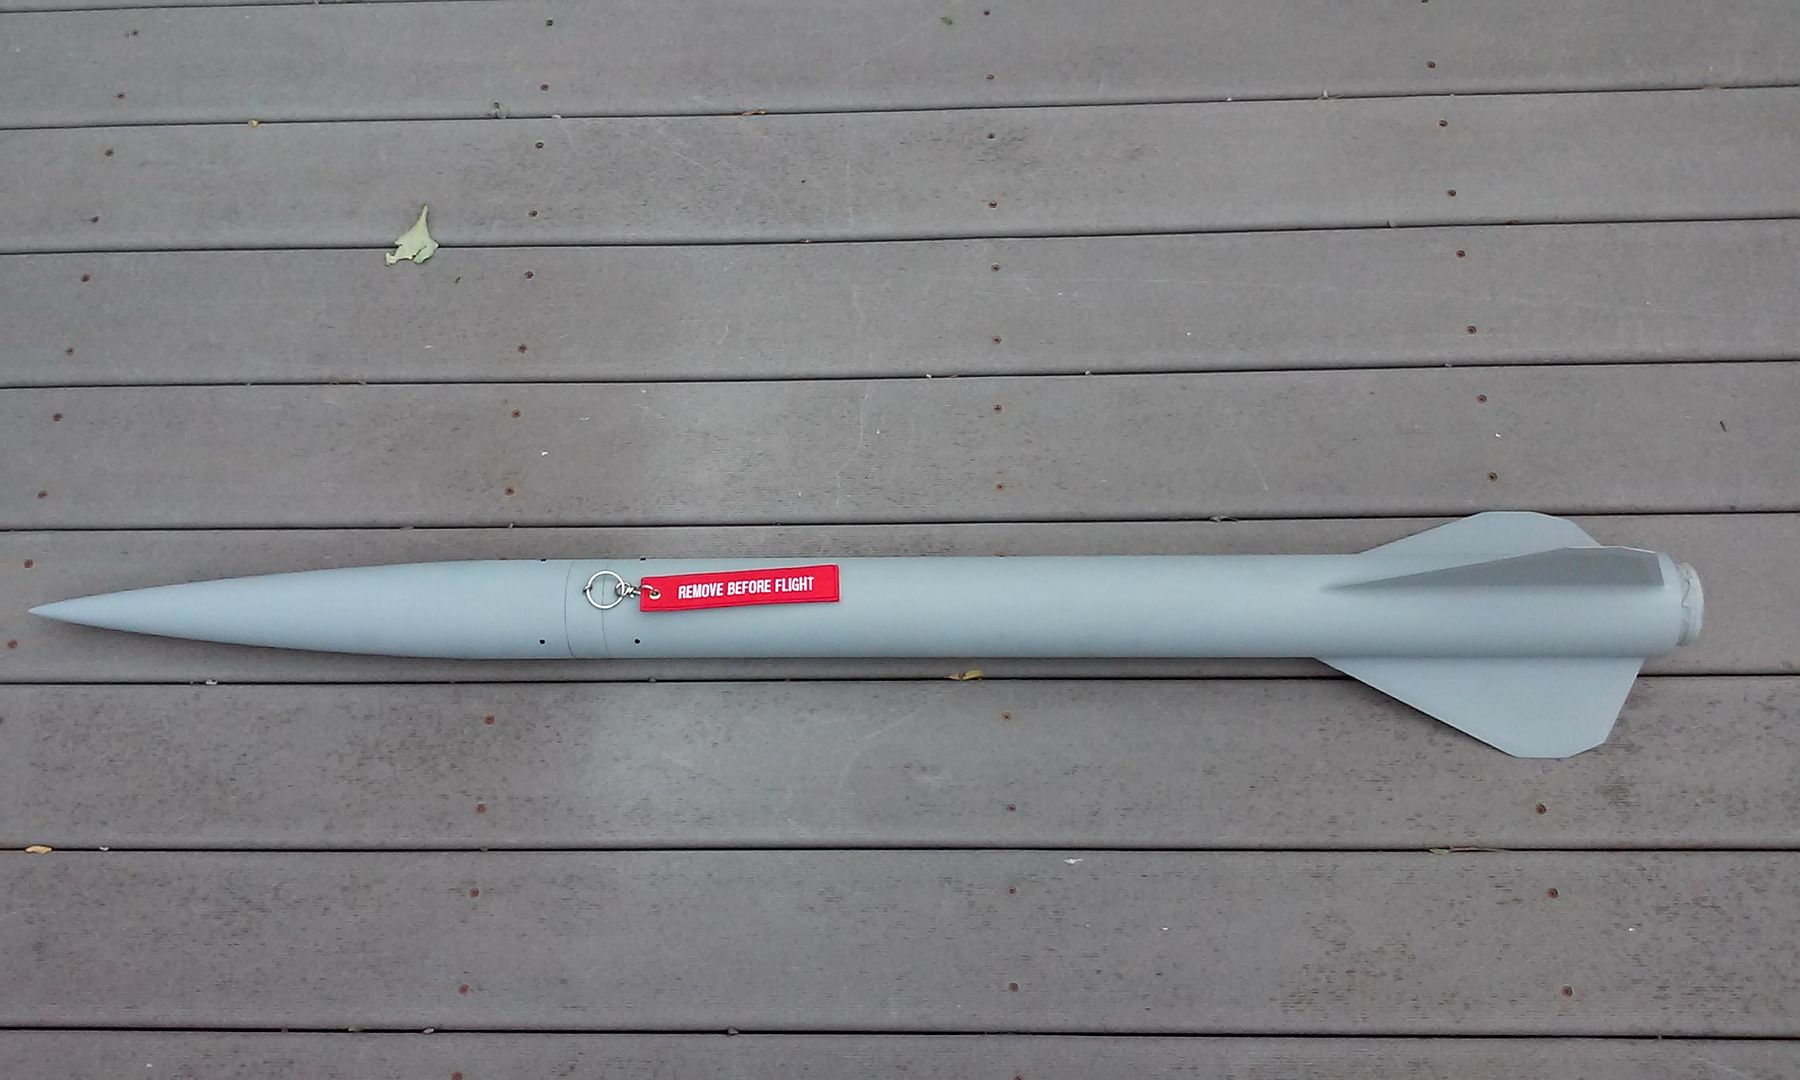
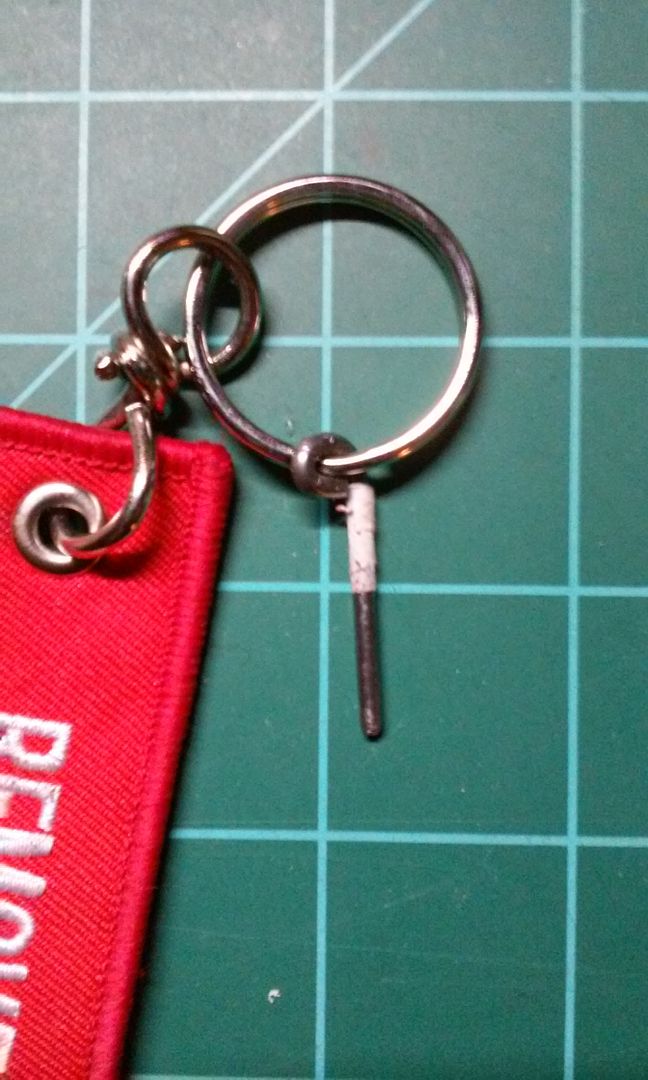
Thanks KenECoyote. You guys pretty much answered my questions and set me on my path. I'm going to try your vac method as I discovered while all looked good for the test, when I downloaded the data from the StratologgerCF, the apogee fired about 4 seconds after the chamber reached apogee. I'm sure it's my doing, but gotta play with the jar sizes to get it right. I'll make sure this is in the right location next time. I really appreciate all the pointers. As for my pin, I've taken a piece of brass wire and found the appropriate tube from Hobby Works (K&S - Thanks again rharshberger). I took a small flat piece and used jbweld on top and made a little spring like lock. Then cut a divit into the rod. It inserts up to the point it hits the divit, then locks in place so it won't fall out. Now that that's all done, I'm still waiting on the switch to arrive in the mail to finish that part of the project. I need to get it dead on, because I need three 1/8" vent holes and the rod is 1/8" Will just slide through the hole, so not much room for a mistake mounting it all. I loved the "Remove before Flight" as I'd not thought about that, so it's on the way too! :)
 
Thanks KenECoyote. You guys pretty much answered my questions and set me on my path. I'm going to try your vac method as I discovered while all looked good for the test, when I downloaded the data from the StratologgerCF, the apogee fired about 4 seconds after the chamber reached apogee. I'm sure it's my doing, but gotta play with the jar sizes to get it right. I'll make sure this is in the right location next time. I really appreciate all the pointers. As for my pin, I've taken a piece of brass wire and found the appropriate tube from Hobby Works (K&S - Thanks again rharshberger). I took a small flat piece and used jbweld on top and made a little spring like lock. Then cut a divit into the rod. It inserts up to the point it hits the divit, then locks in place so it won't fall out. Now that that's all done, I'm still waiting on the switch to arrive in the mail to finish that part of the project. I need to get it dead on, because I need three 1/8" vent holes and the rod is 1/8" Will just slide through the hole, so not much room for a mistake mounting it all. I loved the "Remove before Flight" as I'd not thought about that, so it's on the way too! :)

Don't worry if the one hole is just a bit oversized, in my experience (I always use 3 static ports) the one I put my switch under is usually about .0625" larger than the other two (.125" and .188") and I have yet to have a DD failure.
 
Thanks KenECoyote. You guys pretty much answered my questions and set me on my path. I'm going to try your vac method as I discovered while all looked good for the test, when I downloaded the data from the StratologgerCF, the apogee fired about 4 seconds after the chamber reached apogee. I'm sure it's my doing, but gotta play with the jar sizes to get it right. I'll make sure this is in the right location next time. I really appreciate all the pointers. As for my pin, I've taken a piece of brass wire and found the appropriate tube from Hobby Works (K&S - Thanks again rharshberger). I took a small flat piece and used jbweld on top and made a little spring like lock. Then cut a divit into the rod. It inserts up to the point it hits the divit, then locks in place so it won't fall out. Now that that's all done, I'm still waiting on the switch to arrive in the mail to finish that part of the project. I need to get it dead on, because I need three 1/8" vent holes and the rod is 1/8" Will just slide through the hole, so not much room for a mistake mounting it all. I loved the "Remove before Flight" as I'd not thought about that, so it's on the way too! :)

You're very welcome and glad to hear you've got your stuff "lined up". ;) There are two different vac methods...one is using a vacuum chamber to simulate higher altitude by using a high power vac (plug in) and with that, you would use lights to indicate charge firing and then you can download the data. The "backyard vac testing" I was referring to isn't for altitude data (unless you want to run an extension and use a strong shop vac)...it's for just functionality testing (testing igniters and or charges) and it just shows if the altimeter will fire both igniters/charges and deploy out the bay and nose. In fact, in my backyard tests using a cordless vac, the altimeters will only show maybe 500', but it's fired both igniters/charges each time (drogue first then the main about a half sec after) and I can see how everything works/deploys. First is a simulated lab environment, the latter is a field test to test actual firing and charges. I think the SLCF manual mentions the latter testing.

Also alignment isn't that difficult IMO...just leave the top off, look at lining up, put in the pin, put top on, check pin a few times, then use a marker or paint to make alignment lines crossing the bulkhead and bay tube. Describing it makes it sound harder than it is. :)
 

Latest posts

Back
Top