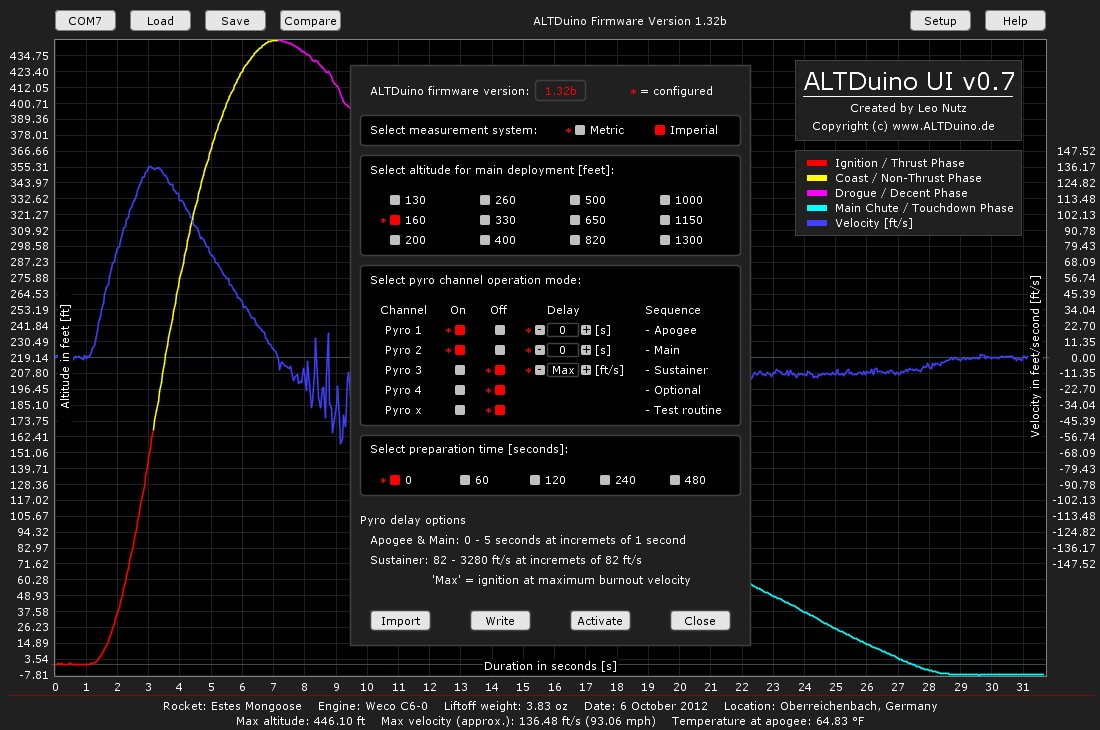
Often, you want to go as slow as you can before lighting up the second stage, with the main limitation safety (due to possible instability). The savings in drag much more than make up for the reduction in kinetic energy extracted from the sustainer propellant by moving it faster before burning.
Depending on the burnout speed of the first stage, this might be 2 seconds, or it might be 10 seconds (!).
The Featherweight Raven lets you set a velocity threshold, as well as other conditions: light it once the integrated speed drops below xxx value, assuming it has reached yyy altitude and the time is greater than zzz. This lets you input simulation parameters that can help prevent sustainer ignition in the case of a non-nominal flight (weathercocking, instability).


") (will post it here)
(will post it here)