Project ALTDuino - A homemade altimeter

The Rocketry Forum

Help Support The Rocketry Forum:

This site may earn a commission from merchant affiliate links, including eBay, Amazon, and others.

Leo

Well-Known Member
Joined
Aug 19, 2009
Messages
2,003
Reaction score
405
Location
Germany
Everyone,

I would like to present work I did within the last couple of months.

Back in February 2012 I decided to tackle a project without realy knowing how the outcome would turn out. To keep to a certain time schedule I decided the project needed to be finished by the end of August 2012 so that I would be ready to use the altimeter at this years Freedom Launch in SC. Otherwise I would have had to use a commercial altimeter.

After defining the hardware I preceded to learn C+ and write the firmware and some software tools for the project. This was a task that kept me extremely busy and I had to overcome many hurdles. In the end however it went a lot more smoothly than I had anticipated.

So, I am now proud to say the goal was accomplished with a resounding success :)

You can read all about it here : Project ALTDuino

Please feel free to comment on the website.
 
Very cool. Impressive work.

Are you bringing it to orangeburg?
 
Dual deploy in a Mongoose with a B6-0. Very nice - I'm impressed.
Congratulations.

I wonder if someday dual deploy in LPR rockets will be relatively common.
 
I have a few Arduinos in the basement and now I have my next project.

Do you have a part list and links to the firmware code. I'd love to start hacking around with this.

Thanks
Carl
 
Last edited:
Congratulations on a very successful project.

I also want to say that your graphs and photos documenting the project are very well done.
 
I have a few Arduinos in the basement and now I have my next project.

Do you have a part list and links to the firmware code. I'd love to start hacking around with this.

Thanks
Carl

The items are listed. For now I'm not going to publish the software as it is all still in beta and needs improvements and tweaking. Maybe at a later date.
 
Great project and well executed!

It might make sense to eventually move to the ATmega32U4 versions of the Arduino, like the Sparkfun Pro Micro or one by another maker. With the 32U4 you have on board USB which would eliminate separate programming hardware and make it simpler. I have done a few Arduino projects as well as some based on just the bare Atmel uC's and have a few planned . When I do another project I plan to transition to the 32U4 for the built-in USB support.

Thank you. Indeed, if I were to start over I'd probably select the 32U4.


I applaud the work!

Excellence is your trademark, Leo.

Greg

Thanks Greg. If there is something I really hate it's losing a rocket so I paid special attention to the steps taken when testing the device on my very old Icarus. It puts a little "possitive" pressure on you :)
 
Just pledged that kickstarter.... For exactly this purpouse :D

Just when I thought mine was coming along looking gorgeous, I got 1-upped... :mad:

Incredible job! You've officially constructed something that is on the level (if not better) than commercially available ones, which is pretty cool. Oh and nice job on the SMD soldering :D

Thank you very much. I'm very humbled.


I've now incorporated a "Compare" function into the UI software. It is now possible to compare 2 flight profiles.
 
Nice project, I've recently taken up rocketry mainly so I can experiment with electronic payloads & hopefully interest my kids in engineering. You mentioned that you learned Basic for this one, would you mind sharing your resources? Was it a particular book or web source that you could recommend? I've wanted to learn Basic for a long time but had no "purpose" so to speak.

Regards,
 
I can't find anything I wrote about Basic but I learned some C+.

I highly recommend you get an Arduino board (Leonardo e.g.) and learn from all the great resources on the net. That's what I did.
 
I can't find anything I wrote about Basic but I learned some C+.

I highly recommend you get an Arduino board (Leonardo e.g.) and learn from all the great resources on the net. That's what I did.
My bad I thought you had mentioned Basic, C+ it is! which will probably be more useful in the long run anyway.

Regards,
MW
 
Leo,

Any chance you might do a build thread on this project?
 
Leo,

Any chance you might do a build thread on this project?

Chuck,

it's under consideration. My priorities right now are adding more features to the firmware and making certain all the options function 100%.

Also what needs to be done is a setup window in the UI where you can change different parameters like main ejection altitude and so forth and save it to the altimeter.
Right now I'm doing this by compiling the changes directly into the firmware.

It just needs more user friendliness before it can go public.
 
Very cool. Nice work. The only problem is that now I don't have anything to do- I was going to do the same but now it would just be reinventing the wheel :)
 
Very cool. Nice work. The only problem is that now I don't have anything to do- I was going to do the same but now it would just be reinventing the wheel :)

Don't let me stop you. You can also think of other projects e.g. making an array of led's flashing in certain sequences primarily to be used for night launches. It's not that hard to do. Give it a try :)
 
I haven't ever seen a dual deploy rocket based on BT-50 size and therefore took that as a challenge with success.

Now for my next milestone :)

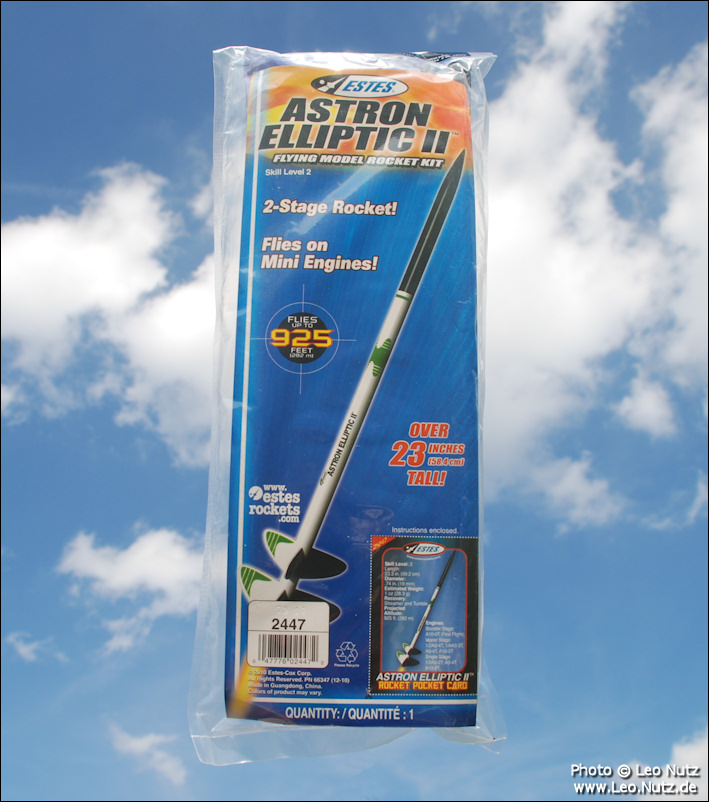
While on vacation in the States I grabbed 3 of these babies:

Astron_Elliptic_II.jpg


The BT-20 sized Elliptic flies on Estes mini engines only.

The challenge of this experiment with my altimeter should prove exciting.
 
Since you have to use jumper wires to connect the addon boards anyway, if you want the absolute smallest size without custom boards here is a fully pinout compatible Arduino clone that is about the same size as your baro board. If you stacked them you could cut the length approximately in half and the width by a few mm.

Atmega328P - all Arduino pins broken out
No direct USB support
20.7x15.2 mm

Order page: https://www.femtoduino.com/2012/04/smallest-arduino-femtoduino/
Project page: https://www.varesano.net/projects/hardware/Femtoduino

I had looked at these when they were first designed but never checked back to see that they had made multiple batches of them.

Any decision on releasing the software? I would like to put one together.
 
The Teensy is also a very nice alternativ. It has a reset button which I will be needing later on in the development.

Teensy website

I do plan on releasing the software at some point and time but I still have a lot of work to do to make it user friendly.
 
I haven't ever seen a dual deploy rocket based on BT-50 size and therefore took that as a challenge with success.

Now for my next milestone :)

While on vacation in the States I grabbed 3 of these babies:

Astron_Elliptic_II.jpg


The BT-20 sized Elliptic flies on Estes mini engines only.

The challenge of this experiment with my altimeter should prove exciting.

Ill be interested to see what you come up with. I already modified one to make it MD, dual deploy, and have a timer to light the sustainer. its crazy hard! good luck.
 
Back
Top