The setup in the above picture seems unsafe to me. I agree that you need to push the workpiece counter to the direction of the cutting or grinding bit. That way your hands are ‘downstream’ of the router bit.
But how do you hold the workpiece (fin) once it is half way through? Seems to me you now have to grab the opposite side of the fin and pull. your hand is now ‘upstream’. If the bit grabs the fin, it will pull your hand into the burr bit.
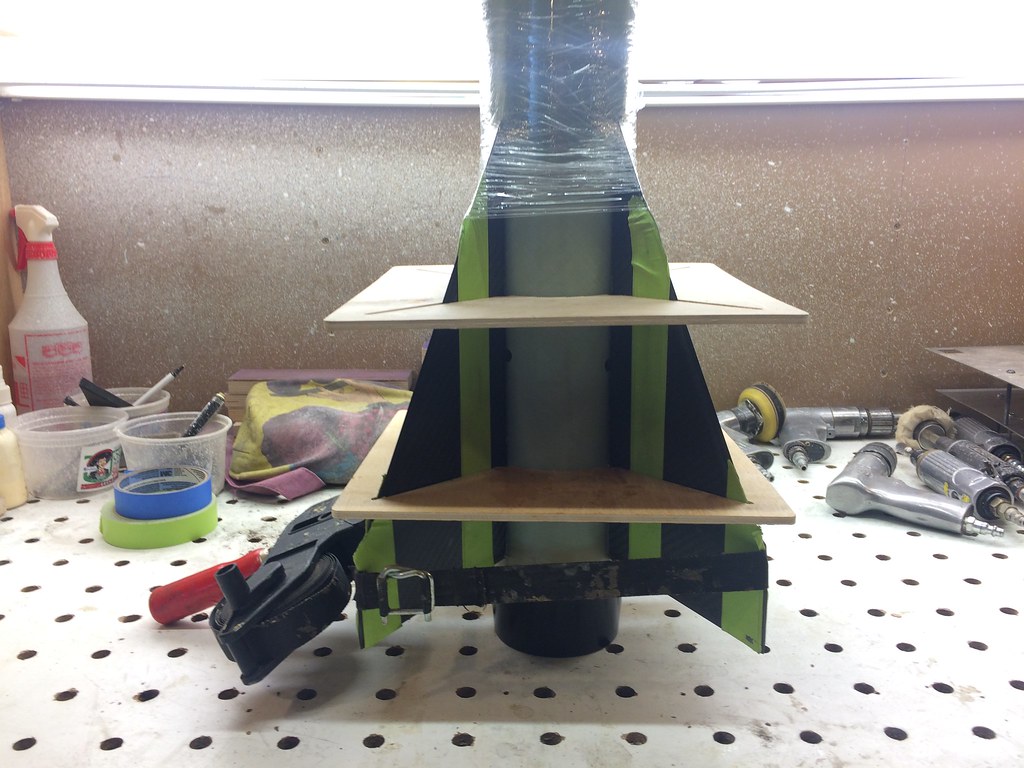
A better way is to clamp the fin to a LONG piece of wood and offset the router fence by the thickness of the wood. That way hands can be kept ‘downstream’ for the entire cut.
Another way is to cut a small hole in the fence and have just a little bit of the burr bit exposed beyond the fence surface. I’d still use an offset wood block or jointer safety holders for this set up.
All of the cut happens in one pass, and it is not grabby like a router bit. And, there is not much for the bit to grab and pull after it passes the bit.
In addition, fondness for my fingers has led me to develop a habit of bracing my hands on the top of the fence when running dicey things on the table saw or router. Some processes require fingers close to dangerous places.
After the fin passes the bit, it does not need to be pulled, only barely pressed against the fence. It is mostly held against the fence by the nature of the cut. On some passes, I did not even touch 'downstream of the bit'', and never did my fingers make it into the elevation of the action. The bit is only up maybe an inch. That fence is around 3" tall. I brace my hands so that they cannot be sucked into sharp things. It is something I have practiced for many years now. I still have all my fingers.
Yes, this is not without risk. I mentioned what I felt was most pertinent, about not pinching between a rotating bit and the fence in the wrong direction. As you say, the router is the scariest tool in the shop. As far as router table setups go, this one is very friendly. I would set it up again exactly this same way. It does not need more, IMO, at least for me.
Burying the bit into the fence would be safer, but, then you have to press the fin into the bit, meaning that there is more potential for variation in the cut. In this setup, the bit presses the fin into the fence.
By all means, anyone working with these tools should always be sure to think things through as much as possible, and be extremely careful.
I have worked with tools since I was a little kid, from back when every tool had to be tested for it's digging qualities, and my cognitive memories were barely forming. It was part of growing up in a lineage of engineers and makers. I offered this as an alternative to the setup with the router that I have seen on this site. That one scares me. This is much safer, faster, better, IMO. As far as router setups go, this felt quite safe. There is someone out there that could get their tongue ground off in this, though, or wrapped up in the bit. Careful out there.
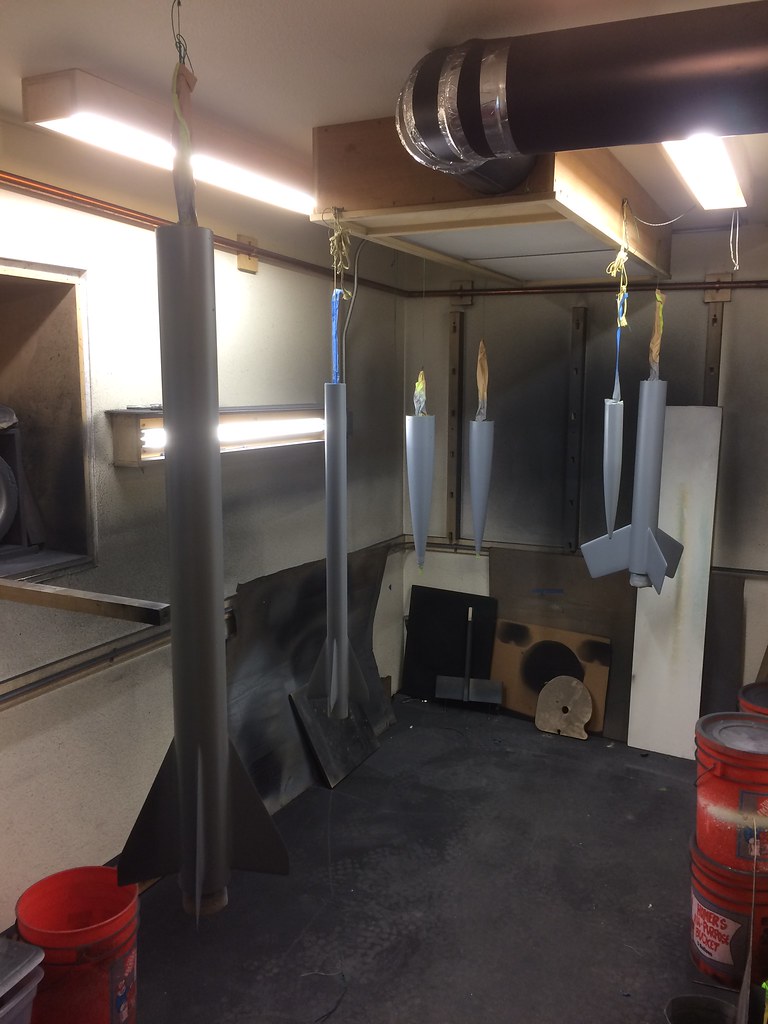
IMO, the very most dangerous thing about this setup, and that I have not mentioned, is dust. That router is connected to a powerful dust collection system that is outside the building. I turned on a powerful spray booth fan in an adjacent room, and opened doors that cause air to flow across this work station to minimize any CF dust that has time to settle and mix with the ambient dust in the shop. Most of it is taken immediately by the dust collection system attached to the router table. I have 2 1700 cfm massive V-bank HEPA filtration units in my shop, one runs 24/7, the other is in a downdraft table and runs when I am sanding or when a dusty process is happening. Finally, I was wearing a JSP Powercap, which I love. It has a stout face shield, and a decent level of particulate protection pumped into the mask.
https://www.amazon.com/POWERCAP-CAE602-941-100-JSP-Powercap-Active/dp/B00JVV4744
Last edited:
")