


Nathan
☢
- Joined
- Apr 19, 2012
- Messages
- 2,230
- Reaction score
- 755
If you like those aluminum deployment charge canisters but don't want to spend $20 for a pair of canisters or would just rather make them yourself, then here's how I make polished aluminum charge canisters for cheap.
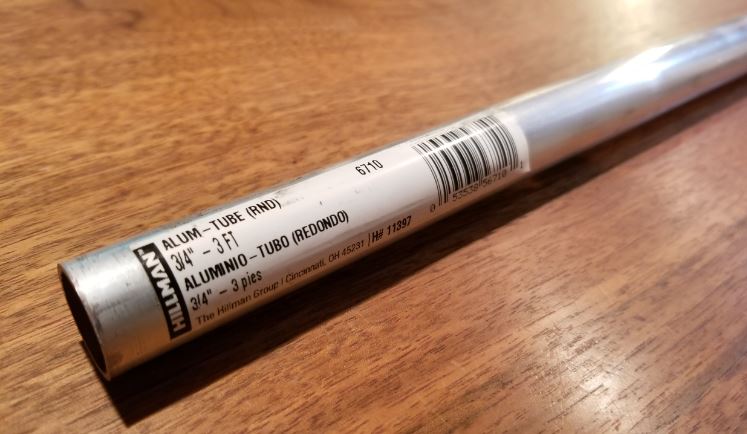
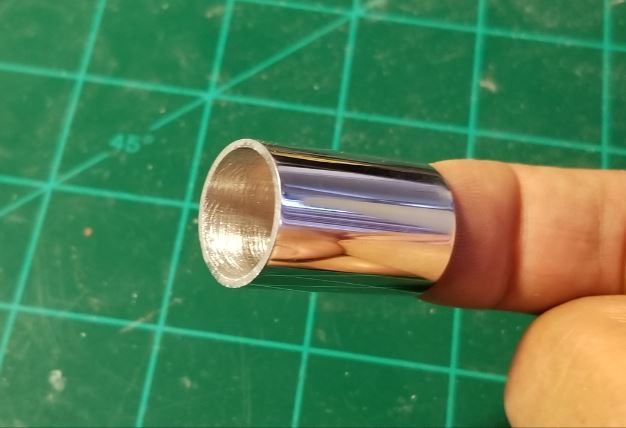
First get some aluminum tubing. I got this three foot piece of 3/4" aluminum tube from Home Depot for about $10 and it will make a lot of charge canisters. They only have two sizes of aluminum tubing at Home Depot but you can get any size you want from McMaster-Carr.
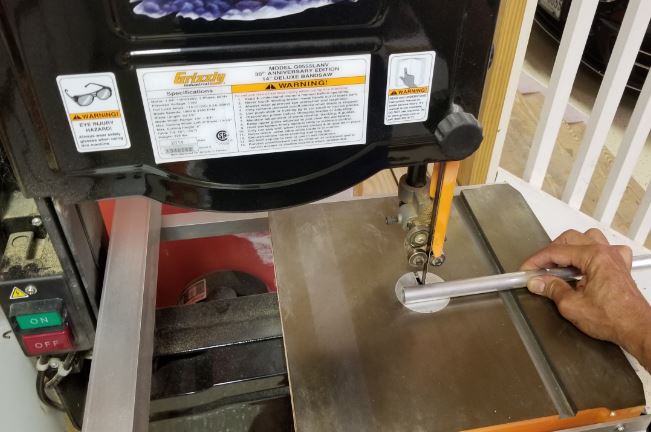
Cut the tubing to the desired length. I used the band saw but a hack saw would work.
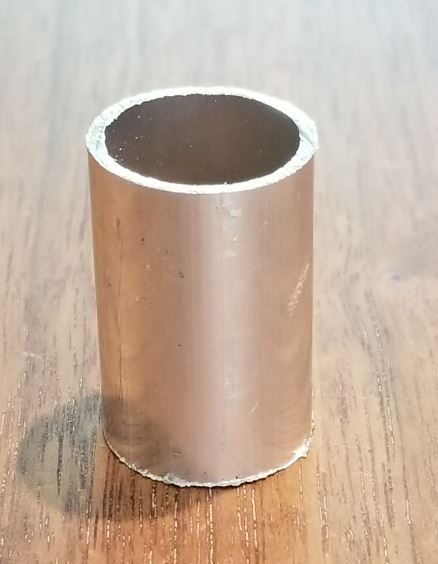
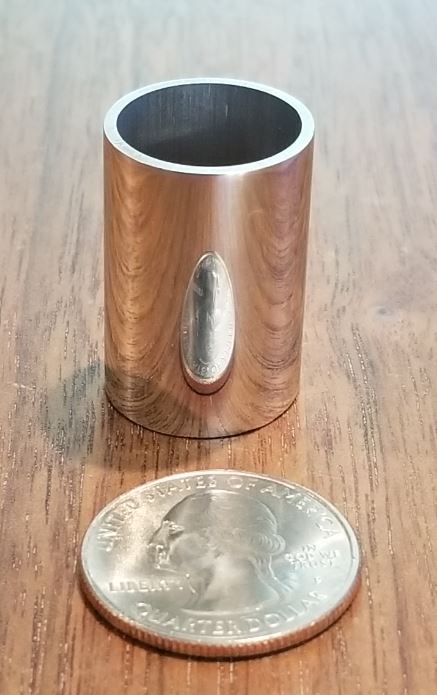
Sand with progressively fine sandpaper. First I smooth out the rough cut ends with 120 grit, then I sanded with 600, 1000, and 2000 grit. If you want them to have a satin finish like the $20 charge canisters then stop there. If you want a mirror finish like this then polish with aluminum polish. I used Mother's Aluminum Polish.
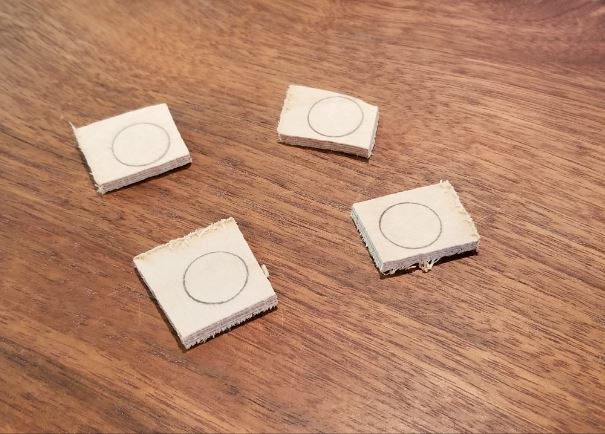
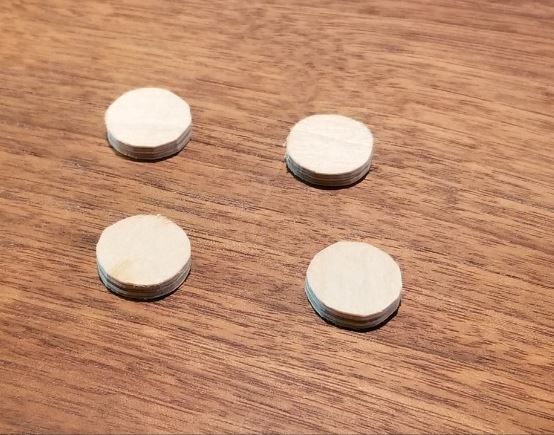
I make the bases out of 1/8" plywood and epoxy. I used Aeropoxy. They are plenty strong; I've made them like this for years and have never had one fail. First I rough cut squares on the band saw and then shape them into round disks on the belt sander until they just fit into the canister tubes.
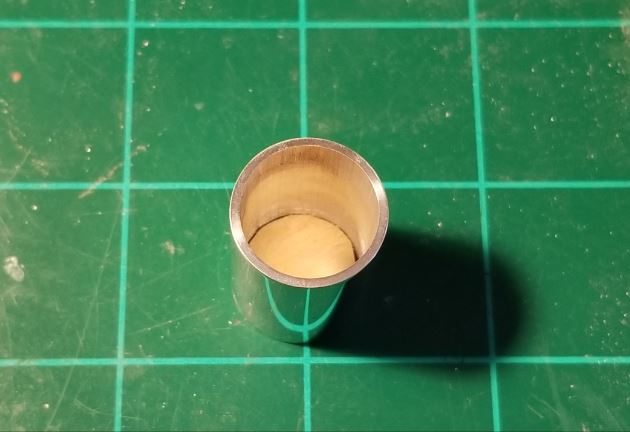
Rough up the bottom of the inside of the canister to give the epoxy a good grip.
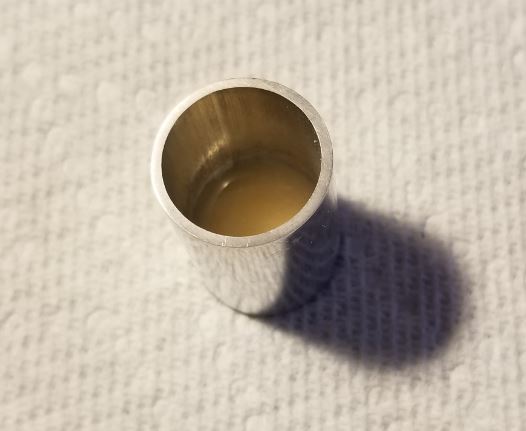
Insert the plywood bases and cover the inside of the bases with a big drip of epoxy and spread it to the edges.
After the epoxy cures, all that's left is to drill holes and and attach with bolts. I use #4-40 machine bolts.

Finished! This is the av-bay of my Upscale Onyx which I am in the process of upgrading from single deploy to head end dual deploy.
First get some aluminum tubing. I got this three foot piece of 3/4" aluminum tube from Home Depot for about $10 and it will make a lot of charge canisters. They only have two sizes of aluminum tubing at Home Depot but you can get any size you want from McMaster-Carr.
Cut the tubing to the desired length. I used the band saw but a hack saw would work.
Sand with progressively fine sandpaper. First I smooth out the rough cut ends with 120 grit, then I sanded with 600, 1000, and 2000 grit. If you want them to have a satin finish like the $20 charge canisters then stop there. If you want a mirror finish like this then polish with aluminum polish. I used Mother's Aluminum Polish.
I make the bases out of 1/8" plywood and epoxy. I used Aeropoxy. They are plenty strong; I've made them like this for years and have never had one fail. First I rough cut squares on the band saw and then shape them into round disks on the belt sander until they just fit into the canister tubes.
Rough up the bottom of the inside of the canister to give the epoxy a good grip.
Insert the plywood bases and cover the inside of the bases with a big drip of epoxy and spread it to the edges.
After the epoxy cures, all that's left is to drill holes and and attach with bolts. I use #4-40 machine bolts.
Finished! This is the av-bay of my Upscale Onyx which I am in the process of upgrading from single deploy to head end dual deploy.
")

