Loc Custom 7.675" Saturn V

The Rocketry Forum

Help Support The Rocketry Forum:

This site may earn a commission from merchant affiliate links, including eBay, Amazon, and others.
Hello Eric,

Just found this thread and if I was the kind of person who would say OMG, then I'd be saying right now. I'm not, but you get the idea I'm sure.

Now for a couple of questions.

1) Kit? Kit by whom? Are you a part of LOC now, did I miss that somewhere along the line?

2) How much for a kit?

3) Seriously what will it take to get ahold of one of these beauties?

Brad the "Rocket Rev.," a very long-time LOC kit and LOC parts builder, Wilson

Hi Brad,

So happy you stopped in! I've been thinking (and praying) for you recently, buddy!

1. This is indeed a kit; offered by LOC, at the link Tim posted above. Here 'tis again: https://locprecision.com/product/loc-custom-saturn-v/

I'm not part of LOC...but they are good friends. And I occasionally get to contribute to the madness!

2. $535-$665...depending on what options you prefer (Single vs. dual deploy, Ebay or not, Recovery included or not)

3. They're in stock and available right now! The current run of ~50 is not yet sold out. But once this run sells out, no guarantees on restocking for a while...may not be until the 60th Anniversary!
 
The total length is 14" exactly what I got in my kit with about 3.75" exposed above the transition. Note my kit had a 24" section of 5.5" tube as well, Jason said you could cut that sorter as you only had around 10" exposed and 10" in the transition/centering rings...

Got it. It looked a bit short to me as the prototype 3.1" tube ended up flush with the aft end of the 5.5" coupler.
The 3.1" tube should be exposed 3.4" to match up with scale and perhaps most importantly, the included Stickershock wrap. With the 14" tube length, the tube will indeed be recessed in the aft end of the 5.5" coupler roughly 1.5". All good!
 
... The current run of ~50 is not yet sold out. But once this run sells out, no guarantees on restocking for a while...may not be until the 60th Anniversary!

I had thought LOC was making more than 50 - they have said that they are no longer limiting the run to just 50 kits - has that changed?
 
I believe LOC said they were opening it up to more people and would run it till interest slowed down, since they do custom parts for this I assume you should get on it asap because I'm sure they won't continue running custom fiberglass parts indefinitely... BTW, mine was around $590 delivered but I had an extra $25 charge to make mine a single motor and they had to do custom fin tabs for me, this is without ebay or recovery since I didn't need those. There are a lot of stickershock decals and they are big, that's a big $$ adder in my opinion.
 
I had thought LOC was making more than 50 - they have said that they are no longer limiting the run to just 50 kits - has that changed?

Frank is correct.

There is no hard cap at 50. However, this is not the type of kit that A) makes practical sense to kit up one at a time, and/or B) have a pile of them sitting on a shelf collecting dust. So whenever the run of kits is done, I would not expect a restocking for a good amount of time. I will say that the initial planned run is over 1/3 sold. If the interest fades, the run could be less than 50, if it grows, could be more than 50. If there's a surge in interest a few months down the road, the interested parties may be out of luck.
 
Hey Eric another Outstanding build!.......with some unique nuances. Yu did a nice job figuring out all the steps for the average builder. No simple feat.

I do have just one request though...... I would like to reserve a seat in the capsule on the "BIG" one when you build it..;)
 
This is a really cool build. One thing I notice from the pictures is that you aren't wearing gloves while epoxying. You really should be, both for your long-term ability to use epoxy and to show your customers the right way to build the kit.

There should be a pinned warning to any post mentioning epoxy. I cringe every time I see a video of someone working with epoxy without gloves. I sensitized to epoxy very quickly when laying up glass on the deck of my boat, now any skin exposure has me wanting to take a wire wheel to my skin for days, so much so it's difficult to sleep. It's the first circle of Hell.
 
Hi Eric. Hope you are doing well. I'm working on my Saturn V kit from Loc. Jay has been very helpful and I'm following your build. Where are you placing the rail buttons and you said you used 4#s of weight? how did you get that much weight into that 38mm tube and how are keeping it there? Thanks Greg Olson
 
Greg I'm also working on a Loc Saturn V. Did you mean 3" tube?
I'm planning on using a 3" coupler with lead and epoxy mix that will slide in the top 3" tube. Im adding blind nuts to the last 3" to 5" centering ring and installing a removable bulkhead. There should be 12" of 3" tube available for 2 couplers one for weight and one for tracker, when you load up all 5 holes.
Looking forward to see what others do.

Mike hight
 
Last edited:
Hey Eric another Outstanding build!.......with some unique nuances. Yu did a nice job figuring out all the steps for the average builder. No simple feat.

I do have just one request though...... I would like to reserve a seat in the capsule on the "BIG" one when you build it..;)

Thanks CJ! Thrilled to have you here! Miss you brother; can't wait to see you at LDRS again....unless you make a Bong run in the coming months!;) Take good care of yourself, mate!

Hi Eric. Hope you are doing well. I'm working on my Saturn V kit from Loc. Jay has been very helpful and I'm following your build. Where are you placing the rail buttons and you said you used 4#s of weight? how did you get that much weight into that 38mm tube and how are keeping it there? Thanks Greg Olson

Hi Greg,

Can't wait to see your Saturn, Greg!!!

Edited for accuracy...

The proto used two 1010 buttons, one into the aft centering ring and one into the top centering ring.

If I were to do it again, I'd likely install the top button into a 1" x 1" block epoxied on the inside of the airframe roughly 10" down from the top of the tube, or 20" up from the aft end. The goal being to get the forward button nearer to the CG (near the top of the booster tube). I do like a bit of a backer on the ID of the airframe for this size rocket.

In my opinion, 1010 buttons are plenty sufficient for this rocket...even if you're a cluster monkey! If you want a longer and/or stiffer 1515 rail, the 1010 buttons still work just fine in there too!:D

Nose weight: the proto with a single K550 used 3# in the 3.1" tube just beneath the capsule. The mass was epoxied into a coupler tube, which slid into the 3.1" airframe. It was secured in place with a couple of machine screws...through the 3.1" tube and into the 3.1" weighted coupler. Simple, removable, and adjustable. Not very elegant, but quite functional!

As mentioned elsewhere, for a single 54-4G load, the Sat could probably get away with less. Plus, the glass fairings in the kit are lighter than the plastic fairings on the proto. That helps too!

Greg I'm also working on a Loc Saturn V. Did you mean 3" tube?
I'm planning on using a 3" coupler with lead and epoxy mix that will slide in the top 3" tube. Im adding blind nuts to the last 3" to 5" centering ring and installing a removable bulkhead. There should be 12" of 3" tube available for 2 couplers one for weight and one for tracker, when you load up all 5 holes.
Looking forward to see what others do.

Mike hight

Nice! Excellent idea and execution, Mike!!!:)
 
Last edited:
Thanks Eric. As I told Jay, I shouldn't work on or ask questions late at night. I make to many errors! I meant 3 lbs of weight in the 3" tube. I've put 2 lbs of shot in the tube so far and I still have room. Thanks for the info on the rail buttons. Greg
 
You’re supposed to wear gloves when using epoxy? I’ve used both BSI and JB Weld without gloves for a while and no problems (of course I also sand fiberglass and use spray paint without wearing a mask). Hell for fillets, I just stick my finger in rubbing alcohol and shape them lol.
 
You’re supposed to wear gloves when using epoxy? I’ve used both BSI and JB Weld without gloves for a while and no problems (of course I also sand fiberglass and use spray paint without wearing a mask). Hell for fillets, I just stick my finger in rubbing alcohol and shape them lol.

It's a long-term exposure issue with epoxy. Eventually, most people get sensitized so they have an allergic reaction if they touch uncured epoxy. In some cases, it gets bad enough that people can't touch cured epoxy because there's still some uncured bits floating around from imperfect measuring and mixing. There are probably people who don't get sensitized, too.

I spray paint without a mask but use a mask when power sanding fiberglass. I should wear a mask when hand-sanding glass but don't always.
 
Fiberglass Parts

Summary of this Section: The following are some general notes on the care and feeding of the fiberglass parts included in the Loc Saturn V kit. For those accustomed to traditional Loc components, fiberglass is a bit of a departure from the norm; but nothing to be intimidated by!


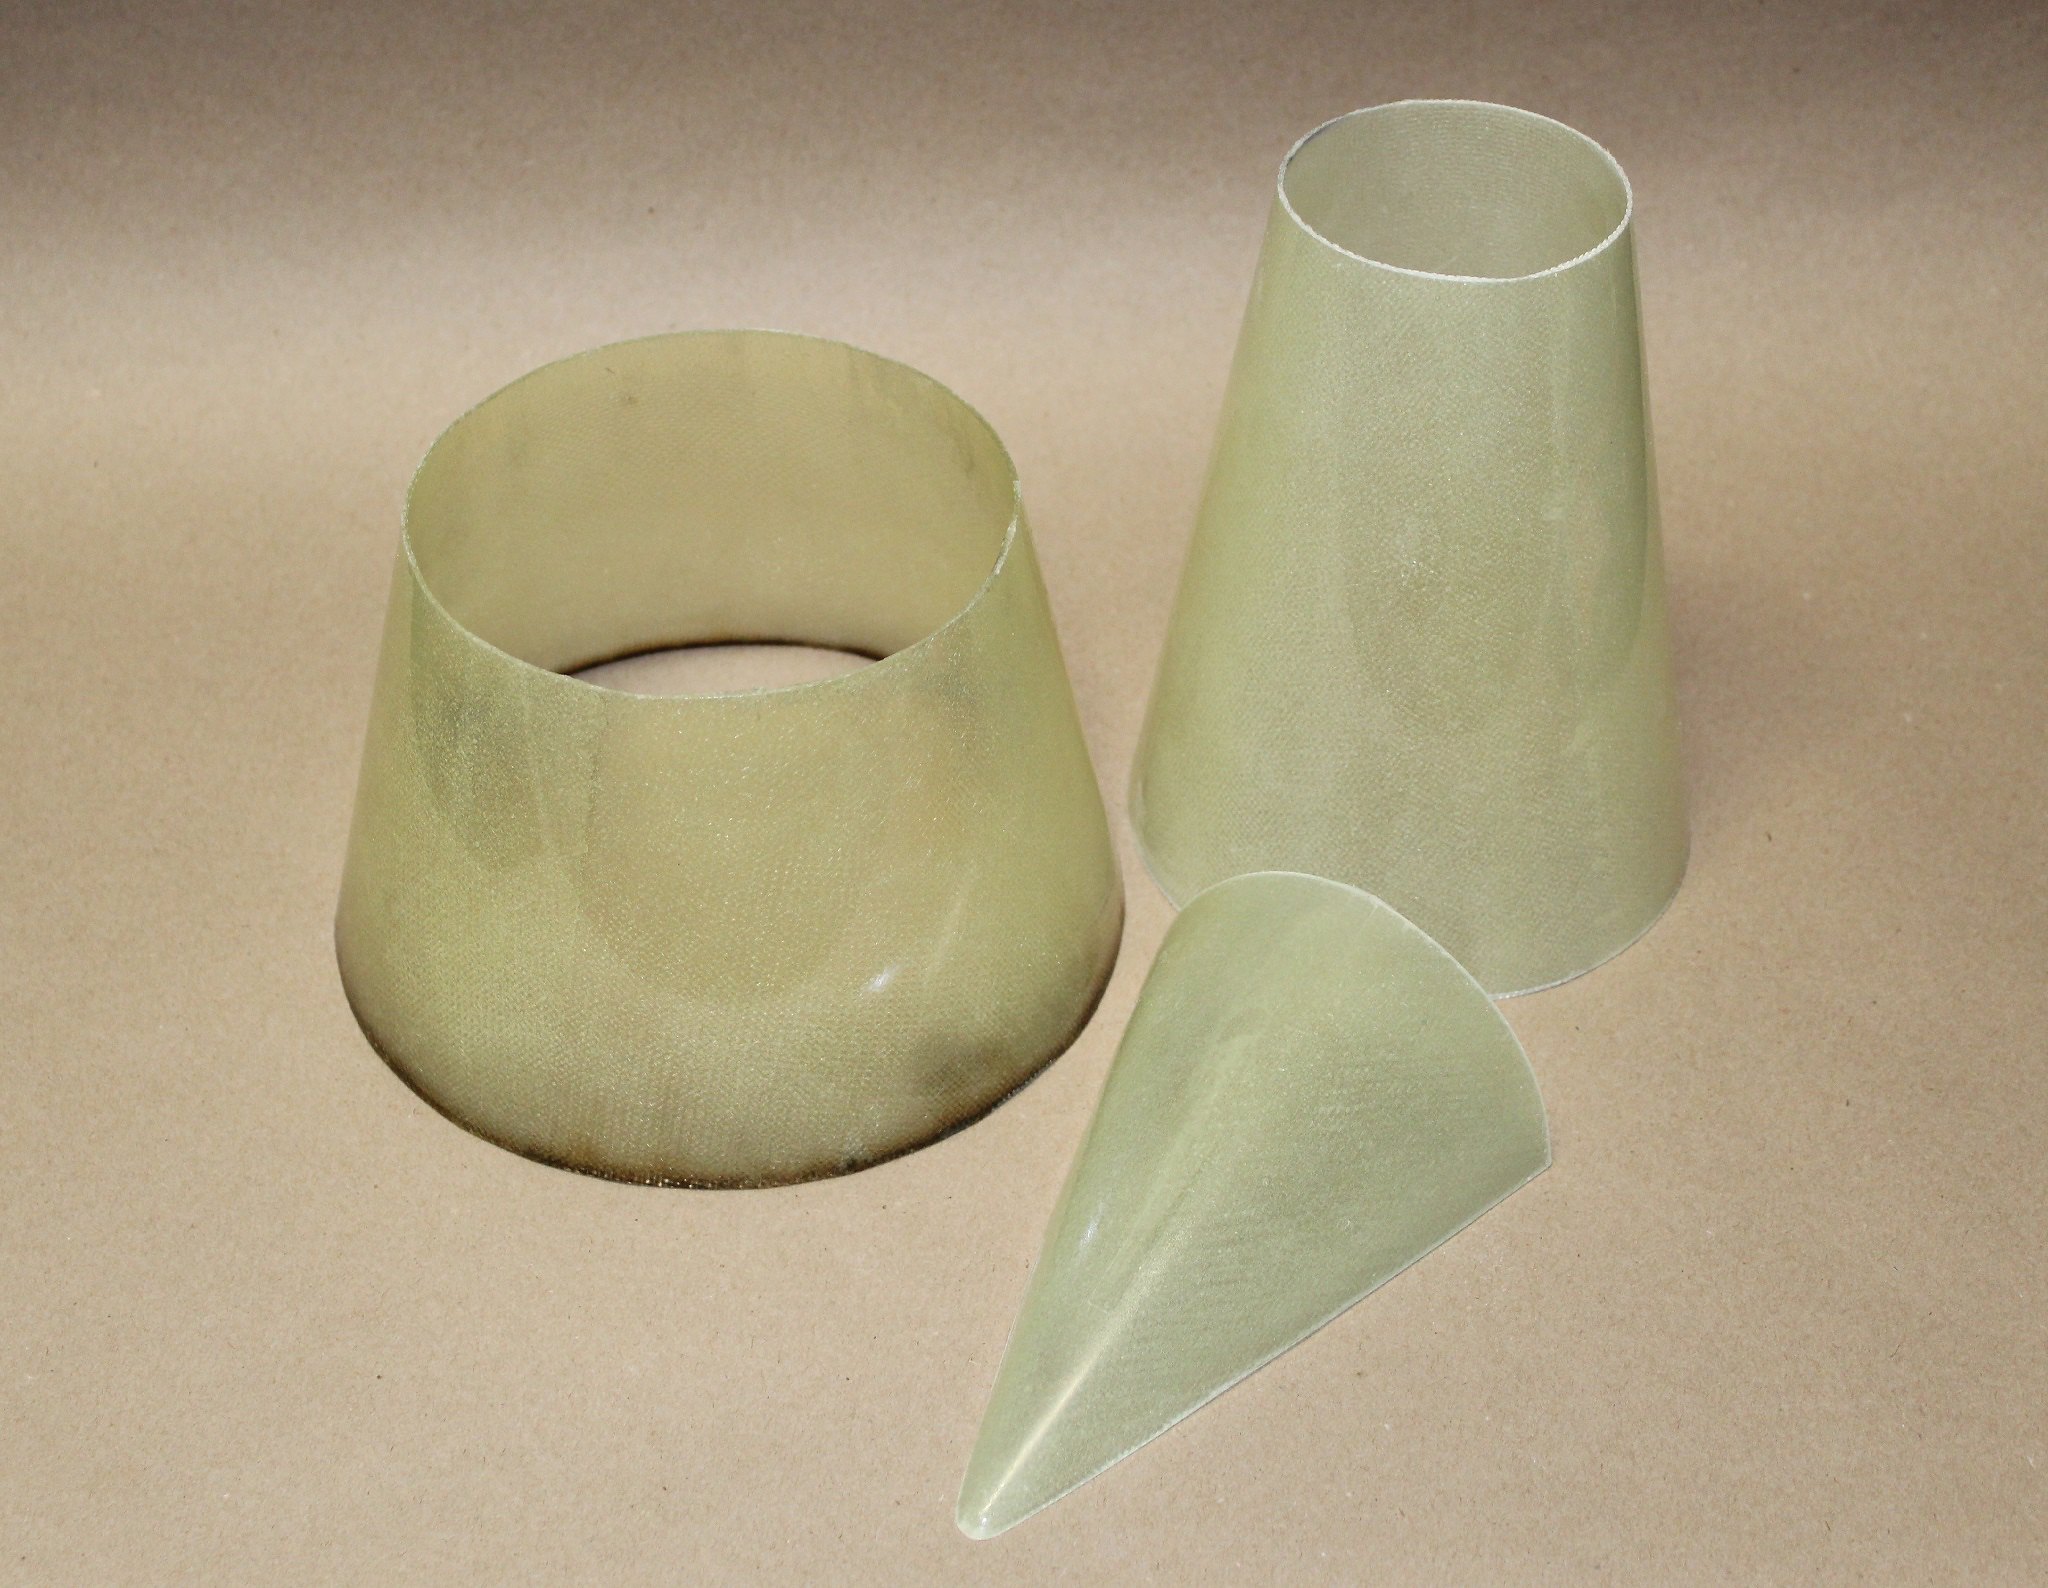
Each kit contains 6 fiberglass parts, custom molded for this kit. Four fin fairings a 7.675” to 5.54” transition, and a 5.54” to 3.10” transition.


Fairings

The Fin Fairings come to you fresh out of the molds…lots of molds! Clean the exterior of the fairings with warm soapy water, alcohol, or your other favorite solvent to remove any slippery stuff leftover from the molding process.


There is a slight indentation in each of the fairings where the fin is to reside. This is courtesy of ¼” wide tape in the molds.
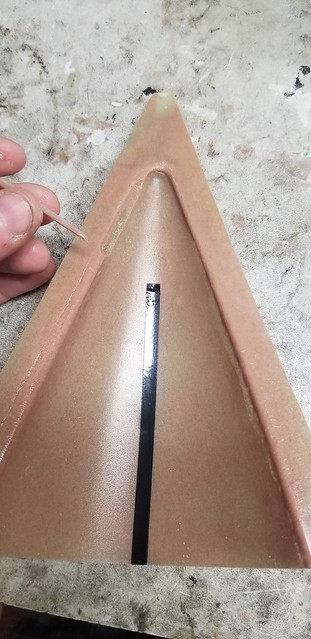


This ¼” wide depression is easier to see if you take a pencil and rub along the ridge at the edge of the indentation.
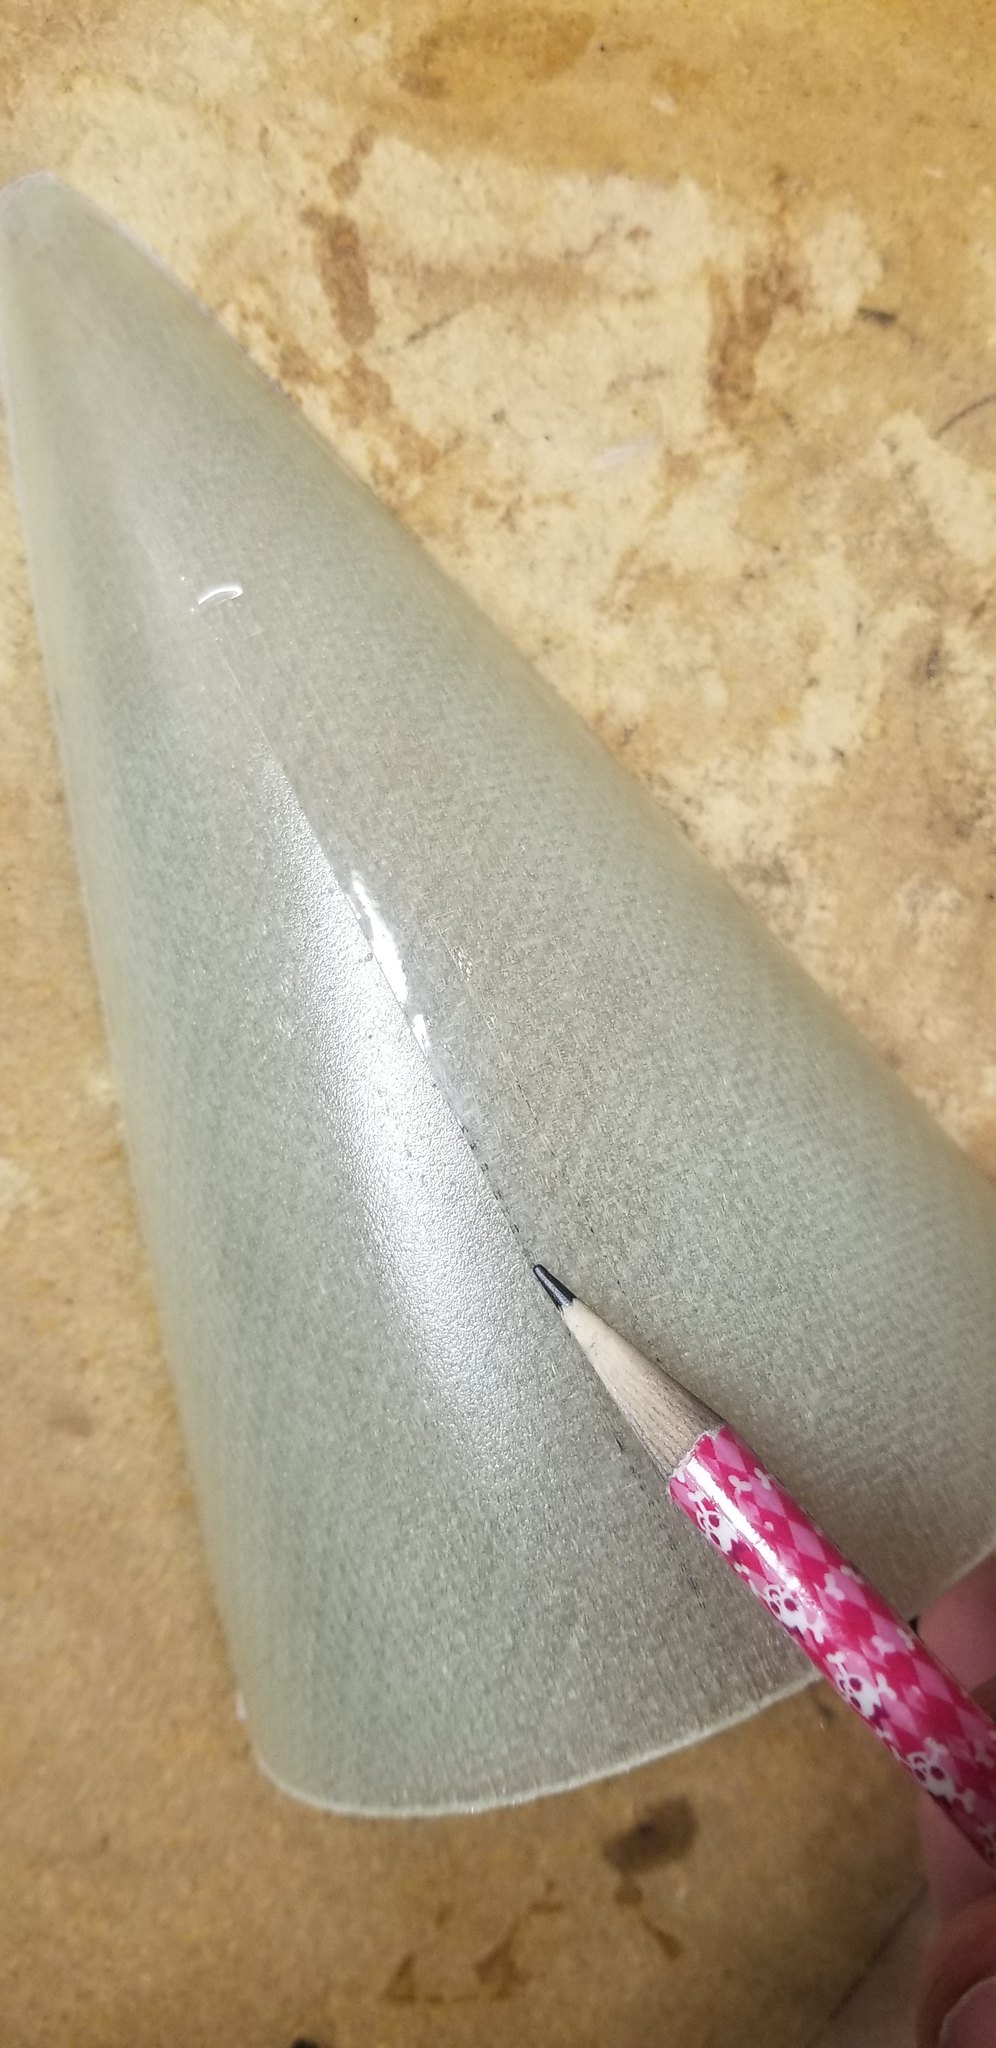


Now that you can see where the fin needs to go, use a Dremel and a cutoff wheel to carefully trim along the inside edge of the indentation/pencil line. If you’re equipped, a bandsaw works well here too. If you’re ultra patient, even a utility knife or X-acto work fine with several passes. A perfect cut is great, but don’t worry if your cut is less than perfect. Any voids will be covered in a fillet later on; so no fears! If you choose to omit external fillets for scale purposes, no worries as the hollow nature of the glass fairings allow internal fillets if you prefer!
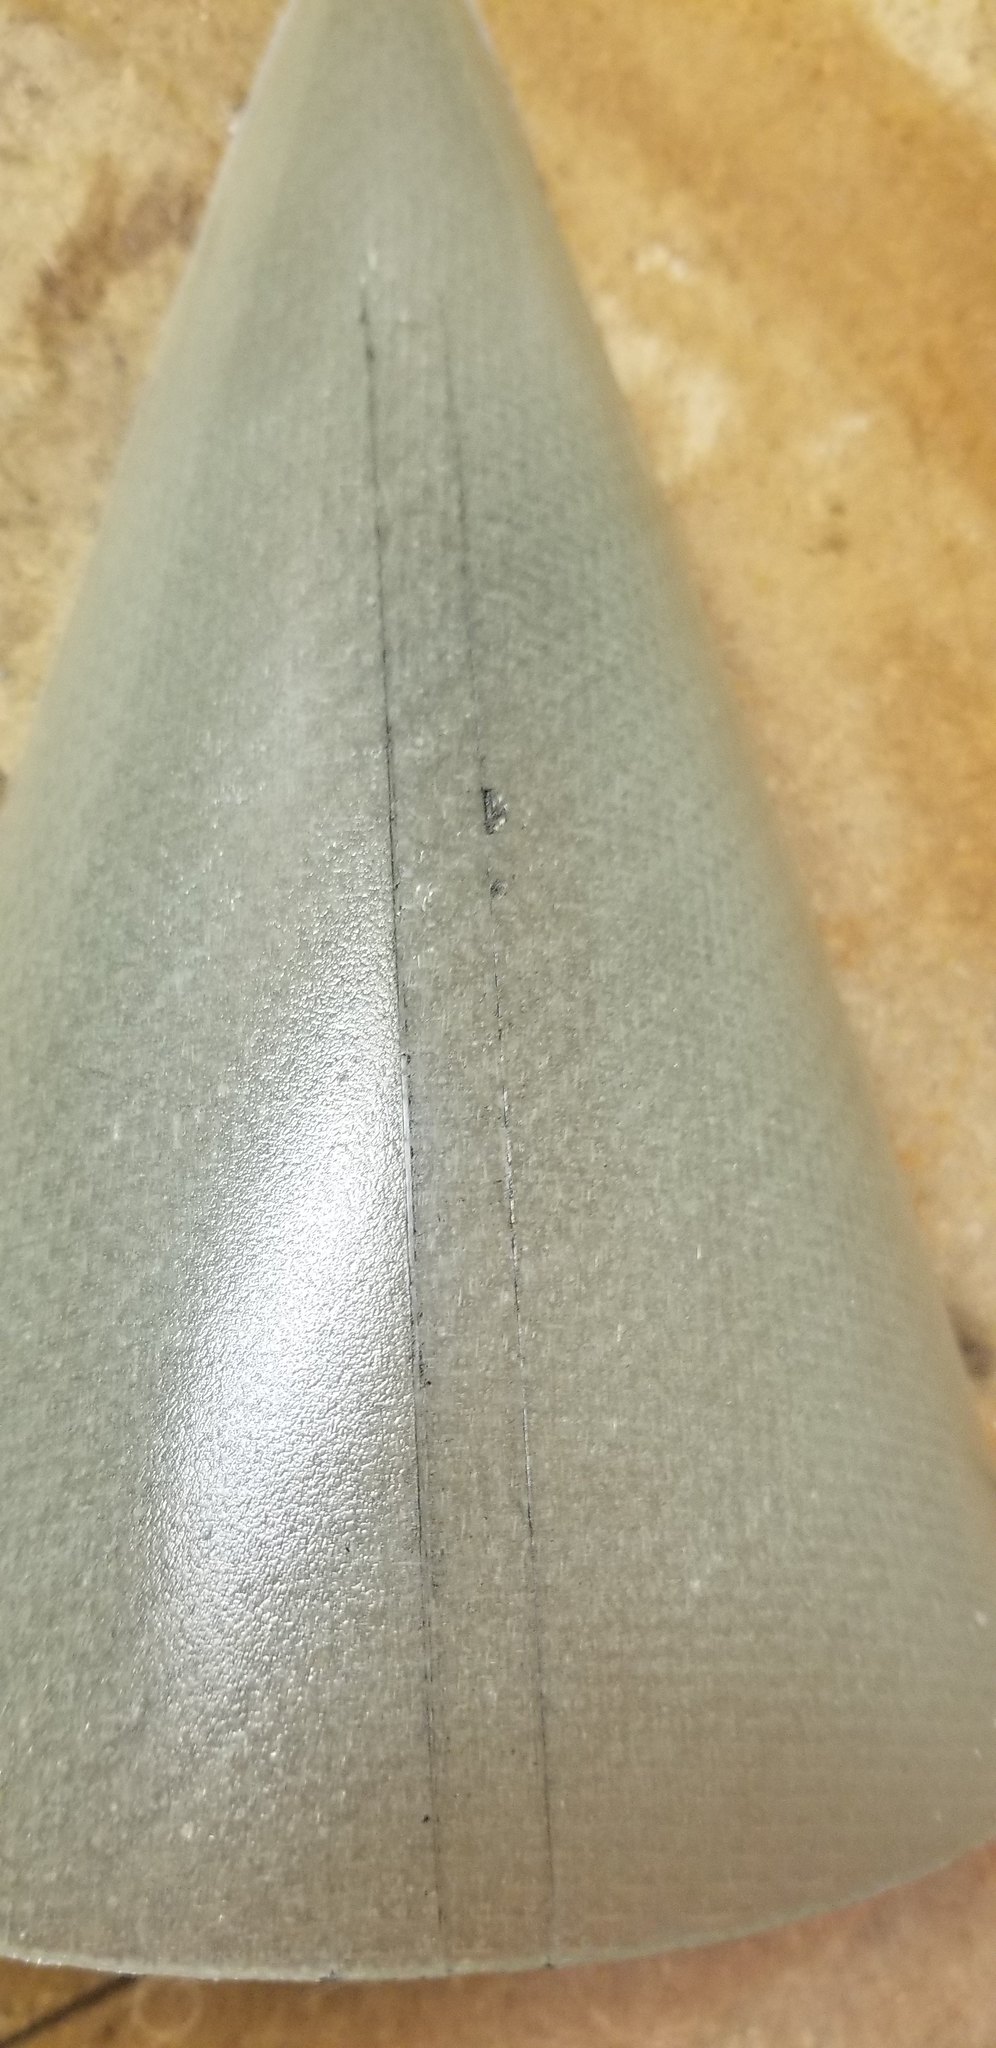


Reminder from an earlier post: This ¼” wide depression is roughly 4.5” long, measured along the fairing surface. Cutting the entire length of the slot places the fairings aft of the trailing edge of the fin in a scale location. The fairing may be more prone to landing damage in this positioning. Shorter slot=a more stout, less scale aft end. Longer slot= a more scale, but less durable aft end. The choice is up to the builder.

Tip: After determining where you prefer to position the fairing on the fin, lay the fairing with the outer surface down, against a drillable surface. Drill a ¼” hole at the forward end of your desired slot location. Then cut along the pencil lines to the hole to create the ¼” wide slot.

Final notes on Fairings:

As mentioned earlier, the fairings are come out of molds, thus are likely to have a bit of mold release residue left on them. Therefore, it is wise to clean them in warm, soapy water…or alcohol or other solvents if you like to “live dangerously” prior to bonding, priming, painting, or licking.

Bonding: it is a good idea to rough up the edges to be bonded. If you’re careful, a Dremel with a sanding drum works well; otherwise 150-220 grit sandpaper and elbow grease work just as well if you prefer. Always remove dust from surface prior to bonding using a tack cloth, alcoholic rag, or equivalent.

Transitions

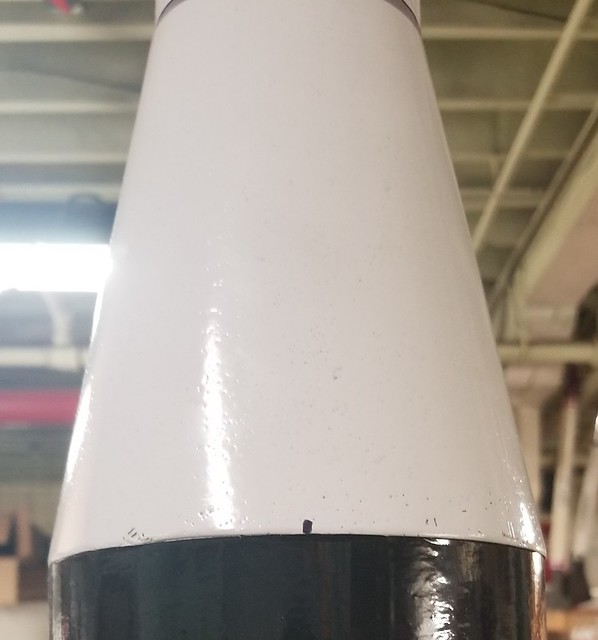
Unlike the fairings, the two transitions utilize a unique molding process that does not require mold release. The surface finish on the transitions are shiny and ready for primer. These two were pre-release test pieces without the ends trimmed properly.
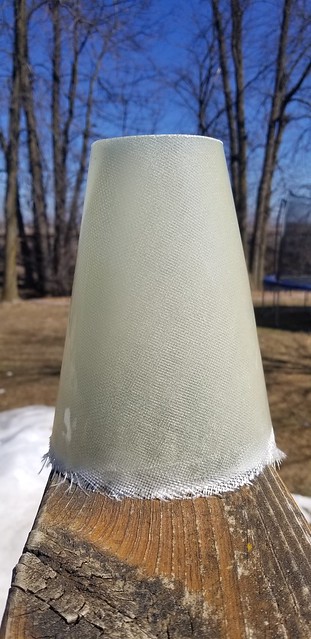
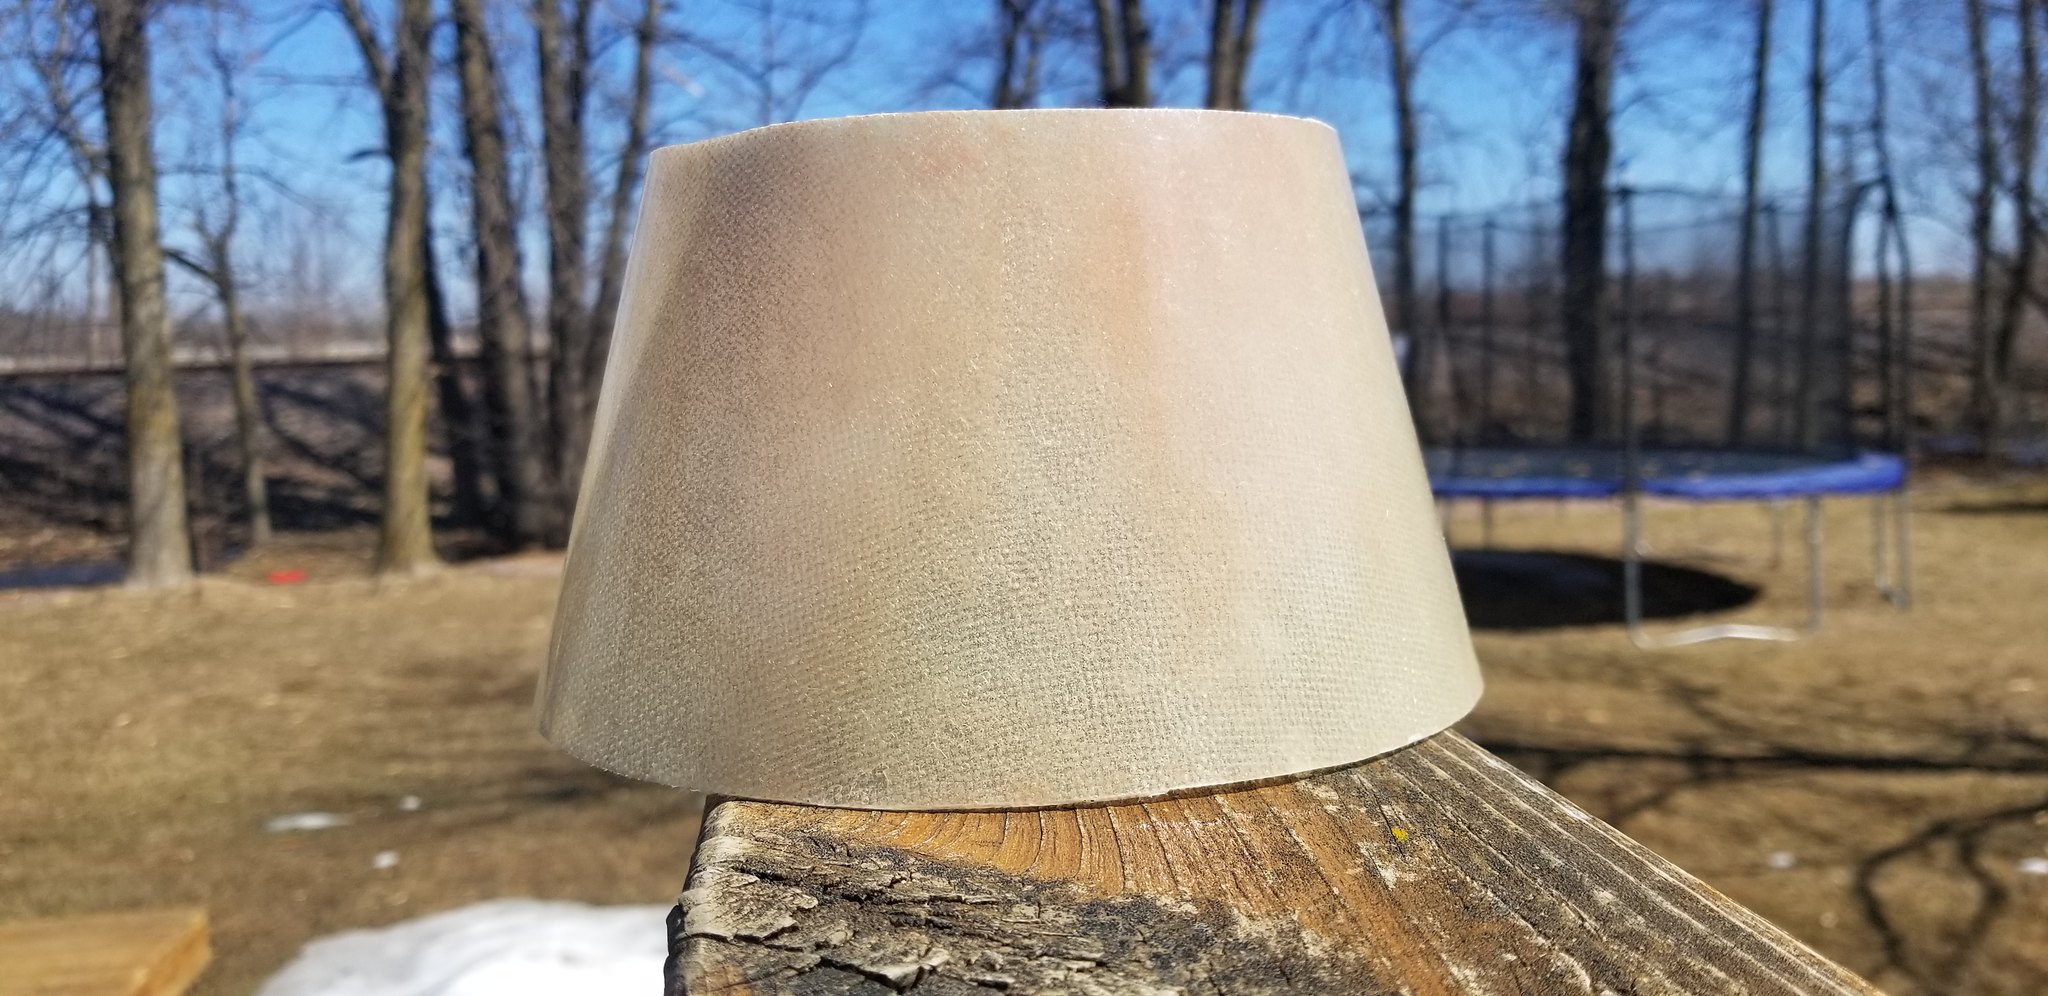


The builder may choose to scuff the surface lightly with 220 or 320 grit paper to knock off the sheen and provide more surface area for the primer and subsequent paint to stick to.
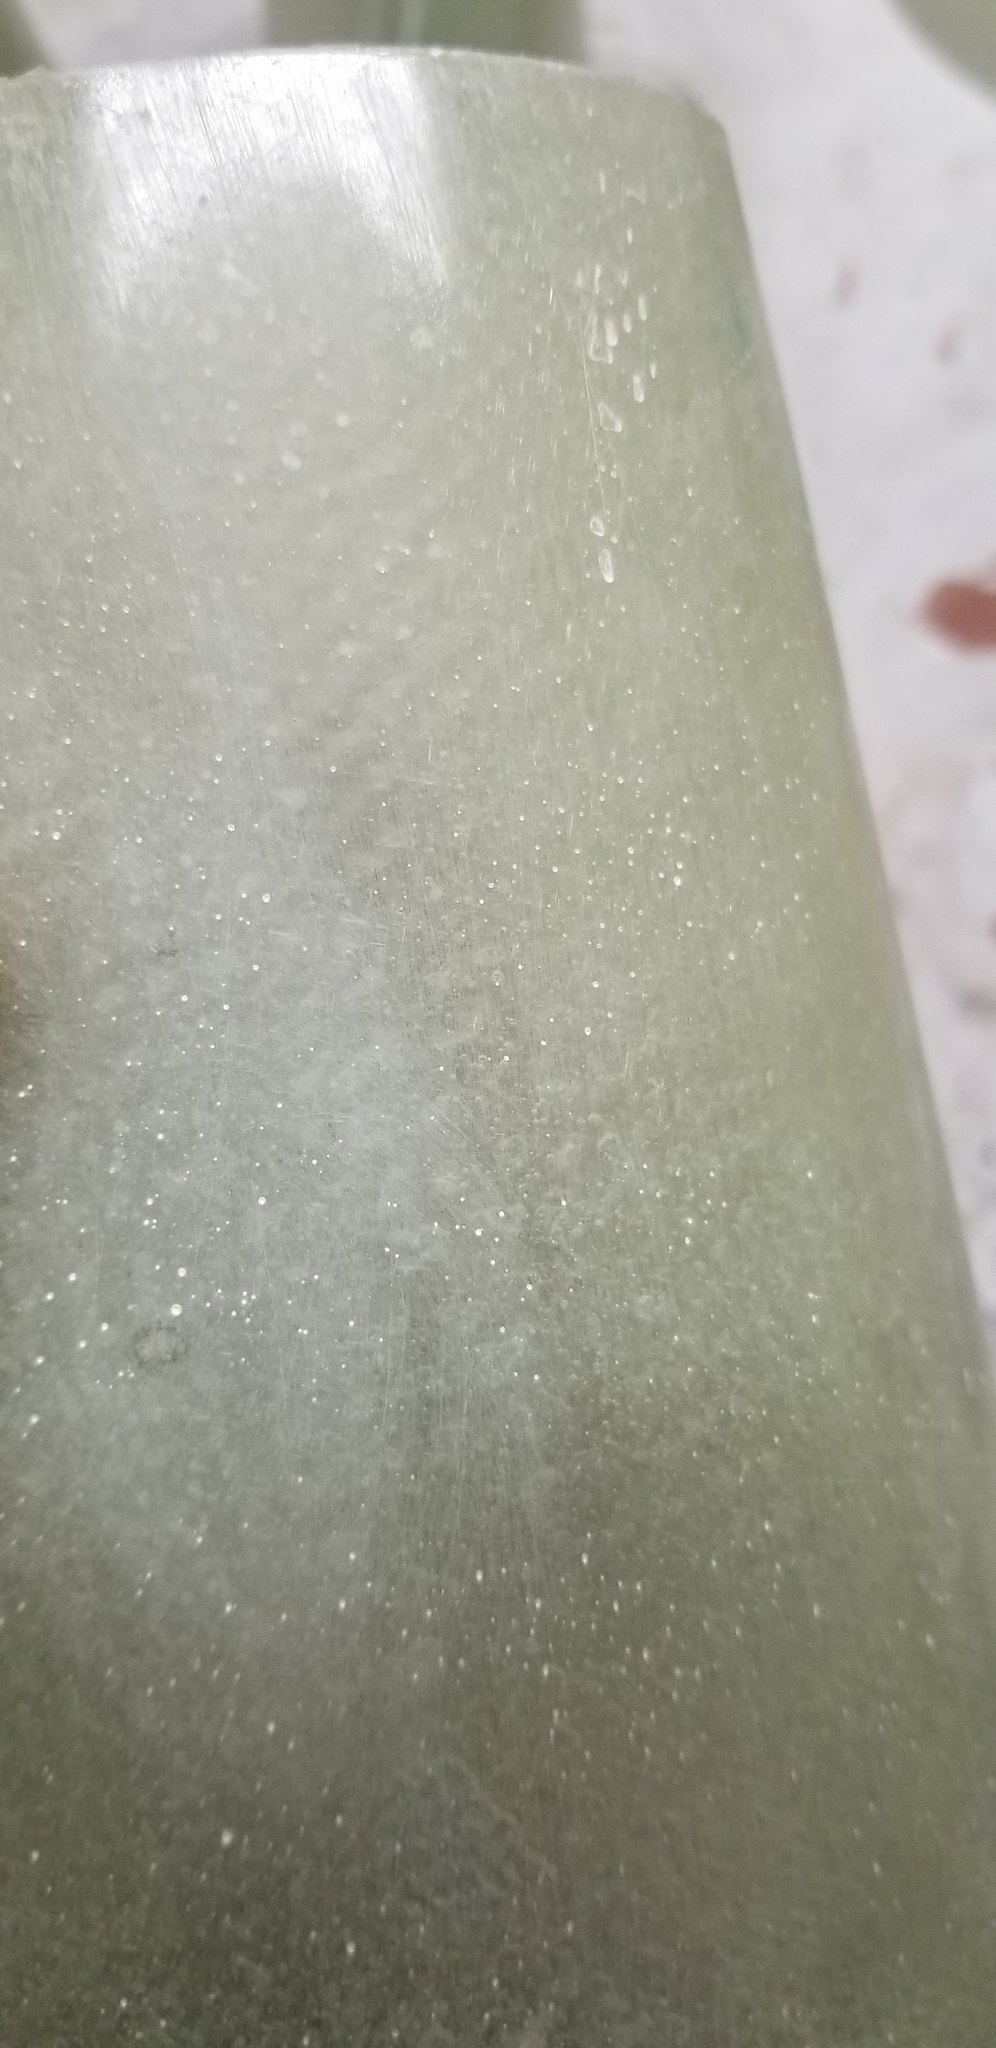


While we considered using a Gelcoat for the surface initially, the idea that a higher quality epoxy-glass part would be favorable to inferior polyester-based resin-glass won out. Long story short: a polyester based gelcoat would provide a nice surface finish but a heavier, lower strength, WAY SMELLIER part. The epoxy-glass transitions have a significantly higher strength-to-weight ratio, and therefore were chosen for the production run. Where am I going with this? Well, as with most or all non gelcoated glass parts, there are surface pinholes to fill. If you look closely at the photo above, the white specs are small voids in the surface that the builder may choose to fill. The voids become more apparent once you hit the piece with primer! (Remember...lower end is untrimmed yet on this one!)


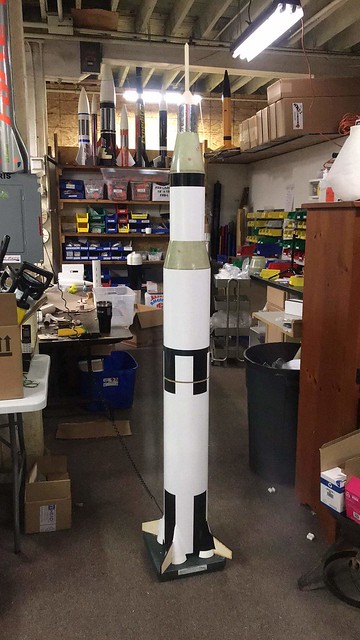
More decisions for the builder! How do you plan to finish this monster? The prototype was completely covered in vinyl except for three pieces: the lower transition, upper transition, and capsule!


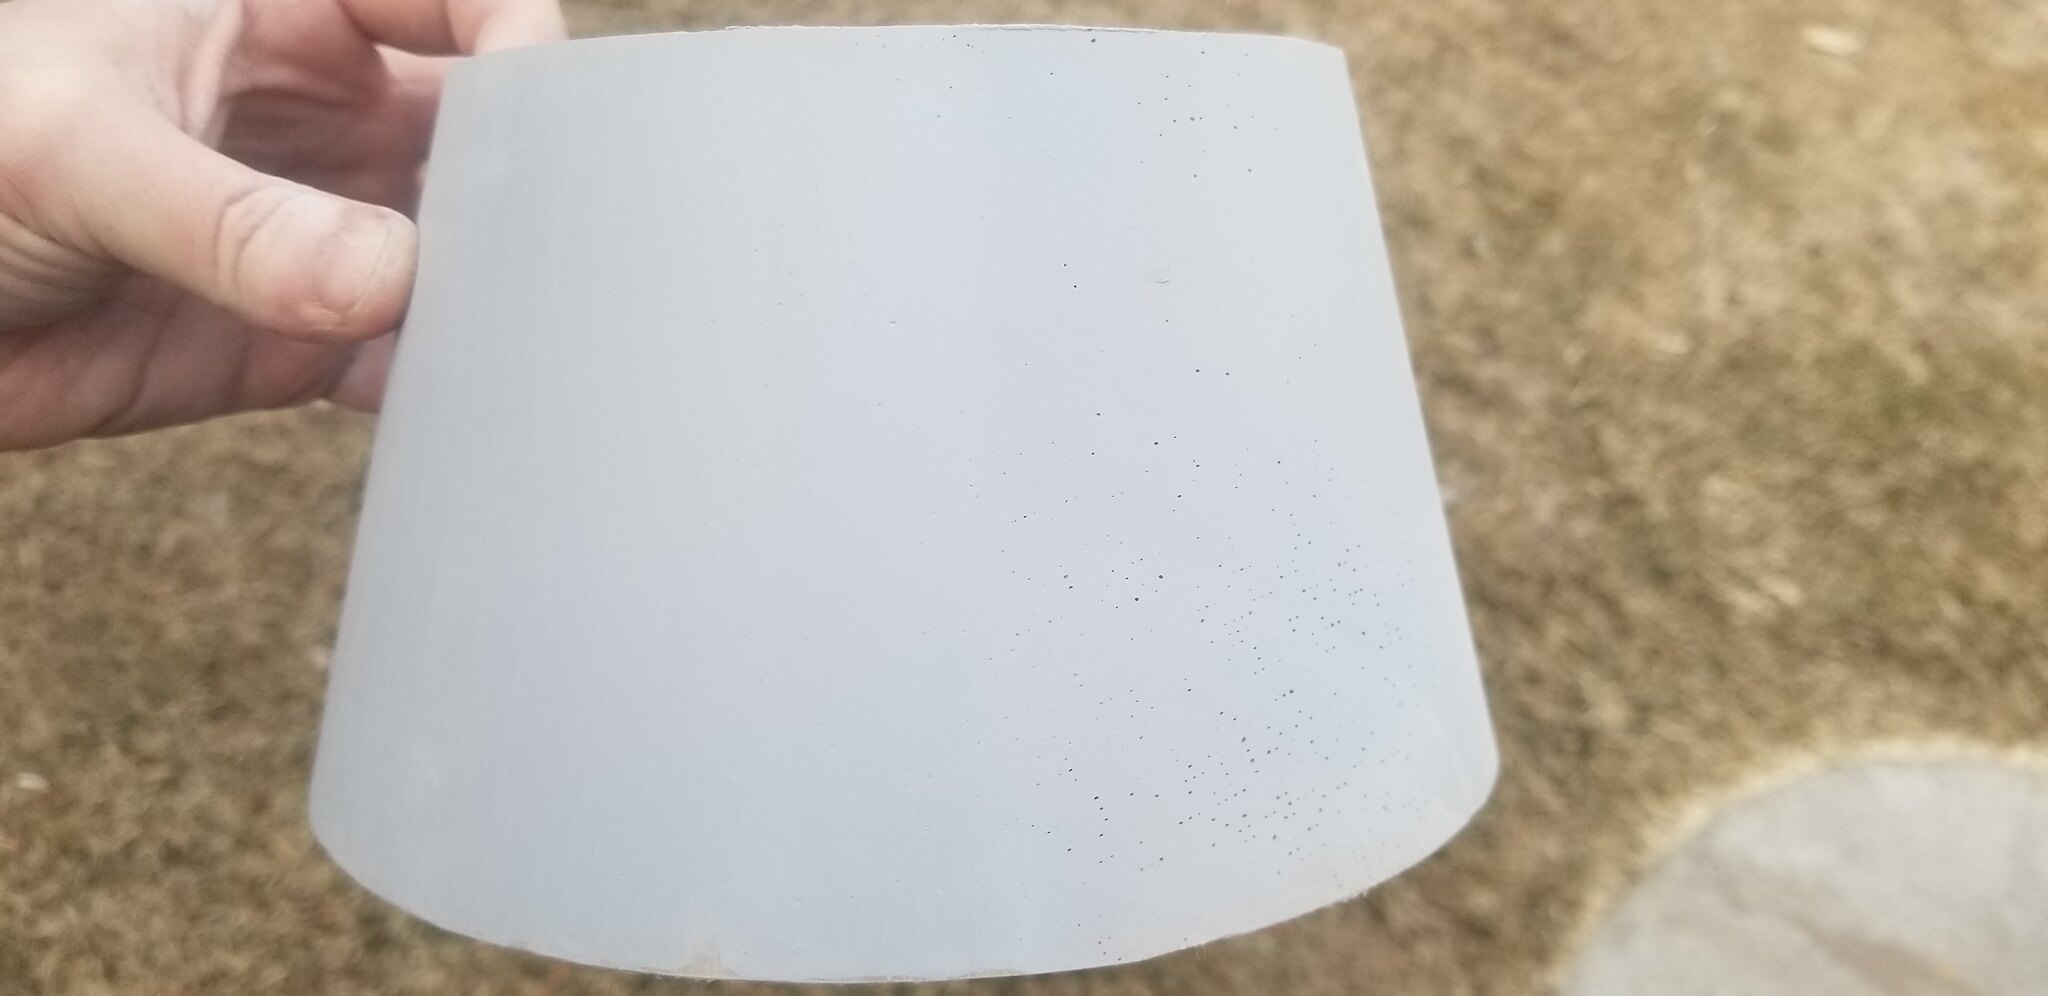
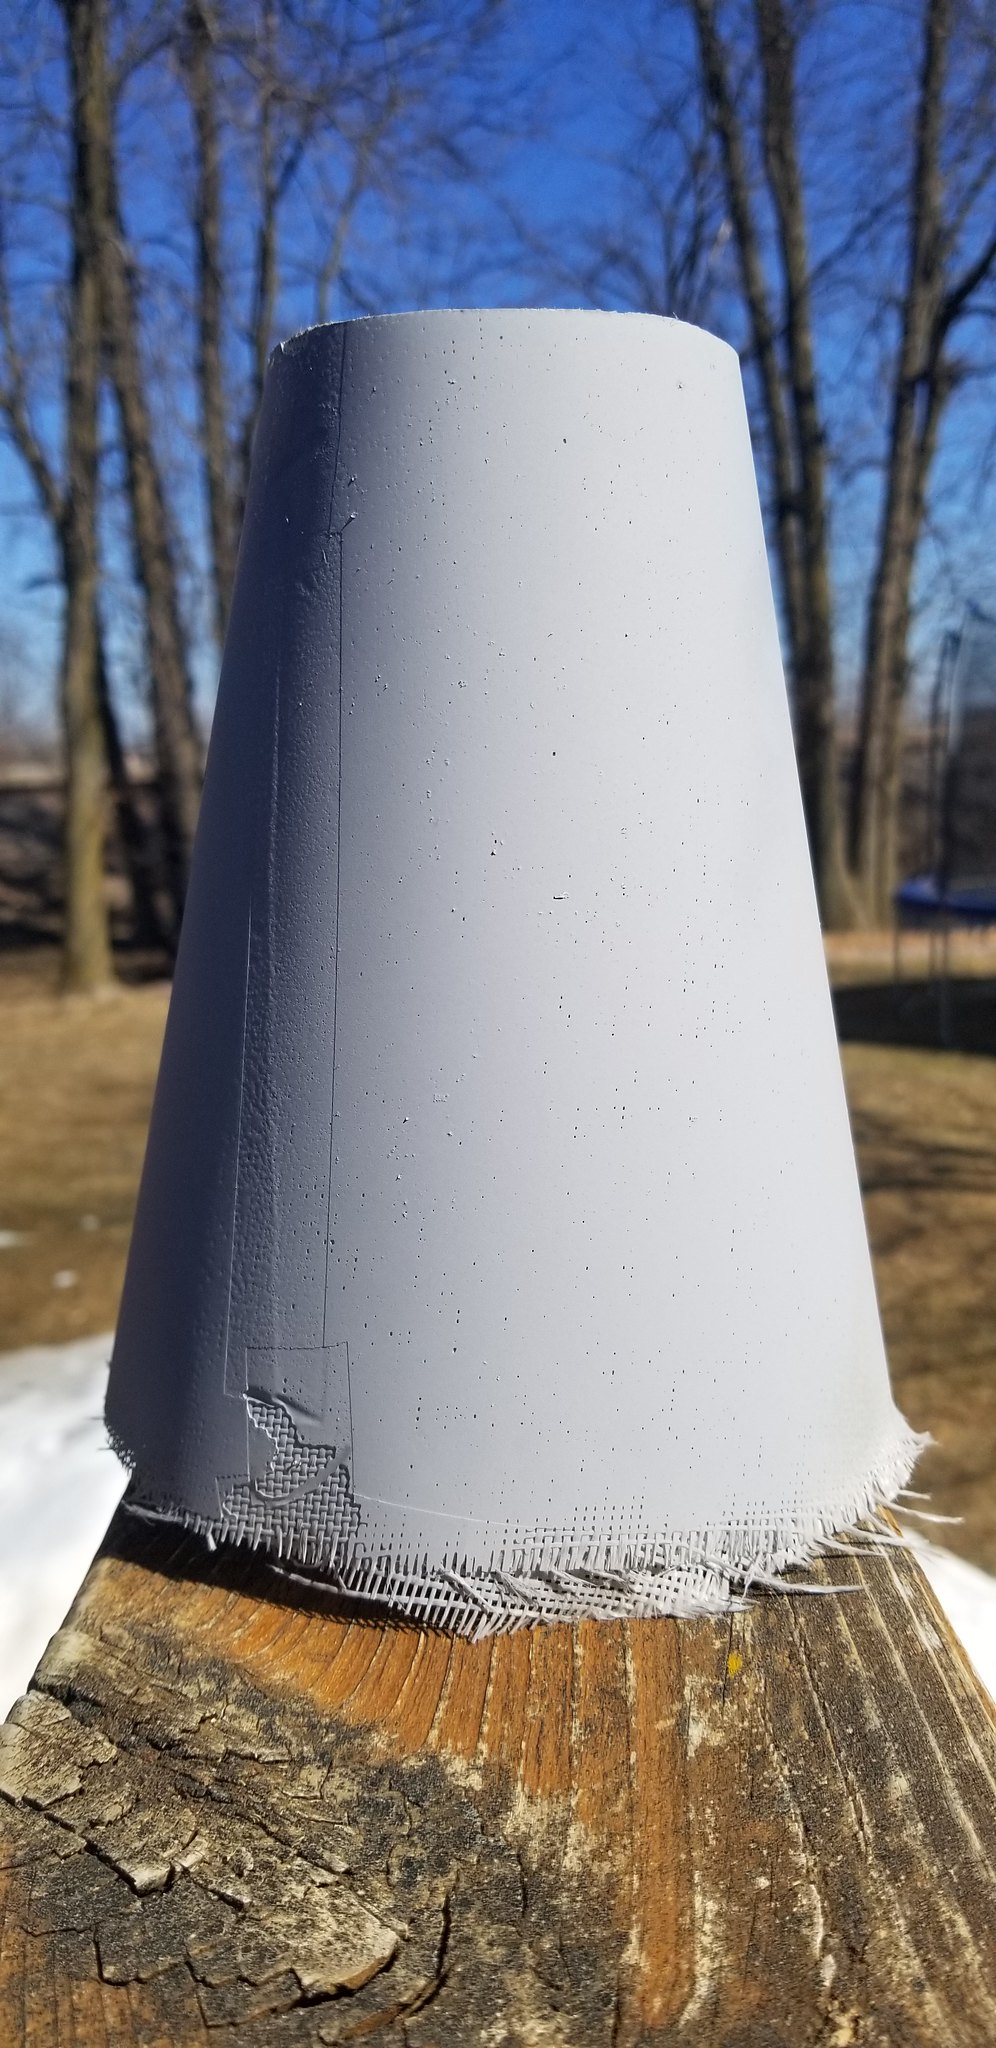
Due to time constraints, there was no filling and sanding on the prototype. Here’s what the upper transition looks like with no filling or sanding. Yes, the “pinholes” are slightly visible. It's about 8' away good, I'd say.:)

T8

For the OCD type (like me…most of the time!), there’s an easy solution to getting your transitions just right!
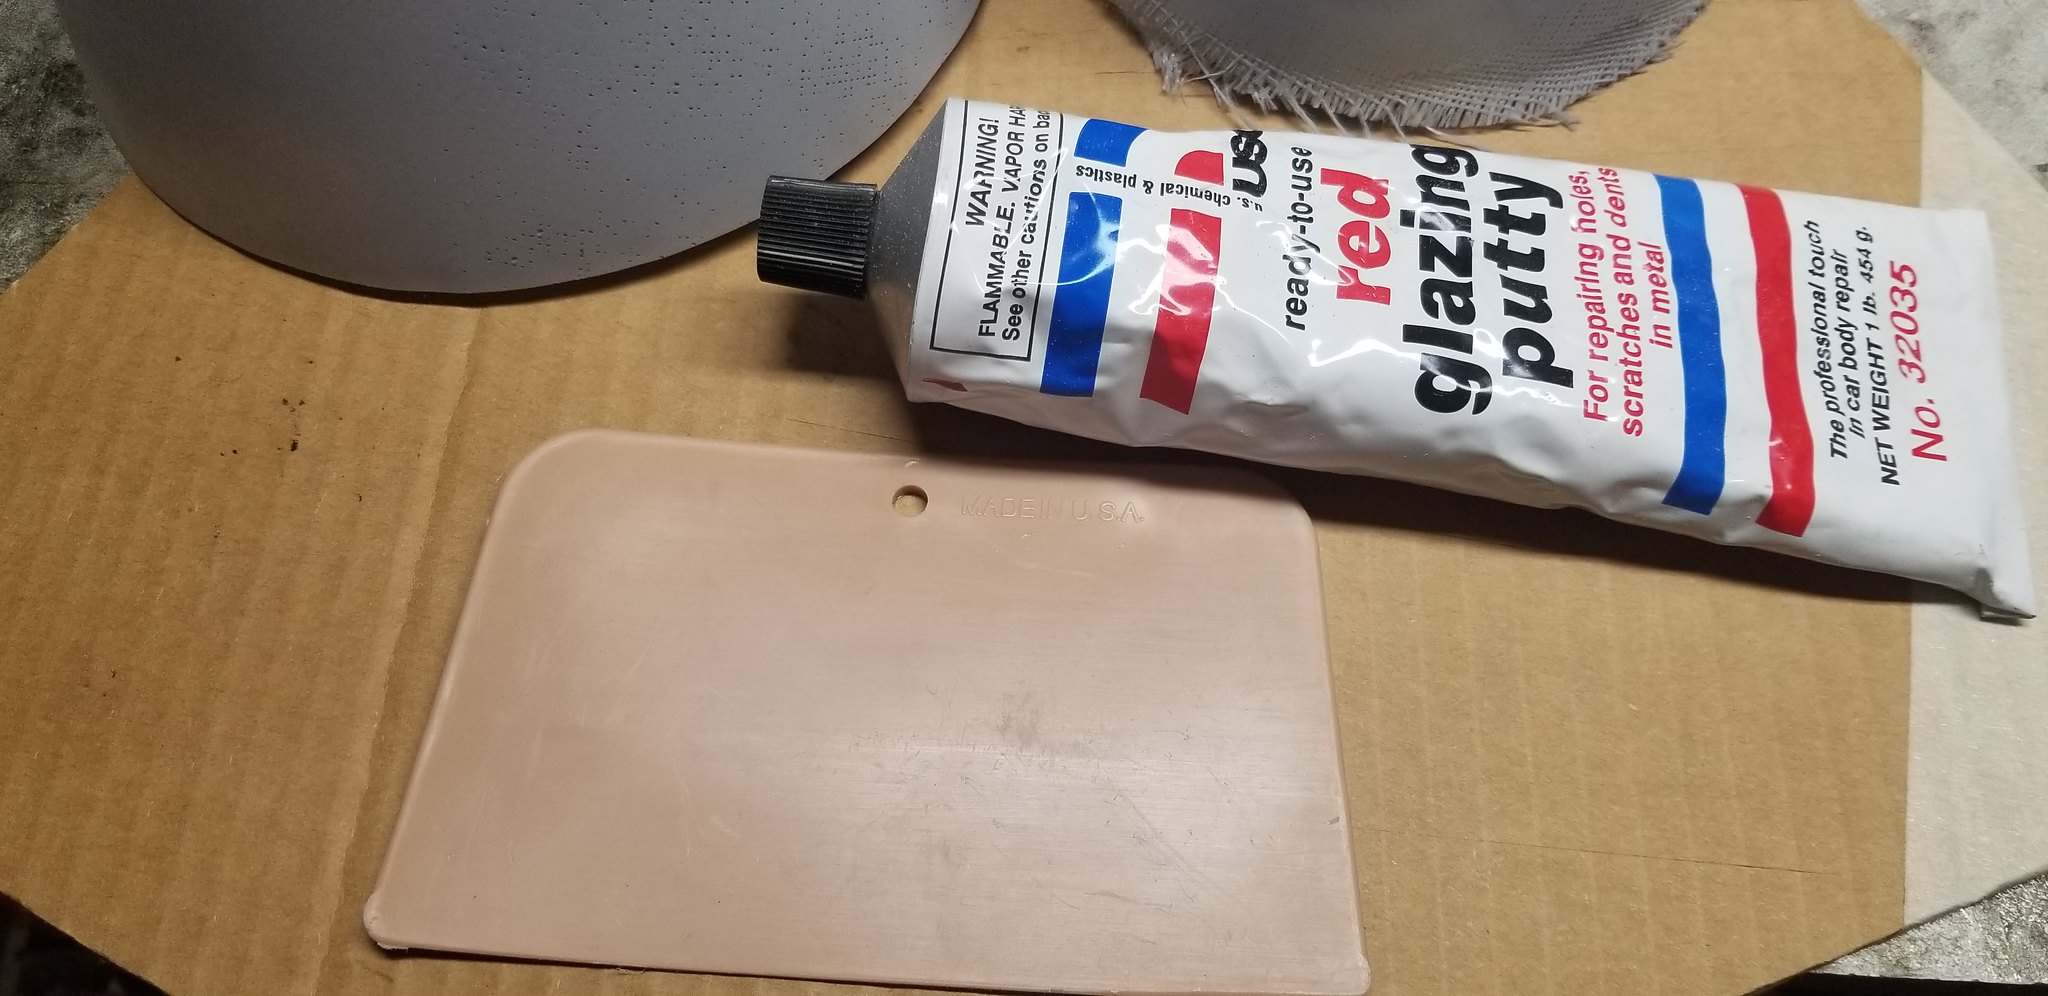


Add a very thin layer of glazing putty, spot putty, or equivalent to the surface. Unfortunately, I don’t have a photo of the area covered in putty…but I want to stress that less is more. All we’re trying to do is fill in the pinholes, not increase the wall thickness or outside diameter of the transition!!! Fill it, allow it to fully dry, and sand. A sanding sponge works well for the curved surface.

For the PPE conscious, a well ventilated area works well for application and drying (off-gassing). A respirator is helpful to keep the red nasties out of your respiratory system. Do not eat the red dust…it is not crushed red hot candy! Once you’re back down to the original glass surface, you should be good!
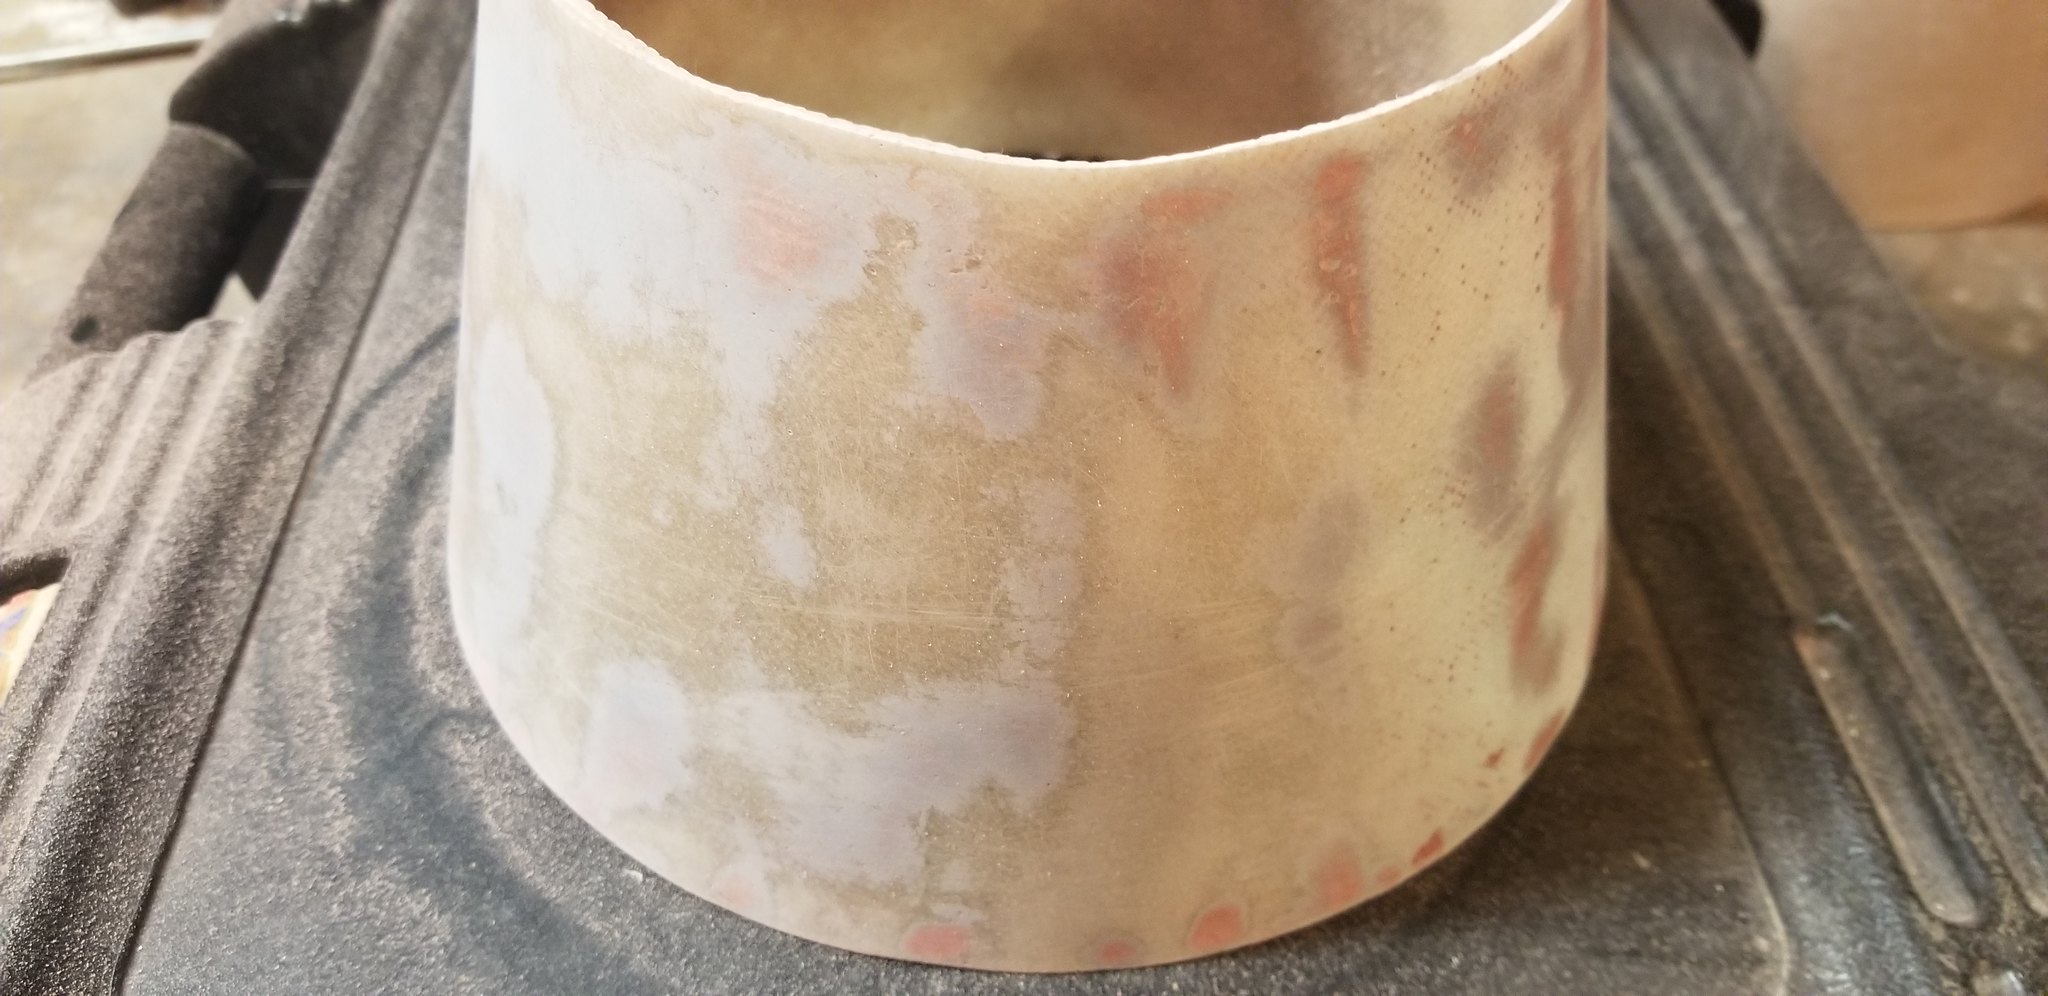


Hit it with another coat of primer to see!
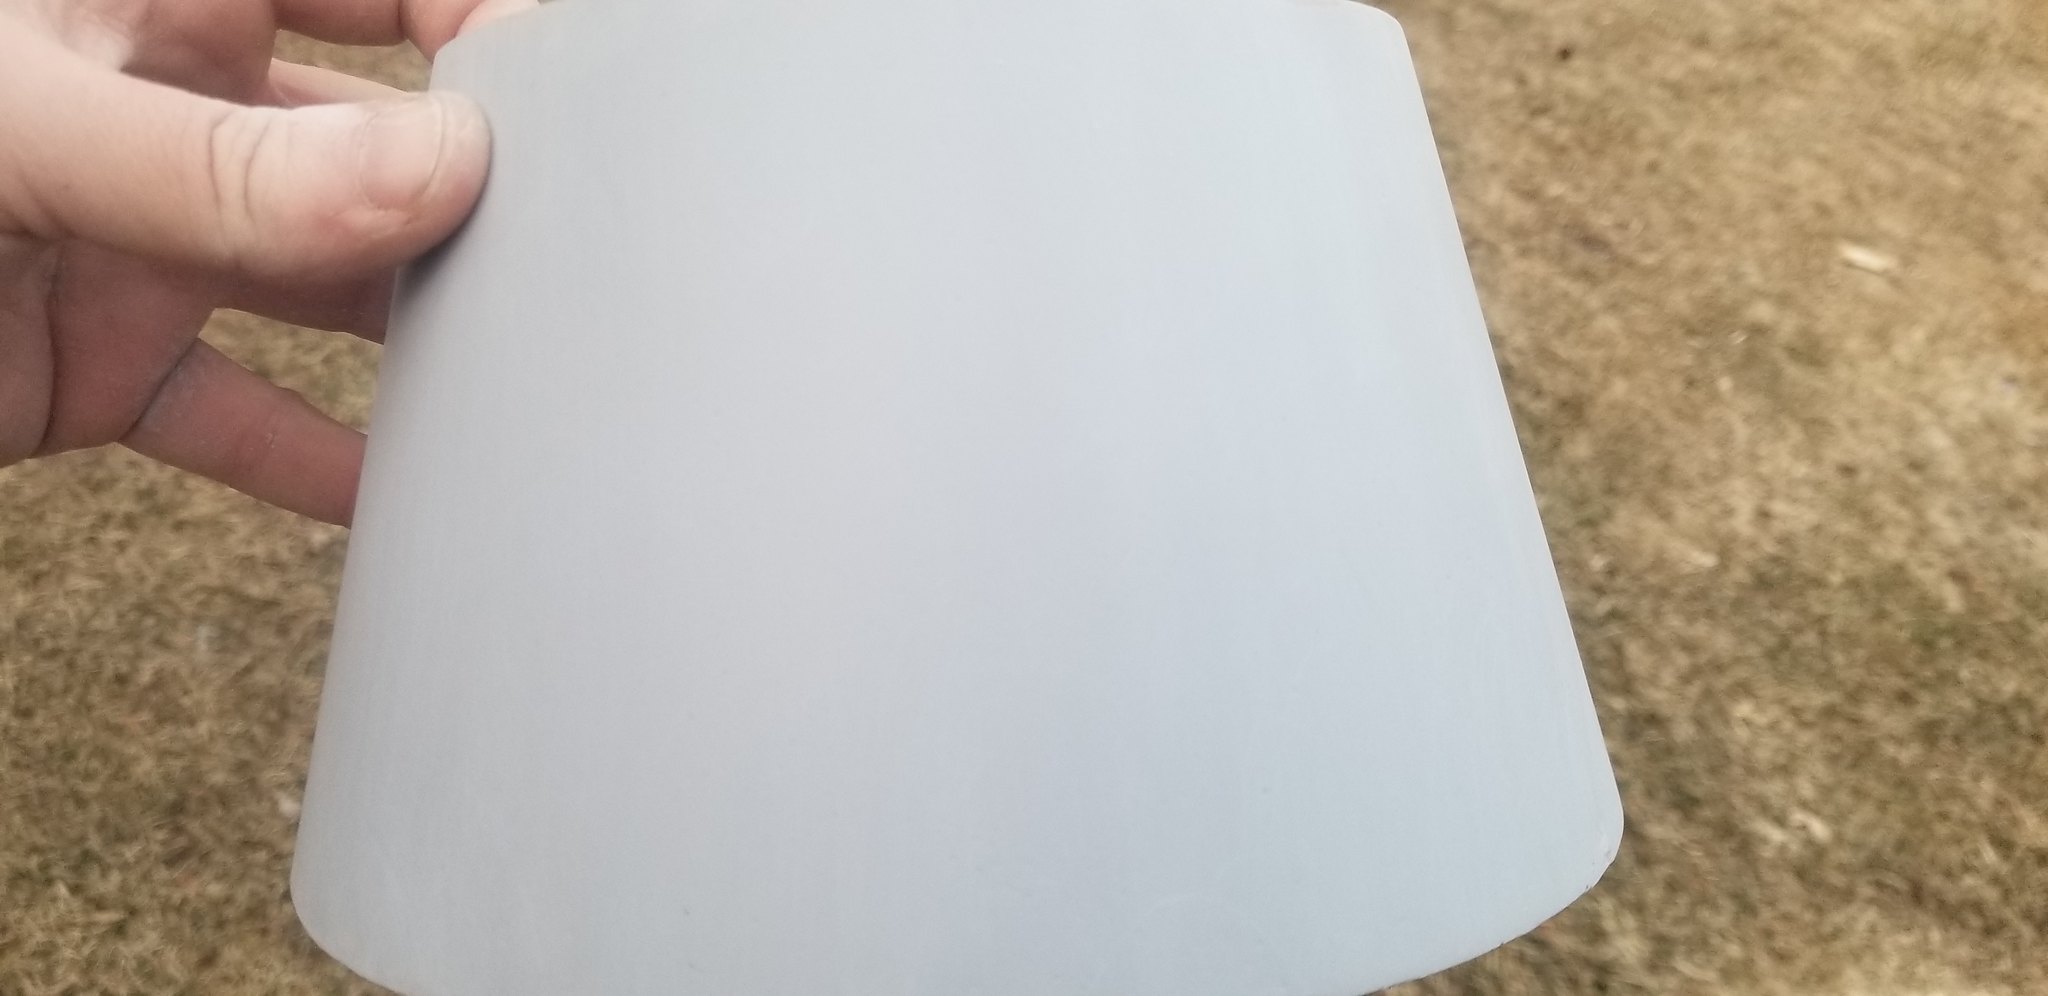


One and done, I’m happy with it!

For comparision, I only filled and sanded the left half in the following photo. Left half filled, right half untouched. Both sides primed. Paint the good half!

47516833821_162af438a9_k.jpg


Recovery section up next….
 
Expensive but works really well for fiberglass pinholes,just wipe on before priming.
 
Can't get pic to load look up fiberglass evercoat 440 exspress
 
I got my "nozzles" today, stainless, mounted to the rear thrust plate with machine screw and blind nut. Added 7 ounces. I've updated my ork/rkt file to fix some incorrect weights and now show 8-12 ounces balast required with a k-535 flying to around 2600' for a single motor version like I'm doing. IMG_20190401_151134595.jpg
 
Last edited:
That's an amazing effect on the back there. Too bad you can't stick one over the retainer and complete the set
 
I know but with all the fire coming out I don't think you'll even notice the center one missing. There is enough room you can mount one on a ply or fiberglass plate that would sit just inside the retainer andabitt on thet ledge and be held in place by the retainer ring so you would have five nozzles when on display
 
For the pin holes you may consider BVM jets "Pin Hole Filler" Works great, no sanding, no smell and you CAN eat it :)
Cool! Thx for sharing. BVM Jets has been around for decades, so I'm sure this stuff works great.

BTW, while searching for the BVM filler, I found references to more fillers on intlwaters forum (R/C Boating).
*U-POL Liquid Gold Glazing Putty (615ml/20.79oz.). O'Reilly Auto Parts sells it for 30 bucks but Amazon has it for $17.96 (Link)
*USC Icing finishing Putty (24oz.) Best price I could find was again on Amazon at $25.20 w/Free Shipping (Link)
*(This was an odd suggestion) Drywall Mud, aka Joint Compound. An alternative to "Mud" would be DAP DryDex. It's pink when applied and turns white when it's dry. Home Depot sells the 16oz tub for $6.20 (Link)
 
I decided to get a slimline bell nozzle retainer from giant leap for the center 54mm mount so should look nice, I'm hoping I can get it in silver.


I got my "nozzles" today, stainless, mounted to the rear thrust plate with machine screw and blind nut. Added 7 ounces. I've updated my ork/rkt file to fix some incorrect weights and now show 8-12 ounces balast required with a k-535 flying to around 2600' for a single motor version like I'm doing. View attachment 378966
 
burkefj, that will look great with all 5 nozzles.
How are you building yours? Single or dual deploy. Are you adding an electronics bay?
 
My ebay is a 54mm tube that mounts in the lower half against the side of the model, it will just run apogee single deploy since im not going to fly that that high....

burkefj, that will look great with all 5 nozzles.
How are you building yours? Single or dual deploy. Are you adding an electronics bay?
 
I drove over to see Bob at giant leap and picked up one of their 54mm mmillimeter belled retainers, the 54's are only in black but I got the idea to use thin strips of chrome self-adhesive monokote trim and wrap the Bell progressively so it didn't wrinkle, I think it will look ok..
IMG_20190405_095617737.jpg
 
Last edited:
So are these built dual deploy or motor deploy. Looking to grab me a kit soon and don't know if I should opt for the electronics bay? Thanks
 
I got my "nozzles" today, stainless, mounted to the rear thrust plate with machine screw and blind nut. Added 7 ounces. I've updated my ork/rkt file to fix some incorrect weights and now show 8-12 ounces balast required with a k-535 flying to around 2600' for a single motor version like I'm doing. View attachment 378966
where were these bought?
 
Back
Top