What did you do rocket wise today?

The Rocketry Forum

Help Support The Rocketry Forum:

This site may earn a commission from merchant affiliate links, including eBay, Amazon, and others.
No, the paper *is* the finish, no reason I can think of to put epoxy over them, at least not for LPR.
I realized that was your plan with that rocket, however you mentioned scuffing paper after using filler, finish in the past. Just curious about various techniques, approaches. A nice smooth finish accents low, mid, high power,.... hell, even N. Korea's rockets look shiny!
 
I realized that was your plan with that rocket, however you mentioned scuffing paper after using filler, finish in the past. Just curious about various techniques, approaches. A nice smooth finish accents low, mid, high power,.... hell, even N. Korea's rockets look shiny!
Ah. Well, normally I do filler/primer on everything (although I hate sanding it). I don't think it accomplishes much on papered fin surfaces, though, since they're already smooth, and sanding the filler primer on them tends to be a delicate operation. The filler/primer *does* help at the un-papered edges of the fins, so instead I just spent extra time with additional layers of glue and sanding at the edges, with the hope that they'll be sufficiently smooth without the additional filler/primer step. It's an experiment, we'll see how it goes. I don't mind if the finish on this rocket isn't perfect.
 
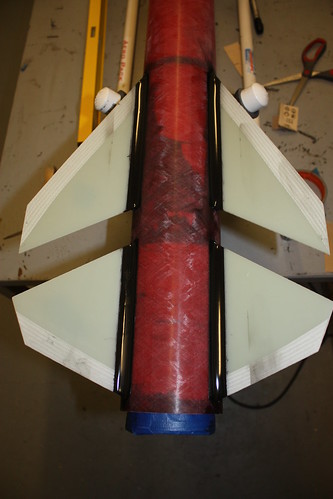
Had a great afternoon/evening in the rocket shop. Put down the first set of external fillets on my Extreme Darkstar. It has been quite a while since I worked with ProLine 4500 before starting this rocket and after about 5 batches I still feel exactly the same way as always. It is the best finished product of any epoxy I have used, BUT it is the most difficult and messy to prepare and use.
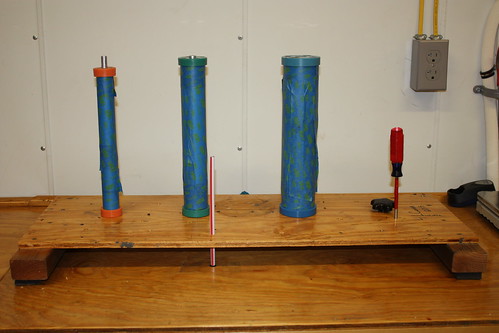
Mixed up a batch of Vee-Oh-Lay and poured what will eventually be 3 motors: 38mm I200, 54mm J338, and 76mm K500.

 
Packed the car backseat full of rockets for Kentucky tomorrow. Can hardly sleep yo.
 
Sanded and cleaned up some 8" tubing Sharon picked up a couple of days ago. We might be looking for some 6" bolted hardware soon.
DSCF0790.jpg
 
Ordered from AC Supply
--------------------------------

Order Details

--------------------------------

Item : Little Joe 1 - Estes Rocket

SKU : EST7255

Quantity : 1

Item Price : $19.79

Item Total : $19.79

--------------------------------

Item : Saturn V - Estes Rocket

SKU : EST1969

Quantity : 1

Item Price : $53.99

Item Total : $53.99

--------------------------------

Item : Nike Smoke - Estes Rocket

SKU : EST7247

Quantity : 1

Item Price : $14.99

Item Total : $14.99

--------------------------------

Item : Black Brant III - Estes Rocket

SKU : EST1293

Quantity : 1

Item Price : $8.99

Item Total : $8.99

--------------------------------

Item : Saturn V RTF - Estes Rocket

SKU : EST2160

Quantity : 1

Item Price : $41.99

Item Total : $41.99


--------------------------------

Sub-Total : $139.75

Shipping Method : [none specified]

Shipping Amount : $0.00

Estimated Tax : $0.00


--------------------------------

Total : $139.75

--------------------------------
 
Have a 3" tube, lower half (cut) of a Big Daddy BT slotted, some balsa, and a BD nose cone. It will be a couple of inches short but "Lowviathan" seems an appropriate name. Just figuring out whether to use a stuffer tube or not on a cut shoulder BD NC. Who knew there were so many threads on stuffers and baffles. That said do any of you push metal mesh down the stuffer to act as a cooling baffle? Seems beneficial and accessible for a nose cone eject model with a card stock sleeve insert then the mesh.
 
And? Good flight? Motor? Altitude? How was the recovery? Any launch photos?

GreAt flight. Sorry for the delay that eight hour commute was a PITA. It was so windy today at sod farm in Kentucky. 16-60 mph at higher altitudes. Bad rod angle initially. Went off range and had my first neighborhood recovery but profile was straight up at 1.83 caliber. The drift under chute sucked! Same with Nytrunner’s flight in a J also went off range. My flight was to 2300 ft on an H130W trimmed to 10s. Somebody else lost a L2 rocket at estimate 4200ft deploy and drifted total far off without a tracker, Will Connor I believe. I had to ask an old lady in the neighborhood who later found my rocket at her neighbor’s place and searched with landowner permission. I later flew two low power birds that also excessively drifted. Lost an RMS 24-40 casing and spacer. All in all we were glad to get flights in after HARA got rained out. But those winds were a lunatic mess. Saw Peter’s cert flight go straight as an arrow. We were all afraid his rocket was gonna weathervane.

Madcow motor retainer worked. That bluegrass sod farm is legit inside a neighborhood it’s nuts. You got rolling hills then houses next door. Thankfully they are sorta familiar with returning rockets lolz...”My son used to do that they’d say with a smile.”
 
Last edited:
I built this composite curing oven after watching ShadowAero DVD set about composite construction instructed by Dave Triano. It’s unknown whether or not the rocketry business has closed because the website has been down for several weeks.

Rule Nos. 1-3 are SAFETY, SAFETY, and SAFETY.

Rule No. 4 is read Rule No. 1.

Rule No. 5 is 3-2-1; Read 3 times, measure twice, and cut once.

Most online solutions were either above my skill set or did not meet my requirements. I bought the ShadowAero construction plan and instructions and it eliminated a lot of trial and error.

Assembly was straightforward although both instructions and parts (materials and electrical) list should be updated accordingly. I had to cut panels at Home Depot because an entire sheet would not fit in the car. I used scrap 3/4" plywood as a breadboard. The oven can be easily moved because it weighs less than 3500 grams including the breadboard.

Curing chamber dimensions are 12" W. x 12" H. x 48” L. because most airframe tubes are 36” length and the heat source required 8” W. x 10”. Uncut panels are stacked vertically and warping does occur. I didn’t cut panels exactly square. Inner cradles are friction fit. Panels didn’t flush fit correctly however gaps were sealed with aluminum foil tape.

A must have skill is electrical wiring knowledge. Wires are 18AWG. Box fan is rated high temperature (90 deg. C) and used to circulate air. Box fan, heat lamp, and PID operate when the circuit is plugged into a power source. The PID monitors and adjusts power consumption to maintain its set value temperature.

There were no issues during testing. More than likely, I will secure the box fan cradle with drywall screws.

I will post website acceptable images later.
 
More like last night for me, but here it is:

-Took my kids out to launch their Generics, convinced my wife to launch my Crossfire, and I flew my redshfted Indicator+ for the first time. Everything went flawlessly, and had great weather. Clear skies, 65 degrees, and only a light 3ish mph wind.

- Installed my JL Chute Release and Altimeter3 on my scratch BT60/24mm payloader. The JLCR is waaaaay cool. Dual deployment the easy way lol. Now just waiting on my 808 camera.

- Decided to make a Super Alpha with my leftover BT-60 tube. I cut out fins, papered, and attached them. Also built and installed an 18mm mount with a Rocketarium screw-on retainer.

- Finished a pair of Estes Star Troopers. they were the original first rockets for my kids, who promptly lost/destroyed them. Now that I know about things like papering, fillets, etc, I built these 100% better than before.
 
Started repairing to crashes:
Hawk Hobbies Orbital Transport: the AT E20-4 was more like an 8! Nose blew about 15 feet from the ground...ugh.
Neubauer Maga Dagger: didn't have the elevator elastic tight, so she didn't glide horizontally...interesting repair, though. Used a cut bt coupler on the outside! Worked nicely.IMG_20190312_200943.jpg IMG_20190314_173900.jpg IMG_20190312_201036.jpg IMG_20190312_200955.jpg IMG_20190312_201005.jpg
 
Good flying with PSC473 at Weber Farm yesterday. Sunny skies but cold with light winds. Two flights on a Mach1 Scat to 1327' and 1416' with the Altimeter 3. One "pre-cert" flight on Madcow DX3 on an I364 to 2635". Drogue charge in an election canister did not fire but saved by the motor charge. I also passed my L2 written exam in preparation for cert flight at Red Glare.
 
Back
Top