3D Printing What Are You Printing Today?

The Rocketry Forum

Help Support The Rocketry Forum:

This site may earn a commission from merchant affiliate links, including eBay, Amazon, and others.
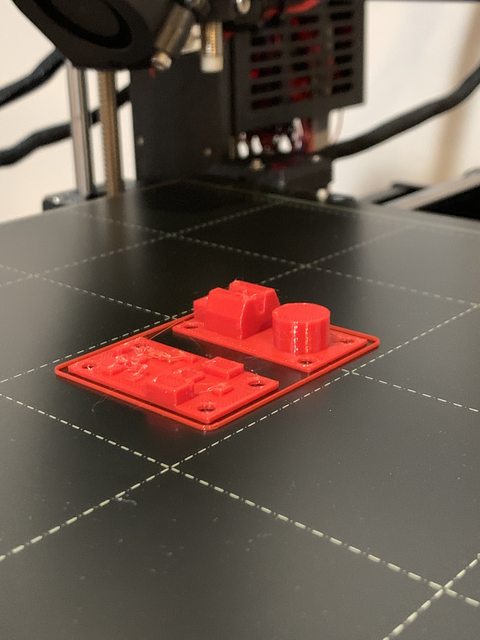
Easy Mini dummy for mock ups (thanks GrouchoDuke!)
XgTYRjQl.jpg


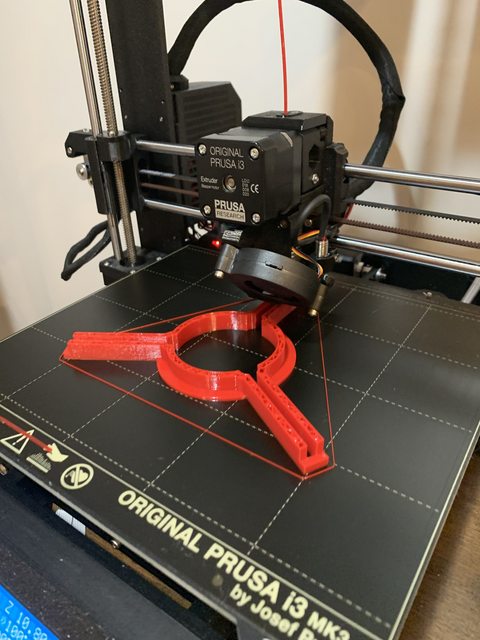
Go Devil 54 fin guide:
BAlPydql.jpg
 
Printed the second part of a two part 2.6" booster. Tolerances was a little tight, but some sanding I was able to get a good fit.

IMG_9488.JPG

Thie send part contained text, a sort of advert for Binder Design's reserach hardware. Unfortunately, the work was done on a work computer, so I was unable to download the appropriate font into SoliWorks... But it is a close second.

IMG_9486.JPG

K-Power 2.6 as I am dubbing the rocket will use 54mm (38mm w/ adapter) FISHER Research hardware pictured here with the 2, 4 & 6-grain cases.

IMG_9485.JPG
 
Simple print today; I am installing a Giant Leap tailcone retainer on mylatest build, and the retainer is designed for Giant Leap's brand of phenolic tubing. Needless to say, the Binder Design kraft tube was a little loose in the tailcone. I printe up a small shim using some PETG to help secure the motor mount a little tighter.

IMG_9502.JPG

A little sanding of the kraft tube makes for a nice snug fit.
 
Ran the test print after helping my boy assemble our new Ender 5.

Didn’t know the test print had such a huge base. Paused it 9 hours in.

IMG_0826.jpg
IMG_0827.jpg
 
As they say,
I just printed a BT80 inch Fatboy nose cone and fin can.
As they say, 'pics or it didn't happen'!

I have a Fatboy nose cone so it would be nice to have a fin can for it. Did you create the fin can with the OpenSCAD file? If so, do you mind sharing it?

I need to finish working on the 29mm Von Karman nose cone file and post it as well.

Thanks,


Tony
 
I can share it. Which material? I printed mine in ABS. I will size it for PETG is that is what you are printing.
 
I did my first rocket related print on my new Ender 5.

It’s avbay for a Quark and battery made in the shape if a 24mm E motor with integral thrust ring. I have 24mm versions of the Pro Series motor retainer, and I have found that I can put a motor mount in a nosecone and retain a little avbay like this quite handily.

Just a simple tube with rails on the inside to stabilize the Quark.

IMG_0829.jpg
IMG_0831.jpg
 

Attachments

  • CC_3.jpg
    CC_3.jpg
    140.7 KB · Views: 85
  • CC_2.png
    CC_2.png
    289.9 KB · Views: 84
  • CC_1.png
    CC_1.png
    353 KB · Views: 81
  • 3g single - 3g single(2).stl
    1.5 MB · Views: 53
  • Lid - Lid.stl
    1 MB · Views: 44
As they say,
As they say, 'pics or it didn't happen'!

I have a Fatboy nose cone so it would be nice to have a fin can for it. Did you create the fin can with the OpenSCAD file? If so, do you mind sharing it?

I need to finish working on the 29mm Von Karman nose cone file and post it as well.

Thanks,


Tony

What material? PETG? Measurements change based on the material.
 

Attachments

  • B_3.png
    B_3.png
    325.4 KB · Views: 86
  • B_2.jpg
    B_2.jpg
    59.3 KB · Views: 86
  • B_1.jpg
    B_1.jpg
    48.6 KB · Views: 85
  • LiPo 2s Holder 450 mah - 2S lipo holder V31.stl
    143.4 KB · Views: 34
I had similar issues with the tips of the nosecones I was printing - the tip won't hold it's shape. I used the detail slider in Slic3r to add detail to the tip of the nose cone. It helped quite a bit but at the cost of blobs near the tip. Next time I'm going to try the trick of adding a solid in Slic3r and modifying the layer height and speed for the tip region.

I also printed my coupler separately since I wanted to also have a tracker mount option. But the one piece unit looks good.

Tony
 
Man, I hate that the edit period for posts is so short! I meant to add a picture of my jig with all 3 fins in place. If it did it again I would use a higher infill to make it a little stiffer but it works well enough. The rubber bands really help by holding the fins very firmly against the body tube. There is no play at all in the fins. I start with lighter rubber bands to hold things in place before using the heavier ones. Really a two person job though to make sure things don't move around too much while putting the bands on.

Next up: some 4" casting bases and a test packing tool.

Tony

completed-jig.jpg
 
I lower my print temp and speed and foxed that ditzel at the tip of the nose.

I was going to say, try lowering the temp by 5 degrees, if PLA I go from 215 to 210, in 1 degree increments over each mm, Slicer app dependent. So on my first layer I go with 215 for PLA then drop to 214 on the second layer, etc. down to 210. I will sustain 210 until the end unless I have some transitions to deal with, in whcih case I will up the temp to deal with them then lower it again. Same with speed, except it is less flexible than temps, which can be adjust in 1mm increments vs. speed which only has first layer then everything after that.

Bottom line. From what I am experiencing, nozzle temp, bed temp and speed play a major role in the results...so does retraction and for that matter many more variables depending on the print. FDM 3D printing really is an art form more than an absolute rule.

That is exactly what I have found. Distortion at the top of the print is print speed and nozzle temp. Distortion at the base is bed tenp or print speed.
 
This is my first attempt at a fatboy - this on is a fatboy XL.
 

Attachments

  • fatboy.jpeg
    fatboy.jpeg
    206.6 KB · Views: 93
Chuck,

Looks very good-you're going to put Estes out of business!

Fred
 
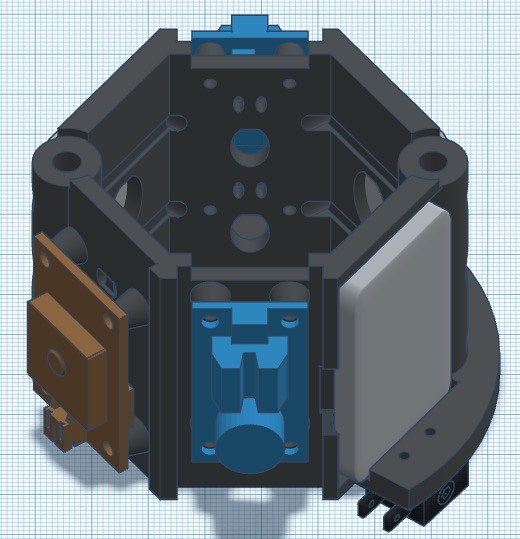
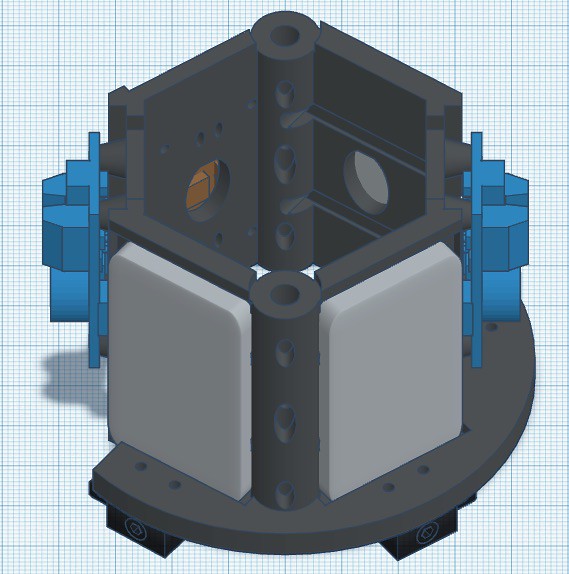
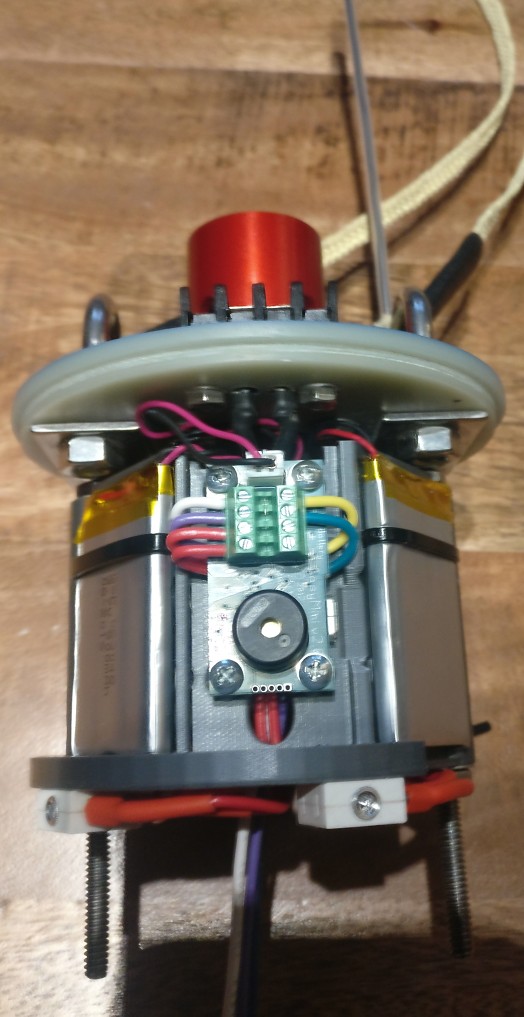
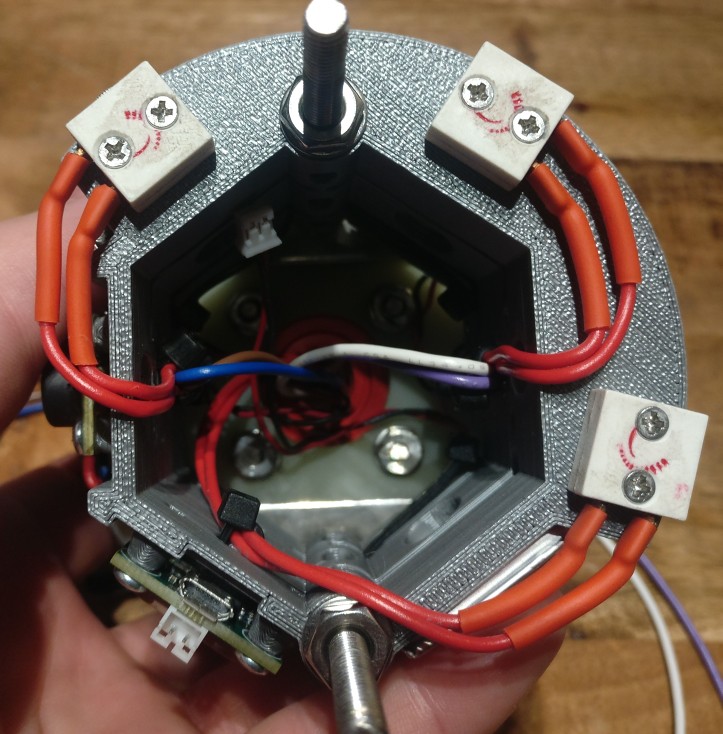
Working on a new HED AV bay for my 4" BlackFly. The sled is a dual altimeter (Altus Metrum Easy Mini) single tracker (Altus Metrum TeleGPS) with independent LiPos (2S 900 MaH) and independent screw switches (FingerTech Mini Screw Switch). The challenge with this sled was that I wanted to fly the Loki 54-2800 hardware, however it extends into the nosecone. So instead of extending the body I opted to go with HED and push the aft bulkhead of the sled into the 7" AV bay by 3.5". This left me with 55mm to work with.


Working on a new HED AV bay for my 4" BlackFly. The sled is a dual altimeter (Altus Metrum Easy Mini) single tracker (Altus Metrum TeleGPS) with independent LiPos (2S 900 MaH) and independent screw switches (FingerTech Mini Screw Switch). The challenge with this sled was that I wanted to fly the Loki 54-2800 hardware, however it extends into the nosecone. So instead of extending the body I opted to go with HED and push the aft bulkhead of the sled into the 7" AV bay by 3.5". This left me with 55mm to work with.

Nice work, Michael! This kind of stuff is the #1 reason I got my printer. It really opens the door for optimizing volume-challenged rockets.
 
Nice work, Michael! This kind of stuff is the #1 reason I got my printer. It really opens the door for optimizing volume-challenged rockets.

To be perfectly honest this was not the reason I got my 3D printer. I got mine more out of curiosity to play with more than anything and I didn't see the full potential. Before this, I engaged Nat Kinsey, AKA Wingarcher, to collaboratively design and cut sleds and bulkheads on his CNC. Then with Nat's encouragement I slowly got my head around working in 2D using LibreCAD. BTW, Nat does fantastic work and I highly recommend anyone who needs 2D CNC work to contact him.

However now that I have some more exposure to the 3D world, both on the printer and CAD (TinkerCAD), I now see things a whole lot differently. I still see advantages in using 2D CNC cut bulkheads, mainly due to the superior strength and heat characteristics of wood, G10, and CF. But one day the results may be on par, close enough or even better, in which case I can see printing them.

I can't recall who it was on our 3D sub-forum but someone effectively said when they design a sled they start with the negative space or volume of the AV bay and deduct from there. That perspective opened up my view.

Michael: That is the best design I have seen.

Thanks Chuck, that is a lot to live up to considering some of the works of art I have seen from others on this forum. The sled in the pic is a full mock-up and not the final print. It has been a iterative evolutionary process, not visionary. At this stage for the next version I have the following changes on the board:

  • wires were left slightly long and will be trimmed resulting in a neater appearance
  • general wire management will be improved
  • swap the soft aluminium Phillips machine screws for titanium M2.5 socket cap screws, with nylon washers to mount the boards...I have a bunch of them so why not use them
  • attempt to add 1mm to overall width of the tie-strap mounting holes for the Li-Pos. Currently the distance between the tie-strap holes puts a bit too much stress on the Li-Po for my liking
  • shave .5mm from the top of the oval holes in the sled for better printing. This sled was designed not just to mount the hardware but also as a support free print. This as many of you know is a bit of trail and error to get it optimized
  • move one of the larger oval holes (behind the altimeters) up a few mm to better align with the altimeter terminal block.
  • whatever else I see as an improvement when I complete the mock-up, which is down to GPS to LiPo and switch wiring, as well as a run through final field assembly/maintenance and logistical processing.
 
Upgraded my Prusa today. It was most of the day job. Now I have a MK3S
 
Back
Top