Questions on papering with self-stick labels

The Rocketry Forum

Help Support The Rocketry Forum:

This site may earn a commission from merchant affiliate links, including eBay, Amazon, and others.

neil_w

OpenRocketeer
TRF Supporter
Joined
Jul 14, 2015
Messages
16,698
Reaction score
11,538
Location
Northern NJ
I have read every post an thread I could find regarding this, and still don't fully understand the technique. I did an initial experiment on a spare piece of wood and the results are... well, I'd say "fair", but I still really feel like I don't know what I'm doing. I liked the overall "feel" of the technique, as the label paper went of perfectly flat very easily, so I'd like to figure out how to do it correctly.

Here are some specific questions:
  1. How do you handle rounded edges (leading and trailing). Do you wrap the paper around the edge, or just leave the edge uncovered and seal it with CA? Do you round the edges before or after papering?
  2. How do you handle the root edge? I was thinking to leave a bit of space near the edge (maybe 1/16" or so) for the fillets to adhere to; doesn't seem to be any reason to extend the paper all the way to the root edge. In that case I don't know if it's necessary to seal that edge at all, since it'll be covered (eventually) by Titebond M&T.
  3. Do you "sand off" the extra paper on the edges, or cut them precisely to fit? The "sanding off" technique seems to be a part of the technique when using ordinary printer paper, but I can't tell if it applies here.
  4. When CAing the edges, exactly how far up the paper to you go? Do you literally just run the CA along that actual paper/wood seam or soak the paper a bit above the seam?

Anyway, if anyone could lay out the steps to how this is supposed to go, I'd sure appreciate it (pictures would obviously be great but I'll take anything).

Thanks!
 
I use SSLP (Self Stick Label Paper) for all my LP and some MP builds, so here is my process:

1) Sand fins if needed, remove any dust
2) trace out fin pattern roughly on label paper with space on all sides (1/4"+), both sides of each fin (not one side at a time since you may forget you have to flip and then you got two of the same pattern)
3) Cut
4) stick onto one side of the fin & snug down
5) trim with a SHARP Xacto knife right up to the edge
6) Use Carpenter's wood glue or CA right on edges and maybe 1mm beyond. I seem to prefer wood glue since I can smooth it out with my finger and not worry about fumes. seems to stick as well as CA too (maybe even better)

If I have rounded/sanded leading edges (I often don't since I fly on the tree-y East Coast and don't need a few extra feet altitude), it's trickier, but still doable. I would have the pattern as one big piece folded over the leading edge. Stick one side, trim, "roll" over leading edge and stick other side, finish trimming.

I usually paper all the way to each edge. I'd guess leaving the root edge clear would be a bit stronger, but I haven't seen any big need for that to warrant doing so.

I've probably papered about 40 rockets this way the past year and each looks great IMO (I'm guessing it's not humble to say your own stuff looks great). :)

Important: PRACTICE/TEST on a smaller/less important rocket first.
 
I was hoping you'd chime in here. :)

Even though the extra altitude is almost completely irrelevant for me, I still can't resist rounding my leading and trailing edges, except perhaps for small canards which are usually not worth the effort (depending on my mood).

If I have rounded/sanded leading edges (I often don't since I fly on the tree-y East Coast and don't need a few extra feet altitude), it's trickier, but still doable. I would have the pattern as one big piece folded over the leading edge. Stick one side, trim, "roll" over leading edge and stick other side, finish trimming.
I am not super-confident in my ability to cut and apply a single piece that large and do it accurately, but I'll give it a try I guess. For the build I have in mind, this still leaves me somewhere from 1-3 seams to deal with other than the leading edge.

It sounds like I need to pre-sand the edges round no matter what. For any edge that will be a seam (which could include the leading edge if I resort to a separate label for each side), I'll cut the paper to exactly the fin size (maybe leaving some room for the root edge, as previously mentioned). That should make the paper large enough to reach partway (but not all the way) to the half-way point of the curved edges. Then, where the two pieces of label do not quite meet at the edge, I'll use glue to seal both label edges and bridge the gap.

If I can do a decent sanding job at the end, that sounds like it should be able to work but I guess I'll have to see. At this point I feel like it almost has to come out better than the results I've been getting with CWF, and I want the added strength.

6) Use Carpenter's wood glue or CA right on edges and maybe 1mm beyond. I seem to prefer wood glue since I can smooth it out with my finger and not worry about fumes. seems to stick as well as CA too (maybe even better)
Presumably after this you sand just to remove the excess glue. Part of my failure in my practice attempt was when I tried to "feather in" the edge of the paper onto the wood. I couldn't realy get rid of the little bit of ridge there no matter how hard I tried, although I did succeed in softening up the edge. I suspect that plain old copy paper would be simpler in this regard because it's so much thinner than the labels. I supposed that's my only worry with the label approach, that it feels like it's pretty heavy. I'll weigh the fins when I try this to see how much difference it actually makes, probably not much.

Important: PRACTICE/TEST on a smaller/less important rocket first.
Scrap balsa all the way. I don't need the extra stress of worrying about screwing up a kit. ;)
 
I was hoping you'd chime in here. :)

I'm flattered! :grin:

For me, if the fins start getting so large that I need more than a half-sheet per full fin, I'd just skip the papering and use CWF since the latter is actually quicker over a large surface and you also don't have to worry about seams. I have used scrap pieces of SSLP and had a seam, but usually I use CWF and fill seams and such after primer.

You can paper first and then sand the edge you need...to cut down on the fuzzies, just sand out toward the edge away from the paper. Then use Filler Primer spray for base coat, sand and you shouldn't have a problem. For the flat edges, I trim as close as possible, use the wood glue, then use Rusto filler primer spray, fill the edges with CWF (if needed - this is actually pretty easy and quick compared to spirals...ugh) and sand.

The more you do it, the better you should get. The first time or two often aren't great jobs, so keep that in mind if you're hoping for a masterpiece. :wink: Additionally, I like to fly my rockets, so I'd say if you're having more aggravation than joy from the finishing, cut that part down and you'll have more time to enjoy the flight part without worrying about it getting beaten up. :)
 
I think that my method for sealing the edges would work fine for SSLP.

On a couple of sheets of paper (to prevent damage to the underlying surface) create a small pool of thin CA glue. Then drag the outside edges (not the root edge) through the pool much like you'd do with a squeegee. Then use a paper napkin or tissue, to blot away any excess glue before it cures. After it cures you lightly sand the edges to smooth them down. Glue onto your body tube, and finish like you normally would (less the aerodope).
 
Last edited:
I have some thin CA in the mail from Amazon, and will definitely try out your squeegee method, although it'll only work on some of my edges (I'll need to apply with qtip or something to the others.) I'm also gonna try to CA my nose cone, so I should have all kinds of fun.

My adventures will all be documented in my build thread, for better or worse.

Ken wrote:
Additionally, I like to fly my rockets, so I'd say if you're having more aggravation than joy from the finishing, cut that part down and you'll have more time to enjoy the flight part without worrying about it getting beaten up.
I like to fly them too, but I spend a lot more time looking at them than flying them, and certain finishing deficiencies really bother me (others I don't care so much about). That said, I also consciously try to avoid overspending time on certain (IMHO) odious finishing tasks, so I'm always looking for a balance. I am definitely not satisfied with my CWF results so far, so I want to try something else. As a kid I used Aerogloss, which worked great, but at this point I prefer to avoid the fumes. So instead I'll work with CA. :facepalm:

I wonder a bit whether my problems with CWF are at least partly related to the recent Estes kits being tung wood rather than balsa, as hcmbanjo has discussed on his blog. For this build it's genuine balsa all the way. For at least one of the transition pieces in my upcoming build I'll be using nothing but CWF, so we'll see if it works better on that lovely balsa.

Oh, one other thing: maybe I'm just lucky, but a couple of weeks ago I flew a couple of newly-constructed rockets three times each and they still look pretty much pristine. So I can't yet buy into the idea that good finishing is a waste because they're gonna get messed up as soon as they fly. Of course, it *could* happen (and I'm sure it *will* at some point), but it doesn't work for me as an excuse to take *too many* shortcuts when finishing. That said, I am naturally lazy and will continue looking for any such excuse. :p
 
I would suggest that you put a wrap of tape around the shoulders of your balsa nose/transitions before you apply CA. balsa tends to 'wick' CA to places you are holding on to it, for that matter cotton swabs w/ plastic shafts work better for CA application with less chance of being attached to them :).
Rex
 
I wanted something that was light but strong. I do not worry about the edges, but I suppose that they could be sealed with CA and sanded round. (Actually, for the wing leading surfaces I put some adhesive backed decorative surface I bought from the auto parts store.) I have used 20 pound stationery paper glued on both sides of 1/8" balsa with white glue. I have made large wings out of this stuff. When making large surfaces like wings, put down aluminum foil on a cutting board with the wet side of the paper and balsa on top and then heavy books on top of the dry side. When the glue is dry, turn over and repeat the process. This will reduce the tendency to warp.
 
How do you handle rounded edges (leading and trailing). Do you wrap the paper around the edge, or just leave the edge uncovered and seal it with CA? Do you round the edges before or after papering?

I round/taper first. If rounded, start on flat side and roll over to the other flat. If trailing and leading edges are rounded, start in the middle of the trailing edge and round over to the flat then round all the way over the leading edge to the other flat. Round the other half of the trailing edge and either trim to butt the seam or leave a slight overlap. seal the seam with CA and sand to flatten.

How do you handle the root edge? I was thinking to leave a bit of space near the edge (maybe 1/16" or so) for the fillets to adhere to; doesn't seem to be any reason to extend the paper all the way to the root edge. In that case I don't know if it's necessary to seal that edge at all, since it'll be covered (eventually) by Titebond M&T.

Don't seal the root edge with CA. I've always papered up to the root edge and haven't seen any indication of weak fin/fillet bond. But leaving a gap could be a good idea.

Do you "sand off" the extra paper on the edges, or cut them precisely to fit? The "sanding off" technique seems to be a part of the technique when using ordinary printer paper, but I can't tell if it applies here.

I'm a "sand off" proponent, to me precision cutting takes more time then it is worth and introduces the possibility of error by misalignment. The smaller the fin the harder it is to align so avoid it all together and sand off.

When CAing the edges, exactly how far up the paper to you go? Do you literally just run the CA along that actual paper/wood seam or soak the paper a bit above the seam?
Squeegee.

I use the Staples brand sticker paper https://www.staples.com/Staples-Sticker-Paper-70972-/product_490429 it's a good value.
 
Last edited:
One of the nicest things about using label paper is that you can print it before applying it to the fins. Since these aren't competition models I prefer to completely wrap the fins rather than rounding the leading and trailing edges. The attached photostrip shows how I wrapped a fin from a Fliskits Acme Spitfire. The nice thing about doing it this way is that the label paper sticks to itself creating a full shell. Once covered with a couple coats of clear coat, it won't ever peel off.

Steve

fin.jpg
 
Wow, very nicely done, I didn't even think about printing them first. Do you have pictures of the finished rocket?

I'll have to try that someday.

It looks like if I could get past my compulsion to round the edges, I could make my life a lot simpler... but for now I just gotta round 'em.:confused2: I'll figure out how to make it work.

Doing pre-printed wraps opens up a world of possibilities to do designs that would otherwise be very difficult. The model I did of India's SLV3 in the photo below is a good example. It would have been very difficult with paint and decals, but was pretty straightforward to do as sticky paper wraps.

Here is a link to a tutorial I did on how to apply sticky paper wraps to body tubes. The last post in the thread shows a number of rockets I've done this way.

https://forums.rocketshoppe.com/showthread.php?t=10456

Link to a thread about the Bertha Vostok: https://archive.rocketreviews.com/reviews/all/berthavostok.shtml

Link to a thread about the Goodbye Kitty (with PDFs of the wraps): https://archive.rocketreviews.com/reviews/all/goodby_kitty.shtml

SLV3.jpg
 
Last edited:
Looked great to me! You also started with what I would consider to be a tough one to do (funny shaped fin and one piece wrap around). The wrap around may be easier if you stick one side first, trim with a knife and then the other side.

Also if you're using a big wide glue nozzle (the ones that come with the Elmer's Carpenter's glue), try changing it to one of the white glue/Glue-All nozzles...they have a small hole which I find perfect for fine/detail application. :)
 
I used up my one small glue nozzle on my bottle of Titebond M&T. :)

For this job, I made a little pool on the side and applied the glue with the tool that *usually* works for me, my finger, because I figured it was like drawing a fillet. It was not.

What is puzzling is how after I struggled through the first one, and then the second, I continued to try to use my finger all the way through to the end. What was the definition of insanity again? :facepalm:

Next time I'll try something different. Exactly where do you apply the glue, and how much? I was thinking that most of the glue needed to stay on the edge, but at least a little should be on the sides. The bits on the sides were what vexed me.
 
I first make sure I trim the label paper right up to the edge (always use a new/very sharp blade!), then when I'm done, I'll add a small bit of glue (a drop or so) to an edge and wipe it down that edge with my finger. You just need a thin film so the edge doesn't lift up (more if the balsa is porous/has grain holes). If I get any on the sides, it's very little and not really noticeable. YMMV
 
I have a Vigilante upscale (BT70) that I papered the fins with self-stick. Pretty big fins. I find that the paper likes to lift on the booster during flight. I'm not sure what I could have done to get better adhesion.
 
Which parts lift, the edges or somewhere else? I am certainly curious to see if my paper stays put for the long term. It really is the one reservation I have with this technique; I wouldn't have that worry with glued paper. I think that if I didn't have the leading edge folded over, I'd be less worried, because I'd have glued down the full perimeter of the fin. Sanding off and sealing the rounded trailing edge turned out pretty easy, so I'm not necessarily convinced whether the fold-over on the leading edge is worth it.

Based on my initial experience, the technique is so absurdly easy, and the initial results look so good, that I'm motivated to try it for a while.
 
I've done a LOT of rockets with SSLP and haven't really had issue; however...

  • Most were Low Power and a few were Mid Power
  • I rarely fly any one rocket more than maybe 5 times due to my big collection and kit-building addiction.
  • I've had one case of it lifting off; however I had CA'd the balsa stock first (TLP kit as per instructions) and later accidentally had the rocket resting on it's fins with weight on top of it.
  • Bigger issue is after a crash and the repair; however it's pretty much like any other repair other than dealing with the ripped SSLP paper.

I've coated winged rockets as well (which have very large surfaces) and haven't noticed any puffiness or lifting. Are you sanding the fin surface first? If so, you have to make sure you get rid of all the dust. Additionally, I try to not apply and lift up on the paper...if it isn't on right, I'll toss that piece of SSLP and get a new one since the stickiness is lowered after you lift it up (like having a sticker fall on the floor). YMMV
 
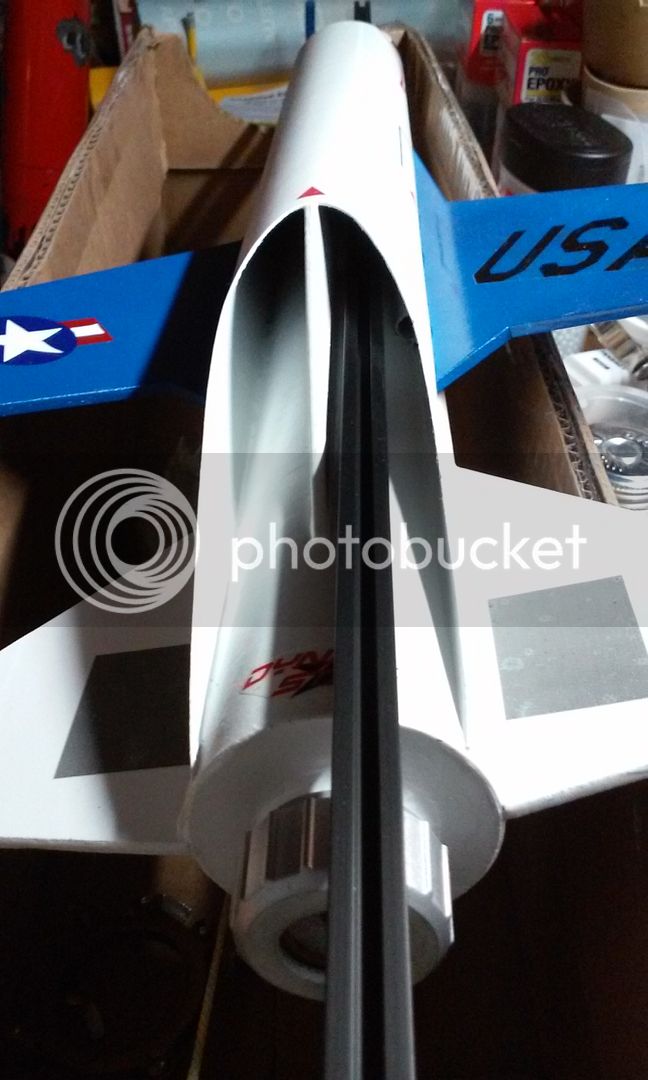
Here's a Snarky pic I recently posted...wings & fins were SSLP'd about a year ago and I've launched it twice now.

2015-11-16%2021.34.41.jpg
 
Back
Top