What did you do rocket wise today?

The Rocketry Forum

Help Support The Rocketry Forum:

This site may earn a commission from merchant affiliate links, including eBay, Amazon, and others.
Installed the MMT and Fins in my D-Region Tomahawk.:) I normally don't like to do all the Fins at once, even with a Foamboard Template, but I meticulously fitted these to their slots, and so I'm confident doing them all up at once.
I have it drying/curing Vertically so that if any of the Epoxy settles it does so in a concentric fashion, rather than on one side.

More DREG 003.jpg
 
Last edited:
Test fit my 36" Fruity Chute into the payload bay of my DD tube fin rocket. Experimented with different chute folding methods of burrito style in the blanket. It all fits!

Sanded and re-primed the October Skies XP payload section with the Rusto 2X white primer. I'll give it a day or two to out gas before laying down the Rusto White Enamel.

Bought a piece of sweet neon pink foam board to make an interior center ring for my nose cone painting rotisserie, cut out two squares of appropriate size, laminated them together with Titebond II, and pressed them under 15 lbs of iron barbell plates. Cutting the assembly to a disk and center punching it and I'll be ready to go color on the Goblin 5.5 nose cone. I should probably post a picture of the rotisserie.

Ran a bunch of sims for the motors and rockets of the March 7 launch at Snow Ranch and am good to go in that regard. I212SS for the maiden flight of my DD converted tube fin and I255 for the followup.
 
:) I think we are going to stage two drones for the next one. One at 250'-ish to get a good "launch" perspective. And then one at projected apogee to try and catch the deploy. One of these days I'm worried we will actually get a little "too close".

Nice what is it? I just made a 600mm that will carry around my contour roam to get some HD video. Hoping to get some cool videos of my rockets at LDRS :)
 
Last night, I installed the secondary motor mounts on my upscale Advanced Target Drone, primed my Astron Cobra clone and got a couple of the fins painted on the PS2 Nike Smoke. I also got a box from Hobby Link, containing a pair of Estes Sprint XL kits. I intended to buy the first one for the nose cone and boat tail originally, but decided I like it enough to actually build one as designed - thus the order for two...
 
Last edited:
I finally started building the Estes Majestic kit that my son got me for Christmas. It's an easy build that can be done when the weather sucks like it does today. He also gave me the booster kit and some F15 motors, both boosters and sustainers. This baby ought to scoot!
 
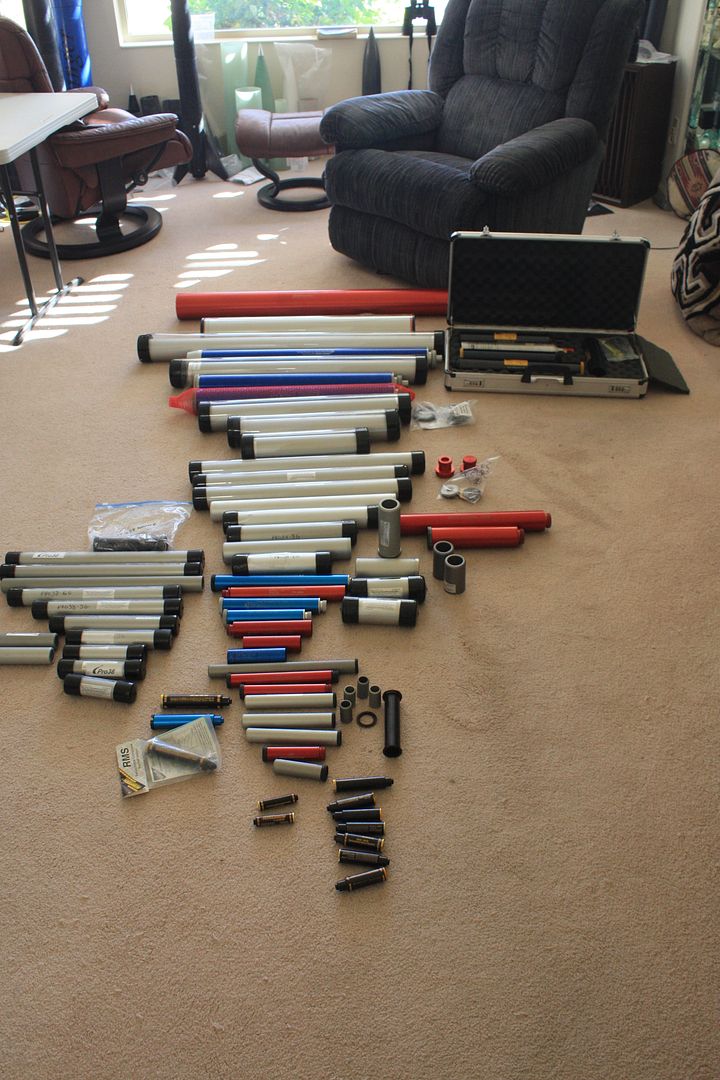
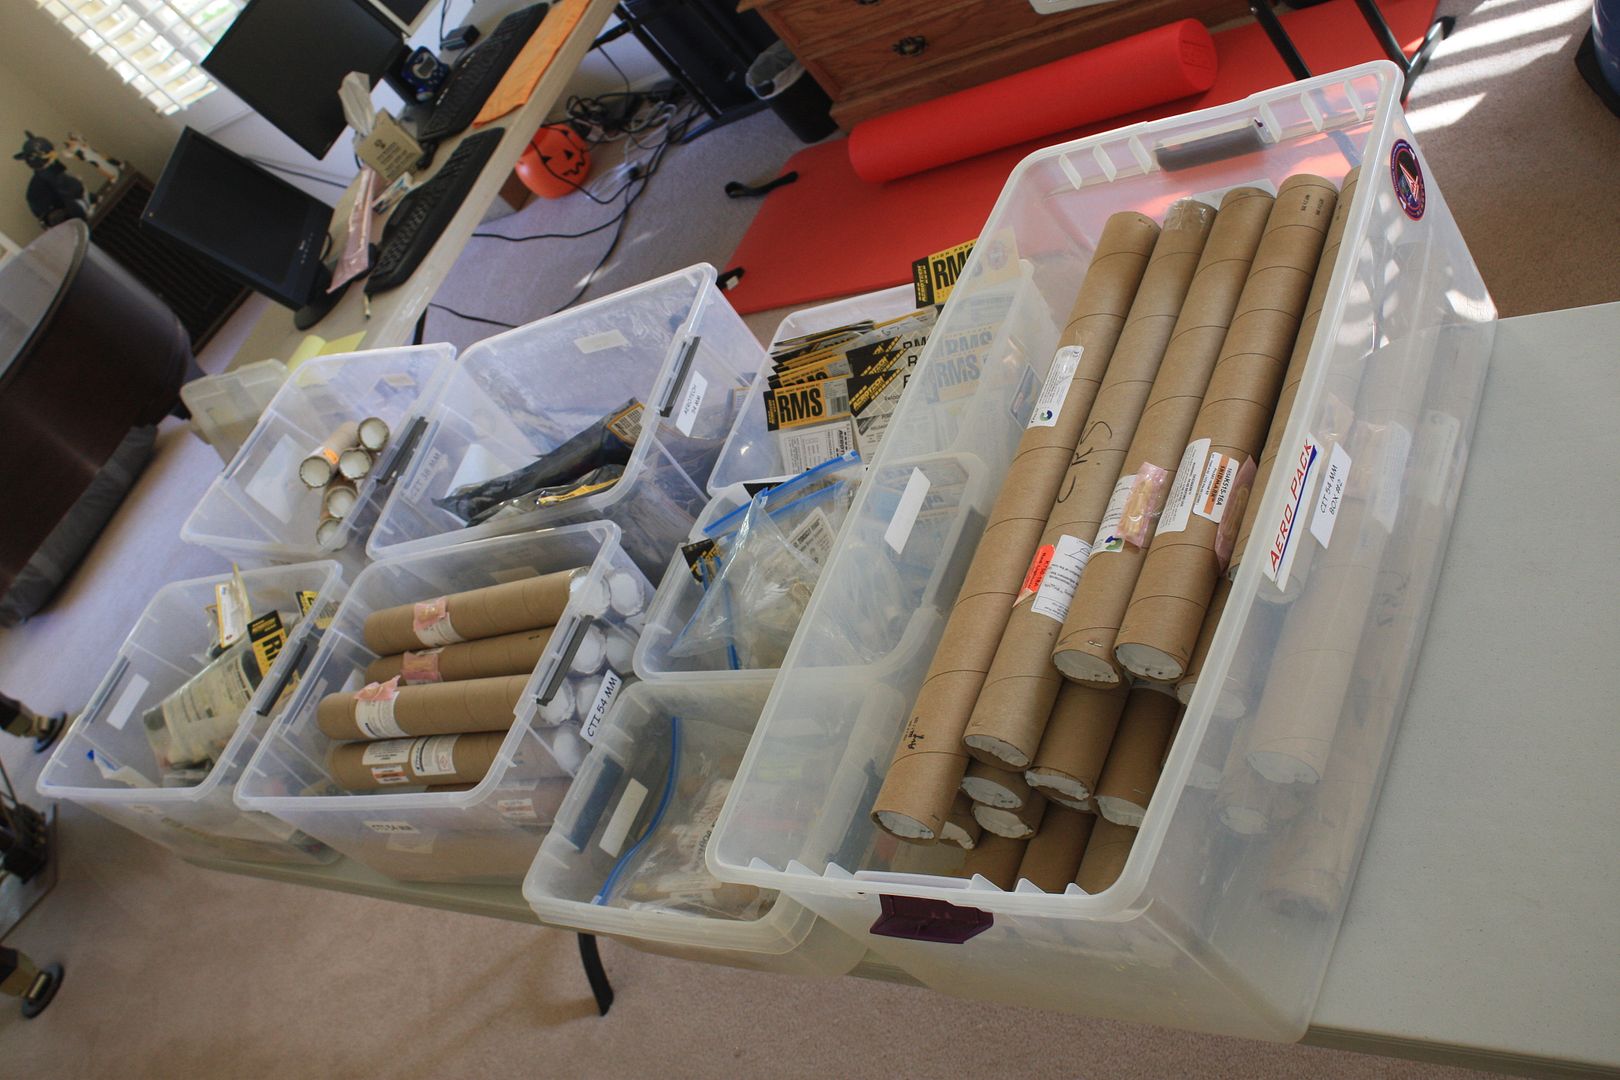
Inventory:

019.jpg


021.jpg


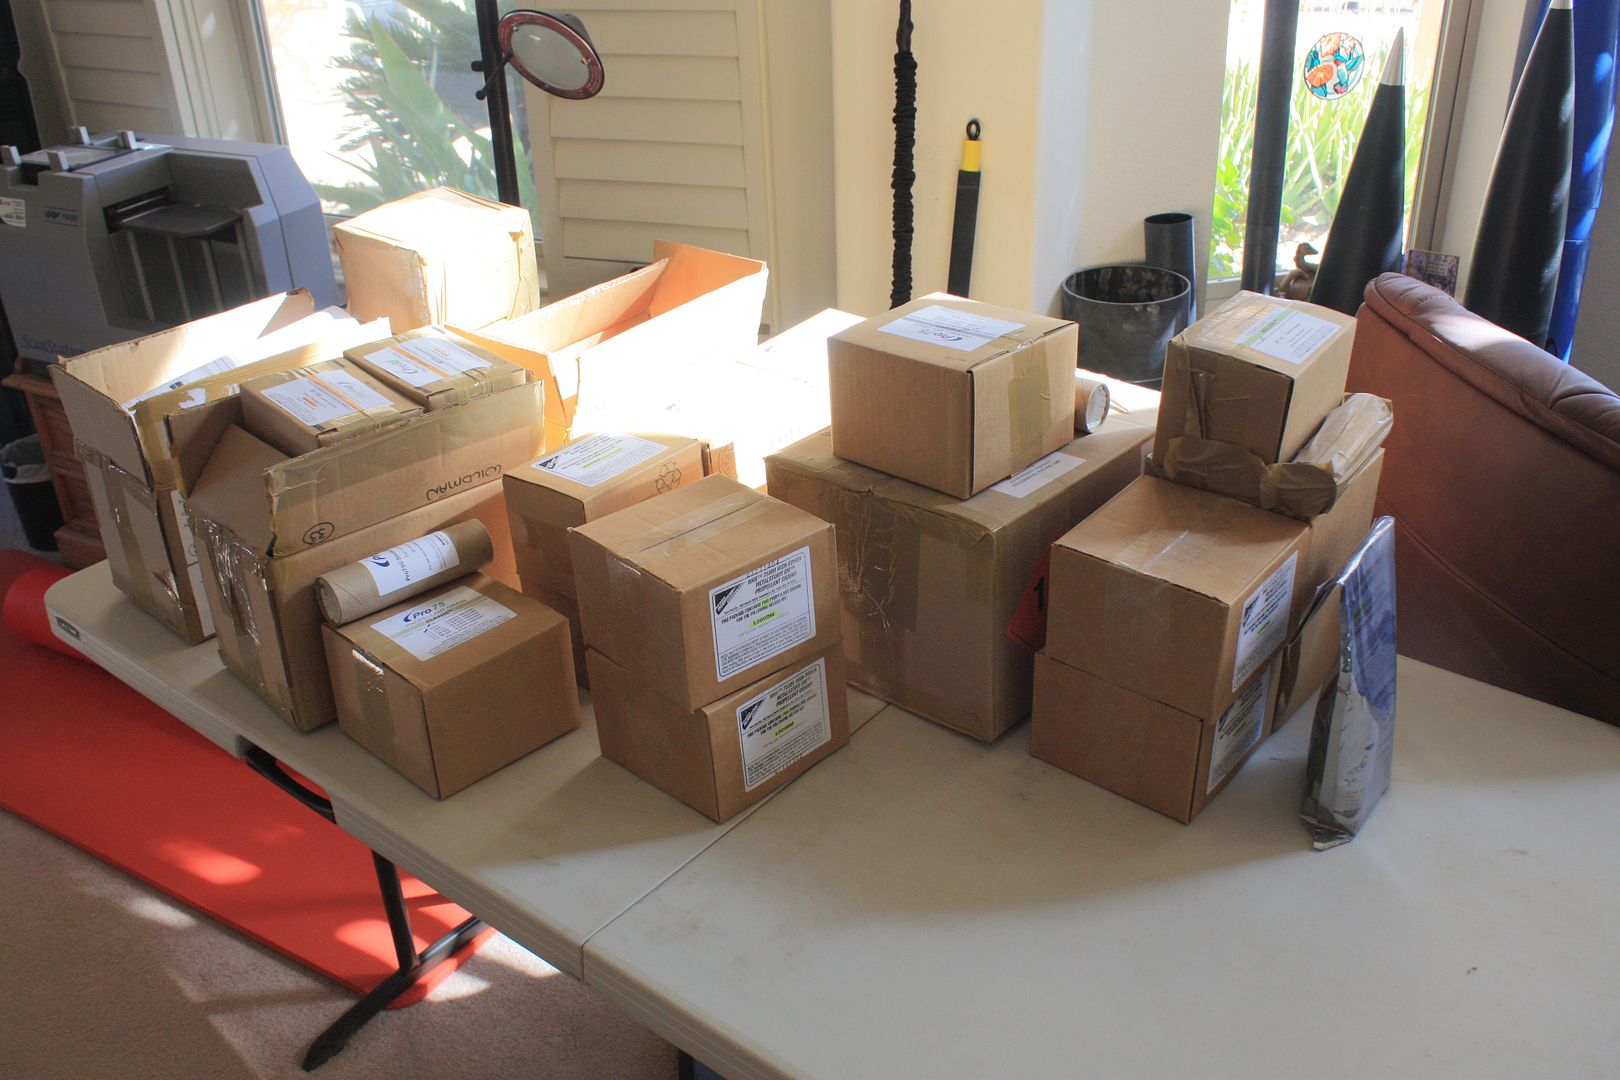
It used to be easier when everything came in a bag or a tube, but now we have a separate table for the boxes of big stuff:

020.jpg


Just got an email from Wildman, our Black Saturday Aerotech reloads are on the way. Another 69 lbs. of propellant.... :surprised: This is what happens when your wife is as obsessed with rocketry as you are.
 
Today was try-to-use-every-power-tool-you-own day.

I did quite well actually. I used the drill press and 4-1/8" hole saw to cut out bulk plates that will eventually become centering rings. At the moment I'm planning to make at least three 54mm motor mount rings. I used the band saw to trim the waste from the 1/4" 12x12 plywood sheet to maximize the number of bulk plates and managed to get six out of the sheet.

Then I used the band saw to cut a hub for the nose cone rotisserie from a length of 1x4. Back to drill press to punch out a 7/8" diameter hole for the spit and the handheld drill to make holes for the wire brads to anchor the hub in place while the glue dries to the hand wheel. Also drilled out the center of the laminated foam board disk that will stabilize the nose cone.

Then busted out the stationary sander to sand the hub flat on both sides, round the corners, and break the edges for comfort.

In the course of these operations I used two separate shop-vac/dust cyclone combos to keep the human air supply as dust-free as possible.

In spite of the efforts to control dust and chips I had to break out the leaf blower (duct tape of the power tool world) to evacuate the detritus from the work area.

Thinking about investing in one of those Jet dust filters that hang from the ceiling.

In addition I cut out the laminated foam board disk with a fret saw before all of this took place.

Handtools used: Center-finder, fret saw, fret saw table, bench vise, combination square, Incra marking rule, Perma-grip sanding block, hobby knife, marking pens/pencils, hammer, sanding round, sand paper, bench brush, and several extension cords.

Results: Rotisserie is finished and I have 6 or 8 centering rings/blanks.

View attachment 256000View attachment 256001
 
What else, sanded. Specifically, sanded down some epoxy coats on fiberglassed tubes. These were made with Soller Composites Neon Green sleeves, so I'm finishing them carefully since they will not be painted.
 
I bought my belated b-day present. Proline Reaper 3 from Rocketry Warehouse. That's a lot of FG rocket for 130 georges. Messed around in OpenRocket to see if I could set this up in a config for L2 with a 38mm J380 motor -yes, with an adaptor, and with the sugar motor I'm piecing together at about K1000 - yes. Mach plus to boot. Sweet.

Now about that tracking device....
 
A friend and I took a road trip to visit Mike at Bay Area Rocketry and pick up our orders. I picked up my Madcow Tomach, an Aerotech 24/40 case for the Saturn V i'm giving my dad, an Aeropack 54mm minimum diameter retainer, and a small rocket kit for my mom to build. My friend picked up his Madcow 2.6" Patriot, along with everything needed to fly it. Yesterday I managed to hook up the power leads to my Eggtimer LCD receiver reversed, so now I need to replace the parts that fried :( And tomorrow I am going to help my friend start building his Patriot so it will be ready for the Lunar launch on the 7th.
 
Ordered some more Fiberglass Cloth. Not that I need it, but it is inexpensive, and I like to try different weights and brands.:)
 
CA glued the balsa edges of the fins on my MDRM, some of the balsa had started to break after another landing at Moffett.
 
Met pyrobob and picked up my motor order. Even picked up some basswood as we met in a Hobby Lobby parking lot.

Also, been popping ibuprofen all day because yesterday's sanding session set off my bad shoulder. The injuries from the things that once kept me in shape (basketball in this case) are coming back to haunt me now.
 
Machined the last 2 Delrin bushings for my comp tower rebuild. Now begins a lot of drilling and tapping. Hope to test it at LV Springfest if not before...March 7 at Holtville may be too optimistic. Just realized I'm still not parts-complete for the thing; I need some small eyebolts since the previous guy line anchors were wood screw eyes and they don't go into aluminum blocks so easy :)
 
Found a new Soldering Iron at the Hobby Shop for $9.99. For the tiny amount of things I need a soldering Iron for this is perfect. It has a precision tip, which is also perfect. The ones at the Hardware Store were quite bulky by comparison, and the ones there that had the Tips I need were way overpriced. This will get me started just fine for now.
Last time I soldered something Rocket Related was the innards of my Aerotech Interlock Controller in 1999.

New Soldering Iron 001.jpg
 

Attachments

  • New Soldering Iron 001.jpg
    New Soldering Iron 001.jpg
    56.7 KB · Views: 58
Installed the Eggfinder LCD Rx into a new 3D printed enclosure I received from BLKKROW. I will post more details on the Eggfinder LCD thread.


IMG_20150227_233515750.jpg
 
- Designed a scratch rocket for the Estes E9 motor.
- Ordered parts for it and my Hawk project.
- Ordered some cheap beepers from china. I hope they will be easily modifiable to use as rocket locators.
 
Ordered a D-Region Tomahawk and Centuri Kit from AC Supply.:)
I'm suddenly finding Sounding Rocket style Airframes quite appealing, and researching them is pretty interesting too.
The D-Region Tomahawk in real life only flew one Mission.
I'm glad it wasn't lost to History thanks to Estes!
I'm almost done with my Kit #1944 Clone of the T-hawk I had in the 80's, so by the time I'm finishing that one up I'll have the new one to start on.:)
I also plan to do some of the Terrier Sandhawks and the Terrier Orion.
The Centuri Kit is going to get the Glass and a 24mm Upgrade.:wink:
 
I finished my Estes Majestic that my son got me last Christmas as well as the booster kit that goes with it. Now, if it will just warm up, dry out and....?
 
Did some sanding on the transition and nose cone for my Semroc Centaur, and glued the last two fins together for my Semroc SLS Hustler. Then fins are sandwiched in wax paper and have several big books on them for the next 24 hours. The last set turned out great. Using Titebond 2. I got the Hustler as a bag of parts before it was released as a kit, so it didn't come with an engine hook, baffle assembly, nor decal. Hope to get those from Randy at Semroc when he has them in stock. Touched up the fillets on the SLS Jaguar and it will be ready for primer paint once the temperature gets out of the single digits (quite a ways out).
 
I actually flew a rocket. So, it was a little chilly (15 degrees), but the flight was mostly nominal to around 7600ft. Wohoo!!

Adrian
 
Last edited:
Started filling spirals on ALPHA #5. Last build was almost a year ago, so I figured to sharpen my perishable skills with the ALPHA before going on to more complex builds.
 
Started working on my Estes V2 again: glued the fins. This build is closer to being finished than I remembered. I'll need to do my first epoxy fillet job on it next.
 
Worked on my L1/L2 rocket but only got as far as cutting the blanks for the CRs and Bulkheads. Worked on the Crayon Bank rockets for my kids (though I may end up using one for my L1).

Since I am doing two Crayon Bank rockets everything is in duplicate, everything is still at the dry fit stage, and next week I will begin the glue up. The two plates in the 3rd picture are the Nose Cone AV bay rings and bulkheads for the Crayon rockets, the screw with washer is actually a well nut that will allow me to pass my E-match wire through the bulkhead to a cable cutter for DD if I so choose.

The white tube and plywood squares are some of the parts for my L1 which is looking to be either a 3" clone of the BSD Thor or a clone of the Madcow FrenzyXL at the current moment i'm leaning toward the Thor.

Build threads to follow

CrayonRockets.jpgCrayonRockets2.jpgCrayonRockets3.jpgCrayonRockets4.jpgFrenzyClone1.jpgFrenzyClone2.jpgFrenzyClone3.jpg
 
Worked on my L1/L2 rocket but only got as far as cutting the blanks for the CRs and Bulkheads. Worked on the Crayon Bank rockets for my kids (though I may end up using one for my L1).

Since I am doing two Crayon Bank rockets everything is in duplicate, everything is still at the dry fit stage, and next week I will begin the glue up. The two plates in the 3rd picture are the Nose Cone AV bay rings and bulkheads for the Crayon rockets, the screw with washer is actually a well nut that will allow me to pass my E-match wire through the bulkhead to a cable cutter for DD if I so choose.

The white tube and plywood squares are some of the parts for my L1 which is looking to be either a 3" clone of the BSD Thor or a clone of the Madcow FrenzyXL at the current moment i'm leaning toward the Thor.

Build threads to follow

View attachment 256180View attachment 256181View attachment 256182View attachment 256183View attachment 256184View attachment 256185View attachment 256186

Build threads! ASAP!

I see you gave the tail cone the same treatment I did on my 38mm version. Anxious to see your fins and their attachment to the airframe.

There's just something about crayon rockets that makes me want to fly them. All. The. Time.
 
Did hardly anything rocket-wise today and am stretching the definition when I count a trip to Home Depot to pick up three 3/16" stainless steel quick links for a recovery train.

Bought one of those new LED shop lights from Costco. It looks like a double fluorescent tube shop light but it's not. This was for over the new rocket workbench/storage cabinet. There's no transformer in the unit so it weighs next to nothing but is still quite sturdy. After messing with it, I decided to replace the four tube fixture in the kitchen with an LED version and discovered the new LED models are SOLD OUT everywhere. Dang! Always a day late and dollar short.

Two 4' LED "tubes" that draw only 38 watts in total, no transformers to replace, no hum, and they start up instantly even below freezing. What's not to like?
 
Back
Top