You are using an out of date browser. It may not display this or other websites correctly.
You should upgrade or use an alternative browser.
You should upgrade or use an alternative browser.
Roachwerks Nike Hercules
- Thread starter Stymye
- Start date


Help Support The Rocketry Forum:
This site may earn a commission from merchant affiliate
links, including eBay, Amazon, and others.
foose4string
Well-Known Member
- Joined
- Jan 17, 2009
- Messages
- 2,853
- Reaction score
- 8
Looks like Fill N Finish, Johnny.
600 X 800 isn't big enough, Sandman? Are you clicking on the thumbnail to enlarge it?
600 X 800 isn't big enough, Sandman? Are you clicking on the thumbnail to enlarge it?
Stymye
Well-Known Member
- Joined
- Jan 21, 2009
- Messages
- 7,599
- Reaction score
- 18
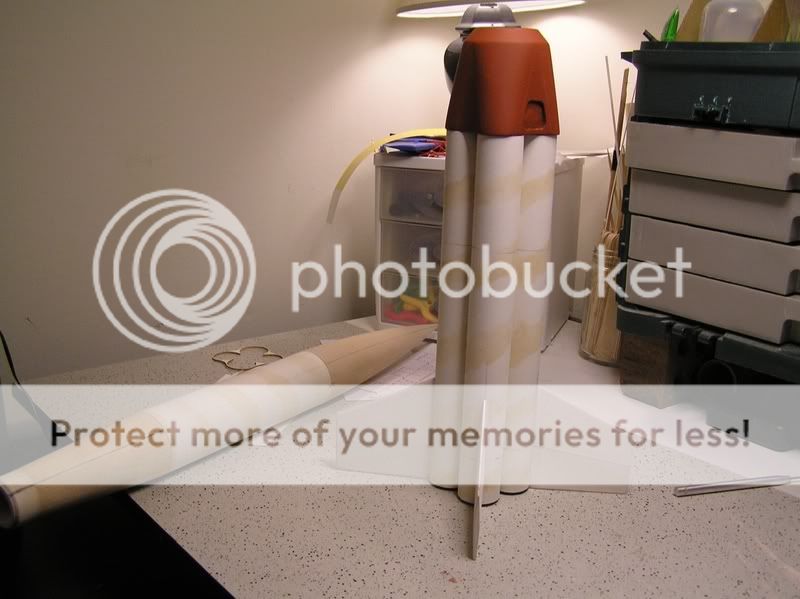
Johnny,I used F-N-F for general filling , I always use the dark wood version .
I find it easier to see against light balsa and spirals.
it's going to be tricky to paint before adding the cardstock wrap around.
I plan to get alot done today.and have all the components atleast primed.
I'm also going to try my riveting tool, and add some extra details.
ohhh, I just realised I've got to remember the launch lugs.!
Stymye
Well-Known Member
- Joined
- Jan 21, 2009
- Messages
- 7,599
- Reaction score
- 18
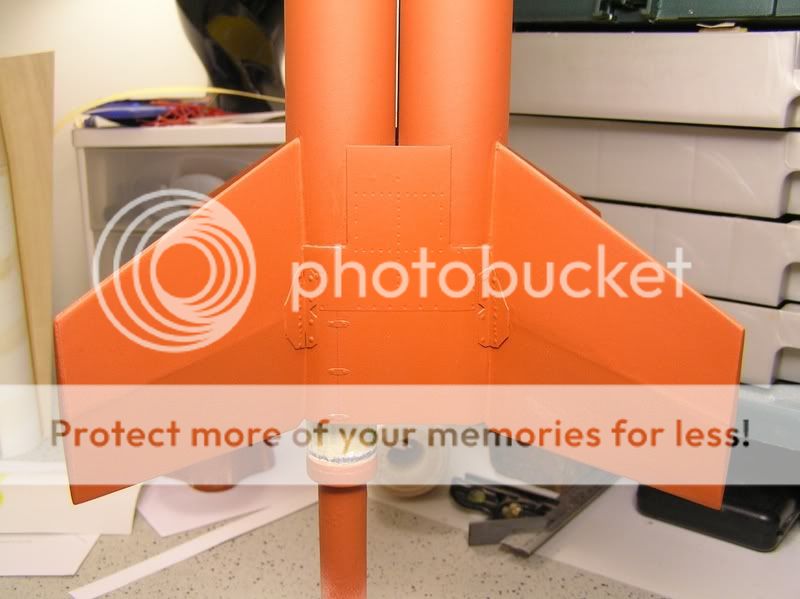
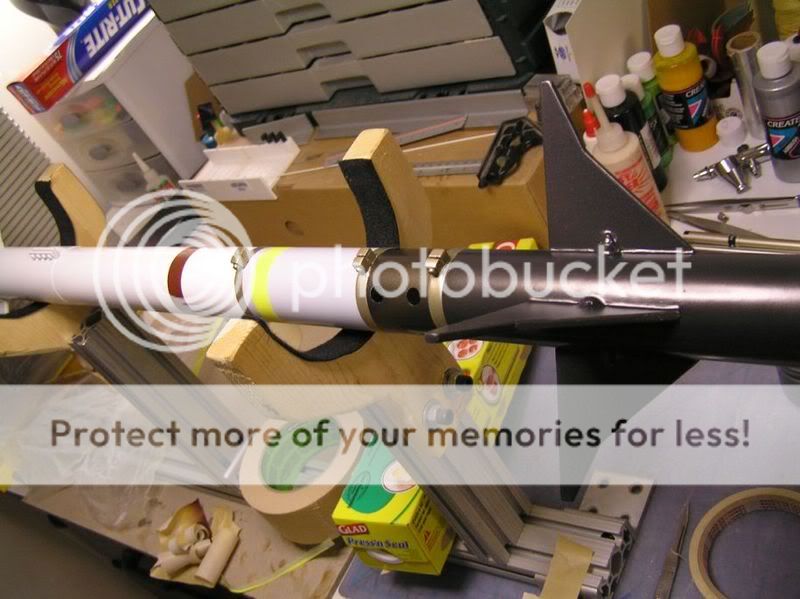
the lower is at a fin joint , the upper is just below the transition.
they require a small amount of standoff for the rod to clear the transition.
yea I agree about the spot glaze weight, plus in reality, bondo spot glaze is designed for use on top of a primer . thats when I usually use it because the wood filler doesnt stick as well to primer. the spot glaze is great for smothing those last little blemishes that the priming stage reveals.
Stymye
Well-Known Member
- Joined
- Jan 21, 2009
- Messages
- 7,599
- Reaction score
- 18
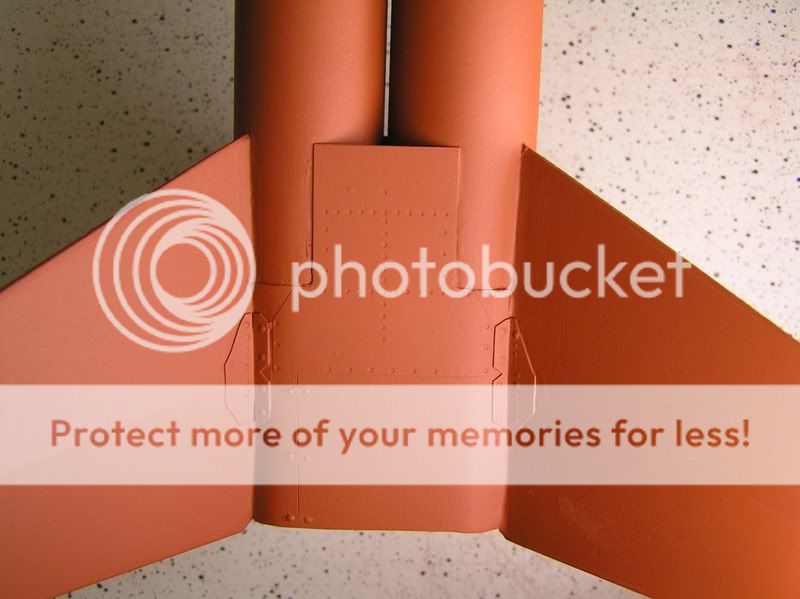
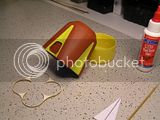
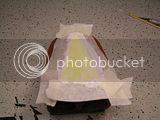
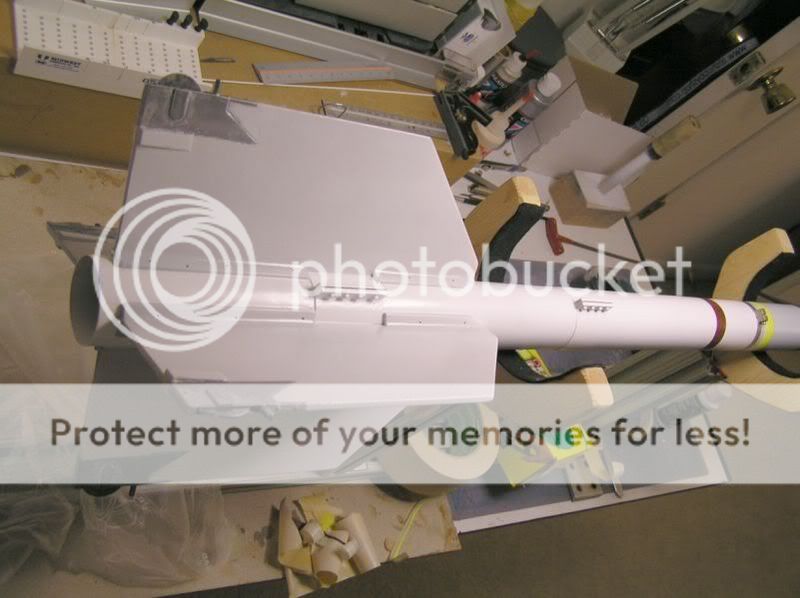
I decided to make the booster wrap from thin plastic sheet.
this way I can do a little panel scribing and add a few details.
these signs are really cheap(walmart) and alot of details can be made just by scribing and snaping the part out and it sands real nice.
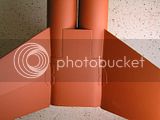
I also made the fin connecters from the plastic and added some rivets and little hinges. some stick out ,some are flush type.just trying different things
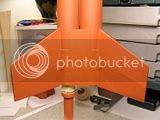
a little better pic
I've made some good progress on the sustainer section, I'll add a few extra details to that as well, and post more pics ofcourse.
thats all for today.
this way I can do a little panel scribing and add a few details.
these signs are really cheap(walmart) and alot of details can be made just by scribing and snaping the part out and it sands real nice.

I also made the fin connecters from the plastic and added some rivets and little hinges. some stick out ,some are flush type.just trying different things
a little better pic
I've made some good progress on the sustainer section, I'll add a few extra details to that as well, and post more pics ofcourse.
thats all for today.
foose4string
Well-Known Member
- Joined
- Jan 17, 2009
- Messages
- 2,853
- Reaction score
- 8
I've got a few favorite builders on this forum, and you're definitely one of 'em, Andy!
Bravo.
Bravo.
Johnnie
Well-Known Member
- Joined
- Dec 31, 2002
- Messages
- 4,292
- Reaction score
- 1
Impressive!
Very cool source of thin plastic material.
Can we see what you will use for a rivet too?
What he said...
Johnnie
Pem Tech
Notorious Member
Impressive!
Very cool source of thin plastic material.
Can we see what you will use for a rivet too?
Yeah....
Share how you make such great raised and recessed rivets.
Fantastic detailing you have done there....
Breeze1913
Well-Known Member
- Joined
- Mar 8, 2009
- Messages
- 316
- Reaction score
- 0
Excellent.
Very nice detail work simulating the metal work!!
Truly excellent work.
Keep us posted, this is an exciting thread.
Very nice detail work simulating the metal work!!
Truly excellent work.
Keep us posted, this is an exciting thread.
Stymye
Well-Known Member
- Joined
- Jan 21, 2009
- Messages
- 7,599
- Reaction score
- 18
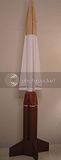
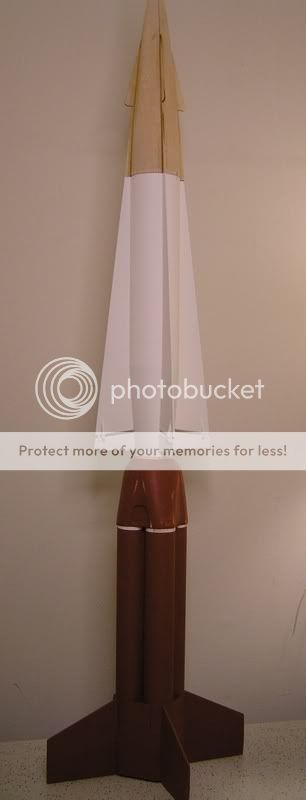
finally,getting a little more done this weekend. the main components are assembled .
It's on to the little 'bits and bobs' now.
I'm going to add some more rivet details and panels and promise to take some pics of that process to post later.
It's looking more like a missile now.
It's on to the little 'bits and bobs' now.
I'm going to add some more rivet details and panels and promise to take some pics of that process to post later.
It's looking more like a missile now.
Martin Vrstal
Well-Known Member
- Joined
- Aug 3, 2002
- Messages
- 561
- Reaction score
- 0
Andy...Great looking detail on a great looking rocket. I can't wait to see how it's done. Your builds are always way cool.
Stymye
Well-Known Member
- Joined
- Jan 21, 2009
- Messages
- 7,599
- Reaction score
- 18
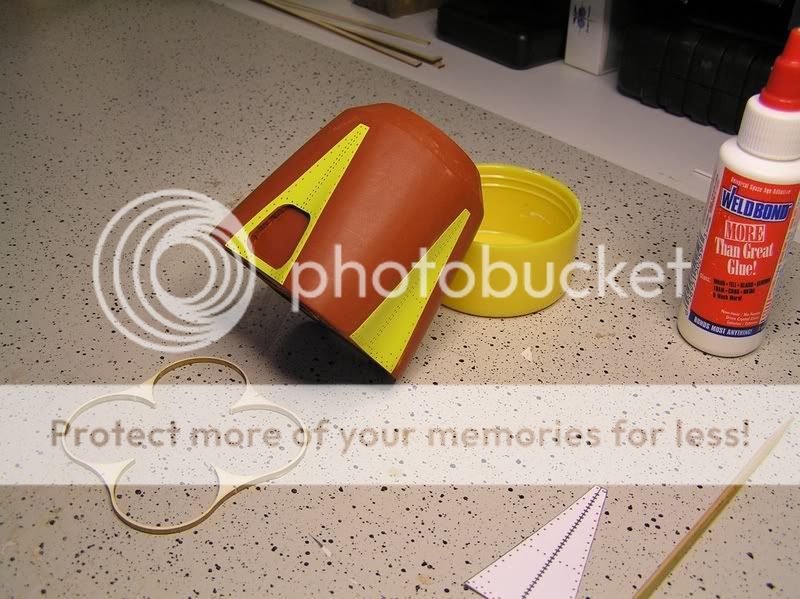
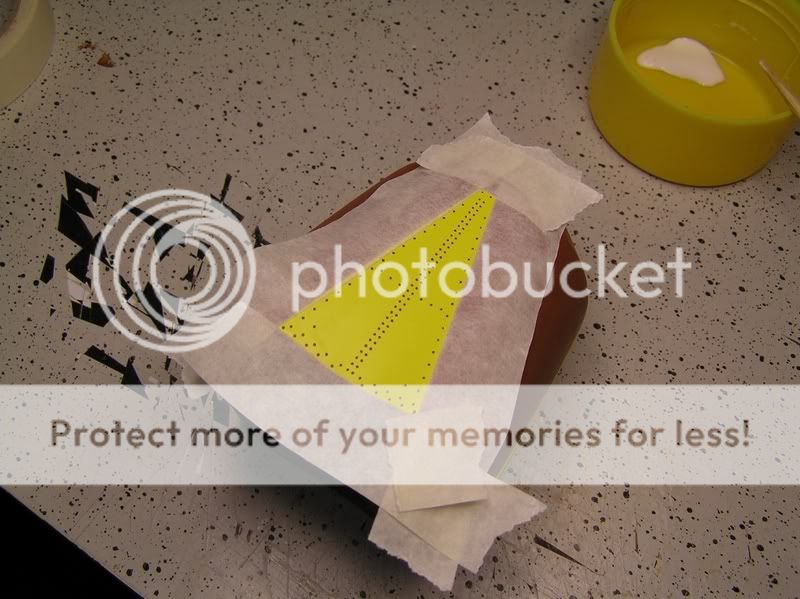
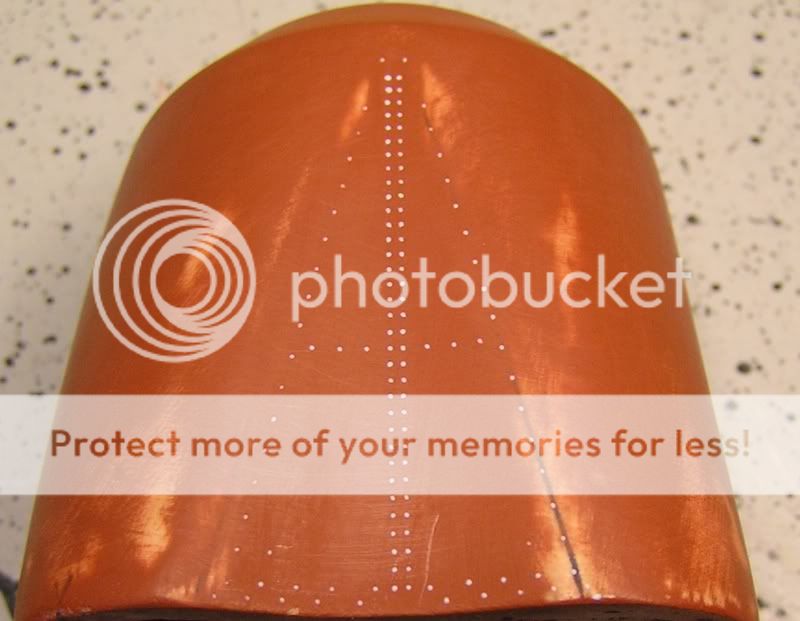
Here one way I do rivets, these are the smallest I've done so far.
almost too small, but it worked.
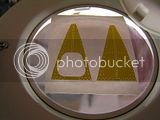
first thing was to import Sandmans templates into the vinyl cutter and cut some masks
than the job is simple, attach the masks. If I wanted a panel with flush rivets I would permanently glue the mask on and paint.In this case I just want some rivet details
the surrounding area is masked off.I could have just made the surrounding mask bigger, but I made it to size so I could position it more easily

because the holes are so small ,I used a brush to spread some weldbond glue
the glue needs to be somewhat thick,aileens would probably work well also but I have only tried this with weldbond as it sticks to anything and doesn't shrink too much. on larger rivets I will dab each hole with a toothpick.
as soon as the glue is spread evenly and thick I pull off the mask, the removal of the mask magically makes the rivets all of an even size.
and thats it. now I have to go easy with the airbrush because the rivets are so tiny ,canned paint would probably be too thick in this case. thats why I don't apply them untill the surface is ready for paint.
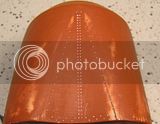
If anyone is interested in playing with rivet masks. shoot me an email/pm I will try to help out since most folks here dont have a cutter.
the bigger the rivets the better ofcourse, this is as small as I can possibly go.
almost too small, but it worked.
first thing was to import Sandmans templates into the vinyl cutter and cut some masks

than the job is simple, attach the masks. If I wanted a panel with flush rivets I would permanently glue the mask on and paint.In this case I just want some rivet details
the surrounding area is masked off.I could have just made the surrounding mask bigger, but I made it to size so I could position it more easily
because the holes are so small ,I used a brush to spread some weldbond glue
the glue needs to be somewhat thick,aileens would probably work well also but I have only tried this with weldbond as it sticks to anything and doesn't shrink too much. on larger rivets I will dab each hole with a toothpick.

as soon as the glue is spread evenly and thick I pull off the mask, the removal of the mask magically makes the rivets all of an even size.
and thats it. now I have to go easy with the airbrush because the rivets are so tiny ,canned paint would probably be too thick in this case. thats why I don't apply them untill the surface is ready for paint.
If anyone is interested in playing with rivet masks. shoot me an email/pm I will try to help out since most folks here dont have a cutter.
the bigger the rivets the better ofcourse, this is as small as I can possibly go.
Lee Reep
Well-Known Member
- Joined
- Mar 22, 2002
- Messages
- 518
- Reaction score
- 0
Andy,
Love the technique you use to do rivets. I visited your picture site to see more of your work, and saw that you soak your airbrushes between use. I am assuming this is water, and you are using acrylics? I'd like to know more about the paints you use, if you'd kindly share.
I'd like to get back to trying my airbrush, and if you are using acrylics, this makes using it indoors a possibility. It is too cold here now to do any rattle can painting outside, and I definitely do not want to use them in my basement shop. I've got a parrot, and a wife, that frown on it ...
Stymye
Well-Known Member
- Joined
- Jan 21, 2009
- Messages
- 7,599
- Reaction score
- 18
heh stones , actually I wasn't going to do a bunch of riveting. the real rocket is covered with them !
but this gives me a chance to show one way they can be done and find out how small I can cut the circles, these are .025 dia !
Lee, I usually wait till I have 2 or 3 rockets to paint, so I submerge the airbrush between messing with the different rockets,colors, masking.
I wouldn't leave it overnight and I make sure to dry and lube it before putting it up, the acrylics don't care if there is a little accidental moisture in the line.
I mainly use the createx airbrush paints, I have enough colors that I can mix whatever shade I want.
Lee Reep
Well-Known Member
- Joined
- Mar 22, 2002
- Messages
- 518
- Reaction score
- 0
Andy,
I Googled Createx, and after seeing a couple hobby shops listed that I could visit, I saw Hobby Lobby listed. Bought the DVD for $9 with 40% off coupon. Thought the DVD would be mostly a plug on their paints (which would be fine), and it turned out to be a decent balance of techniques and their paint. Not an exhaustive treatment on airbrushing, but a good intro.
Will go back tomorrow and get the opaque set with another 40% off coupon.
I've got a Paasche VL, and an old single action Binks Wren. Will start with that one first, since it has been a few years since I've used either.
Thanks for opening up my eyes to acrylics!
Rocket Al
Well-Known Member
- Joined
- Jan 18, 2009
- Messages
- 634
- Reaction score
- 4
I decided to make the booster wrap from thin plastic sheet.
this way I can do a little panel scribing and add a few details.
these signs are really cheap(walmart) and alot of details can be made just by scribing and snaping the part out and it sands real nice.
Ah yes, the world's easiest means of getting vacuform plastic without going to a plastics house. You can even find these at places like a well stocked Discount Drug Mart.
Beautiful work, Andy. Love to watch you work....
Al
Stymye
Well-Known Member
- Joined
- Jan 21, 2009
- Messages
- 7,599
- Reaction score
- 18
Andy,
I Googled Createx, and after seeing a couple hobby shops listed that I could visit, I saw Hobby Lobby listed. Bought the DVD for $9 with 40% off coupon. Thought the DVD would be mostly a plug on their paints (which would be fine), and it turned out to be a decent balance of techniques and their paint. Not an exhaustive treatment on airbrushing, but a good intro.
Will go back tomorrow and get the opaque set with another 40% off coupon.
I've got a Paasche VL, and an old single action Binks Wren. Will start with that one first, since it has been a few years since I've used either.
Thanks for opening up my eyes to acrylics!
If you don't have one, get a #5 tip and needle for your VL than you can
spray as well or more than a spraycan when you need to.
I like the createx because it's ready to spray from the bottle,so it's a great "starter" paint.
you can practice without having to worry about mixing it right with thinners.
you will find that it sprays best at 30-45 psi (45 is spraycan mode)
Lee Reep
Well-Known Member
- Joined
- Mar 22, 2002
- Messages
- 518
- Reaction score
- 0
If you don't have one, get a #5 tip and needle for your VL than you can
spray as well or more than a spraycan when you need to.
I like the createx because it's ready to spray from the bottle,so it's a great "starter" paint.
you can practice without having to worry about mixing it right with thinners.
you will find that it sprays best at 30-45 psi (45 is spraycan mode)
Andy,
Thanks for the suggestion on the #5 tip. Never realized I could get that much volume of paint out of it. Looks like I'll be getting the large bottle of white, too!
Stymye
Well-Known Member
- Joined
- Jan 21, 2009
- Messages
- 7,599
- Reaction score
- 18
yep,thats the first thing I bought ,, a big bottle of white
well...I still have a big bottle of white .
heres the reason,, you pretty much have to clear the acrylics first (like auto air/createx) to mask them because they are fragile by themselves.
if you do try to mask them bare and are sucessfull, .. it will leave a very noticeable different sheen anywhere the tape touched the paint. so I found it easier to just basecoat all my rockets with krylon white(nomatter what the final colors will be).and only than, start airbrushing the actuall colors.If it's going to be white,, well I just leave it alone because it's ready for decals.. (the acrylic white would still have to be gloss coated).
annother thing to know about them, they dry flat, one reason being, I found out late on, is flat paint will throw off more vibrant color under a clearcoat than gloss does.and I can agree the paintjob looks so much more vibrant and deep compared to any spraycan brand !
there are some gloss acrylic brands, I can't comment on them(never tried one), but I understand they are still fragile to masking.
annother trick is to mix the colors with Future, I have tried this and it works pretty good, and you can create instant candy colors by simply tinting Future with createx and spraying over a metallic basecoat. it's sweet ! lots of options.
In fact the only spraypaint I buy anymore is primer , gloss white and clear
Lee Reep
Well-Known Member
- Joined
- Mar 22, 2002
- Messages
- 518
- Reaction score
- 0
Andy,
Good thing I didn't make it to the store to get the big bottle of white! I've got plenty of spray cans of white, so I'll just try the colors to start with.
I've scratch built a Super Big Bertha, and want to paint it in traditional color scheme of yellow, with some white, and some black, such as a single fin and the nose cone. I could paint the entire rocket white. Then apply yellow, but are you saying I should clearcoat the yellow, and then mask it to paint the black, and then clearcoat it?
Stymye
Well-Known Member
- Joined
- Jan 21, 2009
- Messages
- 7,599
- Reaction score
- 18
the acrylics dry almost instantly but
If I'm doing any masking on top of an acrylic color, I will always spray a light misting of krylon clear over the area(s) to be masked. it also dries fairly quick.this protects the acrylic from possibly lifting with the tape.just a light mist coat is all thats needed.
this is a simplified version of the same technique that the pros do when painting graphics on cars and motorcycles, except they are using HOK 2 part urethane intercoats between masking and all that other expensive stuff.
so painting and masking any overlaping acrylics will be a sucession of colors and mists of clear.however it's still much quicker than waiting for spraycan paint to dry.
you can easily spray,mask and clearcoat a multicolor color rocket in one afternoon.
heres a good example, my tlp sidewinder. the rocket was basecoated krylon white. once that was dried for a day or two, I sprayed and masked all the different colors spraying light mists of clear to seal each color before masking the next
there are a total of 9 different colors,yet I easily finished it the same day I started it(between doing yardwork). no way could that be done with spraycans because alot of colors overlap eachother.once you get the hang of it you will be suprised how easy and quick you can finish a paintjob.
all the metallic colors are the cheap craft paints thinned with airbrush medium
the others are createx.
once all the painting is done than simply hit it with your favorite clearcoat or dullcote,all brands work fine over the acrylics that I have tried.
Similar threads
- Replies
- 7
- Views
- 901
- Replies
- 7
- Views
- 711