Quest Future Launch Vehicle Build Thread

The Rocketry Forum

Help Support The Rocketry Forum:

This site may earn a commission from merchant affiliate links, including eBay, Amazon, and others.

dragon_rider10

Well-Known Member
Joined
Dec 9, 2009
Messages
699
Reaction score
2
Here's a build on this Level-3 kit from Quest.

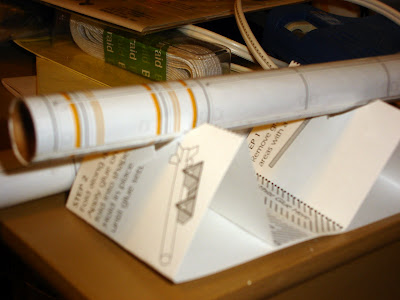
Starting out with the obligatory 'what's in the bag' shot. Note the conspicuous absence of anything balsa.
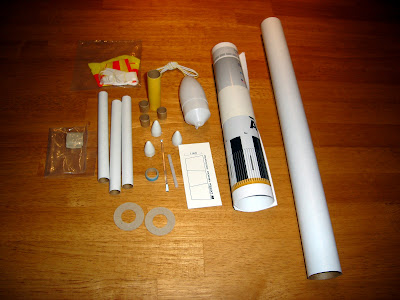
DSC03861.JPG


Next, the assembled motor-mount. Fairly standard Quest fare.
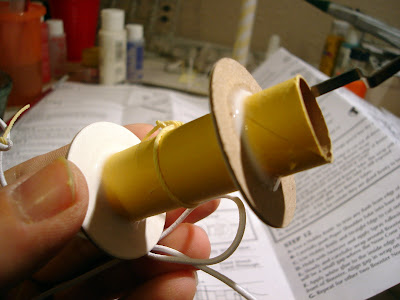
DSC03862.JPG


Working on the nose. According to the directions, you are supposed to cut into the shoulder of a cone with an Xacto knife or razor saw to open a hole large enough to mush clay into the tip. Cutting this with a hobby knife seemed dangerous, and I figured with a little elbow grease i could widen this hole instead.
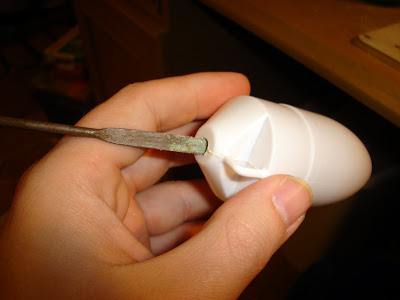
DSC03873.JPG


I 'snaked' the clay and weaseled it in. What I discovered was that none of my tools small enough to fit in the hole had a base big enough to securely tamp the clay. Never discouraged, I figured I could drip in some white glue to solidify it. Well that was a mistake. It never dried. I ended up having to drain it all out and hack into the cone with a razor saw anyway.

More to come!
 
Is that a big paper wrap for the tube?
Cheers
fred
 
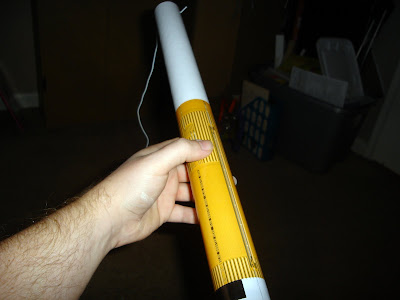
It is. Indeed, here it is after I've applied the first one. I did not use the spray adhesive recommended. I used a thin layer of white glue on the edges of each of the wraps. Outcome was so-so. These were my first printed wraps, so i see it as a learning experience.

DSC03874.JPG


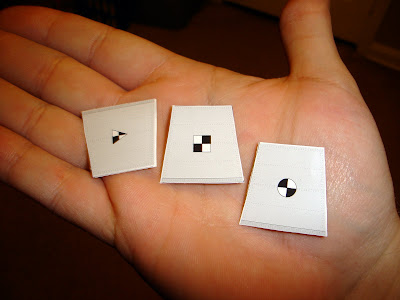
Here is a photo of the fins. These are extremely thin, with "wraps" applied onto cardstock in the same manner as the tube. Again, I used white glue for this and the fins came out nice. I have my concerns about the very thin root edge. I would believe this to be a very fragile glue joint, especially glued right to the wrap as instructed.

DSC03875.JPG


Here's the first booster tube, with its wrap applied. It's resting in a Novia rocket stand. These smaller tubes were much more difficult to wrap. The tighter radius made it harder to keep the wrap in place.

DSC03876.JPG


more to come...
 
That's the kind of thing you can only do in places like Arizona.

Ha Ha. That's funny.

Truth be known, water based adhesives come out of the bottle as powder ;) and you can forget about epoxy pot life (ther aint any). :y:

Try some of the Gorilla Glue for this application. It requires moisture to cure (takes a long time out here).
 
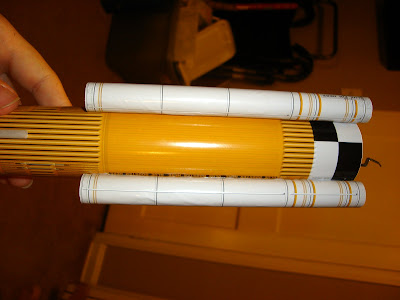
Ok, next down the pipe is the assembled boosters affixed to the main body. I chose to install the booster nose cones after gluing the tubes on, instead of assembling boosters prior to install. I did not experience any problems due to this choice. The challenges i had with the wraps on these booster tubes are evident in this photo.

DSC03878.JPG


I chose to paint the nose and booster cones black as in the new catalog. I have an aversion to unpainted plastic. Instructions call for cones to be unpainted, but the alternate black nose version is also suggested. Had i chosen white, i would have certainly painted them.

DSC03879.JPG


Last step is the recovery system and the paper cones for the engine bells. Nothin exciting about the chute system, although I chose to use a Rocketchutes 12" for this project. The resulting paper cones are so fragile, I don't know how they'll stand up. Cardstock would be better, i believe, but possibly harder to form correctly.

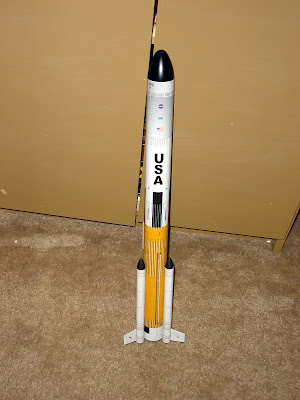
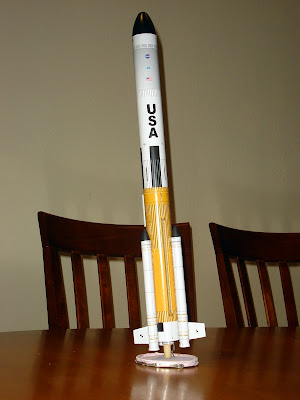
Here it is all ready to go.

DSC03884.JPG


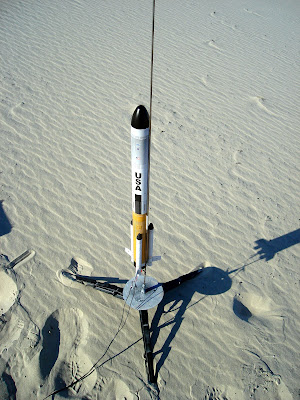
And here she is....

DSC03893.JPG


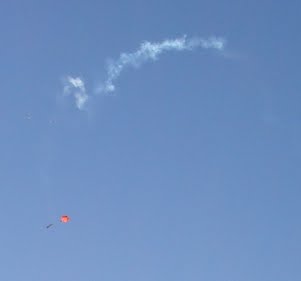
[exciting JAL3 style flight shot]
DSC03895.JPG


...

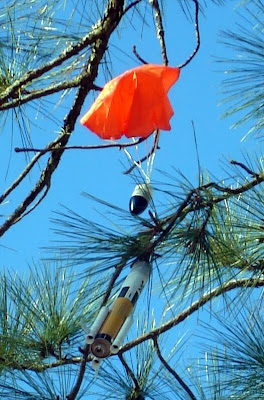
hanging 25 ft up from a pine tree from her first flight.
DSC03898.JPG
 
Last edited:
Ok, next down the pipe is the assembled boosters affixed to the main body. I chose to install the booster nose cones after gluing the tubes on, instead of assembling boosters prior to install. I did not experience any problems due to this choice. The challenges i had with the wraps on these booster tubes are evident in this photo.

DSC03878.JPG


I chose to paint the nose and booster cones black as in the new catalog. I have an aversion to unpainted plastic. Instructions call for cones to be unpainted, but the alternate black nose version is also suggested. Had i chosen white, i would have certainly painted them.

DSC03879.JPG


Last step is the recovery system and the paper cones for the engine bells. Nothin exciting about the chute system, although I chose to use a Rocketchutes 12" for this project. The resulting paper cones are so fragile, I don't know how they'll stand up. Cardstock would be better, i believe, but possibly harder to form correctly.

Here it is all ready to go.

DSC03884.JPG


And here she is....

DSC03893.JPG


[exciting JAL3 style flight shot]
DSC03895.JPG


...

hanging 25 ft up from a pine tree from her first flight.
DSC03898.JPG

It looks awesome can you get it with some tree pruning shears and a ladder maybe. Darn it :(
Cheers
fred
 
Great job! Now I just need to glue the boosters on and get ready for launch. Hope you get your rocket back :)
 
Well, this rocket keeps mocking me. It doesn't look that high up, but I can't get it. The tree is on a sand-dune of sorts, with very loose sand. Ladders wouldn't work. A pole shear wouldn't be long enough, and would cost more than the rocket (i looked) I tried to throw things at it, with the hope of knocking it loose, but i can't seem to connect with it. I tried coupling two 10 foot pieces of pvc together to knock it down, but the pvc just flexes over like it was made of rubber. (I think it actually is) I must look like a wacko swinging this 20 foot flexible pole around. Glad no one sees me out here. There's a tree recovery thread over in support/recovery. I can certainly add things there that don't work. I haven't tried the olympic pole vaulter though, don't have her #.

It's storming now, so hopefully the rain will wash it out and i can salvage the plastic. (sigh)
 
It's storming now, so hopefully the rain will wash it out and i can salvage the plastic. (sigh)

Well, to update this fascinating "Day in the life of one of my rockets" story. Ventured back to the launch site a day after a decent storm rolled through. What i found surprised me. I found the main body tube and a booster still hanging from the tree, but the parachute (Yay!) had separated and blown into some reeds nearby. The nosecone was a few yards away and beyond that, two of the booster tubes. (not surprisingly missing the skinny fins) Apparently the rain had softened the white glue to things just fell apart. The wind must have snapped the shock cord or something, because I'm not sure how the nose and chute separated (snap swivel tied midway down the shock cord) 45% recovery is better than no recovery!
 
DragonRider10, your rocket is awsome.(Who ever`s it is.):eyepop: It looks like a space shuttle with mini boosters.:roll: And that`s sad that the rocket landed in a tree. Darn.:( You launched it at a beach?:shock: And what was it`s name?:confused:
 
I know this is too little, too late, but do you have a decent length of rope? You might try tying a small sandbag weight (you seem to have plenty of sand) to the end and toss it over the branch that holds your rocket.
 
I know this is too little, too late, but do you have a decent length of rope? You might try tying a small sandbag weight (you seem to have plenty of sand) to the end and toss it over the branch that holds your rocket.

Peartree,

That was attempt #2. Used portions of tree branches and nylon rope, not a bag of sand though. Good idea!

41, that's not a beach. It's actually an abandoned mall/condo construction site.
 
Back
Top