Going For My Canadian Level 1-3 HPR Certification! - Wildman Shape Shifter Jr...

The Rocketry Forum

Help Support The Rocketry Forum:

This site may earn a commission from merchant affiliate links, including eBay, Amazon, and others.
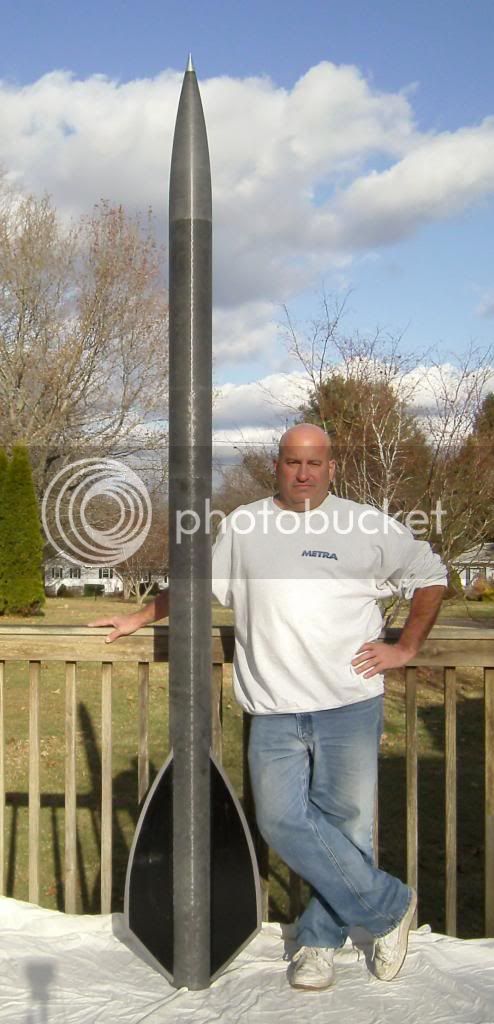
All I did towards the build today was to glue the motor mount into the booster airframe and glue the Switch band to the av-bay coupler. I used masking tape to make some tabs on the rear CR in order to be able to pull it out to do internal fillets once I've attached the fins.
SDC10184.jpg SDC10185.jpg

I've gotta say, I'm loving Rocketpoxy. I find I make much less mess (both in the workshop, and on the rocket) when using this stuff rather then regular hobby epoxy due to the fact it's a lot thicker. I can't find any squeeze bottles in the house, so it looks like I'm going to have to buy some. In the meantime, I've been using popsicle sticks to "scoop out" the correct amount of each part.

The parts I need for the glueless nosecone mod are back in stock, so I'm planning on placing an order tomorrow.

Next up: Fin attachment.
 
You can pick up squeeze bottles at walmart, or use empty ketchup containers.
 
Got the first fin tacked on:
image-1445751356.jpg

I buttered the fin root, inserted, removed and then repeated 3 times to make sure there was plenty of epoxy at the fin root/MMT joint. Once all the fins are tacked on, I'll be doing the external and internal fillets one set at a time to make sure the epoxy doesn't have a chance to run and ruin the fillet.

Next up: I'm hoping to get the second fin tacked in place this evening and the third first thing tomorrow morning.
 
Just to wet your whistle.


ShapeShifter5_zps23ca1bd3.jpg

I'm curious, have you flown it yet?
 
Work on the Mini has begun!

I sanded the components (except for the outside of the CRs as I fully expect to get epoxy on them when attaching them to the motor tube and that I'd have to sand them down again)

After giving the parts their second bath, I preceded to dry fit the Motor mount, and then the whole rocket:
SDC10197.jpg SDC10203.jpg

One thing I noticed today, was that the Mini's nose has a rather significant warp to it (quite noticeable when viewed at the right angle). I'm debating whether or not to contact Wildman to see about getting a replacement. Nate/Nute, if you wouldn't mind; could you check the nose on your Shape Shifter Mini? (Just to get an idea if this is a common issue or not) Thanks in advance.

Next up: Motor mount assembly for the Mini, and tacking the rest of the Jr's fins in place.

Thanks for looking!
 
Looks nice!
As for the nose cone, mine isn't really warped, but looks similar to yours. On mine it doesn't sit squarely on the tube. The shoulder where it transitions to the rest of the nose cone isn't write Even causing thenow Cove to not sit flat. I don't know if this is the problem with yours, but no mine isn't warped

Nate
 
Thanks for checking. Mine also doesn't sit flat, but that's fixable whereas a warp isn't.

I'm in no rush, but I think I will contact Wildman in the next few days to see what they say.
 
Got the third and final fin tacked in place:
image-1033068535.jpg

I mixed up more Rocketpoxy then was needed so I used the excess to practice using the black pigment. Things I learned: a little goes a long way! It just takes a drop or two to turn the whole batch a charcoal grey. I intend to paint the rocket, so I won't bother with using pigment on the fillets, but it's nice that they included some with the epoxy.

So my consensus on Rocketpoxy is: A+! And if my opinion is worth anything, I would highly recommend you get some and try it out for yourself. :D
 
Sebastian,

No the Shape Shifter 5 hasn't flown yet, actually the fins were only stuck in the BT to take the pic. 1st flight will be at Red Glare 16 in the Spring.
 
If it was me I would do low and slow for your certs . Go with a 3-4 " kit ie wild man ,comp not the Jr ' s they will all do fine but altitude would be up there on the smaller diameter kits

A little tardy to the party on this one, but I like to say that people should fly the way they want on their certs. If they plan on flying 2 inch rockets on J motors then why not do it for your cert? Everyone has a preferred flying style.

Take Jim Jarvis' L3 for example. Minimum diameter N4000 to almost 35,000 feet. It would almost have been weird if he flew something to 5-10k for his L3 :wink:


Braden
 
I agree entirely with review of rocketpoxy; really great stuff!

How do you plan to do the fillets? I used it for my mini, and I admittedly didn't do real amazing with the fillets:blush:

Do you know when and where you plan to cert?

Nate
 
How do you plan to do the fillets? I used it for my mini, and I admittedly didn't do real amazing with the fillets:blush:

For the external fillets, Ill mask around the area with masking tape, and pull the epoxy with a popsicle stick or gloved finger.

In the end I'm not sure if I'll do internal fillets. There really isn't much working room in the fin can. I'm thinking I'll go ahead with my previous plan and foam it instead. Though maybe I'll give the internal fillets a try first...

Question: Does anyone know if fiberglass has to be sanded for expanding foam to adhere to it? And what's stronger, internal fillets or expanding foam (or are they about the same)?


Do you know when and where you plan to cert?

Nate

Assuming the weather cooperates and everything else works out, I'll be doing my Jr. Level 1 & 2 sometime this spring at our smaller flying field; and Jr level 3 at Rage at the Gage, our biggest launch event of the year that takes place over labour day weekend.
 
Sebastian,

No the Shape Shifter 5 hasn't flown yet, actually the fins were only stuck in the BT to take the pic. 1st flight will be at Red Glare 16 in the Spring.

Make sure to post some photos of the flight!

Also, If you wouldn't mind, could you post some photos of your Shape Shifter Jr.'s recovery system and av-bay for me to look at?

Thanks in advance.
 
For the external fillets, Ill mask around the area with masking tape, and pull the epoxy with a popsicle stick or gloved finger.

In the end I'm not sure if I'll do internal fillets. There really isn't much working room in the fin can. I'm thinking I'll go ahead with my previous plan and foam it instead. Though maybe I'll give the internal fillets a try first...

Question: Does anyone know if fiberglass has to be sanded for expanding foam to adhere to it? And what's stronger, internal fillets or expanding foam (or are they about the same)?


Assuming the weather cooperates and everything else works out, I'll be doing my Jr. Level 1 & 2 sometime this spring at our smaller flying field; and Jr level 3 at Rage at the Gage, our biggest launch event of the year that takes place over labour day weekend.

Very cool! make sure to post pics of your fillets!

In Canada you can certify Jr. L2/3!:eyepop: I don't think I knew you were gonna do the latter certs as junior!

Lucky...;)

As for foaming- I have never done it, but I would sand the tube, as it's the pitting and scratches that let it adhere. Either way, it couldn't hurt. I can't say which is stronger, but my guess is that the foam would be slightly stronger and more durable. That way if it hits hard, and something cracks, the repair will likely be easier. I'm just guessing here though.

Nate
 
Very cool! make sure to post pics of your fillets! In Canada you can certify Jr. L2/3!:eyepop: I don't think I knew you were gonna do the latter certs as junior! Lucky...;) As for foaming- I have never done it, but I would sand the tube, as it's the pitting and scratches that let it adhere. Either way, it couldn't hurt. I can't say which is stronger, but my guess is that the foam would be slightly stronger and more durable. That way if it hits hard, and something cracks, the repair will likely be easier. I'm just guessing here though. Nate
Yep but it's the Canadian levels. So really it's only up to level 2 for you. I actually turn 18 late this year, but by that time this years flying season will be over and done with. To get my full certification, all I'll have to do is re-fly my rocket at the highest certification level achieved once I'm 18.

I'll be sure to post pics of the fillets;)
 
Make sure to post some photos of the flight!

Also, If you wouldn't mind, could you post some photos of your Shape Shifter Jr.'s recovery system and av-bay for me to look at?

Thanks in advance.

This the Av-Bay I use in my Shape Shifter, I made it in 2008 so needless to say its got a bunch of flights on it. I'm not a fan of switch bands which is why all my Av-Bays use quick disconnects. Attach the SC, slide the main piece down the upper BT and connect the lower Av-Bay lid. I use this one bay for all my 2.1" birds.

IMG_20140114_163732_391.jpgIMG_20140114_163936_411.jpgIMG_20140114_164022_608.jpgIMG_20140114_163838_822.jpg
 
This the Av-Bay I use in my Shape Shifter, I made it in 2008 so needless to say its got a bunch of flights on it. I'm not a fan of switch bands which is why all my Av-Bays use quick disconnects. Attach the SC, slide the main piece down the upper BT and connect the lower Av-Bay lid. I use this one bay for all my 2.1" birds.

View attachment 159197View attachment 159198View attachment 159199View attachment 159200

Thank-you! I'll use this as the basis for my Av-bay. I think the KISS principle is best for ones first av-bay. What kind of wire is best to use?

Thanks.
 
All the best on your Certification :cheers:

Here are a couple pictures of my Av-Bay I use in my Darkstar Jr.
The wire I use is 20 gauge silicone wire, I like it because its very flexible. A Mini Deans Connector (black) so I can remove the bulkhead, 280 mAh 2S lipo battery, small terminal blocks purchased from an electronics store, and a Featherweight Screw Switch that is accessed through a vent hole. I left the All Thread rods longer shown in the photo so I could tape the centrifugal 1.5g BP charges to it.
I went with the Lipo battery because I already have battery chargers for them and I can use them into my Av-Bays where a 9 volt battery wont fit.

Darkstar-Jr-Altimeter-Bay2.jpg

Darkstar-Jr-Altimeter-Bay1.jpg
 
So I emailed the vendor a few days ago, and he's placing an order for the stuff I need, but it will probably take a few weeks or so... Ah well... Still have plenty of time before the cert attempt.

Thanks to all for the Av-bay pics!:)

I spent the evening making a cradle for the Jr (and I suppose any other rocket that fits). So far I've been using the Aerotech box cradles, which work, but are getting worn out (it's only cardboard!) and I also wanted something nicer.
image-3179057618.jpg image-3926404459.jpg

I've got enough wood and strap left to build another, but this time I'll make it shorter so that I can use it for my shorter rockets.
 
Last edited:
Great build thread Sebastian,
I probably wont get around to building mine till toward late spring. Im still tweaking my L3 project to fly in June.
 
That is a great-looking cradle! If I might make a suggestion: Take some leftover strap and add a handle on either side of the rocket. You'll be able to carry it like a tote bag :)
 
That is really nice!

I've seen others make a stand out of PVC so they can work on their rockets with Dual Deploy, but I really like the looks of that!
 
I spent the evening making a cradle for the Jr (and I suppose any other rocket that fits). So far I've been using the Aerotech box cradles, which work, but are getting worn out (it's only cardboard!) and I also wanted something nicer.
View attachment 159973 View attachment 159972

I've got enough wood and strap left to build another, but this time I'll make it shorter so that I can use it for my shorter rockets.

Wow, that's one of the nicest cradles I've seen! I use PVC stands for my dual deploy.
 

Attachments

  • DSCF3187.JPG
    DSCF3187.JPG
    71 KB · Views: 82
  • IMGP2819.JPG
    IMGP2819.JPG
    83.3 KB · Views: 85
Thanks for all the kind words!

GDJ, feel free to make one yourself (and please post pics when you're done!:))

I'm planning on using the leftover strap for a shorter cradle of the same design, but the handle idea is a good one (and I'll probably implement it in the future).

Jim, I've got to say that your PVC cradles are pretty nice! I also like your Av-bay holder. I may have to make one for myself. :)

-S


Sent from my iPod touch using Rocketry Forum
 
Jim, I've got to say that your PVC cradles are pretty nice! I also like your Av-bay holder. I may have to make one for myself. :)

-S

The av-bay holder is actually a rocket stand. Until I made the PVC stands, I had made a bunch of wood stands. The PVC work much better.
 
Back
Top